Stones and Stitches....
You Might recall, Dear Readers, that I was needing to unstitch a good portion of my work on this Medieval Ladies Tapestry. It is another kit by Janet Granger. I have indulged my current passion for Petit-point stitching by purchasing a whole bunch of her kits. As I am gradually moving on to stitching larger items that require a Real embroidery frame (I feel so Grown up!) I have at last also purchased a stand to hold the heavier frames. It does take some getting used to! But more importantly, I have to confess that I am also altering her kit design just a tiny bit. (I have done this a couple times before now as well.) In this case the Lady on the left had a hairstyle which I thought was too modern looking.... I wanted to emphasize the Medieval nature of the project, so I changed the hairstyle a little bit. I will show you the details later. For now you can see that at least I have positioned her correctly in relation to the Lady on the right! You would be surprised how much difference one row to the right or left can make in the end! I am double checking my "counting" constantly with this one.... and "reverse stitching" quite a bit too! But progress is being made.

Here you can see a bit of the stand that holds the frame....
I will have to take a better shot of it.
And the ladies are beginning to look like themselves!
I have already identified a place where
I missed just one stitch of the brown thread....!
Just one stitch!
I have to figure out how to get just one stitch in where it is missing.
As for the Stones.... progress is slow.
I thought for sure I would get the arch supports
in the Stables all finished this weekend...
but then I ran out of the lumber I was using....
just two "stones" shy of completing one of the arches.
I thought I had lots more of the same material,
but the dimensions turned out to be just a tiny bit different!
They were even labeled as the same size "stock"
but when placed side by side you could clearly tell
they were not the same!
I went back to the local Home Depot to get some more
if I could find any the right size,
but I couldn't find any more.
When I got home I found one more piece in my stash that was the right size!
I swear I had looked five times and not found it!
So I was able to complete the arch with the same size stock after all.
And I have enough to make the arch on the remaining wall as well.
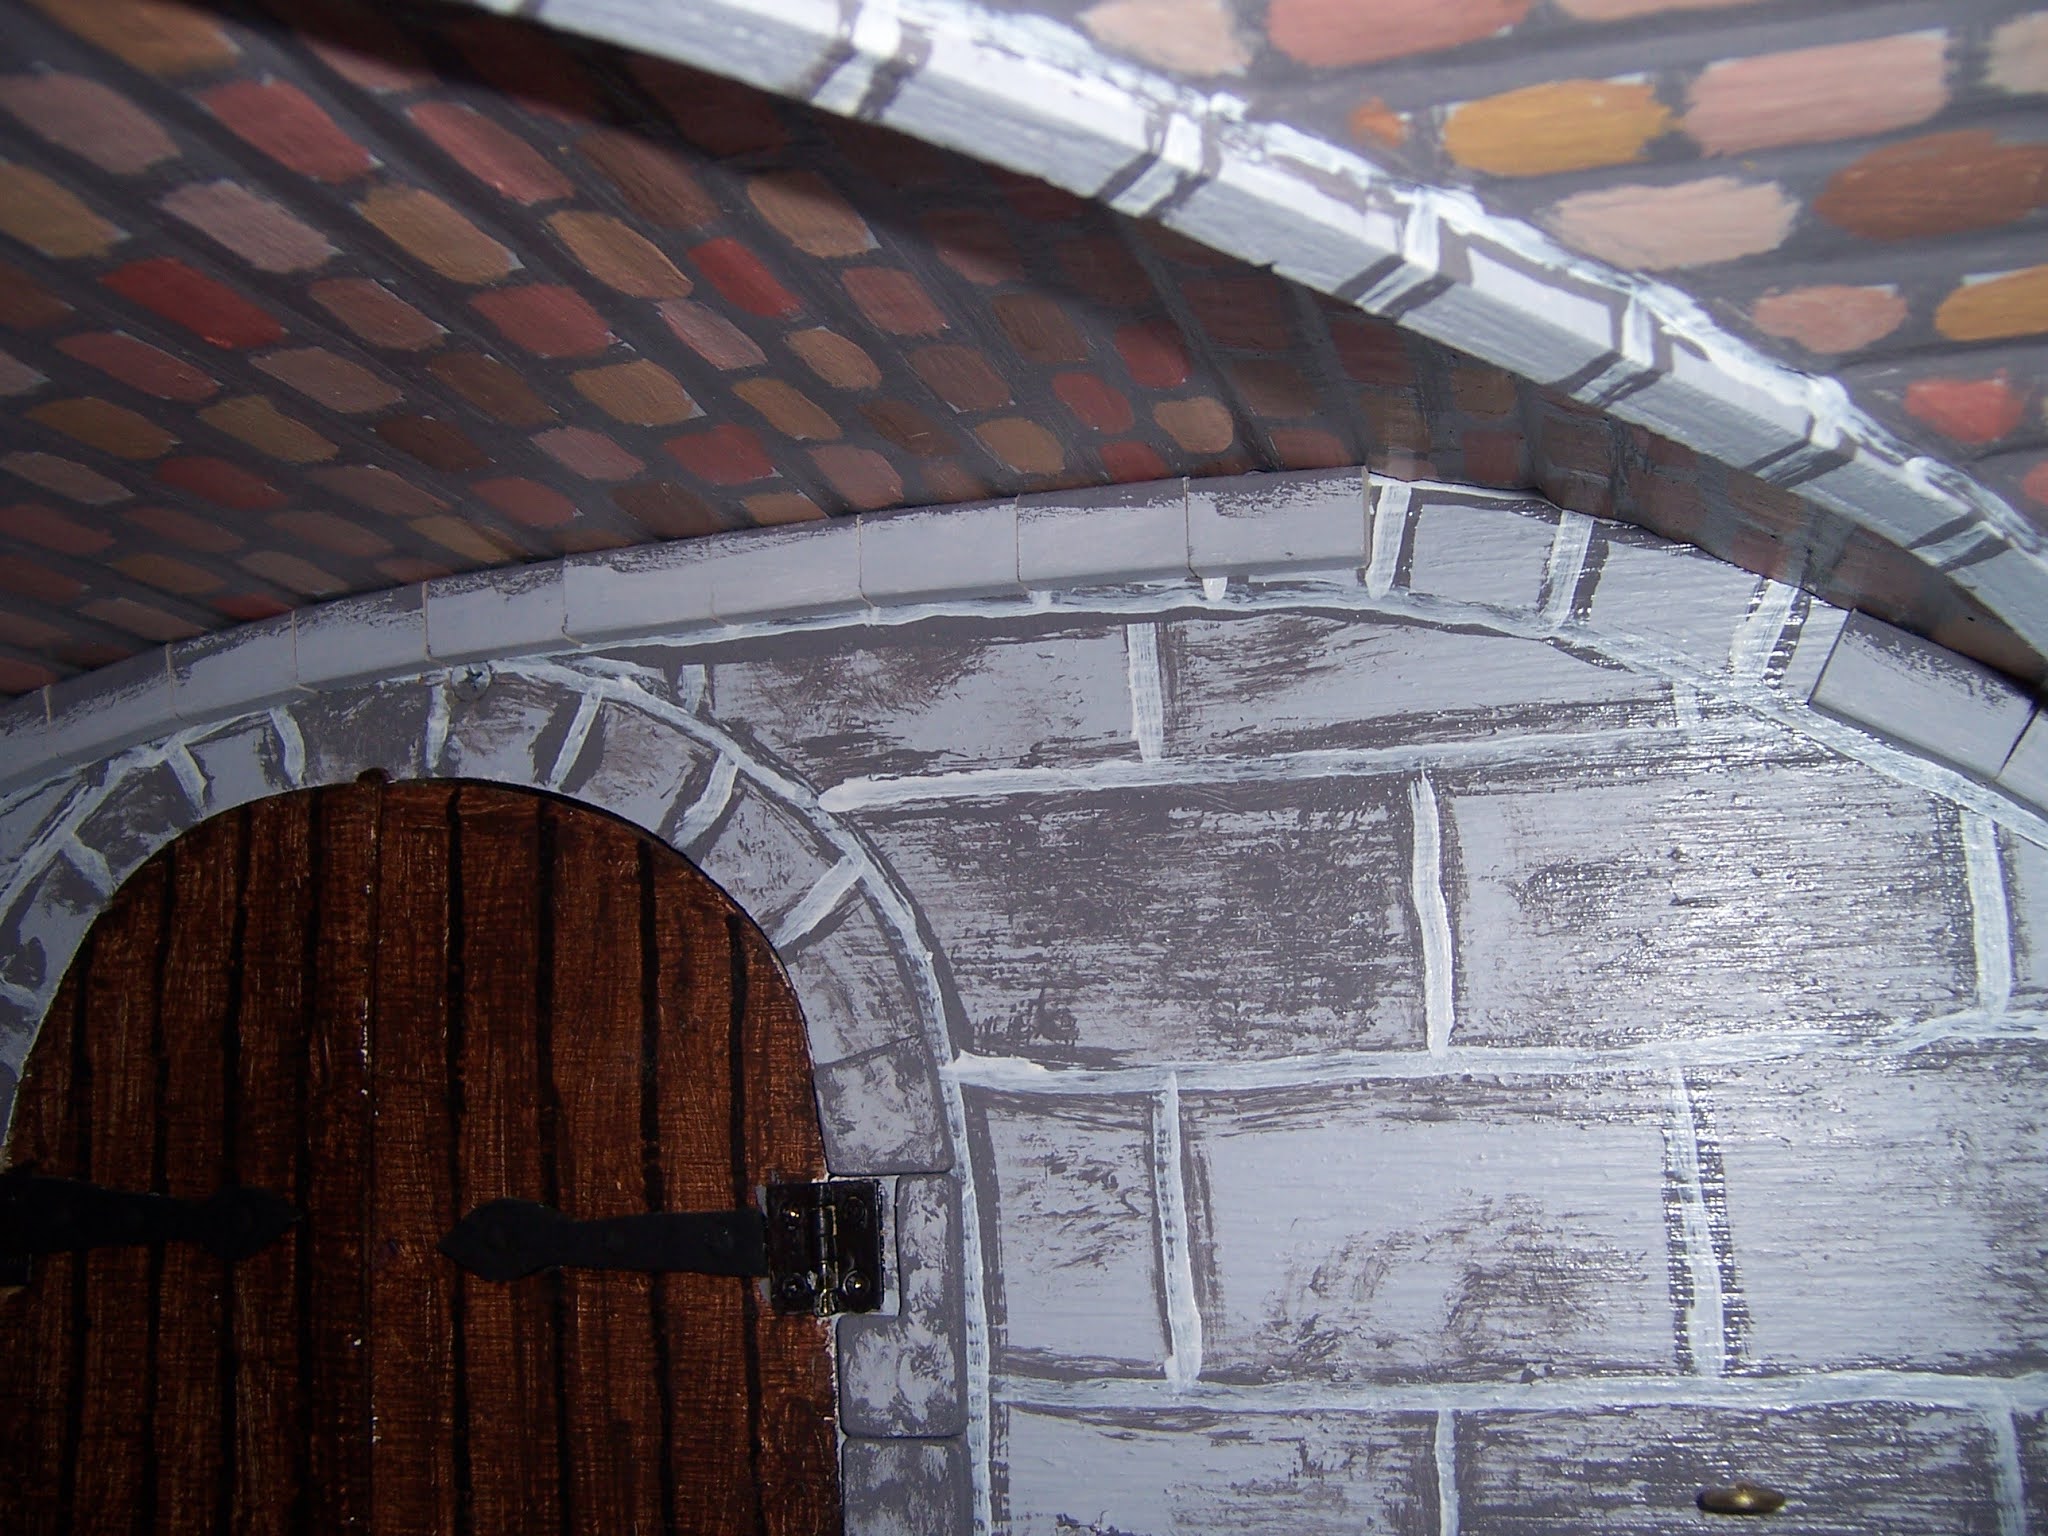
As you can see, none of the "grout lines" have been painted yet.
And once the Vault support stones were in place,
I could continue with the door surround stones.
These will need to be fitted carefully against the Vault support arch.
I still have not added the door handles to these doors!
Here is the Stables as it stands today.
The left side Arch Support stones still need to be added.
And the stones for the Door Surround in the side door too.
And all the grout lines will need repainting.
But, Truly, Dear Readers, I can't tell you
how happy I am with all this Stone Work!
I turn the Castle lights on at night and just sit in front of it
and move from room to room
admiring the sturdy Castle-like feel of the structure!
Doors.... Windows.... Shutters..... Vaulted Ceilings......
it is just so Wonderfully Medieval!
And here is a better (sort of) picture of the Embroidery stand....
It has a whole series of adjustable joints
so you can position it in a great variety of ways
to suit your every need!
And the Tapestry as it now stands....
I still have a long way to go.
But that is the Fun of it, Dear Readers!
It might be just More of the Same....
But Stitch by stitch and Stone by stone
It adds up to a Whole Castle....
And I am Loving how it is turning out!


Wow! It seems to me like you've accomplished quite a bit.
ReplyDelete"Inch by inch, row by row..."
ReplyDeleteThat castle is remarkable, and think how it's going to be when you get tapestries on the walls! And re your lumber sizes, I'm in mind of the fact that "2 x 4" is no longer 2x4 and a pound of coffee is now eleven ounces.
Onward and upward...
Much love,
Mom
The stone arches are truly amazing. Looking at the embroidery stand, I can now understand how your little carpets came out beautifully straight. I love the new embroidery, it's nice to see how the design gets done.
ReplyDeleteHugs, Drora
Hugs, Drora
Great work Betsy. When you are loving what you are doing, the job goes quickly, and you are getting the outcome you really want. The extra effort of all those stones is so worth it! And the embroidery design looks so beautiful. I look forward to seeing more.
ReplyDeleteHooray for being a big girl owning a fantastic embroidery stand after growing up! ;O) I must admit the stitching looked surprisingly big at the pictures so I visited Janet's HP to have a look at the measurements Now I now that it's still a miniature project... but with impressive dimensions. Well, the fun you have while making your stitches shows up and I really enjoy to see your projects grwoing row by row.
ReplyDeleteAnd I have to confess the tale of Betsy's quest for the needed wood strips made me smile... so familiar... except for one thing... if this happened to me I would have found the hidden, perfectly matching strip after spending money for new stuff that doesn't fit well. *LOL* I'm glad that you've been able to continue with your stonework now... and I can truly understand that you like to enjoy looking at your fabulous castle. Guess what - I'm sharing this pleasure! ;O)
Hugs
Birgit