Tuesday, August 30, 2016

More Progress.....


It's a Lot about the Hinges..... And a Little about the Paint...

I hope you will not be Surprised to learn, Dear Readers, that my solution to the colors for The Glass House involves More colors rather than fewer! All I had to do was step back (morning light helped me to see too!) and really look at the addition to The Folly in order to realize that it lacked the lovely Raspberry color in the trim! This was easily solved by adding the extra trim at the top and bottom of the facing wall! And I also decided that the door needed to more closely copy The Folly door, which was primarily the light blue with some dark blue accents.

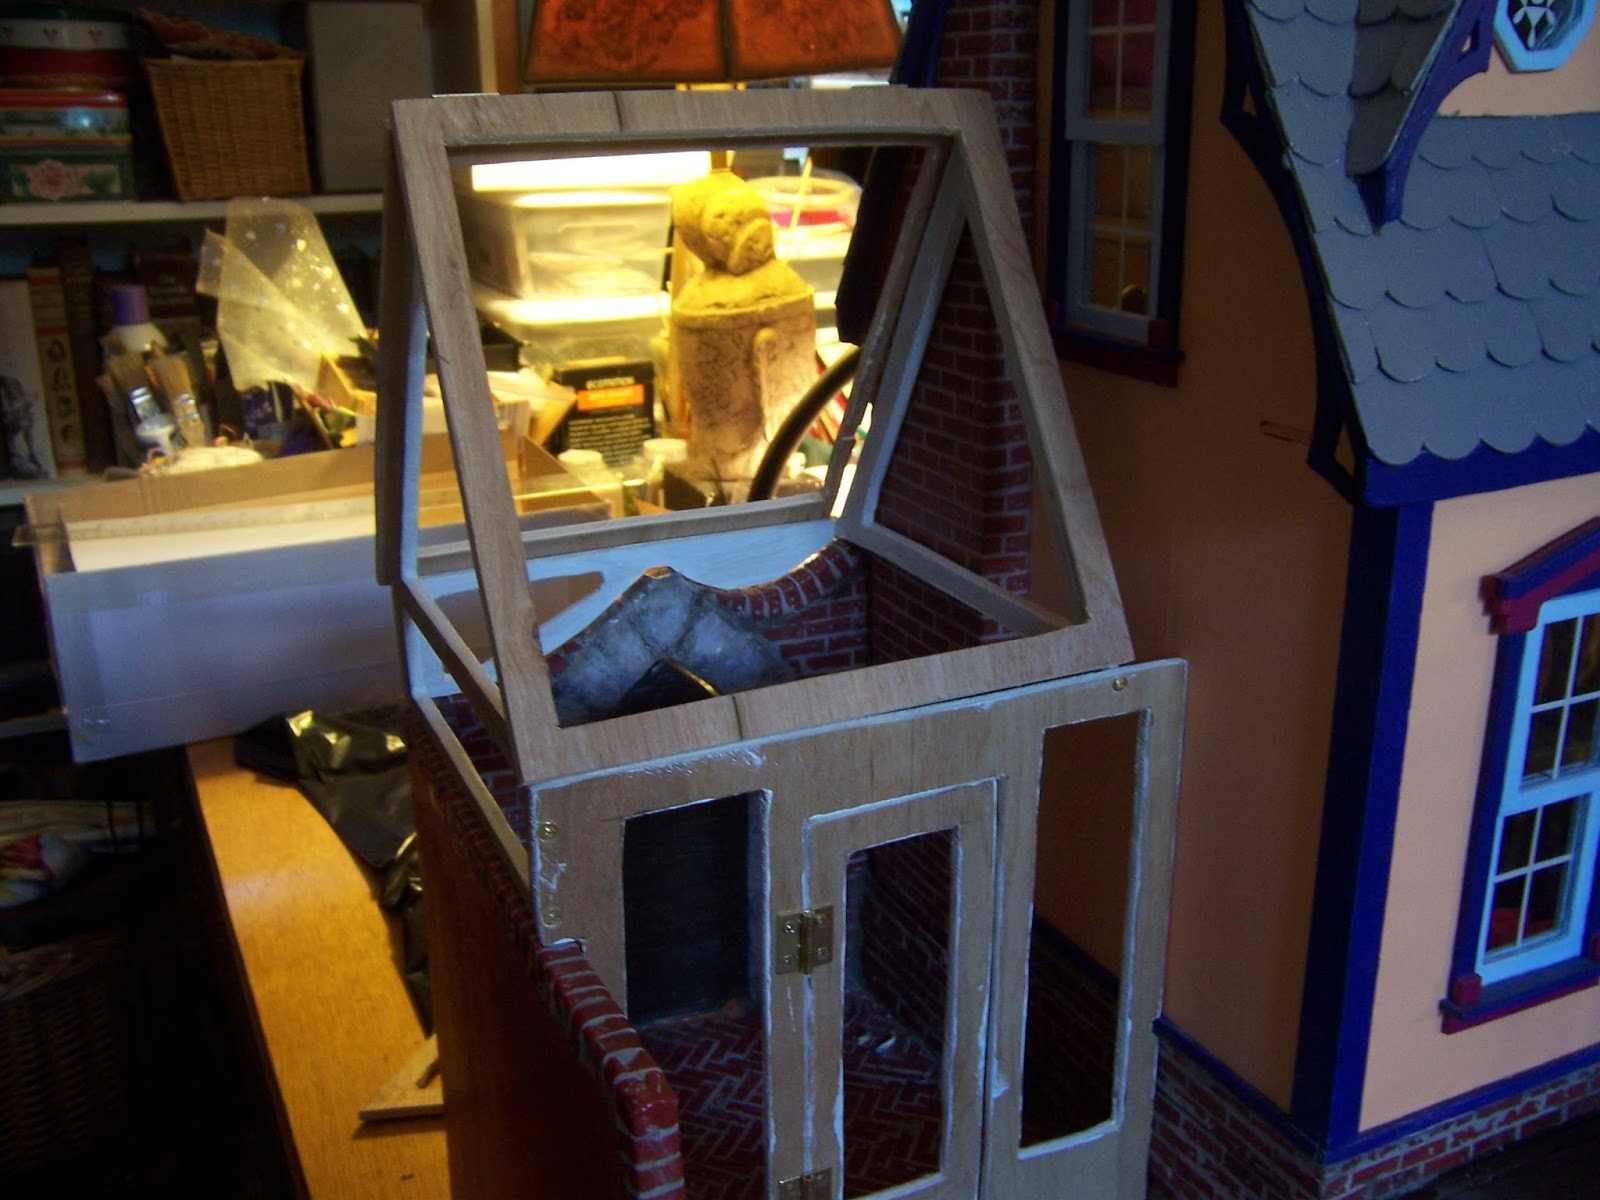
Here you can see I am testing the Raspberry trim....

And with a glimpse of The Folly door.....
 
Here the trim has been attached 
but the darker blue on the door has not yet been added....
 

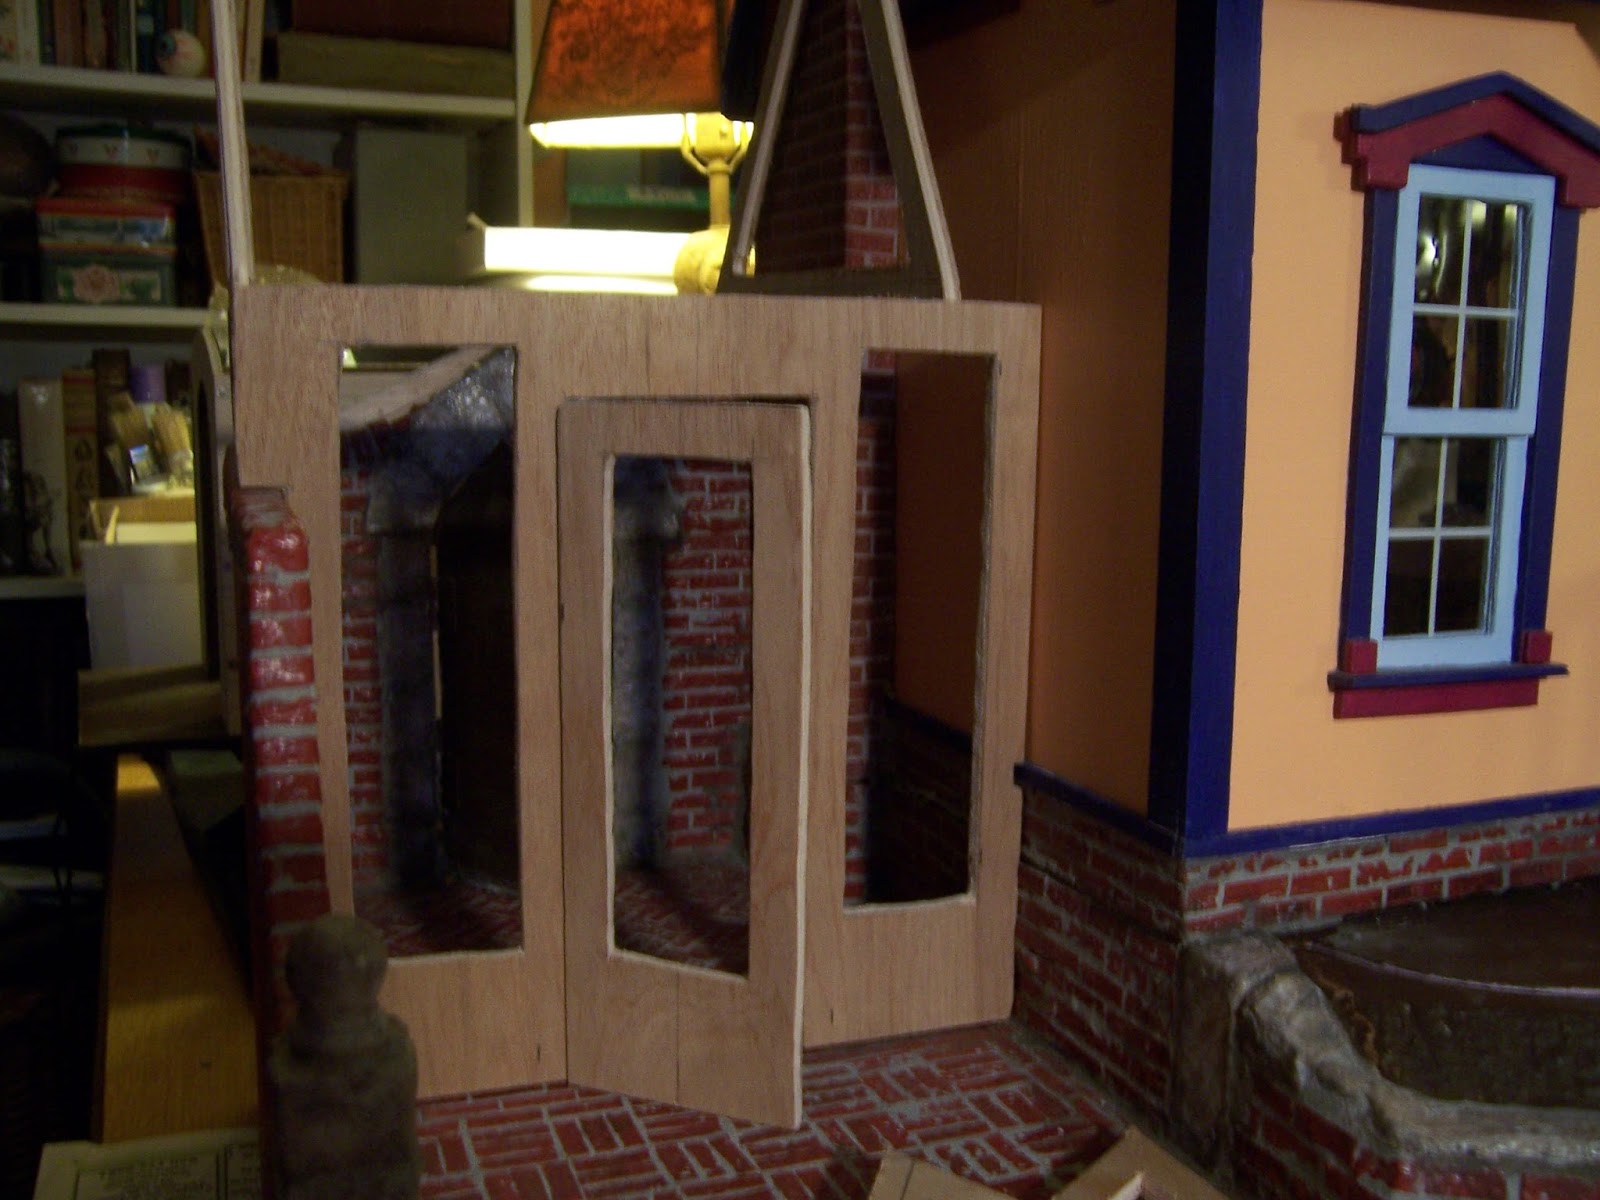
Here you can see the door with the darker trim...
And the windows will all get the light blue muntins once I get the glass....
Which is harder to find than I thought!
(I have to go to an old fashioned hardware store 
where they will cut me some panes of glass... 
not try to sell me a new window!)

(Sorry this shot is a bit dark again!)

And while I was waiting for those many coats of paint
 to dry on those tiny pieces of trim....
I was also playing with more hinges....!
Because, I must confess that I have embarked 
on another whole project that will not be quick to finish....

Well, I hope you will understand that 
the Gypsies must have their home!
(Please do not tell me you are surprised!)
And I know it will take me a while to get it ready.....
So the sooner I get started......

This kit is available from Lea Frisoni of  
and it gives you the basic starter pieces. 
But there are some parts not included in the kit that must be added, 
such as the doors and partitions and hinges!
So there is plenty of room for individual creative expression!
 You can see I have cut my interior partition for the sleeping area
 and am adding the hinged doors!
(You know how much I Love hinges!)
And because the hinge screws stick out on the back side, 
I am adding the decorative trim to cover them.

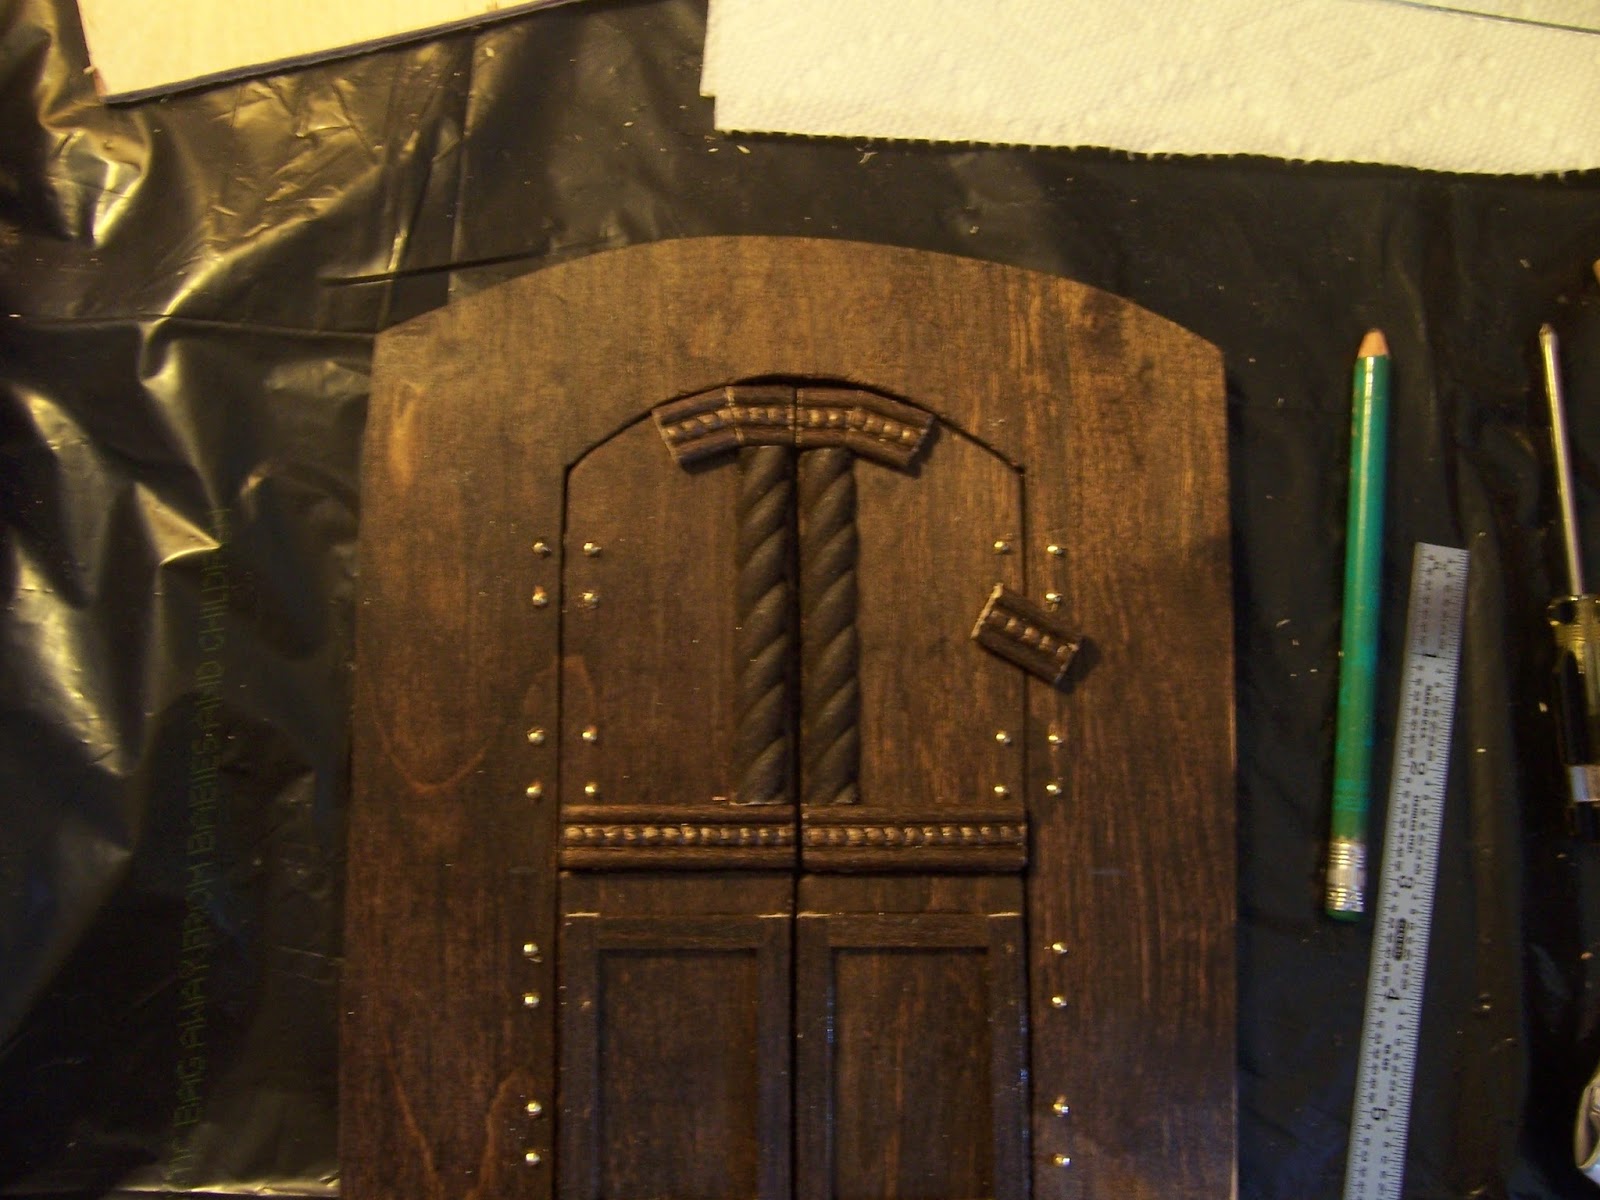
Here they are covered and the doors are closed.

And a view into the Caravan with the top doors open.....

And a little bit closer.... It is dark in there.... 
because there is so much still to add!
But you can see those hinges work!

And lest you think I had Forgotten, Dear Readers, 
all about Pollyanna's Attic dollhouse workroom....
I finally made some progress there too!

Most of the "Attic Stuff" has been cleared out and put in storage...
But the major improvements have to do with the walls themselves.

In case you did not know, Dear Readers, 
this house was built by my Grandfather 
for my sister and me when we were very young. 
And the original design (designed by my Father) 
left the attic all one open space with the stairs coming up in the middle.
(We used to lie down in it when we were little!)
When I was attempting to update it in my teen years 
(adding real windows and doors) 
I also tried to add walls in the attic to make separate rooms.
This was not easy, and I settled on the method you see above 
of adding "beams" that would hold the plywood walls in place. 
This was done by screwing them into the floor 
and the underside of the roof 
in pairs that would bracket the walls. 
This would make it much sturdier than just using glue,
and I had no way of routing channels into the wood instead. 
As the years passed, the plywood walls were lost, 
but the bracket beams stayed in place!
And when I started to rebuild this House a few years ago, 
I changed the way the stairs enter the attic, 
so now they turn in the middle and take up less of the attic space!
Which means the rooms could be larger... 
if I moved those wall bracket beams! 
I had already cut new walls a few weeks ago....
but neglected to take any pictures!
 
This is the other end of the attic, 
(where Victor and Joanna sleep when they visit)
 and the wall had been positioned just between 
the desk and the bedside table... 
you can see the dirt marks on the floor!
There was an additional set of brackets where the wall now is, 
(because originally all those years ago  
I had thought there would be a small closet in the hallway....)
So I simply removed the extra set of bracket beams....
and re-positioned them on the other side of the attic stairs....

Which allowed me to move this wall over two inches! 
I still need to remove the extra set of old brackets...

But here is the new wall in the new position, 
allowing Pollyanna much more room for her dollhouse workroom!
And because I was so busy adding hinges to all my doors....
I had to add them to the attic doors too!
So the doors now have their hinges!

And the stairwell no longer takes up too much of the attic!

So you can See Dear Readers,
With a little bit of paint and a whole lot of Hinges
I made some good progress!


Monday, August 22, 2016

Glass House Progress


Fits and Starts.....


I warned you, Dear Readers, that the Glass House walls were not attached and would fall over at the drop of a pin! Well, here you can see the parts in the early morning light... all tumbled around! I resolved that the best way forward with this project was going to be to attach the walls together while still making the framework removable from the base for all the painting fitting and trim work. And I thought it would be best to add the first coat of primer to the interior before assembling the walls. Because the plywood is thin but not too thin, (one quarter inch thick to be precise) I decided that the strongest method of attaching these pieces would be to screw them together with small screws. And while I was drilling all those screw holes, I could also be attaching the door hinges! Of course, I forgot to take any pictures of so many boring steps fits and starts!

Here you can see the basic framework is screwed together 
wherever the walls touch each other.
And there are my favorite hinges!
(I know they are a tiny bit large for this scale, 
but they will be getting a lot of use so I want them to be sturdy!)

Here is a slightly closer shot!
And before I went any further, I needed to cut out the pieces for the roof sections, 
also relying on the plywood "wall with a window cut into it" method.


Here you can see the two sections have been cut and the hinges attached.

And from the rear, opening side... (sorry it is a dark shot!)
I had to carefully trim the side of the roof frame 
to be able to swing open past the roof eaves of The Folly.
(Lots of fits and starts!)
And there will need to be an awkward roof line 
on the corner next to The Folly wall 
where the roof passes the window frame.

Here the framework has been removed for painting.....
primer then first coats of dark blue for the exterior.

And testing the structure in place..... 
is it too dark?
(Or is it jut the night?)
The frames on the windows will be the light blue, 
and the interior will all be the light blue.... 


Here it is in the morning light... with the light blue interior....

Perhaps I just need to get used to it!
 
 
Paining the many window frame pieces......

Gluing window frames together.....
(Sorry it is so dark again!)

And Gluing the window frames to the openings!
(Even more fits and starts!)
I had hoped to get at least One of the windows completed 
with glass panes, Dear Readers, 
but the glass cutting was not a smooth operation!
I only had a few small pieces to work with,
 and all my attempts were crooked "breaks" 
so the pieces were unusable.
(Way too many Starts and Fits!)
I will have to start fresh with a large pane of glass 
and plenty of "practice" material!

Here I am testing it in place again.....
Just when I was getting used to the dark blue.... 
the light blue frames change the whole look!
Of course, the dividers for the windows are not in place,
 nor is the glass, and the roof section will be divided too....
so there are plenty of parts that will change the look 
of the whole before it is done.

I guess it is still much too soon to judge....
and I do want the colors to be basically the same
 as those used on the Main House.

Here you can sort of see the interior through the back roof view....
(sorry! another dark shot!)

I guess it's still too soon to tell how it will look, Dear Readers,
But at any rate, through lots of Fits and Starts, 
Some Progress has been made!

Monday, August 15, 2016

Glass House Beginnings....


Framed..... Or Not!

I must Confess, Dear Readers, that it was only After I had started to work on (*cough-cough*....) Another Project that was needing me to cut plywood walls and doors, that I realized the simplest method of building the Glass House would be to cut the openings for the door and windows from a piece of plywood, rather than trying to construct the walls from pieces of "lumber" like a real life building! I had been pondering the various steps needed to construct the door and the windows and fit them into the uneven brick wall area, and was making no progress! The ready made commercial windows and doors were not the right sizes to be of use here. And three of the four corners were partly supported by the brick wall, which was not the full height of the sides for the Glass House, so they would need to be fit on top of the brick walls.... and so figuring out where to start was just making me go in circles! Then I realized that I could start with the plywood "wall" and cut the openings for the door and windows! So simple!! And I had just the pieces of plywood right at hand! This Glass House is really quite small, being just under seven inches wide and seven inches deep. So I started right in with the front wall where the door would open onto the "courtyard".

The windows will probably be made of real glass 
with additional "framing" to hold them into the openings.

And then I started on the end wall which rests atop the brick wall.

(I apologize for the dark pictures.. I hate to use flash, 
and the light is not strong in this room!)


And then started to fit the challenging back wall .... 
which needs to match the sweep of the wall on one side 
and establish the level base for the rafters above!

The fourth wall will be The Folly wall. 
And the back side of the roof will hinge open for access to the room.

I cut the other rafter frames, but still have to notch them
 into the top of the wall and add the support under their ends.

It went together much faster than I thought it would! 
(Although none of the walls are yet attached.... 
they fall down at the drop of a pin!)


It makes the "courtyard" feel very small and intimate.... 
but really, all the rooms in The Folly are rather small!

But I didn't have time to figure out the hinges for the door...
The Folly is one of those thin plywood kits
 which don't support the use of metal hinges with screws... 
so I used leather ones on the front door....
 which is the only door in the whole house!
The plywood I have used for the Glass House is thicker 
and would take metal hinges with no trouble.


Meanwhile, Dear Readers, rather than leave you with so little to look at, 
I will share with you some pictures my sister sent recently
Featuring a Fairy Bear adventure (of a small sort!)

Marmalade and Buttercup were playing together
 one sunny afternoon at Hope Cottage.
Suddenly one of them said, "We're sisters, 
but which one of us is the older one?"
"I don't know," said the other one.

And then Marmalade said "Hey, our wings can come off....
 let's trade wings and see if they feel different!"
 
 
And she had removed her wings in no time at all!
But Buttercup's wings would not come off!
"Here, I'll help you" said Marmalade, 
wielding a long sharp looking tool.

But buttercup had complete faith in her sister, 
so she sat quietly while Marmalade climbed onto the outhouse door 
in order to get better leverage!

Soon they both had taken off their wings and they traded, 
Golden for Orange.....
It made them feel a little giddy and full of Adventure!


Next they decided to climb to the top of Sleeping Couch Mountain 
to see if the world looked any different.....
(And of course, they could have Flown up... 
but it seemed more Adventuresome to help each other climb to the summit!)

They made it to the top at last, 
and they could just see Hope Cottage in the distance!

It seemed so small and far away!

Then Marmalade said "Look!"
"We could slide down the Mountain on this beautiful cloth slide!"


And so they did!
Squealing all the way down!
And when they reached the bottom, Buttercup said "what next?" 
And Marmalade said "I'm hungry"

And Buttercup held up her magic wand and recited a quick magical spell......
(The words of which I couldn't hear clearly and have since forgotten!)
Her wand glowed brilliantly....

And suddenly a platter of beautiful fresh fruit appeared, 
brought by a lovely house genie!
Marmalade gave a big sigh! Being sisters was so much fun!
And it probably didn't matter at all which one was older, 
or who wore which wings....
It only mattered that there Was a sister there to share with!

This story was lovingly sent by my sister, Dear Readers, 
to share with all you in blogland 
who might have wondered how Marmalade and Buttercup 
were faring in the South!
Meanwhile, the Glass House is well under way, 
and I didn't have to do any "framing" at all!