The Tower Stairs....
As I am sure you have realized, Dear Readers, this project does not develop in a direct path with clear instructions. There are always raw edges that need to be completed after the main part has been done, necessitating all kinds of disruptions to the structure that was almost finished. In this case you can see the taped up section of the herringbone floor where the doorway to the Tower Stairs enters the room. the bottom of this door frame is the upper section of the ground floor room.... and it still needed the "rocks" (made of egg carton) added and then painted. Two tiny little areas of "stone" needed to be added and primed and painted before any of the walls or the alcove could be glued in place! And it was as I was adding these "rocks" that I realized that I needed to get this doorway properly aligned and the door attached before I completed the "rocks" so that the door could open properly into the Tower Stairs landing. And I am sure you have guessed where this chain is headed.... I needed to get that landing in place before I could attach the door...

You can see here my first attempt to attach the door,
with no landing in place.
It did not align properly and I had to rethink
the placement of the hinges!
Here's the view from the other side without the end wall in place.
It was clear I was going to have to back-track
to the bottom of the Tower and just build the stairs first!
From the beginning of this project I have planned to use Quaker Oatmeal boxes
as the structure for the Tower and have the stairs spiral up the inside.
(The last time I did this was for The Cloud Palace
and the stairs go up the outside of the Tower!)
I really just needed to know how many steps were needed
and make sure they started and landed in the right place.
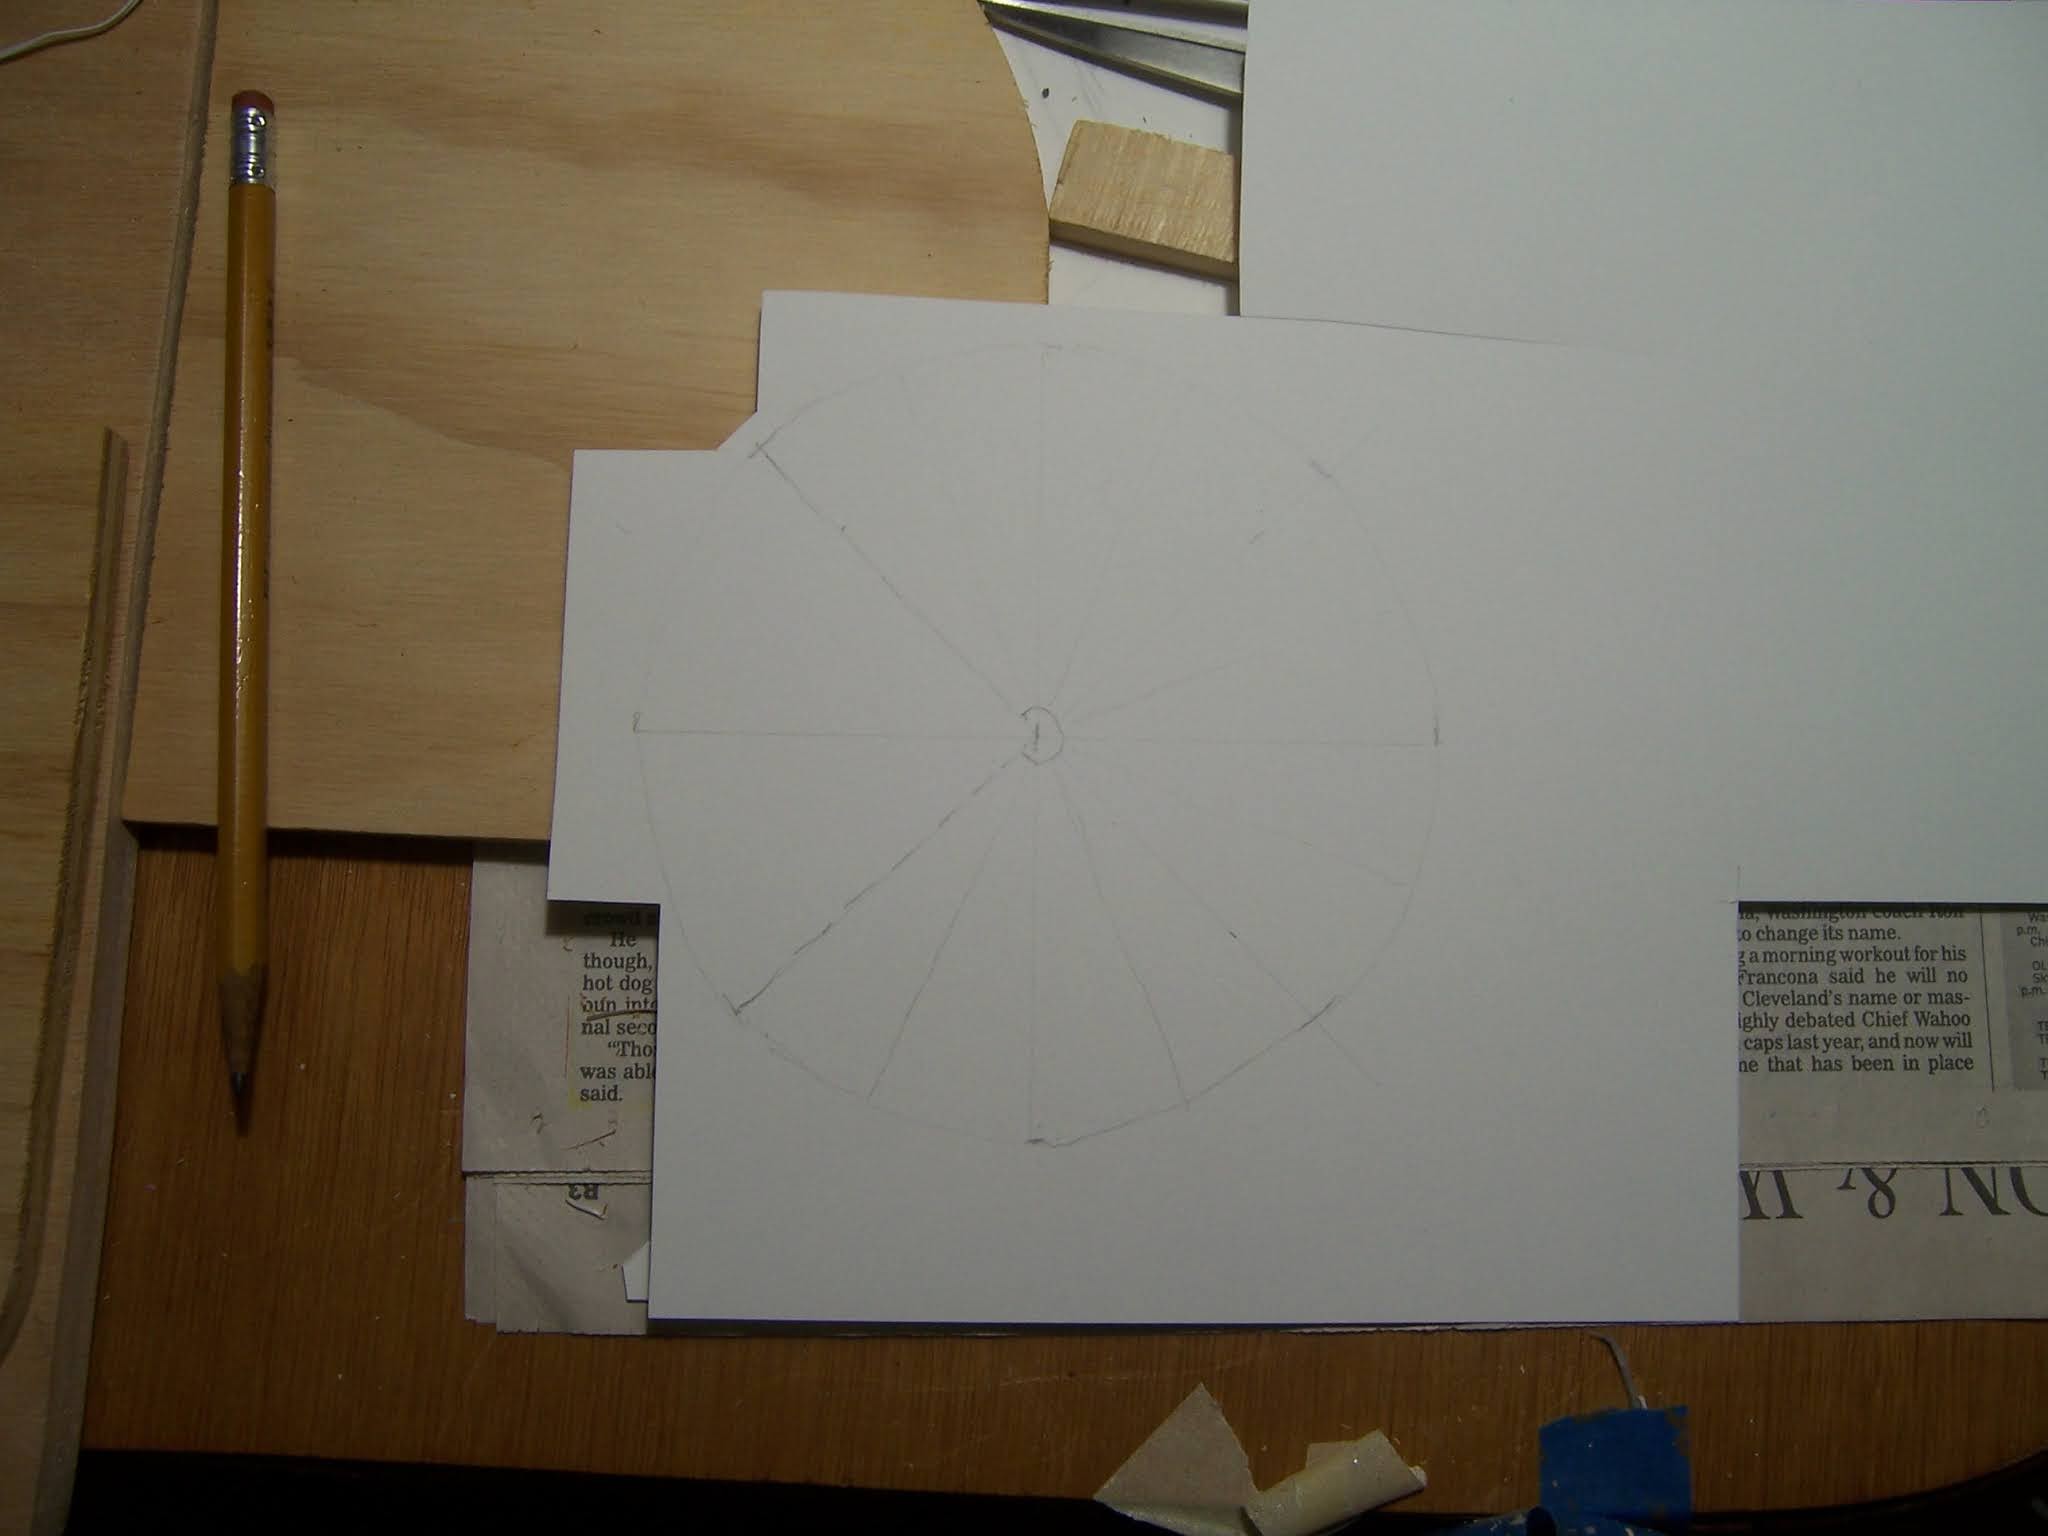
I drew a diagram to calculate minimum step depths.
(Sorry my sketch is a bit faint....)
I calculated three-quarters of an inch height for each step,
and would need a minimum of twelve steps for a 9 inch rise.
I could space four steps in each 90 degrees of the spiral,
thus using 270 degrees out of the 360 in a circle.
(This means 3/4ths of the way around
leaving room for landings. Just perfect!)
Meanwhile, I had decided that my initial "base" for the Tower
was too small and the initial "post" was too wide
(I had used a 1/2 inch dowel)
So I re-cut them both.
The new base is 3/8ths inch plywood
and the post is 1/4 inch dowel.
The steps are cut from 1inch builders foam
sliced down to approximately 3/4 inch thickness.
It is hard to be exact when cutting the foam...
and I am accounting for "discrepancies" in the "stone" steps.
The first steps are glued in the above picture.
It takes a while for the glue to dry
and you need to not rush too quickly... the steps will sag too much!
I glued a whole bunch of "pairs"
so that I could add two at a time once they were dry.
Here is the view from above...
trying to make sure I am getting my four steps
into a quarter turn of the spiral....
If the lower stairs are firmly dry,
the new pair will stay put while they dry!
Here the door has been re-attached... again...
I have made three attempts to get it right!
It now hinges off the back side of the support post.
This allows the Rock of the door frame more thickness
and the door appears to be recessed.
The top steps always seem to be off a little bit....
Yes, there was some sag...
and there was some allowance for different thickness
of floor for the landing...
Here you can see the Oatmeal box temporarily fitted around the stairs.
And the "landing" floor temporarily placed to see how it fits.
I was able to re-use my original base for the landing!
Here you can see the stairs without the Oatmeal Box...
and the door and landing temporarily placed.
I am using some of the foam "slices" to shim
the top step so it meets the landing properly.
(I didn't get a good picture of that.)
And while all those steps were gluing, Dear Readers,
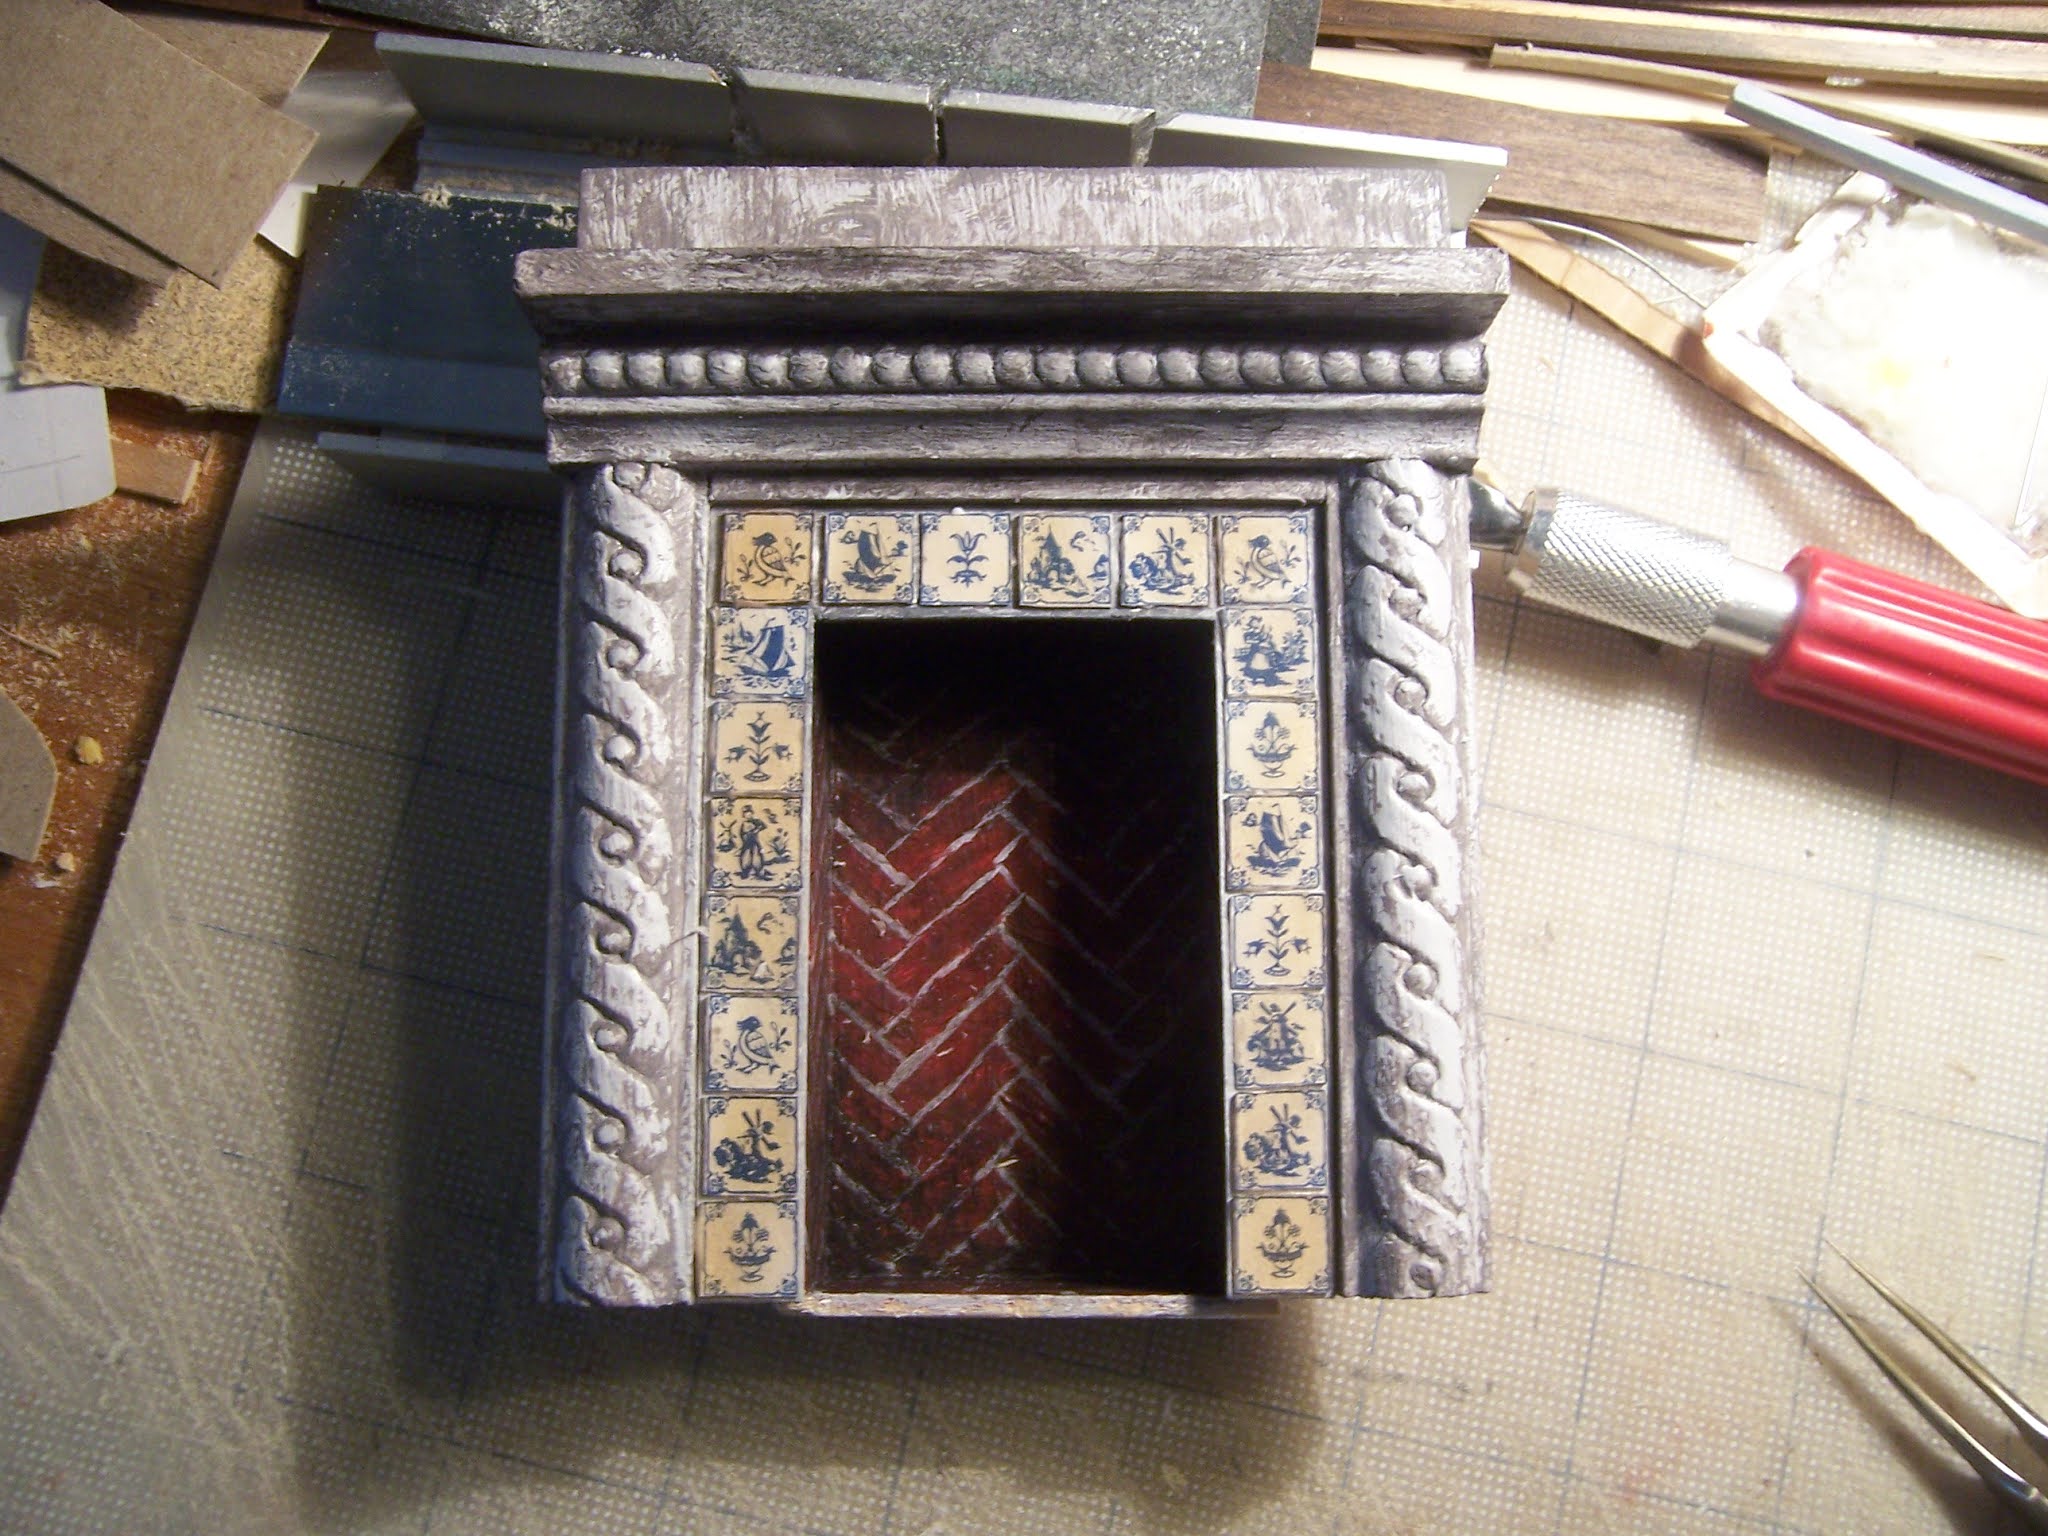
I was adding the rest of the stone door frame to the wall...
And making sure it fit around the alcove posts and the fireplace...
Such a small amount of "stone-work"...
but so essential!
Now I can glue the alcove in place!
And starting to fit the wallpaper too!
And with the ceiling temporarily in place....
(And the flash in play....)
Or maybe just the atmospheric light...!
But clearly, Dear Readers, the next steps
Just had to be the Tower Steps!