Showing posts with label Dollmaker's Studio Doors. Show all posts

Wednesday, March 3, 2021

The Miracle....


 Of Modern Mail....

Some of you Will understand, Dear Readers, the steady dwindling of hope that a certain package sent from over seas a Long Time Ago would ever reach these shores, let alone my personal porch. Yes, I was losing Faith. In fact, I will confess, that on Wednesday the 24th of February at 10:30 AM I looked out on my porch where no package was to be seen and finally admitted that it was getting a little Too late to still be hoping, and maybe the box was really truly lost. (If this is giving up... I gave up...). And so you will understand my Utter Amazement when I looked out at 2PM the same day.... to collect the mail that had been left in my box.... and there was that package leaning up against the wall beside the door....!!! What???? Really??? REALLY???? (Can you tell how amazed I was?) It only took 103 days to cross the ocean and reach my door.... which given the hardships of this past year is probably not remarkable at all. And yet again, I am amazed to think that we take the mail system for granted and think nothing of the Daily Miracle that it is. The very idea that you can put a bunch of carefully wrapped Treasures into a paper box with a few words scribbled (or typed) on it and hand it over to a complete stranger and a few days or weeks later (or months in hard times) it is hand delivered to another very specific door half way around the world... This is truly a miracle of faith and cooperation on a huge scale! Well!... and we take it for granted that it works.... which it usually does!

I was so shocked... it took me a little while before I was ready to open it!
And in case you don't know the sender of these Treasures...
Birgit is the most amazingly creative mini-maker 
and sends awesome Christmas packages!
(Yes, this was intended to be a Christmas Package!)


These little guys are so Wonderful....
But I don't blame them for looking a bit confused...!


It takes a while to open all the little parcels...
There are so many treasures!
Thank you Birgit!!!!!

And in another topic altogether, Dear Readers,
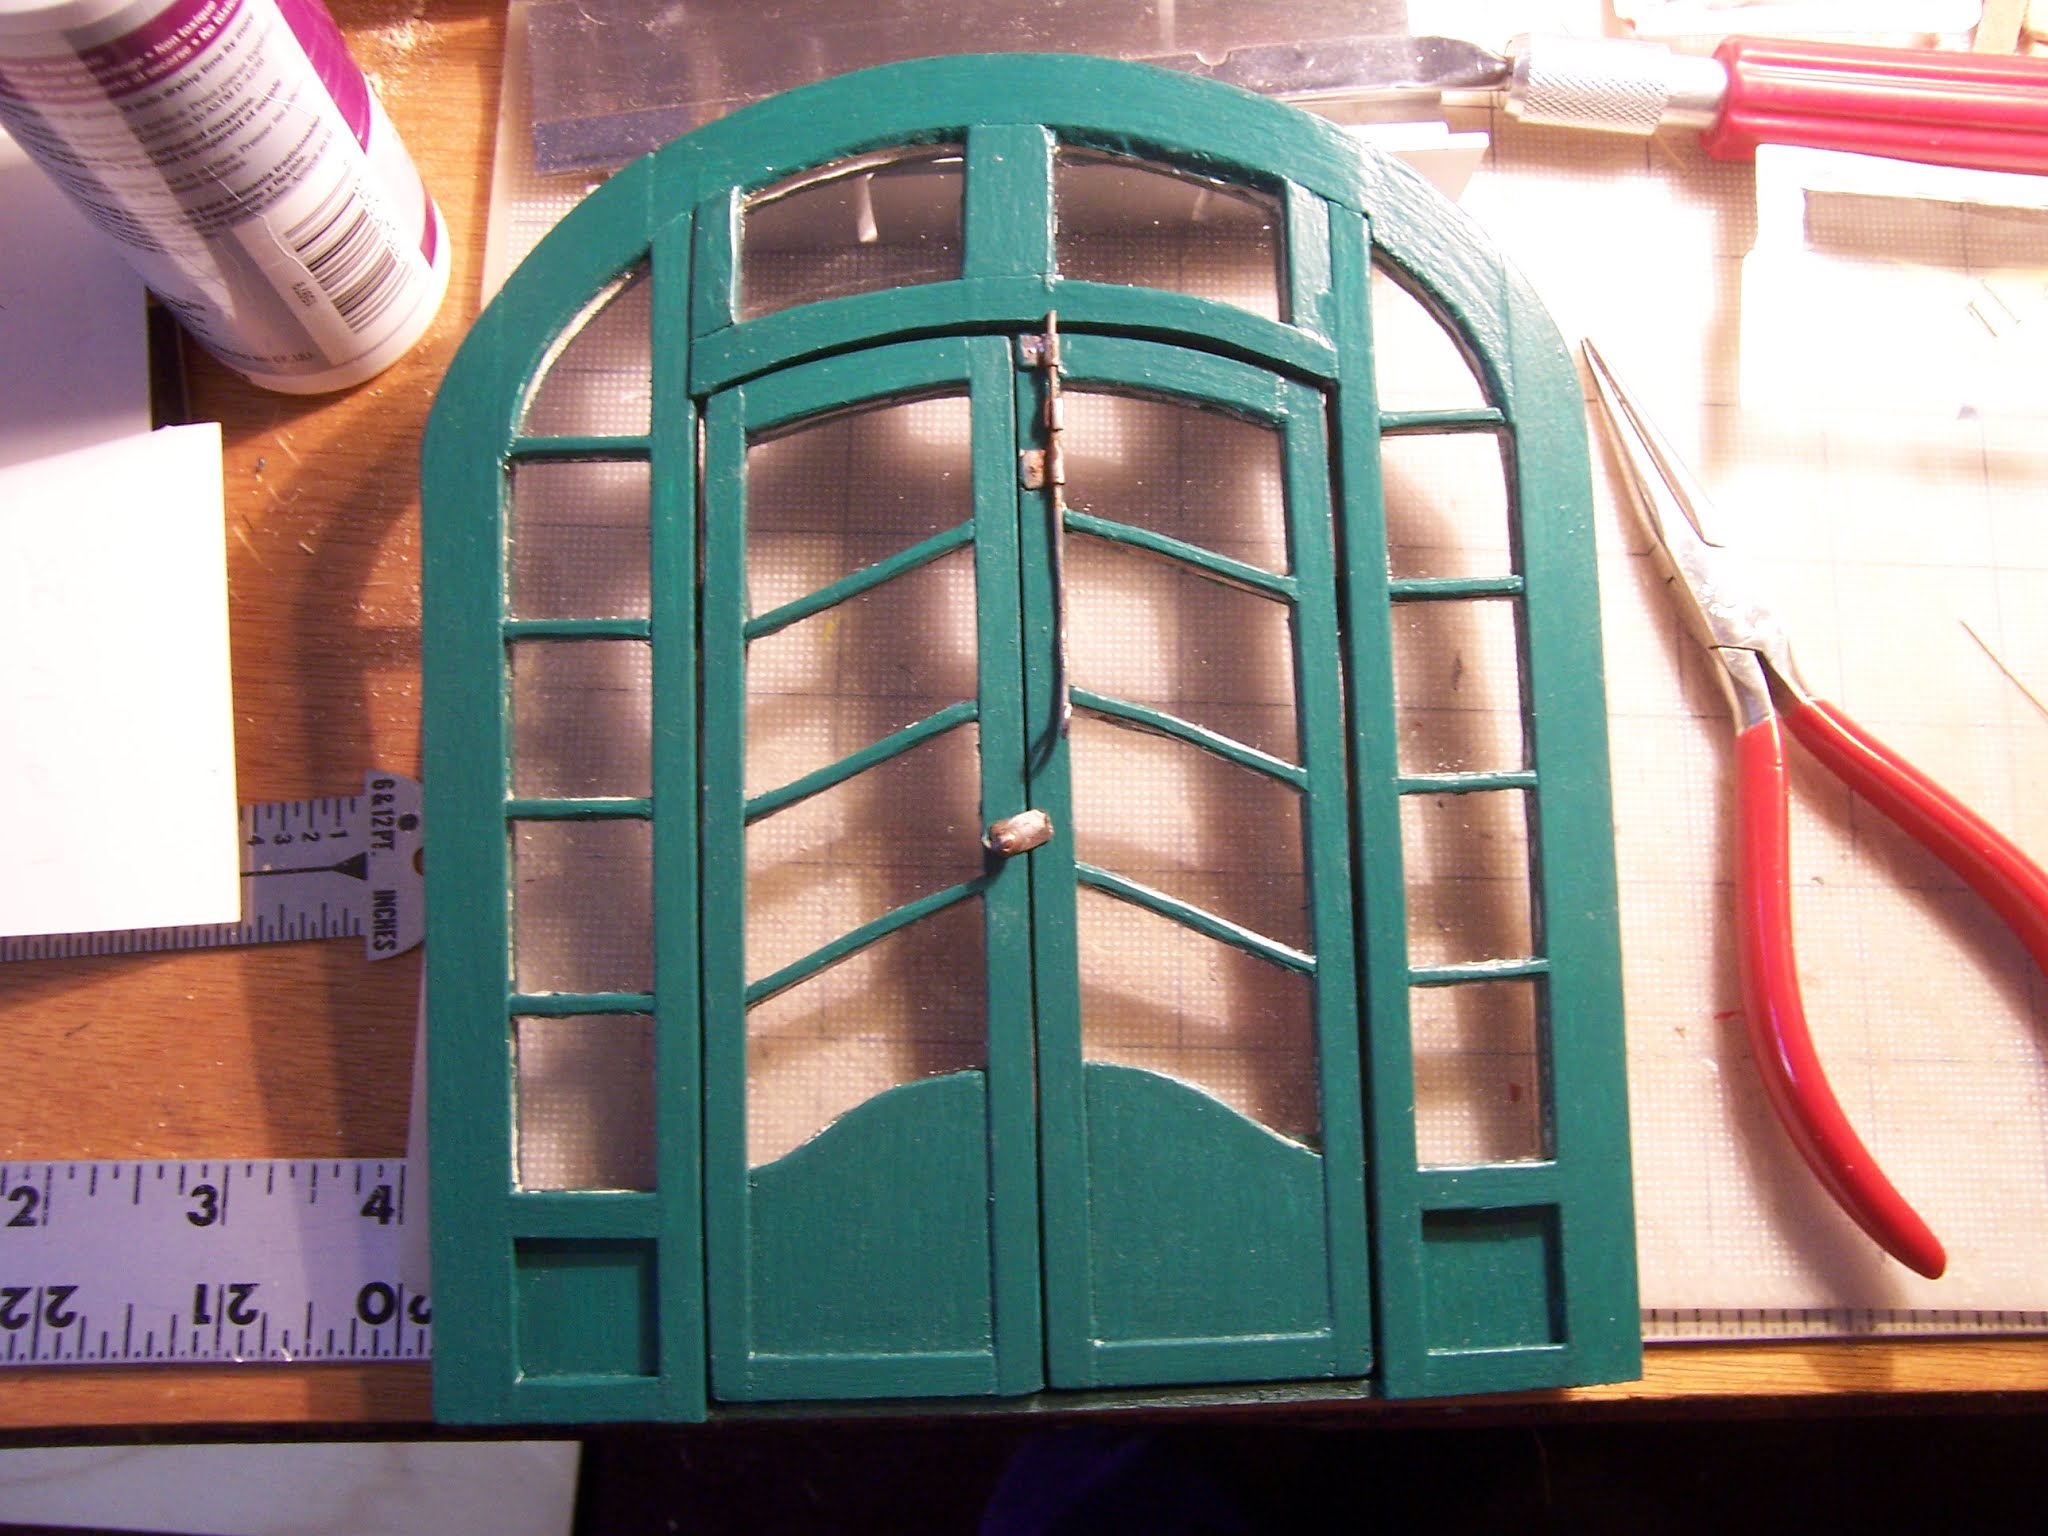
 I spent part of my weekend repairing the doors to the Dollmaker's Studio.
You may or may not have noticed that when I painted the frames,
 I had removed the opening doors. 
The hinges were hand made and quite small
 and a couple of them were not aligned properly in the frame.


When I went to put the doors back in,
 I added some tiny shims to the hinges on the left side.
The notches had been cut a tiny bit too deep
 and it stressed the hinges when they were closed.


Here both doors have been reattached.
They fit perfectly and hinge smoothly.


This is the interior side.... 
you can see the hand-made hardware.


Sorry for the dark picture...
Here I have fitted it back into the opening... 
still not glued in because the outside
 of the structure will need to be painted.

And because I am trying to get to the outside of the structure...
 there are a few details that need to be done on the inside first.


Like adding the curtain rods for the curtains....


Here I am adding lace to the bottom hem.
Testing the fit....


Both of them are done.
And then knowing that these doors will be drafty
They will need "portieres".....


Here I am testing the cloth.... 
still a long way from done...
But I do love velvet curtains!


And I needed to attach the overhead ceiling beams....
You know how it goes, they are never exactly the right length....
(Hand cutting is not reliable...!)
So you get three in place
 and the fourth one is a hair too long
 and causes the rest to fall!
I ended up gluing and shimming one at a time...
and waiting a good while in between each one!

And then I needed to test the ceiling paper I want to use....


It's a sparkly glittery textured scrapbook paper...
I want to pretend it is pressed tin ceiling tiles....
But I do love the shiny look... 
and any reflected light we can get
 in here will be a good thing!

And because I have my lace scraps out
 and am adding window hardware....


I find a scrap of beautiful old lace
 that is crying out to be used in this room...


I added a bottom hem of lace too.


Here it is in place.
I will make matching ones for
 the two little windows on the opening wall doors.


And trying to see how it will work
 with the sconce light I want to put on this wall...
Bit by bit I am starting to see this room come together...
Although it is such a small room... 
I am sure I will not be able to fit everything I want to in.

And that's all I accomplished last weekend, Dear Readers,
But it leaves me feeling optimistic!
With this progress
 and the Delivery of the Mail...
My faith is restored!


Tuesday, July 21, 2020

Finishing.....


A Few Little Things.....

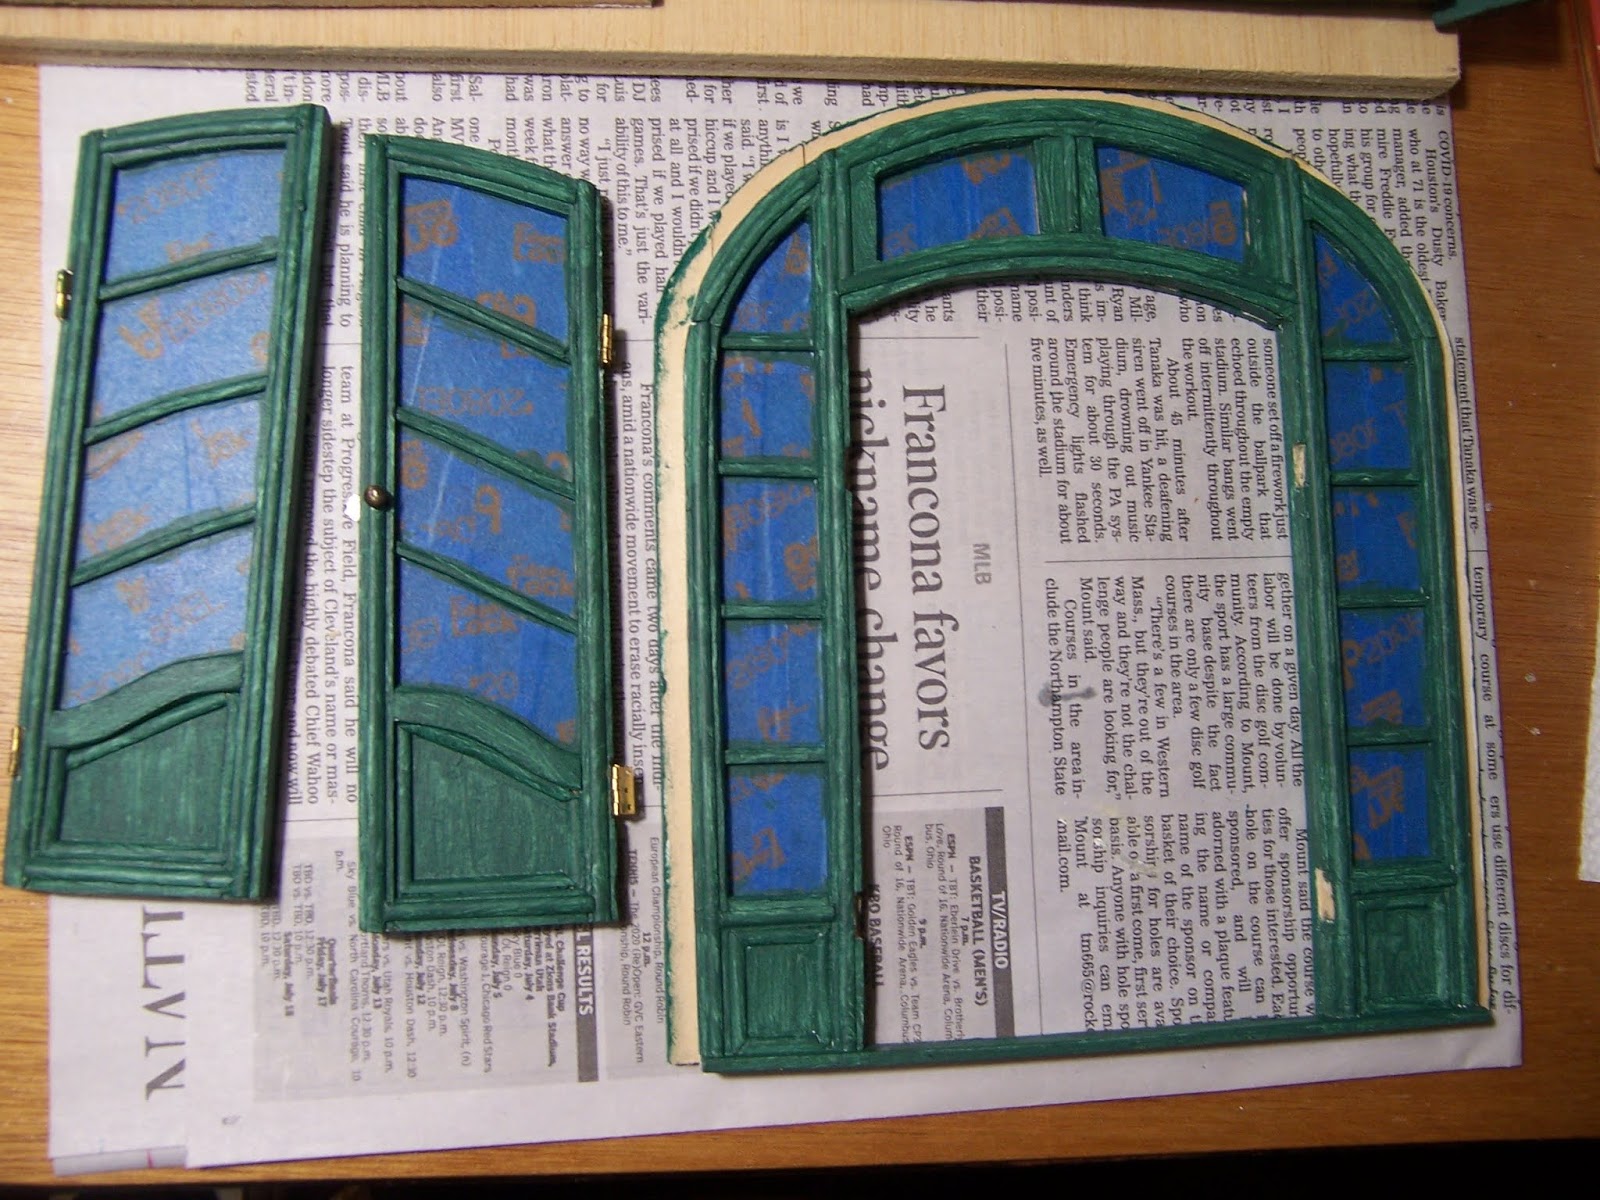
It did Not take me long, Dear Readers, to complete the stitching of the Three Kings stocking! I enjoyed every minute of the stitching and am pleased to report that I didn't change anything about the design (I love it as it is...) and I didn't make any mistakes in the stitching! All it (and the other completed stockings) need now is to be stitched to their backing material. No, I did not finish doing that step. But I was in a "finishing" frame of mind and so I made sure to put the paint on the other side of the lovely arched door for the Dollmaker's Studio.

You might not be able to tell from the photo, 
but it is a different shade of green for the outside... 
it is more of a Forest green and the paint is flat with no gloss.
 It needed to look a little bit weather worn.

Here I am giving it a test in place....
 the lighting is too harsh, and it only has one coat of the paint....
 but I wanted to see how it would look....
I know... it is hard to tell!

A second coat of paint helps!

But while the paint is drying
 there are a couple of other little things I am finishing....

You might recall the little footstool with the Tree of Life stitching.....
(I apologize for the blurry picture... I didn't take many of this project!)
It required patient gluing to the backing and foam cushion....
Which I was Finally in the mood to tackle!

Ta Daaaa!!!! Finished!!!
(How long did this simple step take for me to do...?)
I will show you a better picture later.... 
because I am Finishing Things....!
 
Next up is the Little Tudor Stitching panel
 to go in the embroidery frame...
The Whaaaat??? I hear you say...
It has been a couple of years
 since I was working on this one.....
 
Here you can see the stitching is almost Finished....
But I needed to construct the little frame that it goes into... 
(which is part of the lovely Janet Granger kit....)
and when I pulled out the instructions.... 
it needed special wax finishing for the mahogany wood.
I hadn't ordered that.... 
and it wasn't until the Covid lockdown
 that I got around to ordering the Finishing kit. 
I am glad I did! 

It's a lovely Delicate turned wood mahogany frame!
And I have never Ever used real wax polish on anything.... 
so it was a real learning experience!
But it turned out beautifully!

I am sorry my pictures are so lousy...
I was so intent on the process I was forgetting to take pictures.... 
so this is what I have to show.

Meanwhile, the paint has dried on the door frames... 
and it is time to carefully cut around the edges 
and remove the painter's tape from the windows...

I think it looks just like I hoped it would!

I just need to re-attach the hinges... 
with a little judicious shimming
 and it will be finished!
But the exterior of the Dollmaker's Studio
 has a Looooong way to go before it is done.
(Egg-carton stones somewhere on the horizon...)

And the little piece of tapestry stitching
 had to be mounted carefully in the frame....

Again, I apologize for the poor focus! 
But I was in a hurry to put it  in the stand.....

And add the tiny needle to the thread....
Because it isn't quite "Finished" yet...!

See the tiny "needle" I made?
It is just a bit of very fine wire 
superglued to the thread...!

I just LOVE the way this turned out!
This kit is so well made and the results are beautiful!

And with the footstool.... 
(with the carved feet which you can barely see)
I am very pleased with the results of both of these kits!

And while I was Finishing things.... 
I also Finished the "stones"
 around the little window in the Castle Dungeon....

And I added the shutter too... but forgot to take any pictures...
 and it still needs the sculpey "hinge flanges" 
because I need to make some more.
This completes the "upgrade" on all the windows
 that had already been "finished". 
There are still many windows in the Castle
 that have not been worked on at all.

And because Elizabeth wanted to see the
 ceiling of the Guard Room in a better light....
I will Finish this post with a picture... 
This ceiling was painted so long ago I forget it is here...

Here you can see it with full illumination....!
The scattered stars are reflective, 
but because the ceiling is vaulted,
 they never all reflect the light at the same time....
So only some of them appear to be shining.
And the harsh light really brings out the raw paint strokes...
This is mostly copied from a Medieval Illumination
 series showing the zodiac figures.

So that's what I've been doing lately, Dear Readers,
 a whole lot of Finishing!
But as I am sure you can Imagine, 
I am a long way from finished with the "finishing"!


Monday, March 9, 2020

Doors And Floors....


Panels and Tiles....

There Were Only a few more pieces of rails and stiles to cut for the paneling on the opening wall of The Dollmaker's Studio, Dear Readers, but they required much more patience than the others because of the opening doors. The panels just barely fit so that the central stile would span the crack between the sides when the doors were closed, but this meant I had to glue pieces on more carefully and align them around both the windows and the cracks in the doors. Above you can see the main pieces cut but not stained or glued.

And here you can see the stain has been added.
 I decided to glue all these pieces in place
 before trying to cut and measure the top rail for the middle section.
 I needed the pieces to stay put in order to measure properly.

Here the top rail for the middle has been added.

Here I am making sure the doors open properly..... they do!

And the view through the arched opening... both walls are paneled!

Testing with the arched door in place... those windows need cleaning!


And from the other end..... this really is a very small room!
And I think I need to make some kind of paneling 
for the walls beside the door.
 
But before I do that, Dear Readers,
 I wanted to show you the other project I was working on
 over my vacation a couple of weeks ago.
I had decided I finally had the time to make the floor tiles 
for the Lord's Council Chamber in my Castle!
(It has only been about .... 
I don't know how many years since 
I really made any progress on that room!)

I dug out the sculpey I had bought....
 all those many (seven, eight or nine?) years ago....
 and discovered it was Almost too old and stiff to use....! 
Almost.
With lots of patience and lots of kneading
 it eventually became usable... 
so I cut and baked tiles ... 
one brick per day (all I could stand to knead)
hoping I had enough of the colors I had bought!

I had Just enough, if I also used a few remaining tiles
 from the Conservatory floor... the gold ones in particular.
I wanted to make a pattern that emphasized the center of the floor,
 rather than have an over-all pattern.


 The gold tiles were a "mistake" I made years ago 
when I was making the tiles for the Great Hall Floor.
 The final step was to spray varnish over the painted patterns of the tiles.... 
I grabbed the gold spray can and only realized my mistake
 when the tiles were turning gold before my eyes!
In the right light you can see the painted designs through the gold.
I liked the effect and saved the tiles...! 
I think they work for this floor.


Then I added the Red Star Stone to the center...!


I think it is important to test these ideas in varying light....
Morning light adds a beautiful feeling!


And the next morning I like it even more!
(I can't tell you how long I have been dreaming about this floor!)

But it still needs some more embellishment....
(I do love lots of detail!)


I had always wanted it to have more stars in the pattern...
So I started painting some of the tiles with gold stars.
 

 Just a few to start with to see if I liked it....


And then just to be Sure I was happy with the Red Star Stone,
 I swapped it out for a blue one...
I definitely like the spark of the red one!
(And it will have a power role to play... you will see!)

So I kept adding a few gold stars scattered over the floor...


I will be adding a few more!
But that is as far as I got, Dear Readers,
While I was waiting for the glue to dry
 on the Paneling for The Dollmaker's Studio!