Showing posts with label Tiny Scissors. Show all posts

Monday, July 24, 2017

Just a Little Ho Hum.....


Adding the Trimmings.....

After all the Excitement of the Teeny-Tiny books last week, Dear Readers, I have to confess that the furnishings for the next room in the Secret Christmas House seemed a bit unexciting to me. Maybe I was just getting so used to the wonders of the tiny furniture in all it's perfect details, that making another tiny chair or bedside table just wasn't very challenging! Okay, the beautiful Sleigh bed did present some challenges, but really went together very easily! The furnishings for this room are the Sleigh Bed, the tall Victorian Dresser, two bedside tables and the wing chair. Certainly a lovely matching bedroom set!

Here you can see them all assembled prior to staining them.

Here the wooden pieces are painted the brown color 
recommended in the kit instructions.
 The chair will need to be painted as the other wing chairs
 with Many Many coats of paint until it looks "plush"!

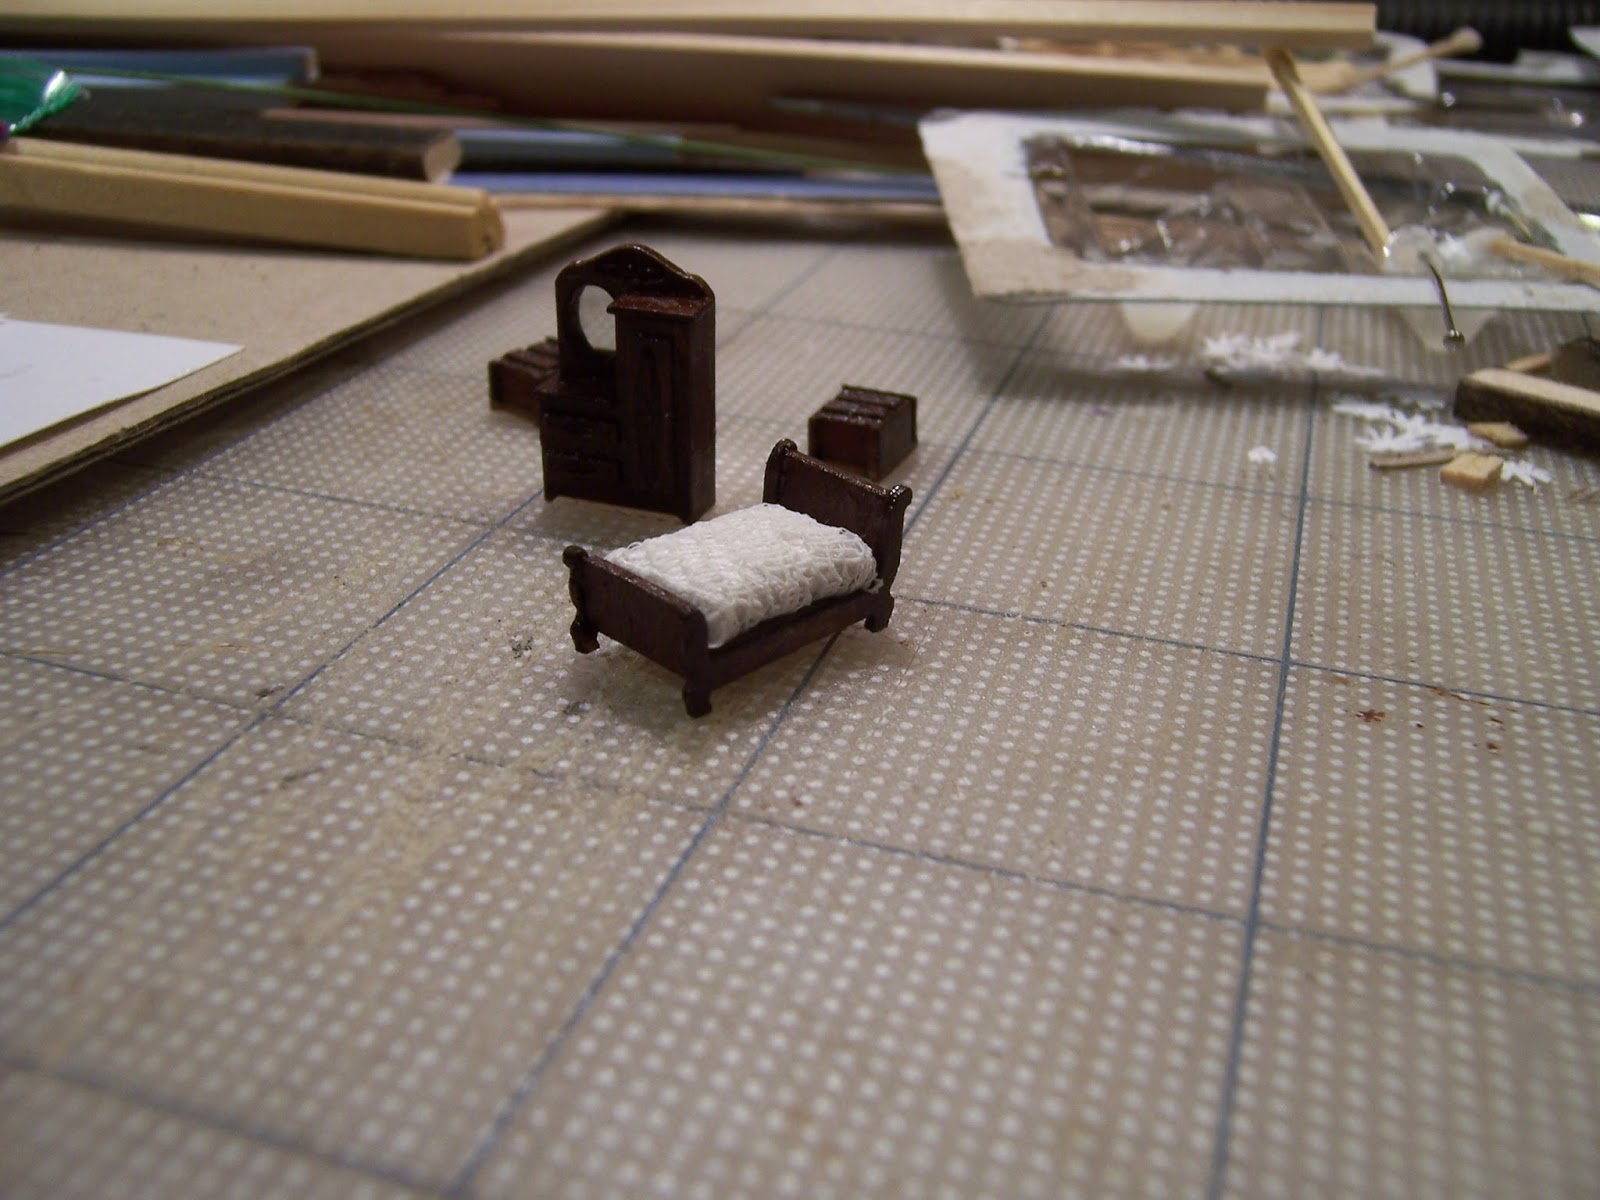
Here they are varnished 
and the bed mattress and covers have been added......
and the mirror in the dresser too!

Here the bedside "lamps" made from 
beads supplied in the kit have been added, 
and the pillows on the bed.

Oh, and a lovely red pillow on the bed too!
But is that All?
Well, let's see how they look inside the room....

Hmmm.... it just looks a bit plain to me!
The only "decoration" that is still to be added
 is supposed to be a couple of wrapped "gifts"
one on the dresser and a couple behind the chair. 
Oh, and the chair will have a pillow 
and a "throw" draped over the arm.
Even with those details, 
I think it a teeny bit of a Yawn.
Well, I tell you, Dear Readers, I couldn't leave it so bare!
To begin with, I thought the dresser should have 
a small tray with some perfumes and lotions on it.....

Oh dear, my lighting is not very good... 
You can probably barely see them!

Here, maybe this is a little better.....
I made the "mirrored tray" by cutting an oval out of the corner
 scrap left over from the mirror provided in the kit.
Then I added the tiniest beads I could find in my old collection....

Here... can you see it now?
(Go ahead and poke the pictures to enlarge them!)
I think this is much more fun than just a wrapped gift...
And I just can't imagine a Lady's dresser without these bottles!
And while I was adding tiny beads....
I thought the bedside table should have an old alarm clock....

Can you even see it there!
Does it even look like an alarm clock?
Well, I am pretending it does!

Perhaps we should test them inside the room....
I think they add a wonderful layer of "realism"!
And since I have been thinking so much about teeny-tiny books...

Well, I had to make one for the other bedside table!
Because, surely the Lady of the house might like to read in bed.
But truly, Dear Readers, I could not leave the bed alone either....
because I could not imagine that all the rush of preparing for Christmas 
wouldn't leave the bed covered in wrapping paper and partly wrapped gifts.....

I had to make some scissors out of wire....
Can you see them there?
I know... they are really Huge!
(perhaps they are the kitchen shears!)

And I had to add some thread for ribbon draped on the floor.....
And then we need to see how it looks in the room....

Can you see it at all?
Oh and the unfinished chair too....

Just imagine a lacy throw over the chair
(when it is painted)
and a few wrapped gifts hidden in the corner behind the chair....
And who knows.... maybe even a footstool and some slippers....
Or a shopping bag with gifts inside....!
As you can see, Dear Readers, 
this room was just a little too Ho-hum, 
So I have been adding all the little trimmings!

Tuesday, March 3, 2015

All Those Little Details


Raw Edges, Unfinished Pieces, Small Improvements....

Can you believe it, Dear Readers, that weeks after my vacation is over I am still showing you little pieces that I accomplished during that busy week? The above picture is a case in point. And it is even a further example of something I have been thinking about doing for ages and ages and only got around to finishing while I was enjoying that productive vacation time. This kit is the first piece of furniture I bought as an adult..... Ages and Ages ago when I was only twenty. I completed the assembly shortly after buying it, but didn't know how to do the "finishing" including the attaching of the drawer pulls. So I put it all carefully away, unfinished, awaiting a time that I could learn the proper methods of staining and gluing. I finally gave it a stain a few years ago, but still didn't attach the drawer handles. I finally decided to just glue them on before the pieces got lost... and I got it done during my recent vacation!  And while we are talking of finishing unfinished pieces....

I had decided to stain the table and chairs for the Willowcrest...
I wanted the silver-gray color I had used on the Conservatory
So I pulled out the stain and got right to it!
Which only got me to thinking about other long-unfinished pieces....

The hutch in the Folly kitchen was given to me by my sister many years ago...
And I have been unable to decide exactly what color to paint it.
So I tested one of the stained chairs in the room and it was perfect!
It didn't take me long to get the hutch stained too.

I am probably going to add more details to it... but it is a start!

But that is not all I have to show you, Dear Readers....
The chief little detail I wanted to show you 
is one of those projects I have been wanting to make 
ever since, well... Forever!
So I Finally got started....

I started with ordinary cardboard and made a little box with a drawer.

And then I started to cover the outside in a pink patterned cotton....
and lined the insides in light green silk....

The shape of the box was a bit complicated to cover... 
but I glued one section at a time...
and only cut away pieces when I was 
sure where they needed to be cut.

And the top lid has a folded edge....

Here you can see it up close...

Here I am working on the lining for the top sections...
I left the raw edges of the silk unturned,
relying on the glue to prevent raveling.

Here it is mostly finished.....
A sewing box just like the one belonging to my Mother...
that my sister and I used to "borrow" 
when we were children just learning to sew!

And here I am starting to add the accessories.
Do you see those scissors on the table?
I have saved those scissors, Dear Readers, ever since I was a child!
I got the larger pair in a gumball machine when I was ten...
and they actually cut paper!!!
The smaller pair I have had for just as long, 
but I don't remember where they came from.
There were a few other things I wanted to add to this sewing box....

 And one of them was a measuring tape....
So I decided to see if I could make one by painting some cotton...
and writing numbers on it....
and covering that with craft glue.....
and cutting it very very close to the writing...


 I think it works!
And when I was at the Sturbridge Fair two years ago,
I had bought some tiny metal thimbles and tiny stork scissors...
which I have tucked into the top of the box...

I also added a pin cushion (bought more recently)
and wound some ribbon on card like bias tape.
I am sure I will be adding details for quite a while.
I just can't tell you, Dear Readers, 
How satisfying it was to finally, Finally get around to 
working on all these Unfinished pieces, 
Raw edges and Small improvements...
I really had So much fun with all those little details!