Showing posts with label Fungus. Show all posts

Monday, April 15, 2019

Fifty-two Weeks....!


And a Few Little Details....

It has been Fifty-two Weeks, Dear Readers, give or take a few days, since I embarked on my Blossom-a-week project for the Lilac bush! And I am ever so Happy to be able to say I did it! I made one (or two) a week for Fifty-two weeks! And now I have a box full of lilac blossoms which will soon cover the Spring blooming lilac shrub for The Folly Garden!

See? Here is the box with almost all the blossoms 
(remember that I had attached four of them to the shrub
 before I realized I had better complete other details first!)


And here also are this week's batch of ten leafy stems..... 
which makes the tally somewhere around eighty leafy stems..... 
only forty or so to go!
And since I am now on the brink of launching the stem attaching program.... 
I thought I had better take care of a few of those other Tiny details first...

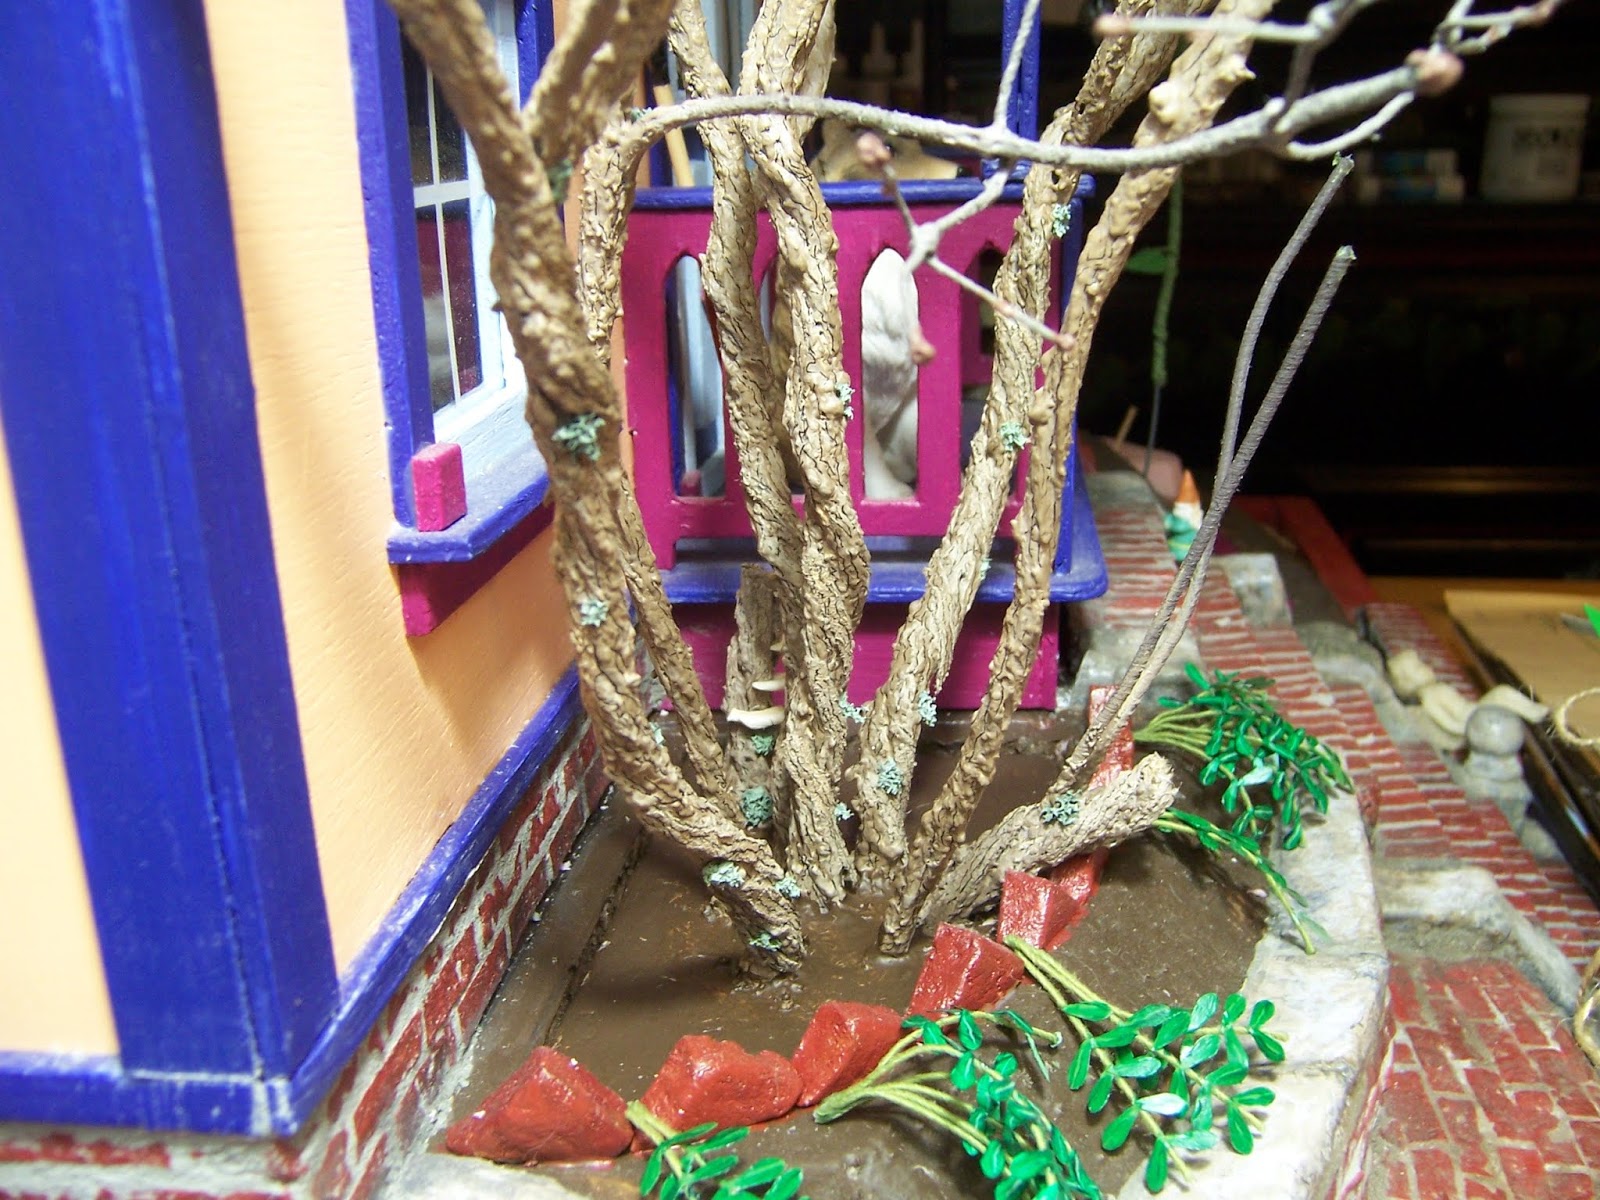
Such as finally adding the fungus
 (which is very delicate and so it should be added last...)

to the bare stemmed Winter shrub.

Here you can see it closer... 
the fungus are on the dead stump at the back.
And I also added a few of the "sucker" stems.....

Which you can see in this overall view.
At this point I am just trying to make this shrub match
 the one that has the snow on the branches.
I am fairly certain that once the blooming lilac is completed 
I will be adding a whole bunch more suckers to the front of the bush.
But I want to complete the blooming one first!

And Another Tiny detail that needed to be done first Dear Readers, 
was preparing the nest for the Spring Blossoming Shrub!

I made a few Robin's eggs from sculpey
 and painted them Robin's egg blue!
I think they are a tiny bit too large....
 but they will be mostly hidden in the foliage...
so I am going to use them anyway.

And then the nest needed to be attached to the shrub.....

This always requires a surprising amount of delicate twigs and glue
 to fill the space between the branches...
(I really don't know how the birds do it!)

Now the nest is ready and waiting.... 
the birds cannot be far away...!
But I promise you I will not be showing them any time soon... 
because I will be busy working on the branches!

And even though I have reached my goal 
of blossoms for the shrub, Dear Readers,
 I will still be making blossoms for a while... 
because there need to be a few for bouquets!
And yes, there might even still be
 a Detail or Two added to the Winter shrub....
After all, it is still a few weeks until the Lilacs will bloom!


Monday, February 11, 2019

Retro-Fitting.....


In With The Old And Broken.....

You Might not think it necessary, Dear Readers, but I found myself wanting to add a few more stems to the ancient lilac shrubs. It has always been part of the plan to add "suckers" around the base of the shrubs, but those are some of the last pieces that will be added because they will get in the way of working on the main stems. But in this case I am not talking about suckers, but a couple more of the old twisted and broken stems. It just seemed to me as though the very front of the shrub had too large a gap... where there should be a stem... and it would have to lean out over the path which means that it would probably have broken in a harsh icy winter a year or two ago.... and then the broken end would have sprouted new growth... which would fill the empty spaces just perfectly! So I started to twist together a new old stem. You can see the very beginnings above.


And of course, I had to make one for each of the shrubs....
above are the first two just starting...
And I neglected to take pictures of all four together.

And while I was thinking of old broken stems,
 I also decided to add an old "stump" at the very back of the shrub.
 There was an empty corner where perhaps the original shrub
 was planted a little too close to the foundation, 
a little too tucked under the porch eaves... 
and over the decades the shrub grew farther out
 into the garden and the oldest stem eventually
 became light starved and ceased to thrive.

And here the new old stems have been attached
 onto one of the garden "pods".
Because of the angle of the one in front, 
it is really difficult to get a good picture of both of them.

Can you see them better here?

And then I had to replicate all the steps 
I had taken for the original stems.....
It's a good thing I could look them up on this blog!

First a coat of acrylic paint to "seal" the paper wires... 
acting like a primer.

Then adding the textured paint......
 (It was a good thing I still had this in a jar all mixed up!)

Then adding the modeling paste for texture...
And between each step there was time to wait for things to dry.

And adding the first coats of paint.....
(I was so relieved to find my cups of mixed paint had not dried out yet!)

And then adding the little strips of painted sandpaper for the peeling bark....

And wanting to test the new retro-fitted stems
 in place in The Folly Garden.....
You can see the one in front that leans out over the path,
 but the one in back is hidden in this shot.

And while I was Dreaming of these new old stems Dear Readers, 
I imagined them covered in fungus and lichens....

So I made a few squished blobs of sculpey to look like fungus, I hope....
and started to attach them to the old rotting trunk at the back of the Garden...
I have not completed this step of adding fungus and lichen.... there might be more!

You can sort of see it here....

It is tucked in the back and will hardly be visible
 when the suckers are all added... 
and probably not visible at all in the leafy season..... 
But yes, I will know it is there!

And you can see how the new sprouts
 on the old broken stem that leans out in the front
 will fill the front of the garden with new leafy growth 
without obscuring the path.

Here you can see it from a better angle....
( sorry about the glaring light....) 
As I said earlier, there will be more suckers
 to fill in around the bottoms of the stems.
 And while these additions were certainly not necessary... 
 I do think they add a layer of "history" to the shrub!

I think it is Finally beginning to look like I hoped it would!
And lest you fear I have forgotten the blossoms.... Fear Not!

Here is blossom number Forty-three!

And in the box with the rest of them!

Now All I have to do is complete
 all those retro-fitting steps 
on all four of the shrubs...
Well... and a few more tiny details...
Because those Old broken stems 
have a Story to tell!