Showing posts with label Rhododendron Blossoms. Show all posts

Thursday, May 23, 2024

Are You Ready....


For the Rhodie-oh......!

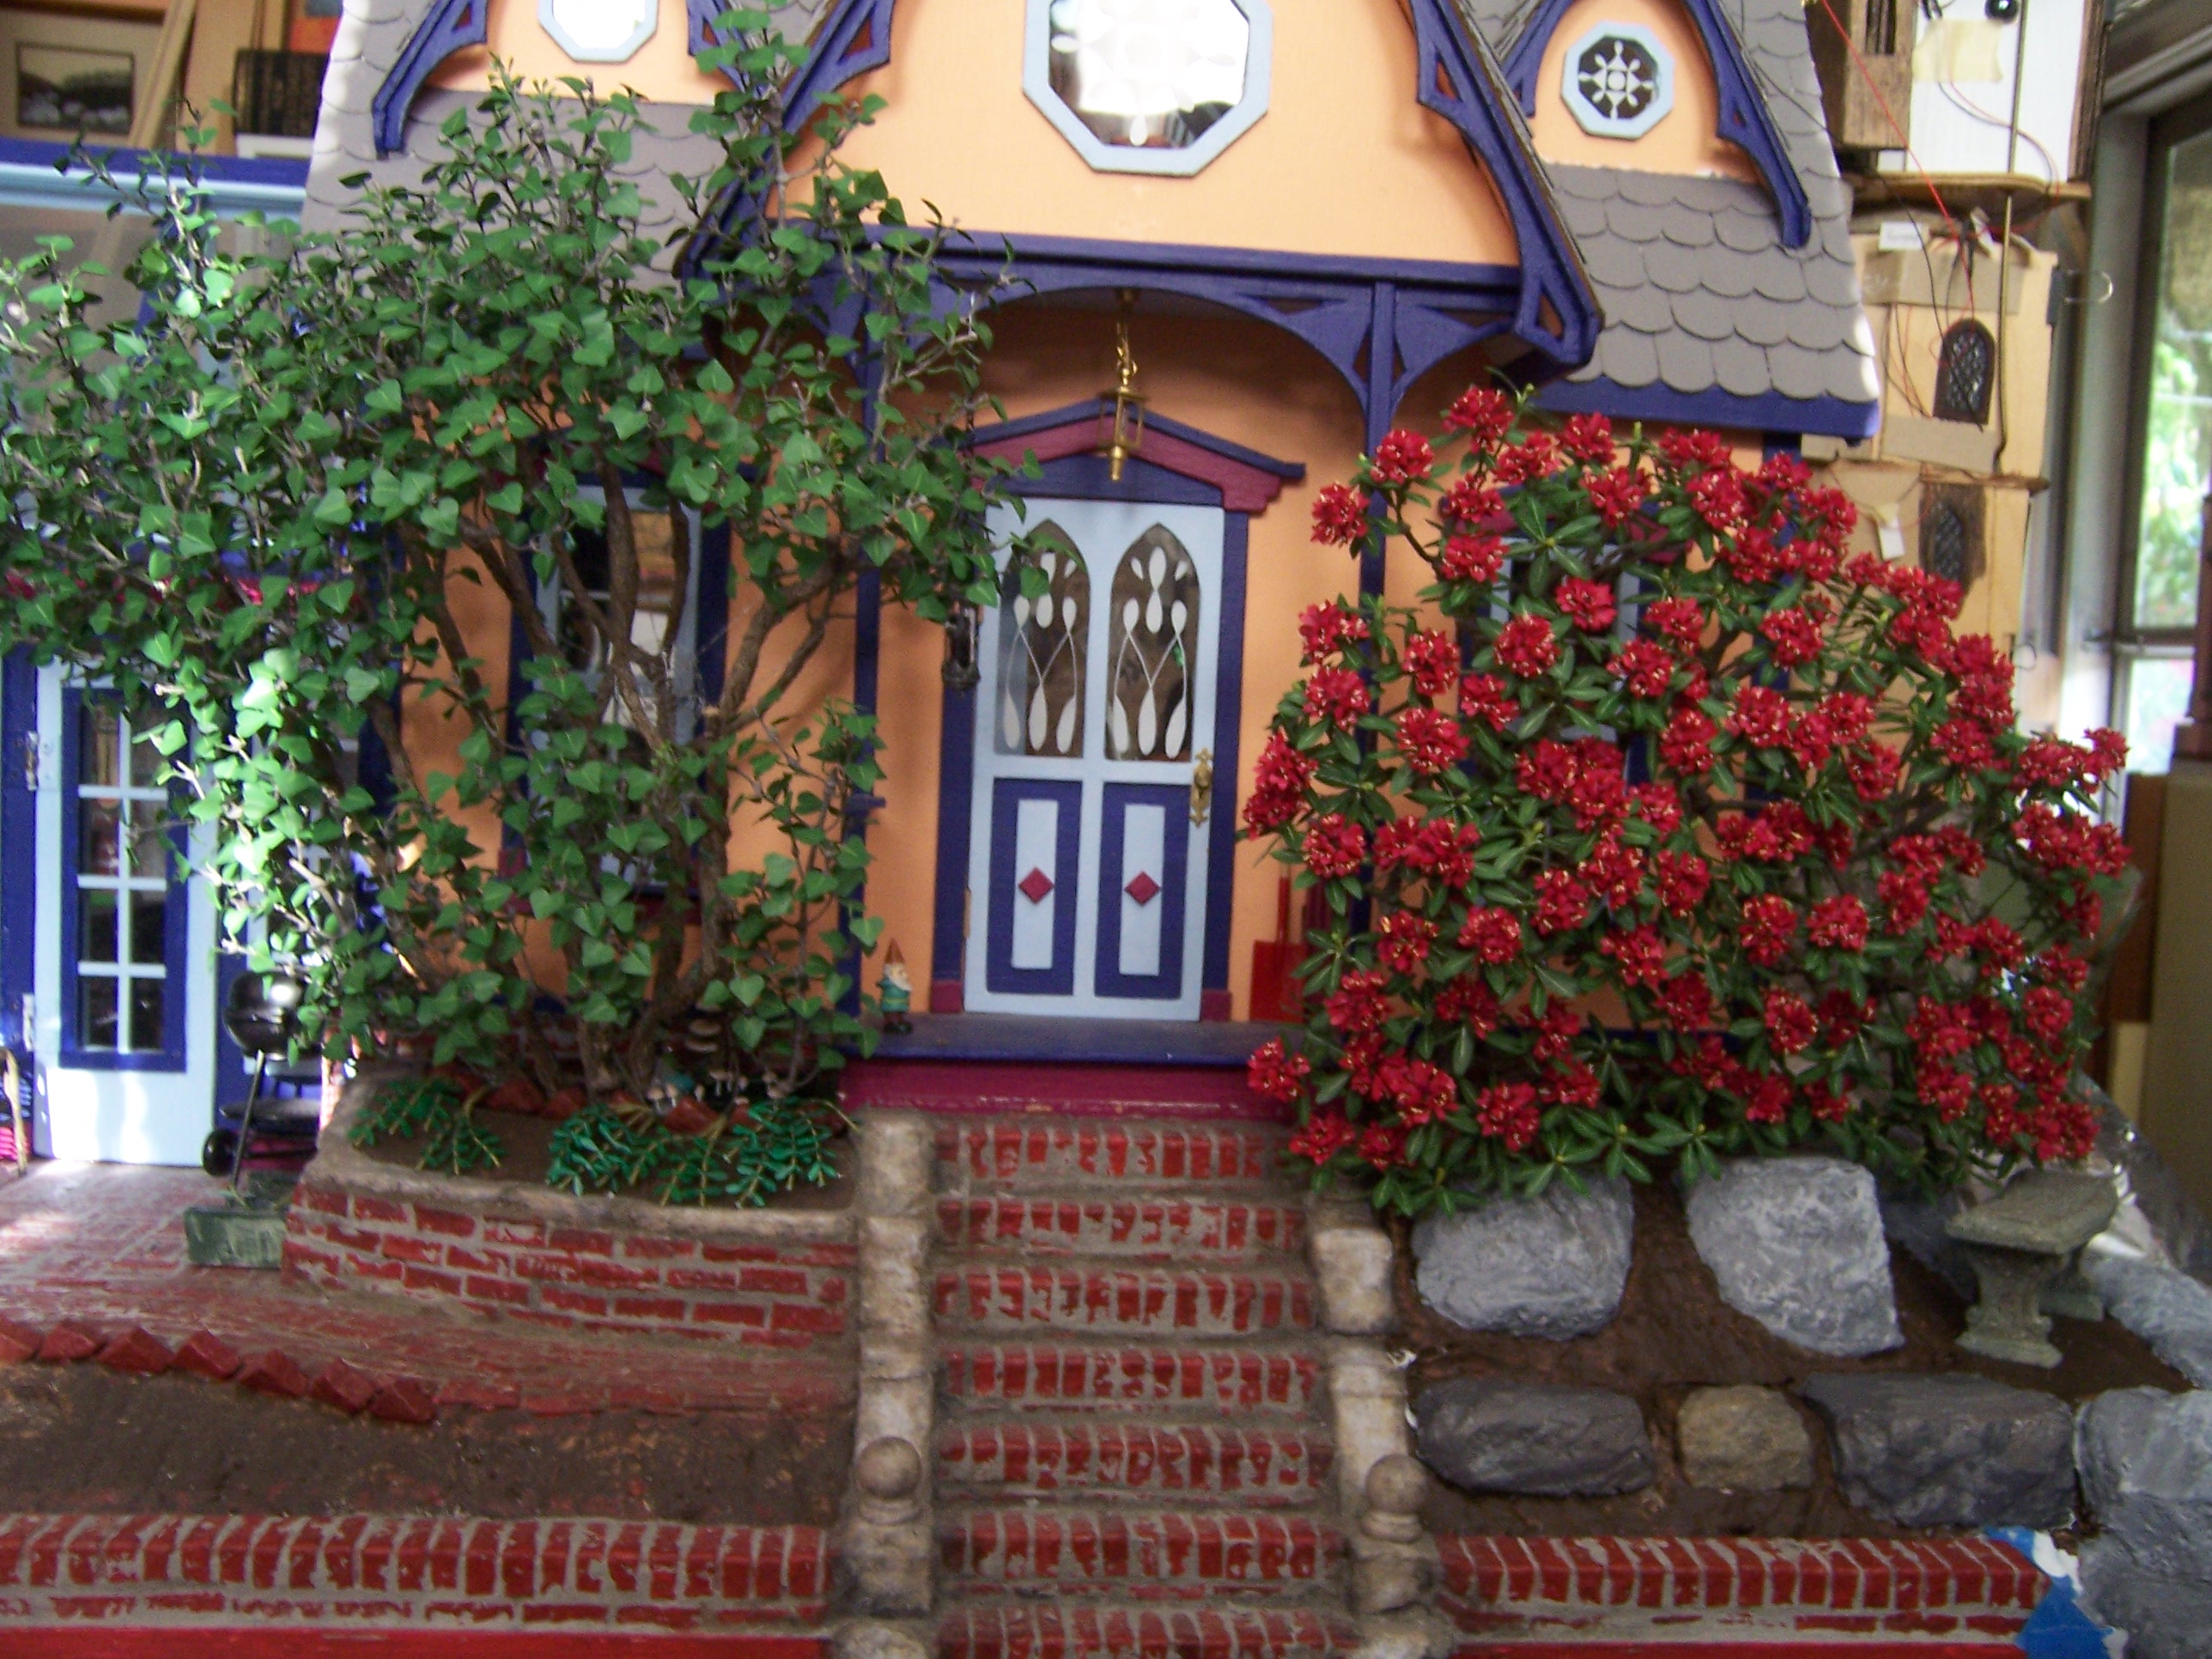
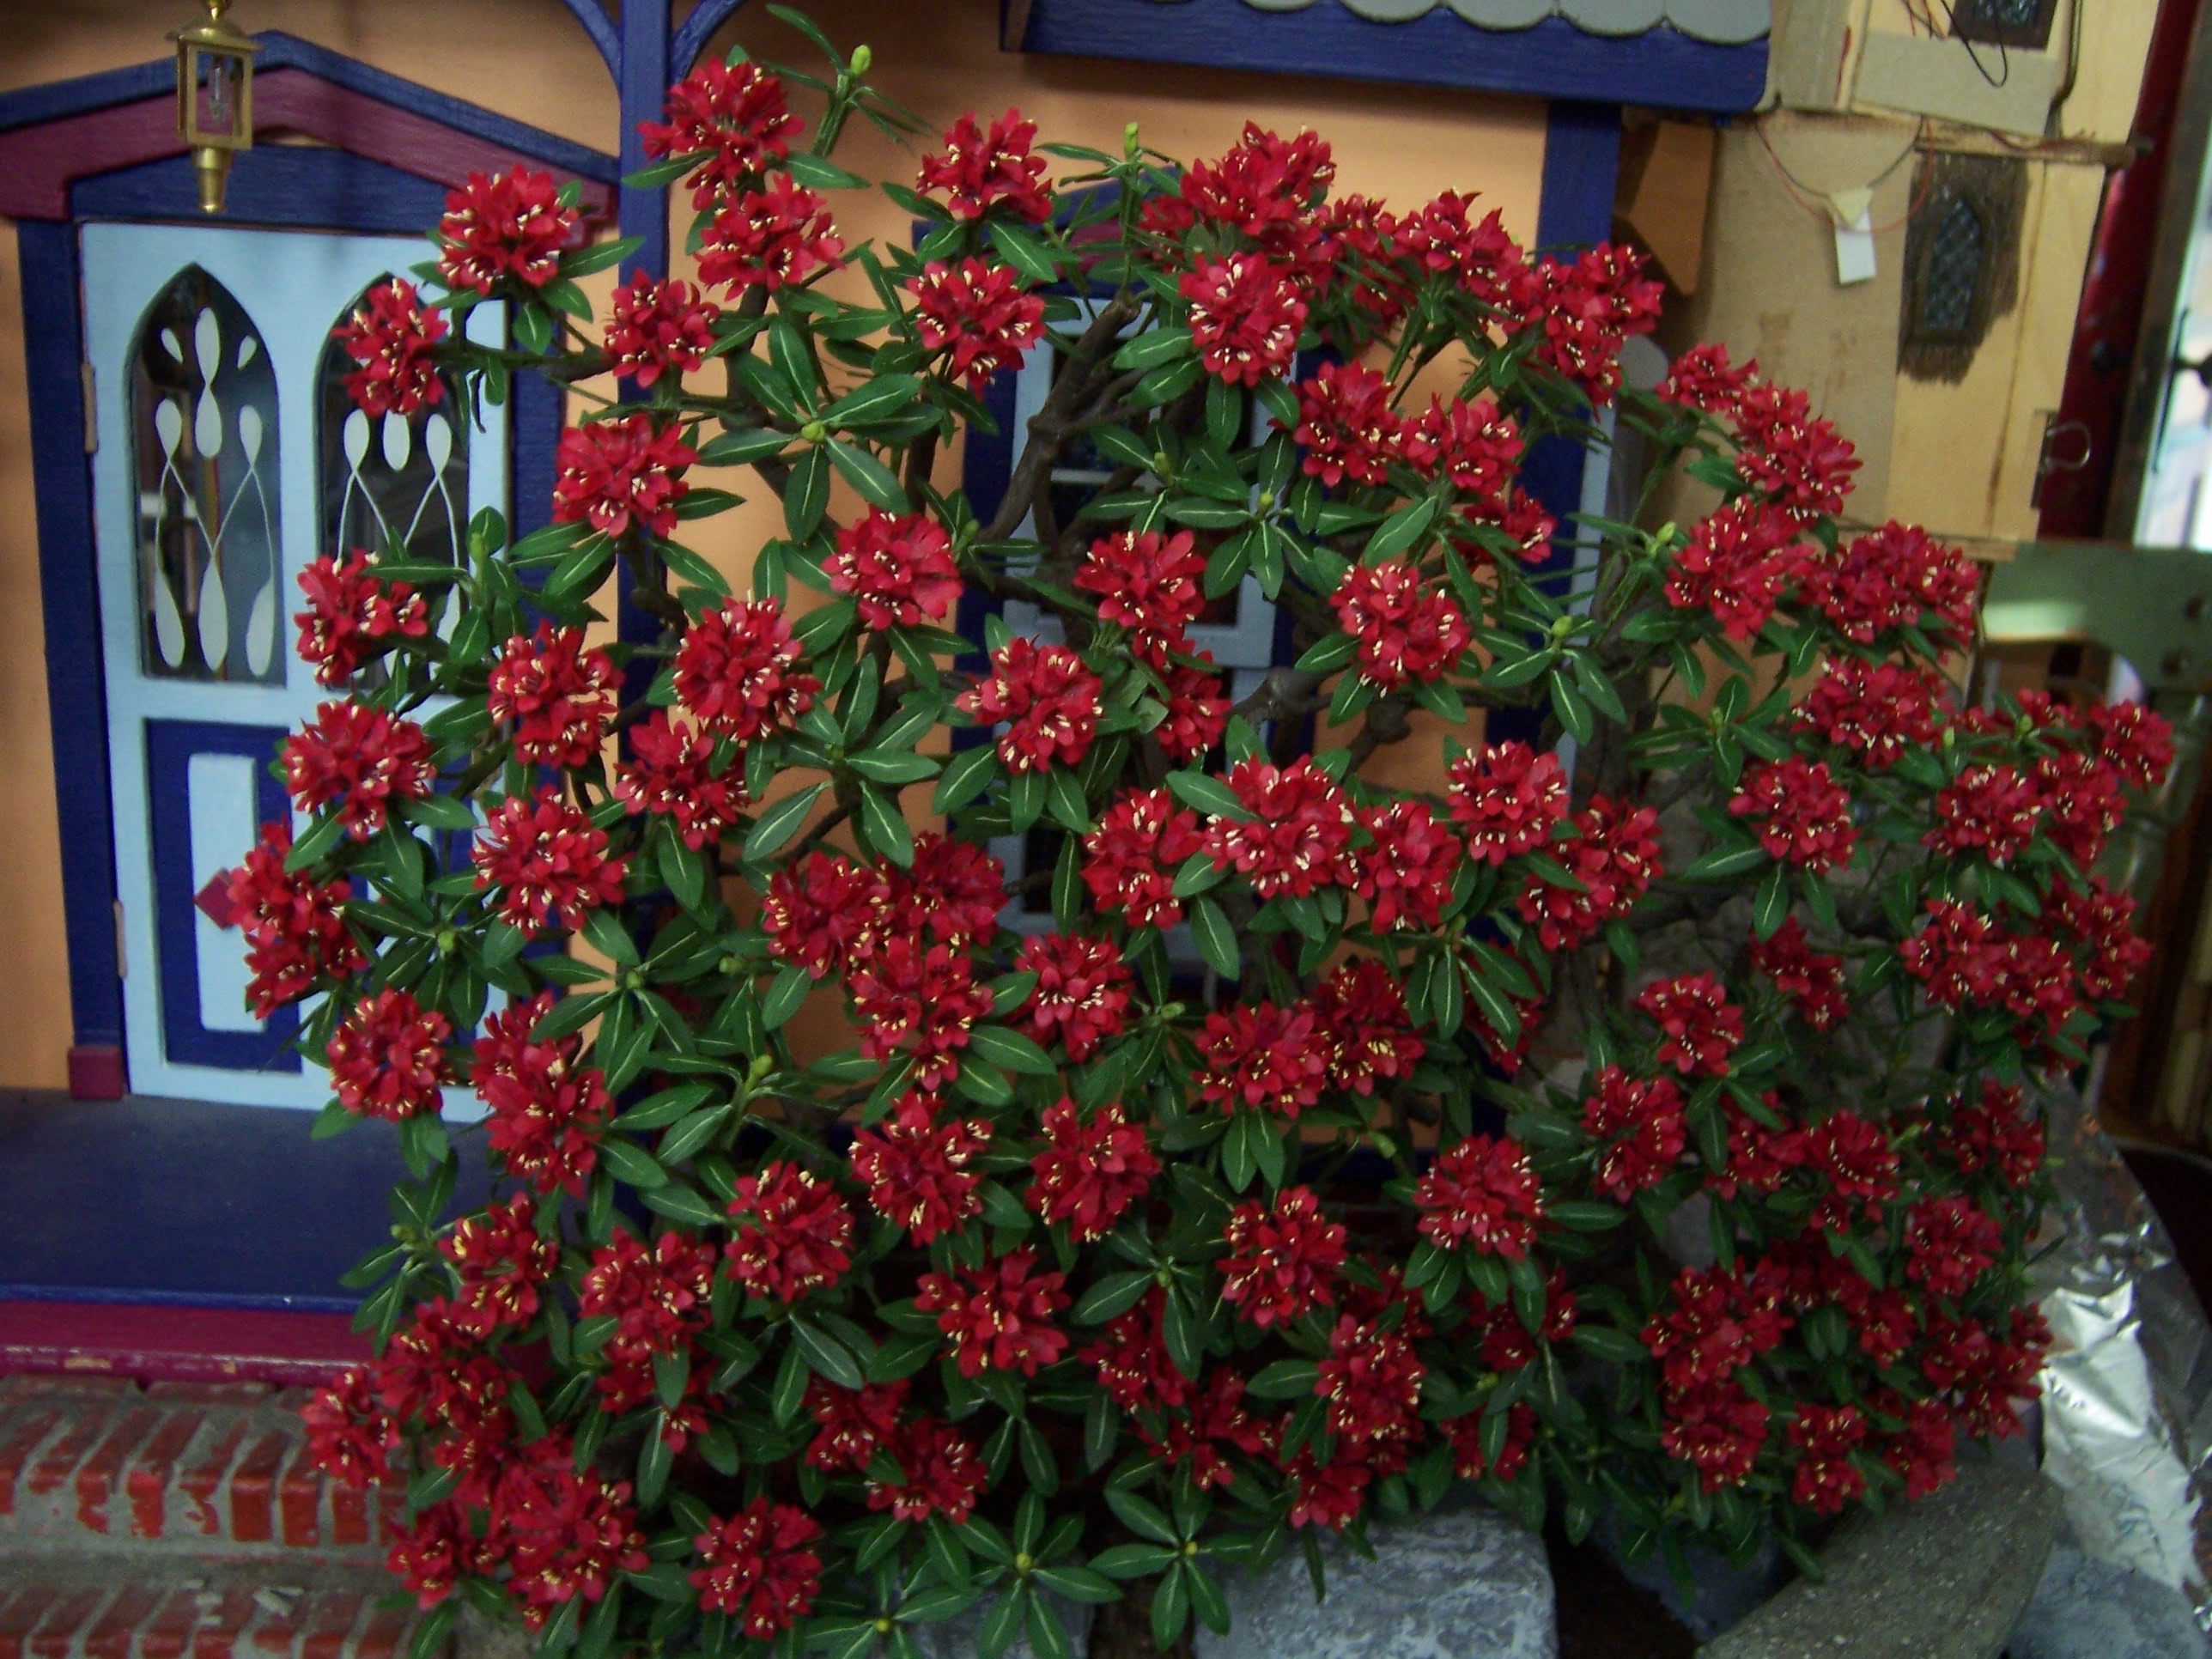
You Might have come here, Dear Readers, looking for another view of the Lovely blooming Lilac Shrub, only to find it is already past it's time of bloom. (How does the time pass so quickly?) But what is this, you say in surprise, I don't recall seeing this here before... and yet, it seems as though it has always sat in that corner on the other side of The Folly Porch! (At least, I would have you believe so!) The astonishing burst of red blossoms seems to have opened overnight.....

And the early morning light 
is just beginning to illuminate their brilliance.


Do come closer.....!


It is almost shockingly bright after the delicate lilac blossoms...


Alas, there is no fragrance.... 
but after the lovely scent of the Lilacs, 
I would not want to have to compare... 
 

 It wraps around the corner of the house above the little brook...
(still under construction!)


And when it is done... 
it will partly conceal the door to
 The Tree House between the roots....

And perhaps some of you, Dear Readers,
 will recall a year ago when I began this project.... 
and was "testing" a blossom or two in this corner...


And the sunlight reached into my room
 and touched the blossoms.... just like this...
and that told me this was a must to do!


And here we are! 
Already!


And while it is not quite finished....
it looks just as wonderful as I dreamed it would!


Oh, Dear Readers.....
Are you ready for the Rhodie-oh...
Oh!!!


Tuesday, February 27, 2024

Shrub Construction....


 Continued...

I Hope you won't mind, Dear Readers, if this is a boring post about the Rhododendron Shrub construction... again! There is not a whole lot to show you because it is slow going on three different skeletons which are all supposed to look the same. That is the trick... it is nearly impossible to make them look exactly the same... so I have to constantly try to adjust a little one way or another. And as I mentioned on an earlier post, I have to make each step on all three of the shrub skeletons at the same time so I don't lose track of which branches I have done what to.... and even then I occasionally notice that I skipped a piece on one of them. The skeleton in the picture above is Shrub#2 (yes, I have numbered them to help me keep my sanity...!) which will eventually be the green leafy shrub for summer, fall and winter (when it is not snowing). You can see (if you enlarge the photos) I have added glue to the places where Green wire wraps around the brown paper stems! Alas, even with the dry winter air, I have to leave them alone for quite a while after making this step. The glue joins need to be very sturdy.

And this skeleton, is Shrub#3, 
getting the same glue treatment on its branches.
When it is finished it will be the leafy shrub in Winter
 with snow on its leaves,
 for those few times I need to set a
 "winter story" at The Folly!


And this one is Shrub#1, which is the "prototype"
 and will be the one with the blossoms when it is finished.


Here they are all together in a row...
 I know, you can't easily tell where one ends and the next begins...
But I have to have them all together while I am working on them!
(Sorry, my table is a mess... I was also sneaking in an extra small project
 sort of visible in the background.... more on that another time!)


And here you can see Shrub#1 in The Folly Garden where it will live,
 showing the added stems on the part that leans toward The Tree House...


Here you can see it a little closer,
 from an angle that shows more of The Tree House trunk...
 and shows how the Rhododendron Shrub will be a big part
 of what keeps the Tree House doorway concealed from passing humans!
(Ah, yes... when Will I get back to building The Tree House???)
The long downward branches will be trimmed and added to next.... 
as I figure out just which branch needs to go where!

And Meanwhile, Dear Readers, you can rest assured that
 the collection of "blossom clusters" is growing at a great rate!


I have added 18 clusters in the past two weeks,
 and am up to a total of Fifty clusters!
I have been diligently adding leaves
 to the clusters that didn't have them.... 
but am still behind on that task.
I have not yet gotten a good leaf making schedule
 worked into the blossom making one...
But it's only a matter of Time, Dear Readers,
As the Shrub Construction continues...
And Continues..... !


Tuesday, February 6, 2024

Rhododendrons...


Take Two...

I will Understand, Dear Readers, if you can't remember the Rhododendron Shrub project I began with great enthusiasm last May. It has been a very long time since I posted about it, and I can't even remember where I left off showing this project in the blog! But never mind, I have not forgotten the project at all! It has been nagging at my conscience for months now, as I slogged through  the Holidays and completed the Christmas Card. If you recall it at all, you might remember that I had stopped trying to make the blossoms last July when the humidity made glue never dry and paper too soggy to punch.... (it was a very very wet July) but I had also not been satisfied with my methods of attaching the blossom florets and the leaves to the stems. The shapes and structures involved with a Rhododendron shrub are quite different than those of the Lilac shrubs. And the blobby mess that was created with the first couple of "completed" blossom clusters was not to my liking. This kept me awake at night! My problem was that I was not trusting that glue alone would be a strong enough attachment if the floret or leaf stem was only 3/16 inch long where it "joined" the main stem. But I had not tested this assumption! Truly, I needed to give it a try!
While I had been making the florets at a great pace last spring,
 I had not kept up with making leaves 
or assembling the florets into the blossom clusters.
 The glue just wouldn't dry fast enough!
So all winter I have been staring at 12 or 15 bunches of florets
 lined up and awaiting the assembly process.
And last week as I waited most of the day
 for an "appointment" to arrive (who never arrived)
I began to test the shorter stem method with the glue!
(I might as well glue a couple things while I was
 checking the door every few minutes!)
And I actually got several of the floret bunches
 glued together into blossom clusters!
(I was so glad for this that I forgave the person who forgot us!)
And to my surprise and Great satisfaction,
 the glue is plenty strong enough to hold tenaciously
 with even such a short space of contact!


Here you can see a closeup of how short those stems are!


And here are a few of the floret bunches in waiting....
Since I had so many bunches lined up and waiting,
 I spent the following day gluing them together!
And started on a new batch of leaves....
Which required that I revise my previous method.


Initially I had thought the leaves should be made of the stiffer card stock,
 but decided plain copier paper once it was painted
 on both sides was plenty sturdy enough.
And the original attachment method was going to be
 wrapping the leaf stem around the blossom stem as with the lilac shrubs, 
which was much too bulky when the leaves needed to be
 so close to the blossom and to each other.
This time, I would assemble the leaves in pairs,
 but cut them apart to apply individually when gluing.


But first I had to get the paint colors right....
I had misplaced my previous paint samples....


I raided my Rhododendron for a small leaf to compare color...


I had not gotten close with the color for the underside! 
I had to repaint the first batch!


Here I am painting the top sides of the leaf. 
The line down the middle is the result of not over-painting
 the lighter stripe with the darker color,
 but just painting each edge of the leaf,
 carefully leaving the middle the pale green.


I neglected to take pictures of the leaf gluing process.... 
but it is exactly the same as for the florets.
I bend the stem about 3/16 inch long
 and glue that along the blossom stem
 starting right below the blossom cluster.
In the low humidity winter air, 
the glue dries quite quickly!
And since I was on a Roll, Dear Readers, 
I decided it was Time to do the Math.....
How many blossoms could I make in how much time... 
and was there enough time to make enough blossoms
 to complete the flowering shrub for this spring?
Good questions!
But first, I needed to upgrade may assembly line space... 
make it more efficient and accessible, 
instead of shoved into the dark corners....


I had to re-learn the process for making the florets!
(I will not bore you with every step here....)
 The above picture shows the process about half way through!
( The first batch of stamens I had forgotten
 to add the pistils to the stamen clusters)


The florets painted and ready for assembly.
 (I kept forgetting to paint the black dots in the throat of the blossoms!)


Florets for one blossom cluster assembled and drying.

But the Big Change was rearranging
 the location of The Folly Dollhouse....
from the favorite location at the end of my worktable... 
to the less visible side of the table.
Leaving the end of the table available for assembly line work....


And The Folly much harder to photograph...


I was able to catch the morning sun slanting in and lighting the front porch....
On the right you can see the beginnings of the Rhododendron Shrub structure...
not very far along in the development process!


Floret bunches waiting for gluing in the "safe holding" box!
(Yes, the same one used for the Lilacs... 
but the length of stay is way shorter!)


And the blossom clusters waiting for leaves in one jar, 
and with the leaves added in another jar. 
I had made about 19 floret bunches last summer,
 assembled only about three of them into clusters....
And I made three more floret bunches last week
 and three more this week (so far!)
That totals twenty five blossom clusters to date.
(Take note! I am counting!)
 
But the fact remains, Dear Readers, 
I have no idea if there is enough Time!
Roughly sixteen weeks until bloom time....
and I can make one, maybe two blossom clusters per day...
But I have no idea how many Blossom Clusters will be needed!
But I'm off and running now with the
 Rhododendron Shrub project... Take two!


Tuesday, October 17, 2023

The Soggy Story....


Rhodies on Hold....

I Apologize for being so Absent in blogs lately, Dear Readers, but I am not succeeding in being able to comment on any blogs at the moment. This is probably due to the fact that I use Mozilla for my browser. And I admit that I resent being forced to change browsers to suit the algo-rhythms of google's new rules. After all, I have had this blog on Blogger for 13 years and have used Mozilla as my browser for all those years! I admit that I am sulking and hoping that Mozilla will be able to write their browser program to suit the new rules..... Is that likely? I have no idea. Meanwhile, I am unable to "play" with all my favorite bloggers in this otherwise magically Wonderful mini realm! And I also have too much to do to re-learn all my systems quickly.... not being naturally techno-fluent. I hope I will figure out what to do eventually... but meanwhile, life goes on, and at least (as of the last posting here) I was still allowed to post on my blog. But enough of my complaining.... well, maybe not, because my very next subject was going to be a complaint of the Drastically Wet summer we had in this part of the world! It started out a bit too dry in June and then the deluge began. We had 4.5 inches of rain in June (2.3 of it in the last two days of the month), then we had a shocking 18.02 inches of rain in July!!! The average is about 3.5" for July. It rained and rained. Downpour after downpour. One 6.2" rainfall in the middle of the month... but it just didn't stop! Hot, humid, Tropical weather in New England!

You might recall me showing you all the clusters
 of Rhododendron blossoms I had assembled.


And all the florets I had constructed in batches
 of ten but had not glued into clusters yet.


Well, in all that humidity the glue was taking Forever to dry!
I would start to assemble a cluster, get one blossom glued....
 and go do something else and forget to come back to glue another one.....
 really, the glue just didn't harden!
And I needed to make the leaves to go with the clusters..... 
and when I tried to punch the paper... 
it ripped rather than cut the edges! 
The paper was just soggy from all the humidity!
Soggy paper is No Fun!


So the Rhododendron bush has been effectively on "hold"
 since the middle of July, Dear Readers,
while the weather continued to Rain...
An "average" 4 inches in August, (slightly above average really)
and a whopping 10.02 inches in September......!
(The remnants of Hurricane's Lee, Ophelia, and Philippe)
Which would have been noteworthy 
except that it wasn't anywhere near like July...!

So that's my Soggy Sob story, Dear Readers!
I will eventually be able to punch paper again.... 
and get the glue conveyor belt going, 
but for Now the Rhodies are on hold
While I hope for a little less rain! 
(And keep my fingers crossed that this will post!)


Thursday, July 20, 2023

Little Progress....


Trims, Blossoms & Borders....

Well, Dear Readers, I really have not got a lot to show you this week, but I have been chipping away at the usual myriad projects. The Gypsy Wagon bed chamber doors, for instance, needed the trims for the door on the side facing the main compartment. I dug around and found the piece of trim I had already stained quite a while ago (years!) just waiting to be cut, fitted and glued in place! You can see above, that the side pieces need to have their undersides cut away where they fit over the hinges (oh, look at all those glorious hinges!) so they can glue securely to the wall surface. It does not matter that this covers the screws on one side... if the doors ever need to be removed (why would that ever happen?) they can be unscrewed from the other side instead.

It did not take very long to carve away the undersides for the hinges. 
It took only slightly longer to fit the sections for the arched top.


I know my sections are not even or "properly" mitered....
It is easier for me to just measure cut and trim....
(and who but me is going to notice this uneven spacing?)
 

The doors still need their "air holes" drilled... 
but I left that for another day while the glue was drying.

As for the Rhododendron Blossom assembly line...
I am still not getting it very organized!
I have made quite a few "clusters", 
and even more blossoms...
 

I am making the blossoms in batches of ten. 
It seems an ideal amount for a cluster
 (I counted when the bush was blooming!)
And I have made seventeen "batches" so far.... 
and started the eighteenth!
 

Here the stamen clusters are glued and the blossoms cut and shaped.
Next they get painted and assembled.
 

But I have only glued together ten batches into "clusters".
And I am way, way behind on making the leaves. 
I really think I need to make a batch of leaves for every cluster.
This is totally different from the process of making the lilacs!
I need to get the leaf making and attaching figured out!
But still, seventeen blossom clusters is not too bad
 for a couple of months occasional work! 

And I know it has been ages, Dear Readers,
 since I showed you any progress on the petit-point carpet...
 

Here you can see I have made quite a bit of progress stitching the outer borders. 
(I think you have to look back to February to see the last update!)
 

It is very slow going!
But you can see, Dear Readers,
 there is a Little Progress
 in some of my many projects!

Wednesday, July 12, 2023

Gypsy Wagon Details....


And More Rhododendron Blossoms...

I don't Know about you, Dear Readers, but Time has been playing tricks on me lately! It seems like only yesterday that I had painted the inside of the Gypsy Wagon Barn addition and got side-tracked with the sleeping nook with the rabbits and roses. I had several unfinished parts of the Barn that needed to be completed once the paint was dry, and I worked on them the very next day. That was almost two weeks ago! But before I show you those details, I wanted to remind you of who lives in this little traveling barn; the goats of course! They are still waiting for me to add the straw bedding and some hay to munch on. The nanny's name is "Jingles", and her kid is "Jester". (Thank you, Birgit for sending him many (but who's counting....) years ago!) The parts of the Barn that I worked on were the chicken coop doors, and the "pannier" cages. 

The chicken coop boxes needed to have a mesh screen added to the openings.
I dug in my supplies and found some already "prepared" scraps
 from way back when I was working on the Tree House windows!
They were already painted and the rectangular scraps
 were exactly the right size once cut in half!
 

 All I had to do was apply glue and let it dry!


Here they have all been glued. 
Once they were dry I decided it needed
 an extra "frame" on the inside for strength.


I decided cardboard would do the trick and cut the openings.
I painted them before cutting them all the way apart.


And glued them to the inside of the windows.

As for the "pannier" cages....
 I forgot to take any progress pictures of the attachment process! 
(It was difficult and fidgety!)


These "cages" had been constructed ages ago...
 and they have been  falling off every time the wagon is moved... 
it is a miracle that they are intact!
The "problem" that slowed my completion 
 was that the holes for the bars at the bottom
 needed to be made larger.
 And the drill doesn't fit in close enough to reach all the holes!
The ones at the edge by the walls couldn't be enlarged.
And I had to align one bar at a time into it's hole....
they kept popping back out!
 Tweezers helped me to push them in... 
their alignment was not exact in the first place
 so they needed to be bent a little....
Bit by bit I got them in the holes... 
but then I needed to get glue in there too!
If you look carefully at the first picture
 you can see a line of glue along the base...
applied with a toothpick!
Whew!
And there were two of them to do!
It took a lot of patience and persistence!


But I got them attached!
And the little "doors" still work perfectly!
And yes, somewhere, the bunnies who will live in them are hiding...

And as for the Rhododendron blossoms, Dear Readers,
 I have been working on them "intermittently".
I have not been able to make a good "sequence rhythm"
 to the construction process,
 in part because I am not happy with
 my methods of joining the florets to the stem!


I am trying to get the minimum length
 of the floret stem needed to attach it,
 and not add too much bulk to the cluster
 where it joins the stem.


Here you can see how they get very "thick" as a bunch.
The problem is exacerbated by the addition of the leaves... 
which need to spiral out right below the blossom cluster.


Here are the first three clusters grouped together
 the way they will be on the shrub...
 they will be densely packed together.
But in this picture you can't really see the ugly mess
 that is the stems attachment below the blossoms.

And at the moment I am Way behind on making the leaves....
 which need at least 8- 10 leaves per blossom cluster.


Here are some of the still not assembled blossoms....
And I am not sure whether I should use
 regular paper rather than card stock for the leaves....
Decisions... decisions...!


The one thing I am sure about, Dear Readers,
 is that I think the blossoms look wonderful in the cluster!
So even though Time is getting away from me, 
You can see I got a tiny bit done on the Gypsy Wagon
 and the Rhododendron blossoms!