Take Two...
I will Understand, Dear Readers, if you can't remember the Rhododendron Shrub project I began with great enthusiasm last May. It has been a very long time since I posted about it, and I can't even remember where I left off showing this project in the blog! But never mind, I have not forgotten the project at all! It has been nagging at my conscience for months now, as I slogged through the Holidays and completed the Christmas Card. If you recall it at all, you might remember that I had stopped trying to make the blossoms last July when the humidity made glue never dry and paper too soggy to punch.... (it was a very very wet July) but I had also not been satisfied with my methods of attaching the blossom florets and the leaves to the stems. The shapes and structures involved with a Rhododendron shrub are quite different than those of the Lilac shrubs. And the blobby mess that was created with the first couple of "completed" blossom clusters was not to my liking. This kept me awake at night! My problem was that I was not trusting that glue alone would be a strong enough attachment if the floret or leaf stem was only 3/16 inch long where it "joined" the main stem. But I had not tested this assumption! Truly, I needed to give it a try!
While I had been making the florets at a great pace last spring,
I had not kept up with making leaves
or assembling the florets into the blossom clusters.
The glue just wouldn't dry fast enough!
So all winter I have been staring at 12 or 15 bunches of florets
lined up and awaiting the assembly process.
And last week as I waited most of the day
for an "appointment" to arrive (who never arrived)
I began to test the shorter stem method with the glue!
(I might as well glue a couple things while I was
checking the door every few minutes!)
And I actually got several of the floret bunches
glued together into blossom clusters!
(I was so glad for this that I forgave the person who forgot us!)
And to my surprise and Great satisfaction,
the glue is plenty strong enough to hold tenaciously
with even such a short space of contact!
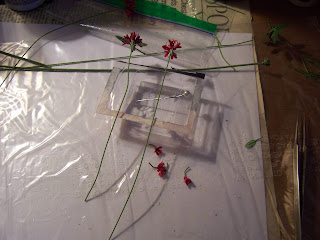
Here you can see a closeup of how short those stems are!
And here are a few of the floret bunches in waiting....
Since I had so many bunches lined up and waiting,
I spent the following day gluing them together!
And started on a new batch of leaves....
Which required that I revise my previous method.
Initially I had thought the leaves should be made of the stiffer card stock,
but decided plain copier paper once it was painted
on both sides was plenty sturdy enough.
And the original attachment method was going to be
wrapping the leaf stem around the blossom stem as with the lilac shrubs,
which was much too bulky when the leaves needed to be
so close to the blossom and to each other.
This time, I would assemble the leaves in pairs,
but cut them apart to apply individually when gluing.
But first I had to get the paint colors right....
I had misplaced my previous paint samples....
I raided my Rhododendron for a small leaf to compare color...
I had not gotten close with the color for the underside!
I had to repaint the first batch!
Here I am painting the top sides of the leaf.
The line down the middle is the result of not over-painting
the lighter stripe with the darker color,
but just painting each edge of the leaf,
carefully leaving the middle the pale green.
I neglected to take pictures of the leaf gluing process....
but it is exactly the same as for the florets.
I bend the stem about 3/16 inch long
and glue that along the blossom stem
starting right below the blossom cluster.
In the low humidity winter air,
the glue dries quite quickly!
And since I was on a Roll, Dear Readers,
I decided it was Time to do the Math.....
How many blossoms could I make in how much time...
and was there enough time to make enough blossoms
to complete the flowering shrub for this spring?
Good questions!
But first, I needed to upgrade may assembly line space...
make it more efficient and accessible,
instead of shoved into the dark corners....
I had to re-learn the process for making the florets!
(I will not bore you with every step here....)
The above picture shows the process about half way through!
( The first batch of stamens I had forgotten
to add the pistils to the stamen clusters)
The florets painted and ready for assembly.
(I kept forgetting to paint the black dots in the throat of the blossoms!)
Florets for one blossom cluster assembled and drying.
But the Big Change was rearranging
the location of The Folly Dollhouse....
from the favorite location at the end of my worktable...
to the less visible side of the table.
Leaving the end of the table available for assembly line work....
And The Folly much harder to photograph...
I was able to catch the morning sun slanting in and lighting the front porch....
On the right you can see the beginnings of the Rhododendron Shrub structure...
not very far along in the development process!
Floret bunches waiting for gluing in the "safe holding" box!
(Yes, the same one used for the Lilacs...
but the length of stay is way shorter!)
And the blossom clusters waiting for leaves in one jar,
and with the leaves added in another jar.
I had made about 19 floret bunches last summer,
assembled only about three of them into clusters....
And I made three more floret bunches last week
and three more this week (so far!)
That totals twenty five blossom clusters to date.
(Take note! I am counting!)
But the fact remains, Dear Readers,
I have no idea if there is enough Time!
Roughly sixteen weeks until bloom time....
and I can make one, maybe two blossom clusters per day...
But I have no idea how many Blossom Clusters will be needed!
But I'm off and running now with the
Rhododendron Shrub project... Take two!


Wow!! creo que has dado correctamente con la fabricación de las flores de rododendro! Se ven preciosas así ya, cuando las montes, seguro quedará espectacular!!!
ReplyDeleteBesos.
That's so fine! Very good work! Hugs Britt
ReplyDeleteI can’t seem to log in, but I wanted to say that your Rhododendrons are so amazing! You’ll have the most beautiful garden for your dollhouse!
ReplyDeleteBest, Michelle from MG Doodle Studio
Oh how wonderful, amazed and so perfect
ReplyDeleteOf course I haven't forgotten the Rhodies! And it is so lovely to see their vibrant colors again and to be talking of spring! It might be a gargantuan task to have a mature Rhodie in sixteen weeks, but even seeing those gorgeous clusters in the jars is so good for the soul! The morning sunlight coming in from the windows is certainly worth getting out of bed for, and if anyone has what it takes, Betsy, it is you!
ReplyDeleteGreat work Betsy. Looks like you've got a process going and issues have been ironed out. The blossoms look amazing.
ReplyDeleteAs if we could ever forget your rhododendron project... or should I better call it "challenge"? Wow, completing the shrub to match with the real blooming season is for sure a challenge and very ambitious. But if anyone is dedicated enough to do this than it's you. However I would like to remind you that every shrub of whatever variety needs time to grow... Perhaps you should keep that in mind and take out a bit of pressure by starting just with a younger and smaller shrub which can grow with each bundle of flower clusters time after time?
ReplyDeleteOkay, when it comes to the selfish part of me I can't wait to see the shrub in all its glory and beauty. The finished flowers in the vase look already so beautiful as if you had real "rhodies" there (btw the real ones last surprisingly good in vases). I'm so glad you're back to creating these incredibly realistic and beautiful flowers again. And yes, I have to admit it... it was also nice to meet the safe holding box again. Welcome back, old friend!
But what made me smile the most was spotting the impressive amount of flower wires being stored in a mug... with a saying on (as far as I could discover): "Nothing like a new day" Well, you should consider to make an addition by placing some tape under it turning the saying into "Nothing like a new day spent with creating the most stunning miniature rhododendron ever"... ;O)
Hugs
Birgit
Están quedando preciosos. Parece que finalmente has conseguido realizarlos más fácilmente.
ReplyDeleteHi Betsy, I admire your tenacity, patience, and perfectionism. This is how great work is achieved and I am sure that you will get there as you did with the Lilacs project. I am already in awe with your first clusters as they look exactly as the real thing. Well done!!
ReplyDelete