Showing posts with label Willowcrest Windows. Show all posts

Tuesday, January 16, 2018

January Dreaming.....


Looking Back.... Looking Forward....

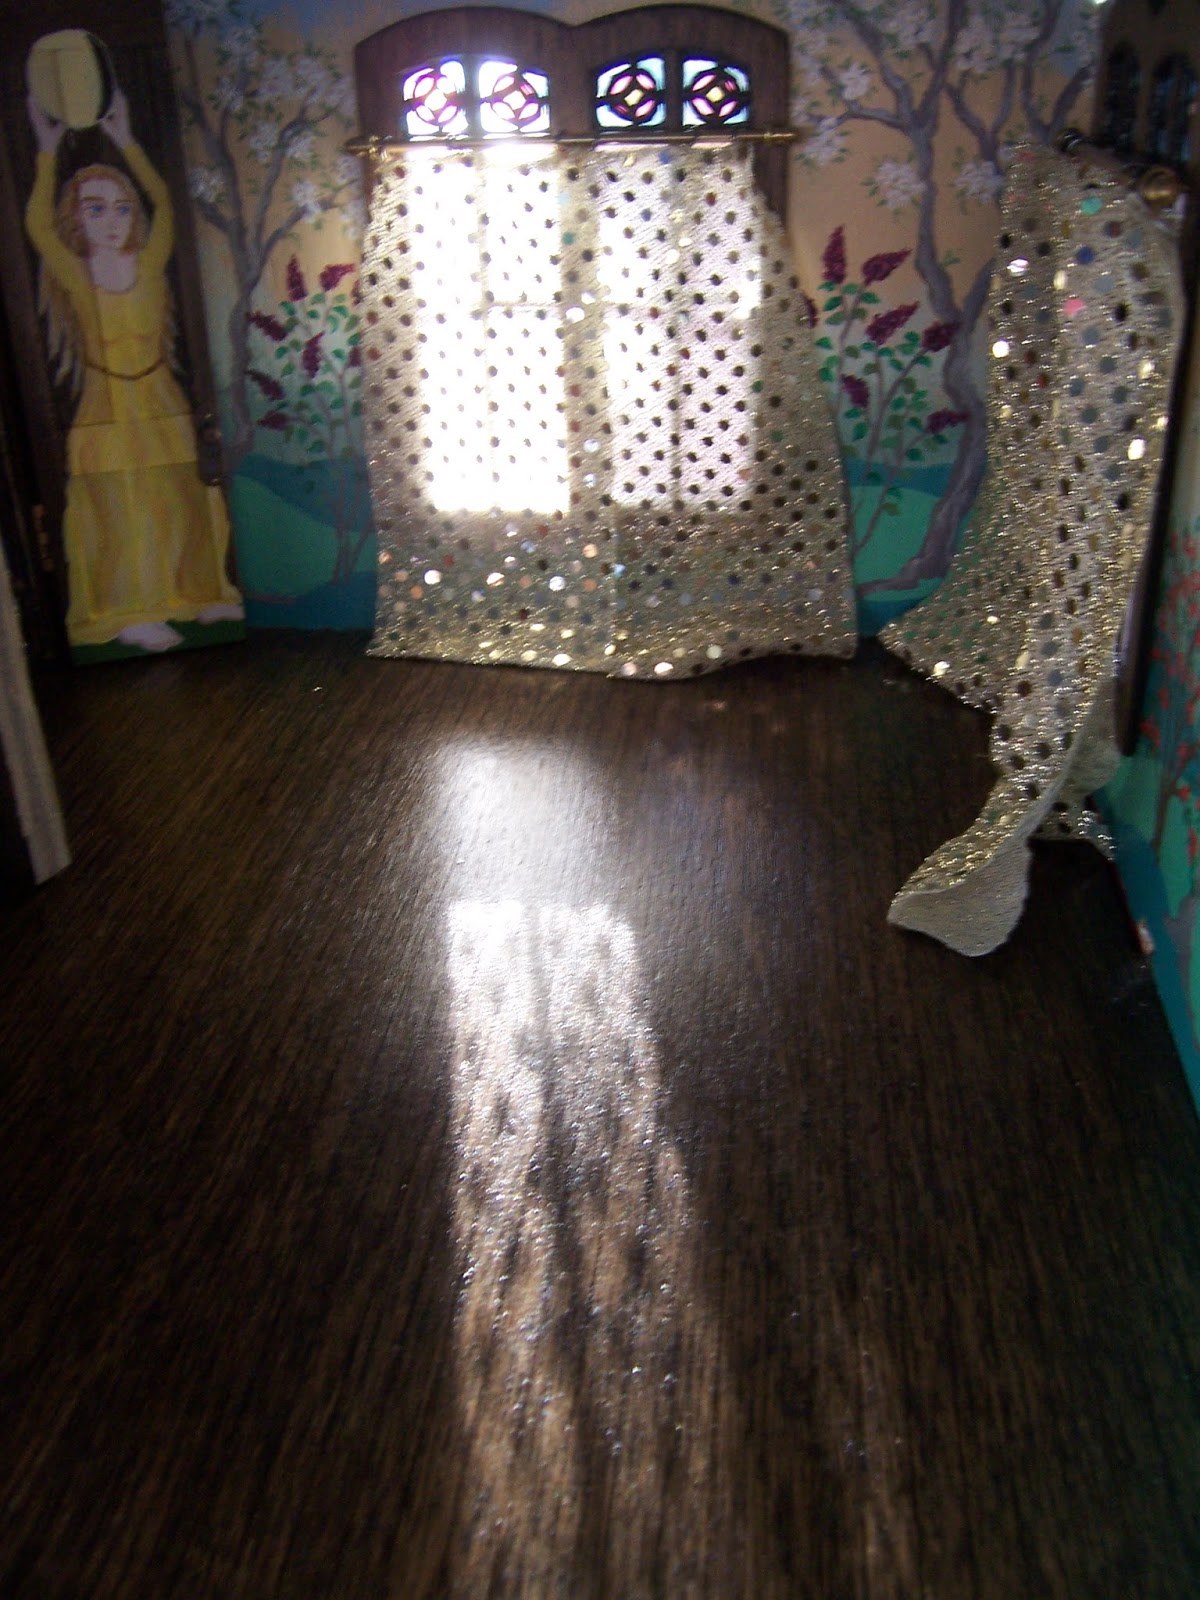
I have to admit, Dear Readers, that January brings with it the inevitable urge to assess the progress, or lack of progress, made during the past year on any of many "in work" projects. And when I review last year's accomplishments in my mini worlds, the list is small! That might be in part due to the fact that I worked on the Secret Christmas House kits for much of the year..... and the results are Tiny! In a "regular" size dollhouse I would feel I had accomplished a great deal if I had built, decorated furnished and accessorized an entire house! But in this case... it is all so small it hardly seems to count! Not to mention that it is Not quite Done! In the above picture (taken back in November) you can see the "shell" of the house with the morning sunlight streaming in the windows (a rare thing at this time of year!) and illuminating the interior of the rooms before the furniture was added.

I love that you can see right into the tiny rooms 
as if they were much larger than they are!
But the chief thing I want to point out is that there is still No Snow
 adorning the exterior of the house!
Lots of lovely icicles but no snow!

Yes, I have been avoiding this step.... 
intimidated by the types of artificial snow and how to apply them......!
 I need to do some test samples to get familiar with the materials!
And because it is snowing right now in my RL world, 
and might snow all night and most of tomorrow... 
I might have a Snow Day to stay home and play with ... snow!

My lack of significant progress on any of my larger projects can really only be ascribed to my lack of focus.... (we won't mention the broken arm). I made a little progress on painting  the Castle Hall ceiling.... but didn't come near finishing it. I made a little progress on the Cloud Palace Roof... but didn't make any progress on the exterior walls... which need tons of egg-carton rocks. I made a little progress on the Gypsy Wagon interiors and windows, but didn't even get as far as attaching the walls to the base! 

I made a little progress in the Attic of the Lovely Old Dollhouse.... 
but didn't even get the new knee-walls painted! 
There was No progress at all in the chapel...

Even though Father Alban has been on the brink
 of an inspirational breakthrough... for ages!

No progress at all on the Tree House.... 
waiting patiently for the next floor to be worked on...

(I know, you can barely see it behind the lamp.... I can't find the better pics!)

But it is the Willowcrest, Also known as Hardwick Hall, 
that has been calling to me recently!

In particular, all the places on the exterior walls where the tabs show through...
making me decide that I must add clapboards to the exterior to cover them up!

Like right there above the bottom trim..... it's driving me nuts!

And all the corners on the dormers in the attic.... 
absolutely need covering up!
But then I have to admit, Dear Readers, 
that before I can add the clapboards.... 
I must complete the wiring of all the lights....
Yes, I tried so hard to run all their wires down 
through the center wall behind the fireplaces....

Except for the bathroom.......

Which has no wiring at all so far..... 
and the middle wall is the one beside the tub.... 
not really where the lights would be placed!
Not to mention the other side of the kitchen.... 
which right now only has the overhead light....

Shouldn't there also be a light over the sink? 
Which means running the wires down the outside of the wall....
And even in the attic..... there should be a couple more lights....

On the outside walls...
Which means running the wires down the outside walls...!
I guess it's Time to go back to the Drawing Board 
with the layout of the wiring!
Not to mention the interior trim needed to cover 
all those not very appealing corners on the dormers!

And the design for the cupola which brings light into the top floor.... 
and the chimney re-design since the kit placement was so not acceptable!
And speaking of little bits of trim needed in odd places....

The bay window in the living room has gaps between the panels.... 
where daylight shows through!
I filled the cracks with 1/8 inch square strips...

The clapboards will run between the strips....
I just need to decide how I am making the clapboards!
I bought some of the pre-formed basswood panels, 
but don't like the way they would need to join at the ends
 and overlap their sections.....

At least the strips have covered the gaps in the panels!
(But I still need to add the exterior window muntins too!)
So which comes first... 
completing the interiors with all the wiring
 so I can cover the exterior walls... 
or just getting the wires in place.... 
for all the remaining lights...
and decorate later....
 
And surely, the oven should have a light too?
I guess I have a whole lot of re-thinking to do with this house!
But that's what January Dreams are for Dear Readers,
Looking back so we can look ahead!
 
(And I did finish the Christmas Card! 
But I don't want to show it here until
 it has arrived at my family's homes.
 I will show it next week!)
 

Tuesday, January 12, 2016

New......


And Not So New..... Progress!

It was a busy weekend in my RL World, Dear Readers, with the removal of the last Christmas decorations and the Beginning of a major refurbishing of one of the bedrooms in my house, so not much got done on the mini houses. But whenever I say that, I often discover that I got more done than I thought I did! Since the Christmas Trees have been taken down, the Doll Houses have been shuffled around again, and it suddenly feels as though there is a Lot of room, and the new positions of the houses makes it easier to see what needs to be done. So I started to "chip away" at the problems I was having with the Willowcrest. The windows continue to be the most obvious sticking place when it comes to moving forward with this building! Above you can see the kitchen window from the exterior, after I had already added the cross pieces at the bottom of the windows where they abut the sill. I could not find a good picture from before.... but I had already decided that it looked too unrealistic to leave them with no "bottom" to the windows! And to make matters worse, this window was originally constructed with the exterior sill sitting above the level of the window openings so that it would show from the interior and look awful! (It must be a mistake in the kit design!)

This picture shows the interior view (or it would if it was lit well enough... sorry about that!) where you can see the window sill and the added pieces at the window bottoms when looking out from the inside.

And since the kitchen wall still has not been attached, 
you can see it better here.... along with the larger pieces I am adding 
on the interior to hide both the exterior pieces.

And testing it with the sink I plan to use in this kitchen...... 
before adding the interior window sill.....

Which you can see here.
And I think it looks okay, even though it would look better
 if I had realized before adding the muntins...
that the windows would need an extra "bottom" piece.

But it turns out that once the sink is positioned in front of the window......
you can't see much of the sill anyway!
And while I had the sink out, I glued all its pieces on too!

And while I was adding the fiddly little pieces to the windows....

 
I also added the cross bars and muntins to the cellar windows.....
although here, I decided that there was not enough room 
at the bottom to add the window bottoms.

Probably not noticeable to anybody else....
But I think it looks strange... and will probably
 hide it behind a bush when the house is finished!

And here you can see a test run of the kitchen stove....
Not a new piece, but I haven't shown it here yet!
It resembles the stove in my RL kitchen.....
because this house resembles my RL house in the basic layout, 
so I decided to use that to influence some of the design choices for this project!

Here you can see the mini stove on top of the RL kitchen stove!
The rooms in this kit are really quite small.....
just like the ones in my RL house....
You start to notice that as soon as you try to place the furniture in them!

Here you can (sort of) see the Willowcrest back in the construction area....
(It is really difficult to get good pictures at this time of year!)
But I think, Dear Readers, that I am getting closer 
to being ready to glue the walls on this house!
 
 
I have also decided that I will need to paint all those "trees" in the parlor, 
and not just leave them the unpainted color of the sculpey clay.
 
 Here you can sort of see them as they are 
(picture taken months ago when there was still a little sunlight...!)
I think they need to look as though they are the same carved stone as the fireplace... 
otherwise they neither look real nor like stone.... 
but just sort of raw... and that has been bothering me!
And while I have debated with myself for a long time about the name for this house....
in my mind I have always thought of it as "Hardwick Hall".
Yes, it is a bit of a Grandiose name for such a tiny bit of space!
But it belongs to my Witches, and it does have a fairly Grand facade....
and I am just getting tired of calling it "the Willowcrest"!
So I am making it official..... "Hardwick Hall" it is!

And on an Entirely different note... also a New beginning...
There is a new persona in my doll Worlds.....

She is made by the very talented Sumaiya.
Sumaiya's blog was one of the first blogs I discovered 
years ago as I was finding my way back into miniatures, 
and I have always been enchanted with her exotic and elegant dolls.
As soon as I saw this one posted on Sumaiya's blog,
I knew she had to come play in my Little Worlds!


She comes with the name "Meera"
But I think that is only part of her name...
She obviously has the ability to hold her listeners Spellbound....
and perhaps, like Sheherezad, 
she has a thousand songs to sing...
or ballads to enchant us....!
I do not know yet what her story will be... 
or where she will lead me...
But that, Dear Readers, 
is part of the mystery of anything New!
And I do hope you have enjoyed 
all this "Little" Progress!

Tuesday, January 5, 2016

Picky Picky!


Little Details.....

I had a couple of days of Holiday Time left, Dear Readers, after I had finished painting the Christmas Card (see previous post for a picture!), and had hoped to get a Great many things done on All my mini projects! But, as often happens, every little thing takes longer than you could imagine to complete.... and the Indecisive part of my Imagination prevented me from Choosing the best projects for the moment.... so I did not get very much done at all. But I did get a few Little Things done.... even ones I had almost forgotten about! I hope you can recognize, or even Remember The Folly Bed Nook in the above picture (It is so dark at this time of year it is difficult to get a good photo!) Long ago I had started to sew a pair of bolsters for either end of the bed, but I was not at all satisfied with the way the first one was turning out, so I put them aside and forgot about them! Well, for some reason, I decided it was time to finally finish them!

I had sewn one of them but did not have the right material to stuff them. I wanted to try sand or beads so they would look heavy and sag in the middle. They are sewn the old fashioned way by hand, and at first I thought they would be too large and bulky for the bed nook. But then I decided to over-stitch the ends, making a welt around the end seams, which gave more shape and definition to the pillow. I had bought some bird gravel and used it to stuff and I really liked the way it came out after all! Then I tried to make the second one to be just like the first one, and even though I had cut the pieces at the same time, the second one did not turn out right at all! I had to pick it apart and re-stitch it more than three times! (This never happens to me!) Eventually I got it close enough to the first one....

When they are in place on the bed they are almost impossible to see.... 
(Maybe the next time there is a sunny morning.....)
But I know they are there!

And because one is at each end of the bed.... 
you don't notice any difference in size at all!

Another Tiny little detail that I worked on was the Curtain rods in the Willowcrest.
It bothered me that it was impossible to remove the curtains from the rod once the walls were all in place! This is because the rods are made to slide out the ends of the eye-screws that hold them to the walls.... but you need enough length of the wall on either side of the window for this to work!  Which just isn't there in these small rooms! I decided I would need to open up one of the eyes on each set of curtain rods.... so that it was a hook instead....

This way you could lift one end of the rod out of the holder 
and slide the curtain off the end!
So while I had taken the Willowcrest mostly apart.....
I fixed all the curtain rods!
And while I was at it I worked on those pesky window sills....
remember the problem with the muntins abutting the window sill on the exterior?
When I fixed the exterior side.... it left an unfinished strip visible from the inside!

Here you can see I have covered three out of four of the panes... 
that little white stripe at the bottom on the right 
is the exterior frame showing on the inside.
(Sorry about all the reflections!)
You can also see I have added the under-painting for some more flowers
 on the wall murals along the bottom edge.
And once all the window frames had been fixed... I added the interior sills.
It makes the windows so much more realistic!
(The kit design does not include any interior window sills!)

Here you can see the window sill added to the interior of the window.
(Sorry it is so dark.... night again!)
And the exterior window sills that had not yet been attached I fitted and glued in place.
It takes quite a bit of picky carving away at the notches in these pre-cut pieces 
to get them to fit flush to the frames and the wall!

These also required the exterior window frames and muntins to be added.....

And I had Almost enough already painted pieces 
of the very fine silver trim I am using....
But not quite enough! 
I will have to cut and paint some more pieces 
in order to complete all the windows.

And yet another small detail I worked on 
was the fireplace for the Willowcrest bedroom...

I had not been happy with the way the paint looked 
the first time around, so I re-painted it!
It is made of wood, but I wanted it to resemble carved stone.
(I also added a thicker wooden base for the hearth.)
And painted the bricks on the hearth interior....
And tested the look with the Regency Fireplace insert....

It looks lovely, but Much too clean!
So I added a lot of "soot".

Which really doesn't show well in this photo... 
the light is too glaring!

Maybe you can see the soot a little better in this view.
I have not attached the plug to the wiring for the fire yet.... 
so we cannot see it lit.
But you can sort of see the additional tiny flowers 
I added at the bottom of the murals....
(Very picky little details!)
Tulips, violets and dandelions....

So hard to imagine at this time of year! 
(And there will also be a baseboard added at the bottom.)
I will have to get some better pictures for you in the daylight!

And Another project I picked away at was the 
Painting of the rocks on the Cloud Palace Tower!

Believe it or not, Dear Readers, this is a part of the project 
that one could never possibly be satisfied with the results!
The rocks are fine.... but they are all different
 from the ones painted on the lowest section of the Tower!
It is like when you buy yarn and you get two different dye lots 
and don't notice until the project is all done and you can see where one color is off!
The paint batches for the rocks will never match the older part!
So I have decided that it is "good enough" and moved on 
to gluing the parts together!

Which means I can construct the beds 
for the Guy Bearys.... in the "Bear Racks"!
(Otherwise know as bunk beds and a loft!)
Once I get the interior structure glued 
I can add all the rest of the "Rocks" 
to the outside of the Tower!
 
And one more thing I want to show you, Dear Readers, 
is not a project at all....
But a Gift I received for Christmas from my Dear Niece!

She sent me this fantastic roll-top desk 
and the beautiful painting and the bouquet of flowers!
Thank you, Hali!
The only way I can be picky with these is Where to put them... 
and I think the roll-top desk might just belong 
here in the attic of the Willowcrest!

So Dear Readers, I hope I have not bored you 
with all these Picky Little Details!
Sometimes you just have to be Very Picky!


Tuesday, November 17, 2015

I Made A List......


(And the Sun Came to Play.......)

Have I mentioned, Dear Readers, how much I Love it when the Sun comes to Play in my Little Worlds? Even when they are situated far away from the windows of my RL house, so the sunbeams have to stretch and reach way into the distant corners.... and there they are for the briefest moments before they have moved on, illuminating the Tiny Worlds in a way that is impossible to copy with artifice! There were a few such moments on Sunday morning, making me pause Life in order to capture the moments with my camera! And here I can share them with you.....

Alas these moments are so brief, 
If you are not there with the camera, 
they are gone before you blink!

And in the Willowcrest too, 
the sun filled the Parlor with radiance.....

Don't you just love the way this delicate lace is silhouetted by the sun?

And the way the sun shone into the bedroom, 
casting a pattern on the floor!

I know you can't see it from here with the curtains closed, 
but these are the very windows 
that are causing me such trouble on the exterior!
Fortunately, I have thought of a workable solution to the problem.
 
But first I made a List, Dear Readers,
 of all the things I needed to do on this house 
before I could glue all the walls in place.... 
and it was longer than I had thought it would be!
There were ten major categories of tasks to do!
Everything from planning the attic lights wiring routes 
to completing the painted details on the bedroom walls, 
to finishing the trees in the Parlor, 
to fixing the curtain rods 
to completing the window frames details...... 
to mention just the most obvious ones!
Yes, it is a good thing I have NOT yet glued the walls in place!
 
Meanwhile, I have tested an idea for the exterior window muntins. 
You might recall that I was bothered by the idea that from the outside 
the muntin on the lower half of the windows 
would abut directly onto the exterior window sill....
(See previous post for reference pictures!)

I found some very thin and narrow coffee stirrer sticks 
to use as the framing material. 
Above you can see the lower edge of the "window frames"
being tested on the windows. 
I think they succeed in making the windows
 look more realistic from the outside.

But you can see here what it looks like from the inside!
 
Here you can see a little closer......
(Sorry it is so dark.... it is night and it is hard to get
 close enough and not block all the light!)
 So you can see I am going to have to add 
small pieces to the inside window frame too.
And I think it will work if I conceal the "crack" between them 
and the outer frame by adding a little window sill as well!
(At least I hope it will look okay... and the curtains will conceal it too!)

And here you can see the exterior with the thin muntins in place....
At least it Fosters the illusion that the lower window 
is set back and can slide past the upper window when raised...
entirely an illusion, of course, as these are non operative windows!

I think it looks So much better with the bottom edge 
of the window frame visible!
And believe it or not, Dear Readers, that is the Only thing 
I got done this week in my Mini worlds!
That and Making the List!
So at least now I know what I need to be doing...

Besides capturing the Brief sunny moments, that is!
(I do Really Love it when the Sun comes to Play!)
Oh look! There's that little fairy again.....
I wonder where he is off to now?