Showing posts with label Vaulted Ceiling Arch. Show all posts

Monday, December 6, 2021

Ceiling Details....


 More Rocks...

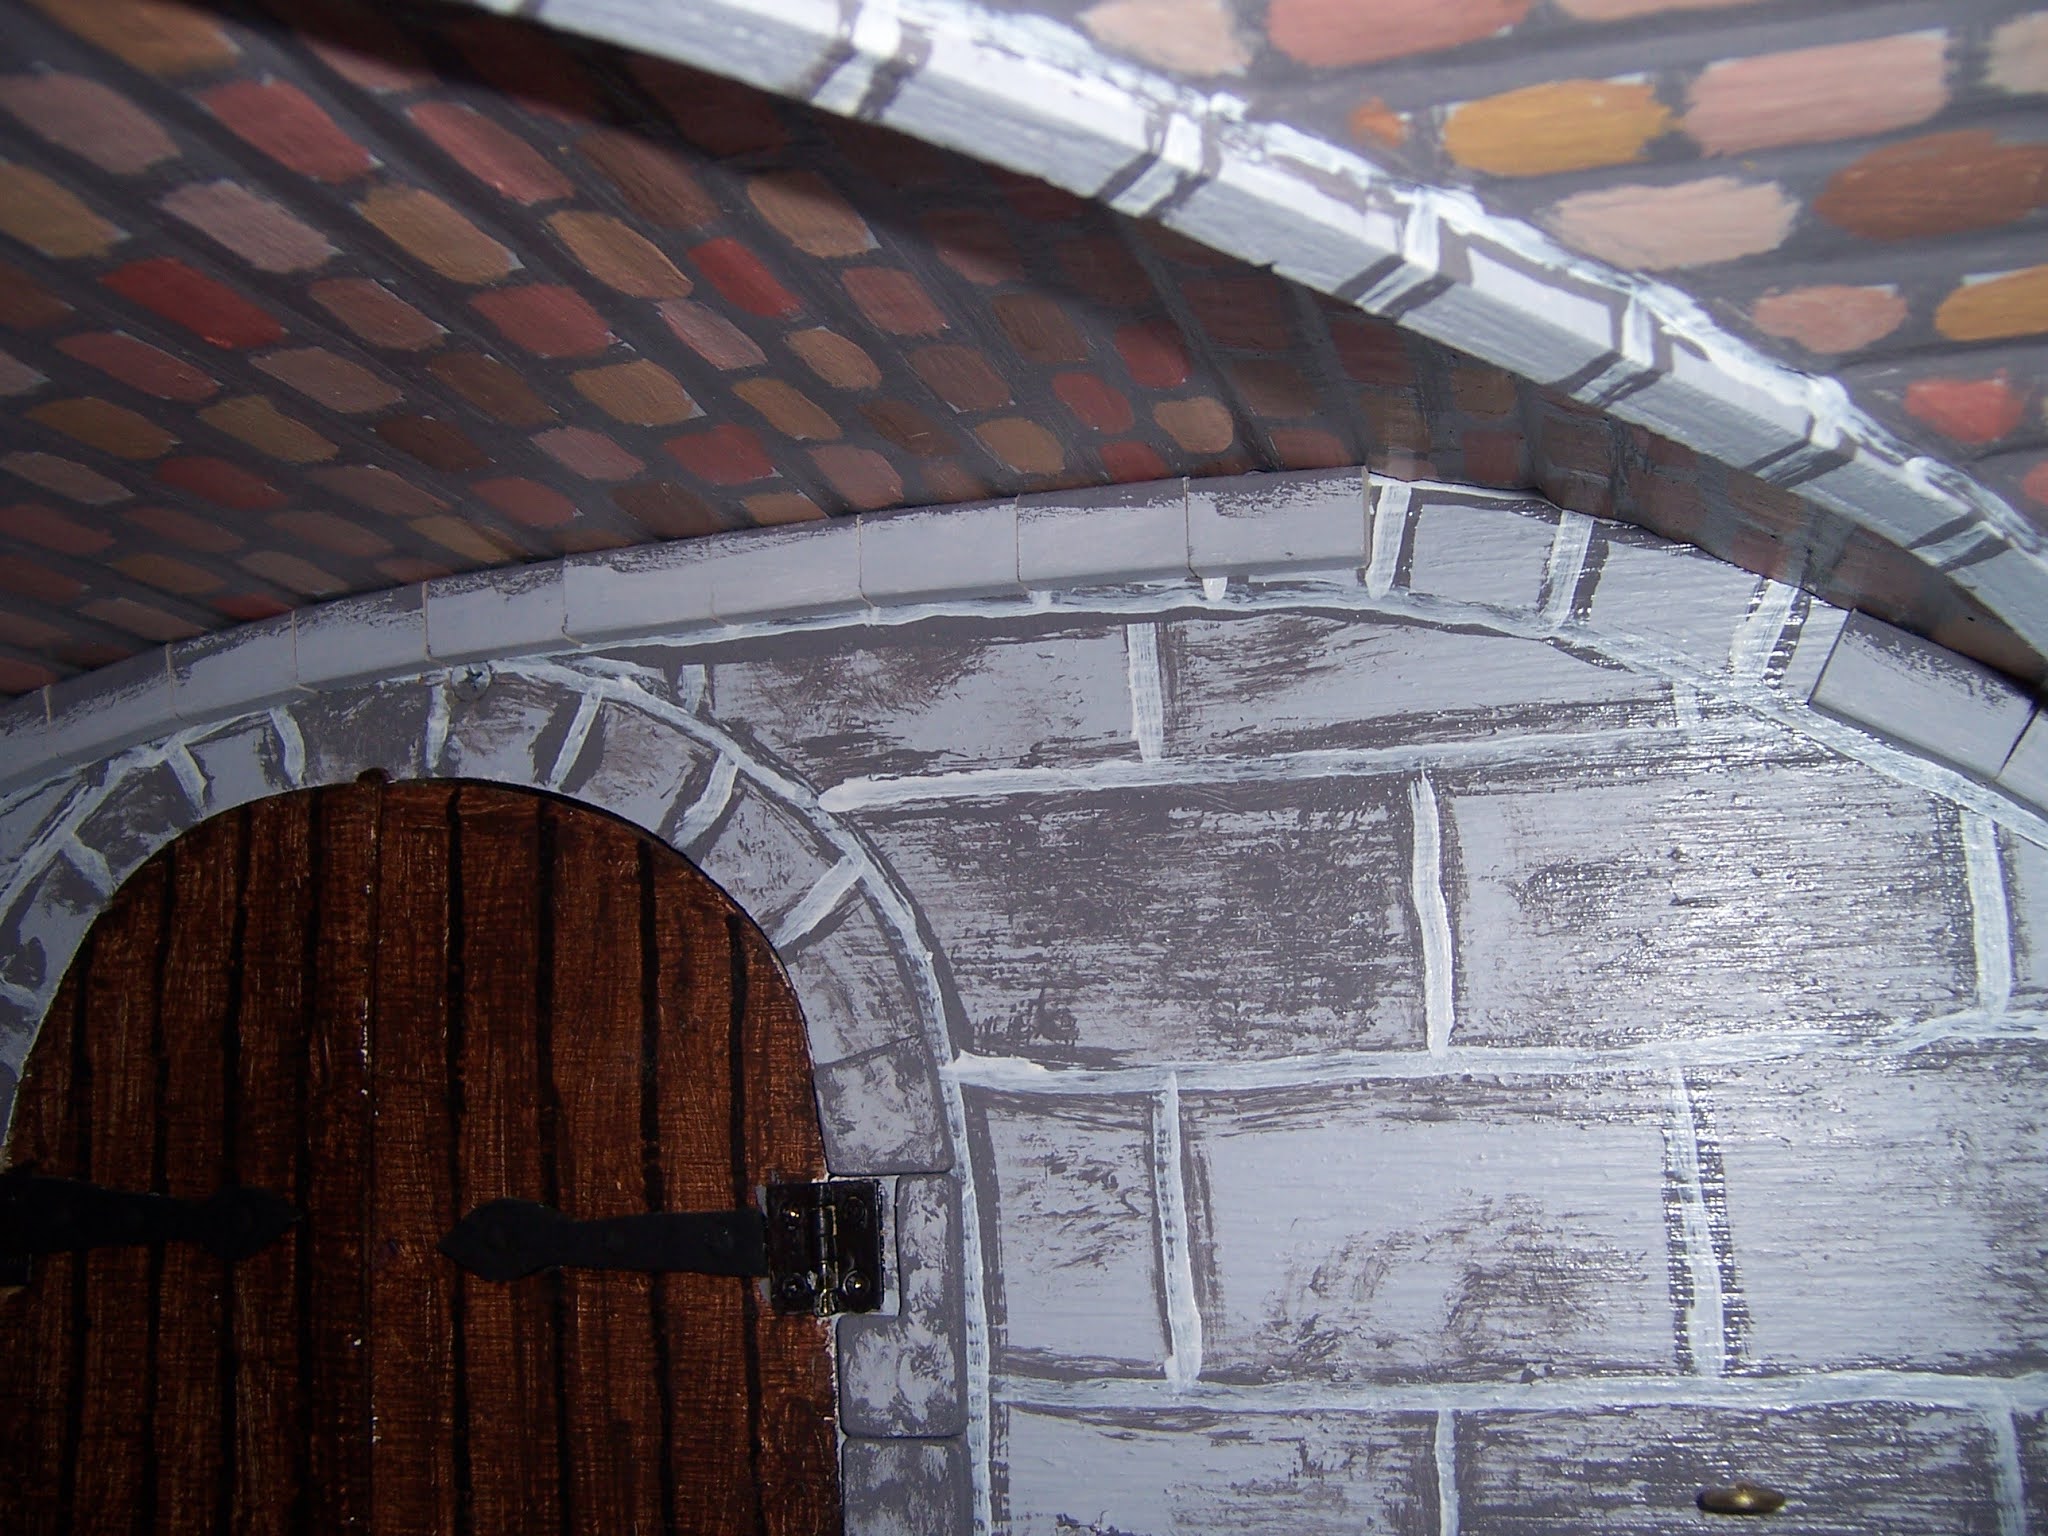
You Might not have noticed, Dear Readers, but I have always felt the the arched ceiling "ribs" of the Castle Great Hall Ceiling were too skinny to adequately support such a vast ceiling! It has always been my intention to make them more robust, but the method of doing so has not always been clear. As I have worked on all the other parts of the Castle that needed strengthening, I have figured out the method I should use. I would just cut a whole bunch of those little "rocks" and apply them along each side of the existing arches! The problem being that the stores are having difficulty stocking the wood I had been using (a Pandemic problem, it seems) and so I had to use a slightly different stock. In any case, when I was originally painting the ceiling, I forgot to leave all the edges with an unpainted border that would get covered in the end, so in some places the rocks do intrude on the paintings! (But who is going to notice this except me?) Above you can see the very beginnings of adding these "rocks". I started in the center for symmetry's sake, and because the way the rocks need to be fitted at the ends where they meet the wall is going to be complicated.

Here you can see even closer, where the "rock" covers
 the top of the head of that angel who is peeking in through the gap....


But since the idea is that they are peeking in through a gap... 
they don't mind being partly covered!


Here you can see that I am leaving the very bottom ends
 without the "rocks" until I can fit them while the ceiling
 is in place in the Great Hall....


Like this!
The bottom ends on the front section are even less finished
 because the front wall connection is only partly designed...
and still could be changed.


Here is a slightly closer view of the ends where they join the wall...
I will fit them very carefully!


These strengthening "rocks" also needed to be added along
 the edges of the ceiling where it meets the end walls.
And in order to get them to be positioned correctly, 
the ceiling needed to be in place while gluing them.
This meant that I needed to get the arched sections of the ceiling
 to curve properly before I could add the "rocks".
(This has been a complicated process!)

And once all those "rocks" were added, Dear Readers, 
the "ribs" all needed to be repainted!


Because I had already painted the "darker" edging
 of all those new rocks where they abut the ceiling,
 I didn't need to worry about getting paint on the ceiling part.
Only the old part of the ribs needed repainting.


And because all those new "rocks" were so symmetrical,
 I could easily repaint the ribs with an alternating "stone"
 pattern of dark and light stone...
creating a wonderfully dramatic effect!
(If you can see it in that dark old Great Hall....)
Above it is mostly painted.


Here you can see it from a slightly different angle.


I also needed to repaint the end wall "arches" 
so they would match the vaulted ribs.
(Sorry for the dark photo...)


This is testing it in place before I painted the grout lines...
That very necessary step!


Starting the process.... slow and steady...


And on the end wall arches too.... 
partly done so you can see the difference it makes!


And here we are testing it in place again with the grout lines done!
You can also see I have fitted the end "rocks" 
where the ribs join the back wall.
The front wall ones are still not finished.
That wall is a whole other chapter still to construct!
 
And now, Dear Readers,
 after adding all those "rock" details
 I think the ribs finally look strong enough
 to hold up this ceiling!

Wednesday, September 2, 2020

More Of The Same.....


Stones and Stitches.... 

You Might recall, Dear Readers, that I was needing to unstitch a good portion of my work on this Medieval Ladies Tapestry. It is another kit by Janet Granger. I have indulged my current passion for Petit-point stitching by purchasing a whole bunch of her kits. As I am gradually moving on to stitching larger items that require a Real embroidery frame (I feel so Grown up!) I have at last also purchased a stand to hold the heavier frames. It does take some getting used to! But more importantly, I have to confess that I am also altering her kit design just a tiny bit. (I have done this a couple times before now as well.) In this case the Lady on the left had a hairstyle which I thought was too modern looking.... I wanted to emphasize the Medieval nature of the project, so I changed the hairstyle a little bit. I will show you the details later. For now you can see that at least I have positioned her correctly in relation to the Lady on the right! You would be surprised how much difference one row to the right or left can make in the end! I am double checking my "counting" constantly with this one.... and "reverse stitching" quite a bit too! But progress is being made.

Here you can see a bit of the stand that holds the frame.... 
I will have to take a better shot of it.
And the ladies are beginning to look like themselves!
I have already identified a place where
 I missed just one stitch of the brown thread....!
 Just one stitch!
I have to figure out how to get just one stitch in where it is missing.

As for the Stones.... progress is slow.
I thought for sure I would get the arch supports
 in the Stables all finished this weekend... 
 
 
but then I ran out of the lumber I was using....
just two "stones" shy of completing one of the arches.
I thought I had lots more of the same material,
 but the dimensions turned out to be just a tiny bit different!
They were even labeled as the same size "stock"
 but when placed side by side you could clearly tell
 they were not the same!
 

I went back to the local Home Depot to get some more
 if I could find any the right size,
 but I couldn't find any more.  
When I got home I found one more piece in my stash that was the right size!
I swear I had looked five times and not found it!
So I was able to complete the arch with the same size stock after all.
And I have enough to make the arch on the remaining wall as well.
As you can see, none of the "grout lines" have been painted yet.


And once the Vault support stones were in place,
 I could continue with the door surround stones.
 These will need to be fitted carefully against the Vault support arch.
I still have not added the door handles to these doors!


Here is the Stables as it stands today.
The left side Arch Support stones still need to be added.


And the stones for the Door Surround in the side door too.
And all the grout lines will need repainting.
But, Truly, Dear Readers, I can't tell you
 how happy I am with all this Stone Work!
I turn the Castle lights on at night and just sit in front of it
 and move from room to room
 admiring the sturdy Castle-like feel of the structure!
Doors.... Windows.... Shutters..... Vaulted Ceilings...... 
it is just so Wonderfully Medieval!

And here is a better (sort of) picture of the Embroidery stand....


It has a whole series of adjustable joints
 so you can position it in a great variety of ways 
to suit your every need!


And the Tapestry as it now stands....
I still have a long way to go.
But that is the Fun of it, Dear Readers!
It might be just More of the Same....
But Stitch by stitch and Stone by stone
It adds up to a Whole Castle....
And I am Loving how it is turning out!


Wednesday, August 26, 2020

Indecision Overcome.....


More Re-doing.....

I am Sure you won't be surprised, Dear Readers, to see more of the Castle Stone Re-building project in all it's rough and imprecise details, since that has been the story for a while in my Mini World. The Vaulted ceiling in the Dungeon also needed its arch supports strengthened. Above you can see the beginnings....  I have turned on the Flash for my camera so you can actually see what I am talking about. It makes everything look horrible... and you can clearly see all the inadequacies of my earlier construction and the irregularities of my painting! I hope you can overlook the piles of bones.... this is the "Ossarium" for the ancient Chapel which has stood here for Ages. Fortunately, adding the "stone" vault supports has become rather Formulaic.... that is to say easy... and it went quickly with no problems.


All it needs now is the grout lines added.

And this would be the final arch to re-do.... 

unless I decided to re-do the Stables too.


Which you can see here.

And I left them for Last because I was Undecided! 

The painted arches looked fine! (I told myself.)

It is way too deep in there to reach! (I told myself.)

Nobody can even See way back there! (I told myself)

But the Stable Door needs its stone framework done! (I told myself.)

And that will make the Arch supports look terrible! (I admitted reluctantly.)

I didn't want to leave this as the Only Castle Room unfinished! (I reminded myself.)

And the arch supports aren't that difficult! (I reminded myself.)

Which meant I would have to knuckle down and just get it done!


But when I started to add the arch support stones 

I made an alarming discovery....


The vaulted ceiling didn't quite meet the wall!

 And the crack was wide enough to make adding the "stone" supports tricky... 

they could disappear into that crack!

(This picture was taken after I had already added supports 

to the corner posts... hiding part of the gap!)


You can see here, more clearly, the added corner posts... 

I decided that the foundation itself needed to be "strengthened".

Otherwise the stronger "vaulting" would look out of scale.


And with the last section of the "post" added... it just needs the grout painted.


Then I added a strip of "vaulted ceiling" to the crack....

 (painted the dark gray) 

and then I could add the support stones!


Of course, I also needed to "strengthen" the other corner post.....

 back there where it was Really Really difficult to reach.... 

let alone see what I was doing!


Which is why I only managed to get half way across one section of the Vaulting!

But I am glad I decided to tackle this.

 I am making the whole structure better in the process!

And that is all I am going to show for now, Dear Readers, 

because I am not enjoying the New Blogger!

I have not managed to make my pictures fit.....

Which is more than annoying!

Well.... I'll just show you the next stitching I have started ..... 

although it is requiring re-doing as well....!


It is a Medieval style wall hanging....

but I counted wrong when starting the second lady's hair....

I am having to unstitch all of her!

And my frame isn't really big enough... 

so I've ordered another one!

Re-doing seems to be my new Normal!

I hope you all are faring well and making minis....!


Tuesday, July 28, 2020

Rocky Road.......


Castle Kitchen Upgrade....

We have been suffering a Heat Wave, Dear Readers, with temperatures in the 90's F nearly every day, which means it is prudent to close the windows and blinds early in the day to keep the cool indoors for as long as possible. And that means my already dark workspace is darker still... and the Castle, dark to begin with is Gloomy as night. I apologize for the dark photos, but all I am doing is adding more of those Rocks you have seen before... surrounding the doors with a three dimensional framework. This is slow going so I did not take many pictures. The door above has all but the "keystone" attached. And the other kitchen door as well....

The kitchen has even more doors beyond these,
and they all need "Rocks" added to both sides of the frame....
Which means I will be "Rocking on" for a while!
And since I was upgrading the doors,
and had found such success with the arch supports
on the Guard Room Ceiling....
I decided to do the same here as well.

Can you even see back there in that corner
above that "modern" Bread Oven?
The vaulted ceiling support arch on the sides is just painted on...
But that is easily remedied!

Can you see I am adding the same "Rocks"
that I added to the Guard Room Ceiling?
I think I need to turn on the big spotlight....
To be able to make sure the Rocks are aligning properly...

There!
(I should have done that sooner....!)
(But you have no idea how challenging it is to get the spotlight down here...!)

Now you can see the Kitchen in all it's "Modern"
(for the Middle Ages at least) decor!
Shutters at the windows,
Modern Fireplace with a smoke removing chimney,
with room for more than one cauldron...
and a Roasting oven right to hand!
And the well is right beside the door on the other side of the wall!
And now the "stonework" will be sturdier too!

All I need to do is re-paint some of the grout lines
to match the new "Rocks"
And nobody will Ever Ever notice anything has changed at all!
But I am glad I did it... it does look so much better.

See? Can you tell anything was changed?

And lest you think I have lapsed on my Petit-point stitching jag....
I have started on a whole new era of stitching possibilities....
My first Carpet!

This is another Janet Granger kit which I had ordered
at the beginning of the Covid Era.
It is stitched on 18 point canvas with crewel yarn.
I had not used this scale since....
Well, I think this was the thread count I used with the stitching
for my little sofa I made in my teen years....
that resides in The Lovely Old Dollhouse Hallway....

And I hadn't used this weight cloth since!
But I had bought a frame for holding the cloth a number of years ago...
so I dug it out and started my first carpet stitching!

This will only be a 3inch by 5inch "scatter" rug when finished.
But I already like the pattern so  much I have ordered the larger version....
Sally May has been wanting a new carpet for her Living Room for Forever!

I have worked on it mostly while I would normally be commuting.
But I might be going in to Work more often in the near future...
So my rate of progress might slow a bit.

For now it is coming right along!

And I have only had to unstitch mistakes a half dozen times or so...!
I think I get careless because it feels so "easy" compared to the tiny works.

The "lattice" work is being relatively tricky...
trying to decide which part to stitch in what order
without missing any stitches....
It's really a sweet design!

And because I am still "Rocking Along"....
I will show you the Castle as it now stands....

(Yes, It is huge!)
It is a Long Way from finished
And the kitchen is in the middle at the bottom...

There are still some other "Rocky" trim pieces I want to add...
but I haven't figured out the details yet.
And the doors... all six on  both sides...
I will be traveling the "Rocky" Road for a while,
Dear Readers, on this Castle Kitchen upgrade!

(And I am not sure I like the New Blogger...
but I think I managed a Post!)