Showing posts with label Tiny Embroidery. Show all posts

Monday, March 14, 2016

Tree House Bed Curtains Completed!


Stitches.... And Love....

Can you Believe it, Dear Readers, but after All this Time spent making these Tiny Bed Curtains for the Pagoda Bed in the Tree House, I am a little sad to be finished? Don't get me wrong, I am Overjoyed at  how Perfectly they turned out! But I was enjoying the process of Stitching those Tiny flowers and vines so much... and now they are Done! I find myself thinking I need to start some more just so I have them there to stitch on a Sunday morning...! But let me show you the finishing of the curtains. As you  might recall, all I had left to add was a small amount of "ground" at the bottom of each curtain.

Here you can see what I mean.
I added a closely stitched gold border at the very bottom, 
to act as a hem, because I intended to pull the threads
 and make a fringe with the silk, 
rather than actually hemming the bottoms.
And just above that I stitched a small layer 
or "hill" of light blue-green to be the "landscape".
And with that the embroidery part was truly finished!

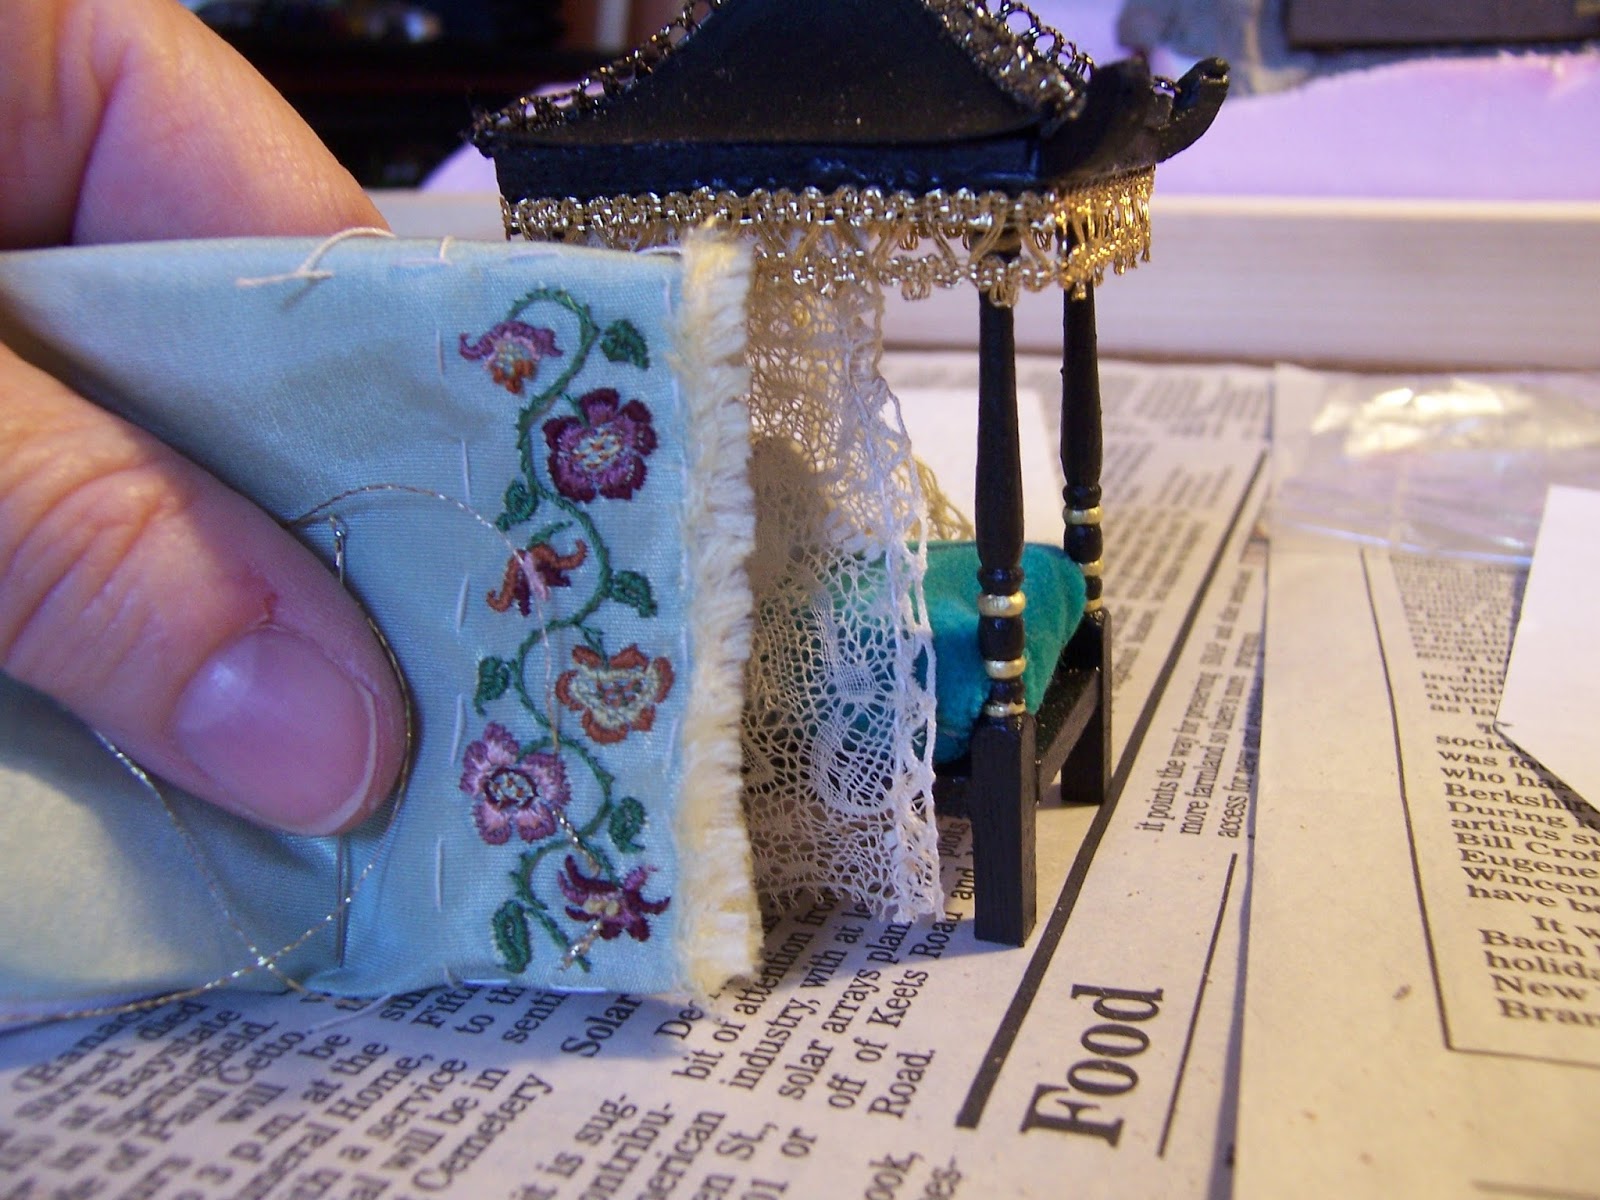
Next I took some very thin silk charmeuse in an ivory color.... (made from an antique slip...) and stitched the cloth right sides together along the two sides that had no fringe. I first pressed the other two edges so that when it is turned right side out, the hems would be already turned under and correctly aligned with the fringe edges. (See above!)

Then I cut the curtains apart from each other, 
leaving about a quarter inch for seam allowance.
(This is the back side of the embroidery!)

Then I turned them right side out and carefully... 
with tiny stitches, sewed the two open sides of the lining 
to the fringed edges of the curtains.

This is the reverse side of the finished curtain... 
with the fringe pulled at the bottom edge.

And then I had to run and get the Tiny Bed to test the curtain....
 
Oh! OH! OOooHHH!!!
I am in Love with this bed!!!
 
Here is a closer view.... and this is just the First curtain!

And the other one..... 
they are still not attached, 
just tucked under the gilded trim....

And just testing the bed in the Tree House... 
but it is getting late and dark and hard to get good pictures.

Here you can see the two curtains side by side.....
the first and last time....
because now it is time to glue them in place!


Which was easier said than done, 
because there was so little space under the edge 
of the gold trim on the bed frame....
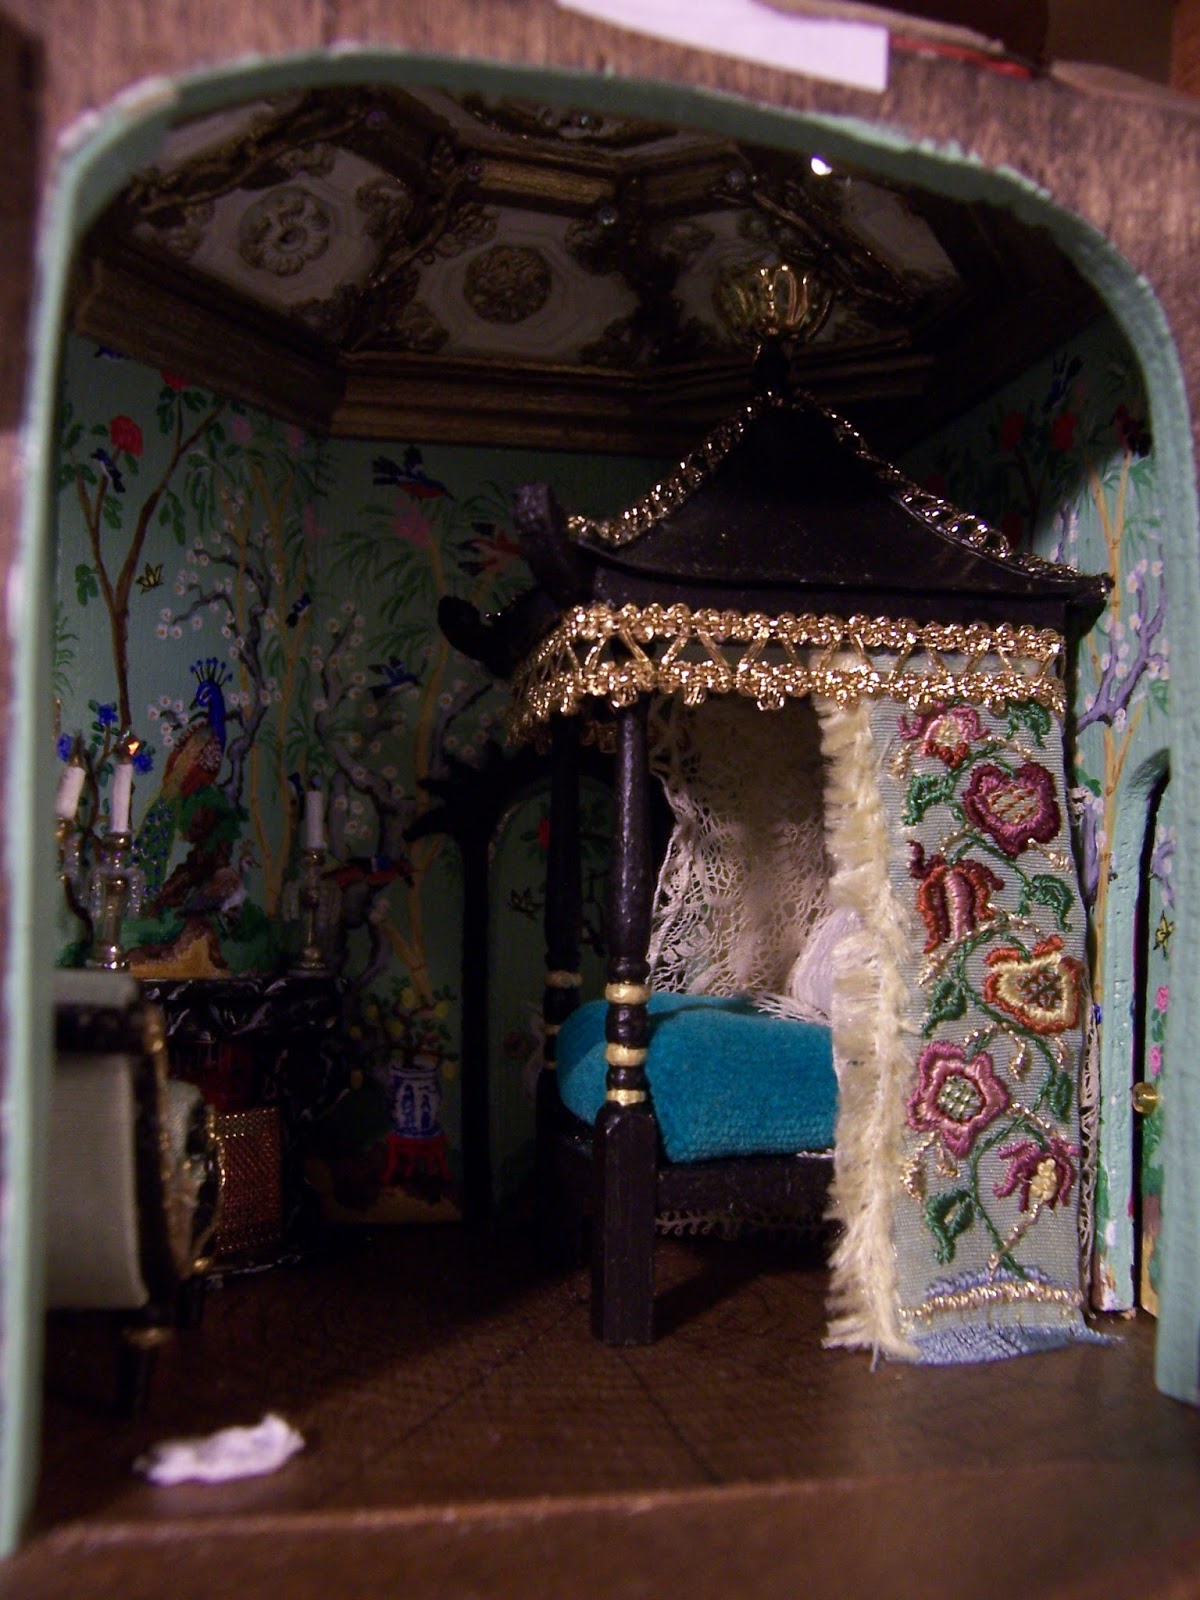
Then I just have to see how it looks in the Chinoiserie Bedroom....

And with the fire lit.....

 
And from a little further back.... 
it is hard to get it all in focus!

And then in the morning light the next day.... 
can we get better pictures?
 
I think they turned out as Fine as I could have Imagined!

And then just to remind you of the scale of the Tree House....
 
Here it is in the Bedroom of Hardwick Hall!


 Oh, Dear Readers, I cannot express in words
 how much I adore this little Bed!!!

I don't know about you, Dear Readers,
But, I am in Love!


Monday, February 29, 2016

Leaping Ahead....


A Little Stitching, A Lot of Glue......

Well, Dear Readers, It is Leap Day, in a Leap Year, and I have some Leaping progress to show you! It has taken me more than two years to stitch these tiny Bed Curtains, and now that they are nearly finished, I have asked myself What took me so long? The embroidery part is now complete... (unless I decide to add a few more leaves in another color....) but the pattern is now done! I was originally not sure how I would "finish" the edges, whether or not glue used to stop the fraying of the silk would be enough, or whether I would need to hem them. But having read Josje's post on the durability and longevity of materials used, I now question using ANY glue on fabrics! I will be stitching the hems! But besides that, I had also realized that these tiny curtains would need to be lined... because they hang on the bed and the "back" side of the stitches would be visible! They are "relatively" neatly stitched.... but the back side of the embroidery is not as pretty as the front! Having reached this stage with these curtains, I thought it would be fun to see how they are going to look .... so I pulled the Pagoda Bed out of the Tree House....

Of course, it is really difficult to get a sense of how they will look.....
but I carefully folded the fabric and held it next to the bed!
 Heavens, it makes the flowers look Huge!

But the Main thing I got done this weekend, Dear Readers, 
was a Lot more Gluing of the structure of Hardwick Hall! 
I left you last weekend with the side walls attached, 
but only part of the Parlor Bay windows was done.

Here you can see the Parlor Bay Windows "propped" in place, but not yet glued.
There were several steps I needed to do while the wall was partly open.
I needed to make the curtain rod for the bay window while measuring was easy, same with cutting most of the baseboards and the windowsills for the bay. And I wanted to attach an outlet on the outside wall beyond the bay window so future lamps could be added at will.

Can you even see the outlet I have added?
 I painted it brown and ran the wire down into the basement!
Then I worked on adding the sides to the bay window.....
They didn't fit very well...
I ended up shaving a lot off of one side panel,
And the other one was a bit warped.

It took all day to get them attached!
Here you see them in the following morning light.

And from the interior.... 
with the baseboards and windowsills mostly added.....
 
And another view.... the trees with the lights in the branches 
are still waiting for me to finish painting them.

Here is a close-up of the interior windowsills....
I think they turned out very well!
But you can see the daylight through the seams of the wall panels!
This will have to be covered with the exterior trim....
although I don't think the kit provides any for these seams!

This is what the house looks like before the attic walls are attached. 
What you see here is now all glued in place!

I had done the preliminary preparing and painting 
of the attic walls a year ago, 
but then realized I could not attach any of it 
without finishing the side walls of the house. 
This is a complex structure to assemble!
Here you can see I have glued the main attic walls in place!
(weighted with a can of paint!)

And then I added the side dormer walls, also "prepared" long ago!
It feels so good to Finally be able to work on this attic level!
I plan to make "adjustments" to the kit plan for this room.....
but I could not even begin to test my ideas without the structure completed this far.

Here you can see I have also added 
the "rear side walls" on each side of the house.
I thought the width of the kit pieces was much too large,
so I "thinned" them down to about 3/4ths of an inch on each side, 
rather than the almost two inches they start out as!
This will allow for the rear corner trims, 
but also allow for maximum access to the rooms!
I am Finally making Progress!
And with the tiny stitching too!

I know I have mentioned before how difficult it is 
to photograph the Tree House rooms....
but I thought you would like to see the bed and the curtains in place.

So you can see, Dear Readers, 
with a Little stitching and a Lot of Glue
I have been Leaping Ahead!

Monday, December 30, 2013

New Years Resolutions....


The Christmas Card.... At Last!

I finished this Year's Christmas Card two days after Christmas, Dear Readers, which is Not how I would like to have it happen! But so it goes when there is a busy life and I set myself a difficult task. This year it was a drawing of my Memory of Christmas Morning fifty-four years ago.... when I first set eyes upon The Lovely Old Dollhouse... and the "Never Ending Story" began! I won't go into detail about the struggles I had with drawing this Perspective! I just knew the "Vision" in my Memory..... and had to make it work on paper! There are no photographs of this.... so I am sure there are a few details that might be different if there were. I was only four years old and my sister was three and the dollhouse was built by my Grandpa from designs drawn up by my Daddy.
The little details around the edges are the current pictures.... if you follow this blog you will recognize many of them.... (with me hard at work painting things at the lower right)... but I had to take liberties with the perspectives to make things fit the spaces!  The original painting is 8 inches by 10 and a half inches, done in watercolor and pen and ink. It took me over a week to complete it. I do hope you can forgive me for taking you on this journey down memory lane.... the Lovely Old Dollhouse is what started it all!

So now that we are putting Christmas behind us for another year..... 
and looking to the future... the New Year is almost upon us....
which means many of us are Making New Years Resolutions!
(Usually I avoid this challenge!)
But this year I find I really want to resolve to Finish projects sooner....
(Don't laugh!)
And really, I have spent the past couple of days working on partly finished  things...
Do you remember the embroidered bed curtains for the Pagoda bed in the Tree House?

Well, I added the final flower and the details to another flower....

Then I started on the leaves....
This will mean the first curtain is nearly done!
It is the one for the back side of the bed... towards the wall...
That way I can make mistakes and it doesn't matter as much!
Each curtain is two and a half inches tall!
Perhaps I shall start the second curtain tomorrow...!
 
And because I have So Many Unfinished Painting projects.....
I decided to work more on painting the Saints on the Castle Hall Ceiling!
You may remember I started it last July....

Here above is a close-up of how I left the Saints Hedwig and Mark... 
partly done.....

And this is Saints Mary Magdalene and John.... 
Barely started!
So I got busy and spent a Wonderful day painting details....

I added the darker outlining for Mark,
as well as the Lion and the book stand...
And I did the face and hands of Hedwig...
and worked more on her head covering and halo.

Here she is closer.... 
with some of the details started....
there are still a ton of details to paint...
And another closer view of Mark...

 I still need to work on the highlights of his robes 
and add another layer to the background....
Here you can see I have added a lot to Mary Magdalene...
 
She will need another layer on the background 
and more highlights on her cloak...
And I also worked quite a bit on John...

 He still needs details everywhere....
but the basic colors are laid out....

Just a tiny bit more was added here....!
It is really difficult to get a shot of all of the Saints together....


It is so dark out and the light reflects off the curved surface....
but you can see that I still have to start the six Saints for the other side of the ceiling!
Maybe I will get that started Tomorrow!

Meanwhile.....
Here is a closer view of Mary Magdalene....
I also need to work on her hands....

And a closer shot of Saint Hedwig....
Lots still to do....
I don't know why I am bothering with so many details on these Saints....
They will hardly ever be looked at... 
up on the dark ceiling of the Great Hall!
But somehow I can't seem to help myself.....
Like with the tiny embroidery, and the Christmas Card....
I just Love the details!
Perhaps it is the Saintliness of the Saints 
which inspires this New Years Resolution....
(We'll see how long I keep to it!)

Happy 2014 Dear Readers!
May your New Year be Wonderful.... 
And may your Resolutions be truly Inspired!