
A Few Little Things.....
It did Not take me long, Dear Readers, to complete the stitching of the Three Kings stocking! I enjoyed every minute of the stitching and am pleased to report that I didn't change anything about the design (I love it as it is...) and I didn't make any mistakes in the stitching! All it (and the other completed stockings) need now is to be stitched to their backing material. No, I did not finish doing that step. But I was in a "finishing" frame of mind and so I made sure to put the paint on the other side of the lovely arched door for the Dollmaker's Studio.
You might not be able to tell from the photo,
but it is a different shade of green for the outside...
it is more of a Forest green and the paint is flat with no gloss.
It needed to look a little bit weather worn.

Here I am giving it a test in place....
the lighting is too harsh, and it only has one coat of the paint....
but I wanted to see how it would look....
I know... it is hard to tell!

A second coat of paint helps!
But while the paint is drying
there are a couple of other little things I am finishing....

You might recall the little footstool with the Tree of Life stitching.....
(I apologize for the blurry picture... I didn't take many of this project!)
It required patient gluing to the backing and foam cushion....
Which I was Finally in the mood to tackle!

Ta Daaaa!!!! Finished!!!
(How long did this simple step take for me to do...?)
I will show you a better picture later....
because I am Finishing Things....!
Next up is the Little Tudor Stitching panel
to go in the embroidery frame...
The Whaaaat??? I hear you say...
It has been a couple of years
since I was working on this one.....

Here you can see the stitching is almost Finished....
But I needed to construct the little frame that it goes into...
(which is part of the lovely Janet Granger kit....)
and when I pulled out the instructions....
it needed special wax finishing for the mahogany wood.
I hadn't ordered that....
and it wasn't until the Covid lockdown
that I got around to ordering the Finishing kit.
I am glad I did!

It's a lovely Delicate turned wood mahogany frame!
And I have never Ever used real wax polish on anything....
so it was a real learning experience!
But it turned out beautifully!

I am sorry my pictures are so lousy...
I was so intent on the process I was forgetting to take pictures....
so this is what I have to show.
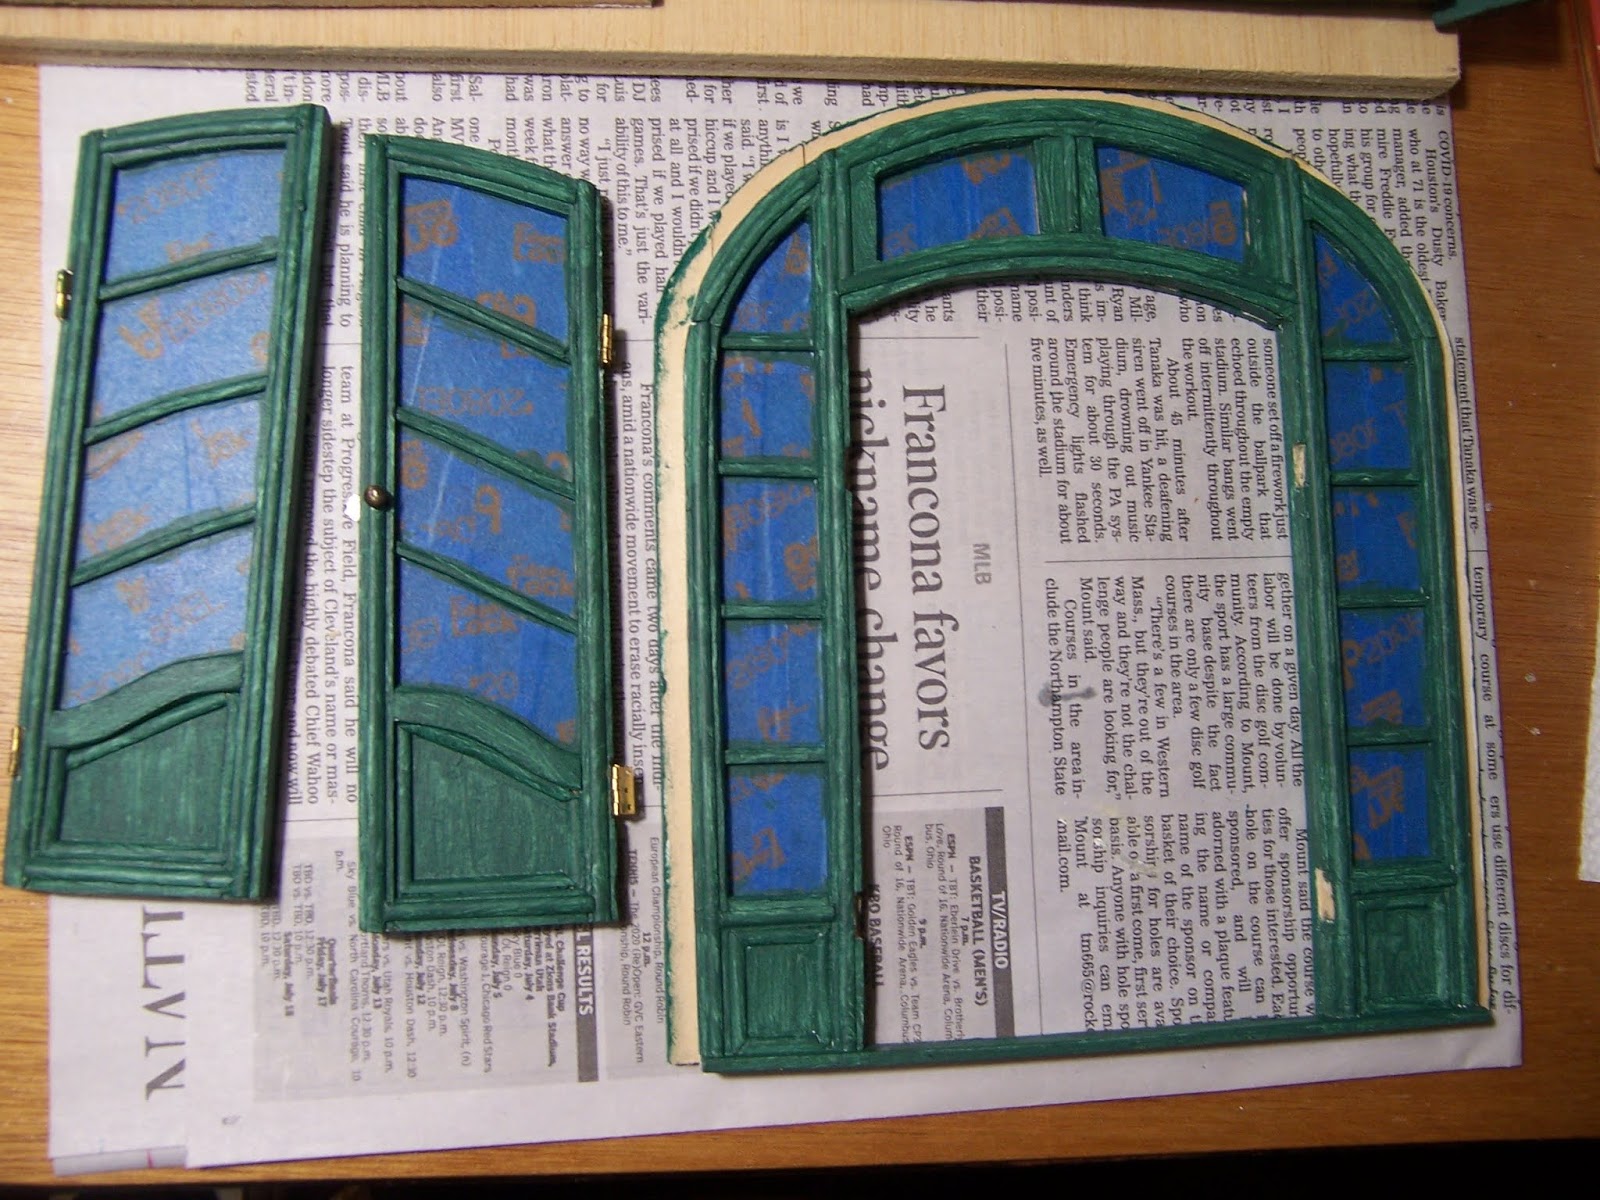
Meanwhile, the paint has dried on the door frames...
and it is time to carefully cut around the edges
and remove the painter's tape from the windows...

I think it looks just like I hoped it would!

I just need to re-attach the hinges...
with a little judicious shimming
and it will be finished!
But the exterior of the Dollmaker's Studio
has a Looooong way to go before it is done.
(Egg-carton stones somewhere on the horizon...)
And the little piece of tapestry stitching
had to be mounted carefully in the frame....

Again, I apologize for the poor focus!
But I was in a hurry to put it in the stand.....

And add the tiny needle to the thread....
Because it isn't quite "Finished" yet...!

See the tiny "needle" I made?
It is just a bit of very fine wire
superglued to the thread...!

I just LOVE the way this turned out!
This kit is so well made and the results are beautiful!

And with the footstool....
(with the carved feet which you can barely see)
I am very pleased with the results of both of these kits!
And while I was Finishing things....
I also Finished the "stones"
around the little window in the Castle Dungeon....

And I added the shutter too... but forgot to take any pictures...
and it still needs the sculpey "hinge flanges"
because I need to make some more.
This completes the "upgrade" on all the windows
that had already been "finished".
There are still many windows in the Castle
that have not been worked on at all.
And because Elizabeth wanted to see the
ceiling of the Guard Room in a better light....
I will Finish this post with a picture...
This ceiling was painted so long ago I forget it is here...

Here you can see it with full illumination....!
The scattered stars are reflective,
but because the ceiling is vaulted,
they never all reflect the light at the same time....
So only some of them appear to be shining.
And the harsh light really brings out the raw paint strokes...
This is mostly copied from a Medieval Illumination
series showing the zodiac figures.
So that's what I've been doing lately, Dear Readers,
a whole lot of Finishing!
But as I am sure you can Imagine,
I am a long way from finished with the "finishing"!