Showing posts with label Tiny Hinges. Show all posts

Saturday, September 13, 2014

Intermission!


Getting Away.......

I hope you will not mind too much, Dear Readers, if I don't continue with Daphne's Story this week! I have been so absorbed with the Drama of this Tale... creating the Park, the birds, the clothes, the settings and taking all those photos..... that I sometimes almost forget there are other things to do! I am going to be Traveling to visit my Mother who lives thousands of miles away! So the real life adventures are going to be taking all my mini time for the next week or two! But rather than leave you "hanging on that cliff" with Nothing to do.... I thought I would fill this Intermission (every Loooonnng Story should have an intermission!) with a small update on the Tree House Nursery! Because, In spite of my obsession with the Story Telling... I have found moments in which I have worked on my other projects. 
Above you can see the Tree House as it currently stands.... 
with all the doors closed.

And here you can see all the doors open! 
The rooms are (from the bottom) 
the Kitchen, 
the Salon, 
the Library, 
the Chinoiserie Master Bedroom, 
the Abalone Shell Bathroom,
 and the Nursery, just being started.

Here you are a bit closer.... 
it is so hard to show any of the details this way!
But you get a good sense of its scale beside The Folly!
This time, the progress I wanted to show you was to the Nanny's room. 
But first, I have to show you the newest "extension" of the Tree Framework....

I needed to add another solid post at the side 
for the Nanny's Door to hinge upon!
You can see it at the right in the above photo.
And then I needed to add the Nanny's door.....
And it needed to have Tiny shutters in the window......

 
With Hinges!!!

So they can be opened.....

And closed!!!
(I LOVE Tiny Hinges!!!)
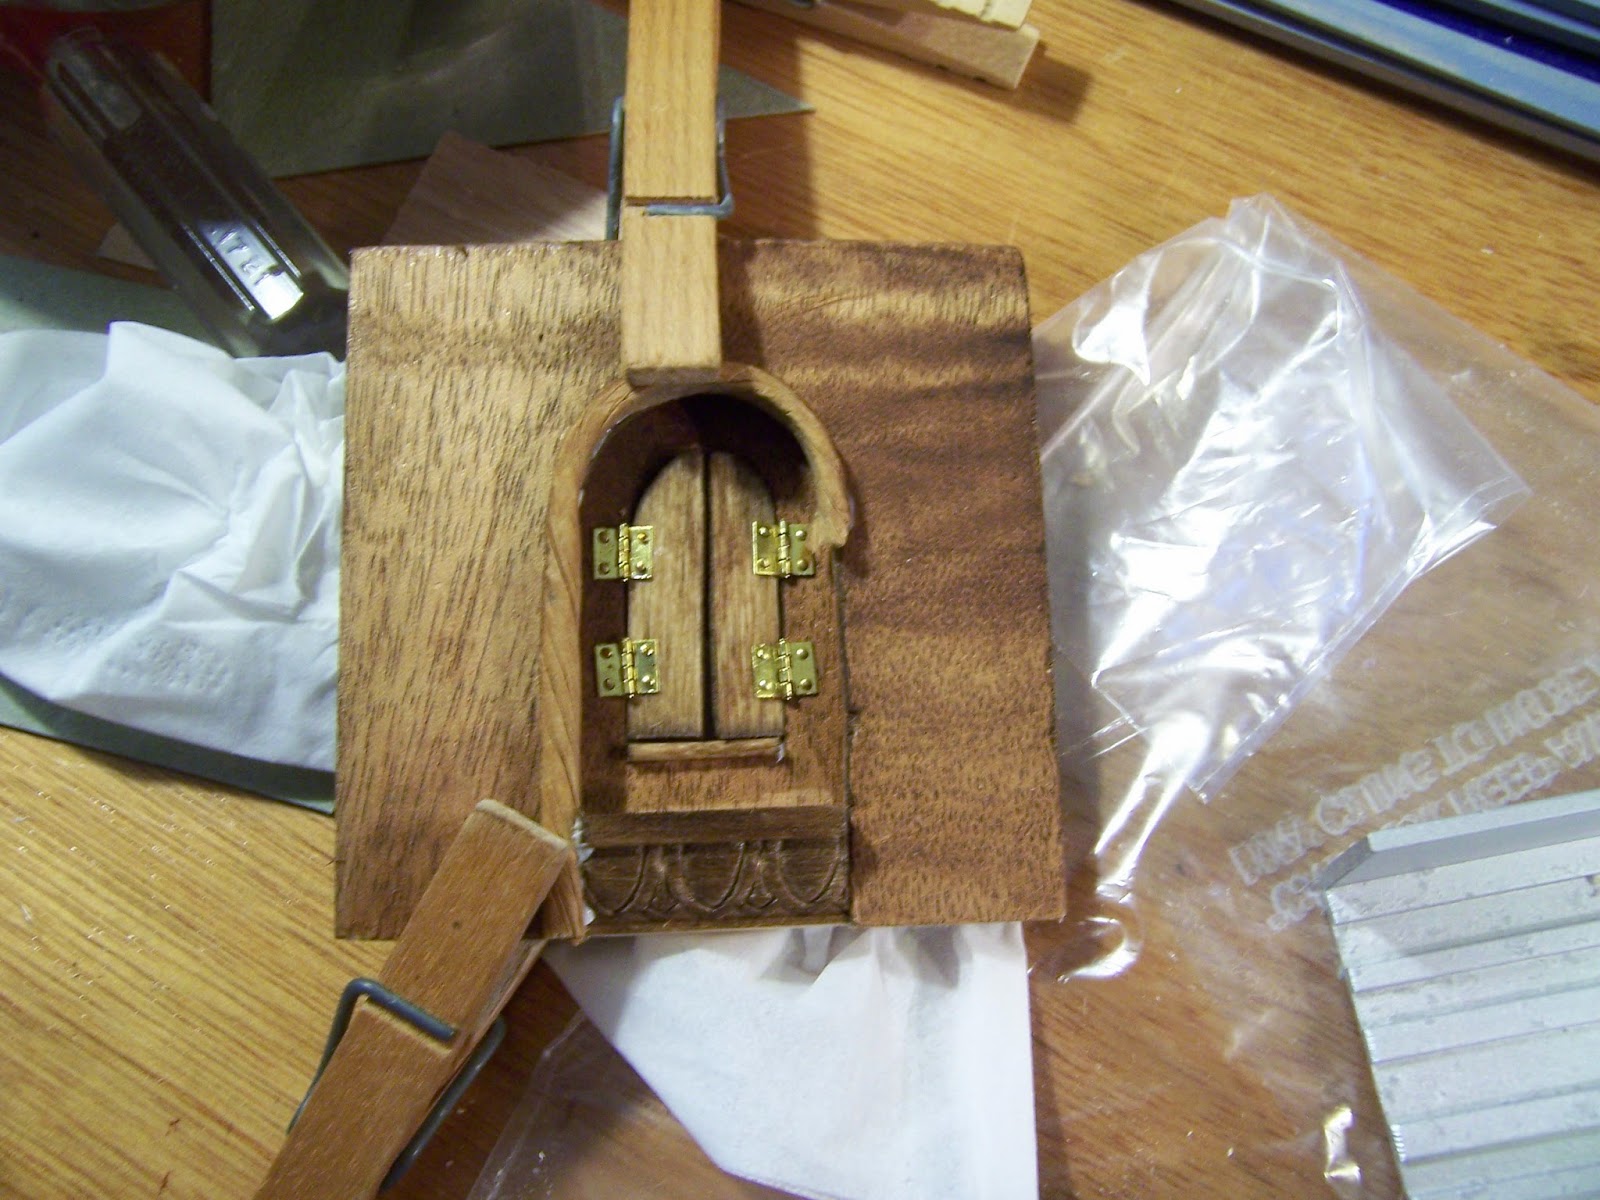
Here you can see I have stained the door and am adding the paper twist trim.....
using my trusty clothespins for clamps! :)

Here you can see the door with the Inner Framework for the room wall... 
so you can tell where the sections will abut when the door is closed.....
and I am adding the match stick paneling in the side sections.

Here you see the Nanny's Room door from the outside....
hinged on that new post!

Here you can see the Tree House exterior on the upper corner.....
With the doors all closed.....

And here you can see the side doors all open.....

Here you see the Nursery and Nanny's Room  
looking down from above!

And a view of the Nursery again....
before the match stick wainscoting was stained...

And with the Inner Door frame in place but not yet stained....
(sorry about the terrible lighting... it was late at night!)

And another glimpse of the bed alcove......
still waiting for the pillows and bed covers!

And in the back corridor..... 
more stairs spiraling upward.....!
What? Another level?????
Well, we will see when we get there, Dear Readers!
But for now....
We are just Getting Away with
A Little Intermission!
Be Back Soon!

Tuesday, January 22, 2013

The Next Room


Ready Or Not....!

There are still a few items I want to make for the Tree House Library, Dear Readers, but they will have to be added later because I just Could NOT wait to start on the Next Room in the Tree House! There have been several things about this next level that have been unresolved in my mind as I try to envision the structure I will need to build. But then one night I had a Dream, and in the Dream I could see the room so clearly, it was as though I were walking around in it...! So is it any Wonder that I had to get started right away? For this next room will be the Master Bedroom....
In the picture above you can see that the beginning is much the same as for the last two rooms....
I cut the walls out of very thin plywood and loosely taped them in place while I decided the position of the doorways..

The room will be entered from the hall at the top of the stairs.... 
which runs at the back of the room....
And on the right side where the stairs usually go up in the lower rooms, 
in this room the door will lead not to the stairs, but into a dressing room instead. 
The stairs will take a different path upward..... 
but I will have to show you that step when we get there!

And as usual, I have started on the design of the room by working on the outer door wall first.....
And rather than have windows, like all the other rooms, 
 it will have doors that open onto a little Juliet Balcony.....
Here below you can see the roughly cut doors.....

And here you can see the Hinges being added.....
 
(And you KNOW how much I LOVE Hinges...!)

Because it means the Doors Open and Close...!!!!

And here you can see the rough framework for the Balcony floor....

And the Outer Door is attached to the Frame of the Tree House.....

Which is starting to look quite tall...!!

Oh, I think I am going to LOVE this little Juliet Balcony.....!

With the doors that swing wide open to let in the fresh breezes.... 
(I will need to patch the wood on the insides of the doors....)
And the view through the room to the hallway door beyond.....

Please Forgive me while I play with the Hinges...!!!
Because Ready or Not.....
We're in the Next Room!

Monday, July 30, 2012

The Doors and More Doors


And More Hinges!

Sometimes, Dear Readers, if I am Not Sure of where I am going with a Design, I find it helps to start with the parts I AM sure about and see where it leads me. With each choice I make the field of options is narrowed and the vision becomes clearer. This is proving true with the next room in the Tree House. I have known the Purpose of this room since the Beginning.... but have been much less clear about the Specific aspects of the Design. And the more I mull it over in my mind.. the more I get LOST in the Possibilities! So I decided to jump right in and make the Outer Door for the Room. This would be relatively easy as I was following the basic design of the other two doors already made. It would be thick and sturdy and hinge on the Post already built. And it would have a Window in it.... as the other rooms have. This time I decided to give the window a pointed Gothic Arch. AAAH.... I Do LOVE the Gothic Windows! And of Course, it had to have shutters with more of those Tiny Hinges!

And then, Because this room is going to be a Library of sorts... 
I am thinking of it as the "Scholar's Room"... 
I needed to build shelves flanking the Window... and a seat in the embrasure. 
Here, I think you can see the seat a little better in this shot.....


I added my usual mesh window treatment.... diamond panes this time.
And I stained it all a Lovely Dark Walnut color!


But I was not content to leave it there, Dear Readers, 
I had to make it Much More Complicated!
You see, I wanted to make the shelves into Cabinets with Doors.....
Doors that Open and Close....
So I started by making the Doors according to the method  I use for the Windows.
The Frame is cardboard cut with an exacto knife. 
The top frame is glued to the plastic "window pane" with the mesh fitted into the opening.


"But what about Hinges?" you ask! For those I used an idea that is quite common in miniatures... 
the metal pin hinge.... but I had to be inventive for such a small scale!
I was afraid the pin would not stay in place just glued between the layers of cardboard. So I added a strip of cotton cloth, bias cut, along the outer edge of the door frame where the pin "hinge" was to be glued and wrapped it around the outside of the pin.... creating a stronger attachment to the frame.
Here below you can see the cotton with the pin in place prior to wrapping.....


And here you can see it with the pin wrapped and the inner layer of the door frame added.
I also added a layer of cardboard between the outer and inner layer to make up for the thickness of the pin... so the frame is three layers of cardboard and one layer of plastic.

And here you can see me testing the Doors in place....

OOOOH.... don't they just Give you the Shivers????
The part you Can't see is that I under-estimated the amount of "shrinkage" the motion of the doors would create.... so the doors themselves are too wide for the openings! And I tried to be clever and make the doors for the double section in one piece and cut them apart once they were done..... 
and it Sort of worked....
But the cardboard layers got messed up in the cutting...  
so one of the doors really was not useable as you can see below.


Which was okay since I really had to make a new narrower door anyway if I want the doors to be able to close all the way... which I do!!!
So here I am making the new narrower door...
 and as with many things it was easier the second time around when I knew what I was doing!


And here I am testing the new doors for fit.....

Oh, I Do LOVE how these are turning out!!!


See, they open.......!

All the way...!!!

And Such a Gothic Cabinet needs a bit of Mythical Adornment..... 
A little Dragon come to visit...!

Here you can see the door in place on the Tree House.....


But when you look inside....

 
You can see I have a LOOONG way to go with this room!
 
 
I probably will be making Doors and More Doors for a Quite a while!


Monday, June 18, 2012

New Door, New Floor And More

I LOVE Tiny Hinges!

I Wanted a New Door, Dear Readers, that would be the more Formal Front Door and open into the Main floor of the Tree House, rather than into the below ground Kitchen level. I don't know how it is in your neighborhoods, but around here in New England, people almost Never use their Formal Front Doors! Sometimes they are even nailed shut against the cold Winter Winds and are never opened again! But nevertheless... there IS a Front Door.... and so I wanted one for the Tree House! Figuring out Where it would fit in was a bit tricky and required quite a bit of odd angles and tiny spaces... but I have managed it! It opens at the top of the kitchen stairs into a tiny vestibule off the "Salon" (which is what I am calling the Formal Living Room!) Here below you can see the door and the tiny bit of vestibule flooring....


And here you can see the door from the other side.....
I have made the door handle out of a bit of root.. 
and the end sticks out to act as a lever so I can operate the door from the outside of the house.... !

The tiny vestibule wall is "hung" with a piece of the Unicorn Tapestry.... 
which is Just visible through the door into the Salon....
And the floor of the Salon is made of a marquetry patterned paper.......

Here below you can see the outside of the vestibule wall with the door on the left..... 
and you can see I have started to add the paper mache to the lower level for the roots of the tree...
(I have put a layer of plastic wrap between the damp mache and the wooden floor while I am working...)

More of the paper mache being added to the Kitchen level........
This is not the final shaping of the mache but more of a strengthening base layer.....

And more of the mache layer.... 
this will form a level base for the next floor to attach....


And here you can see the rough framework of the Salon loosely set in place for fitting purposes.... 
nothing is attached yet! You can see the front (opening) wall has a window cut in it....

And I just HAD to add Shutters!!!
These are interior shutters as were common in the eighteenth century around here....
Please forgive my crooked hinges and the ratty edges to the wood... 
But can you Believe there are Hinges that small?!!

See, they open and close!!!!

And here you can see I have added more of the interior wall layers, creating a deep window embrasure.... 
It will eventually be painted, hiding some of the flaws in the wood.... 
and there will be more paneling at the bottom of the wall for wainscoting....


And here you can see the window "glass" panes have been added! 
I used the same technique as before with the painted gold mesh, only this time I used a lighter gray paint and lined the panes up vertically so they would look more like the "sixteen over sixteen" type of colonial window frame which is typical of the elegant older houses in this area.


Here is a view from the outside with the interior shutters partly open....

Meanwhile, for the interior of the Salon I have built a fireplace and mantelpiece in a style I think is sort of "Georgian" what we call "Colonial" over here! It sits on a diagonal wall between the door to the vestibule and an alcove on the left hand wall which is not yet built...... and on the opposite corner there will be an ornamental "Niche" for some statue or elegant china.... whatever I can come up with in such tiny scale!!

Here below you can see the mantelpiece in slightly better detail...
 made of tiny bits of wood and tinier bits of thin cardboard....

And here below you can see the Mirror I will be using.... 
I know it is a bit much... but I will probably tone the gold down a tiny bit.... 
and I think it will do well enough...! 
I also added a "marble" hearth... painted cardboard of course.....
And would you just look at those Tiny Hinges on the door!!!!


Here you can see I have added the painted brickwork to the fireplace...... 
yes, there will be a fire!!!

Here is a slightly closer view of all those painted bricks....!


And here is a view of the "Front" Door from the outside....... 
it will eventually be much more closed in with tree roots....

And an overhead view looking down at the opening wall with the window.... 
this will not be viewable from this angle once the ceiling is in place....! 
But I love how it makes me able to imagine standing at that window looking out at the little brook down below.....

And a view from the "front" where the walls open... two floors tall...
Eventually these opening doors will be covered in paper mache "tree bark" to match the rest...

Oh, and I almost forgot to show you the last Tiny pieces I made for the Kitchen......
I had to make a copper Tea Kettle.... (for how else can one boil water for tea?)
I also made a tiny trivet for it to sit on in the fireplace.....

And here you can see them by the fire......


And there HAD to be A Robins Egg Blue Teapot on the kitchen table.....!

So there you have it...
A New Door, a New Floor and a Whole lot More!