Wednesday, February 23, 2022

More Of The Same....


Castle Lord's Bed Chamber Construction...

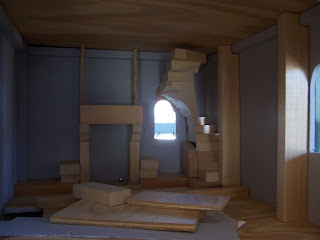
I Hope you will Not be surprised, Dear Readers, to find that I spent my entire vacation week working on the Lord's Bed Chamber construction! I was so eager to find out if my ideas could be made to work, in particular, fitting the stairs into the back corner and still having a window (with shutters) beside the fireplace. You can see from the above picture (thanks to the flash it is very bright!) the basic layout of the elements I want to include. The stairs will have a door at the bottom and the windows beside the hearth will have seats beneath them. The seats are positioned with a gap for your legs so you sit sideways to the window, allowing for the best use of light for reading. The bed will be against the right wall, and the wall enclosing the stairs going down to the Council Chamber (on the left and not in place in this picture) will have a door too. This way the Lord can have his privacy if he desires! The back left corner will be a nook  with the window seat and possibly room for a servant to sleep. The task that had to be completed before anything else was making the windows and shutters. It would be far too difficult to work on them once the stairs or side walls were installed.

If you have been following this blog,
 you will know I have been making my own windows 
using real glass and faux lead glass paint.
I started using this method way back in the beginning of this build
 before I knew anything about other possible methods.
Because the window openings are all irregularly shaped,
 there are no ready-made windows to use anyway.
Above you can see the basic elements I use.
A window frame made from 1/8 inch plywood,
 shaped to fit the window opening as closely as possible,
(you need two for each window, inner and outer frames)
and the glass cut to fit in the opening
 which is "painted" in the design you want.
The lead glass paint goes on in a very uneven blobby way.
But I discovered that once it has cured for 24 hours, 
it can be shaped to a more delicate design using an exacto knife. 


The one on the right has been "cleaned up"
 while the one on the left is still curing.


Here it is being tested in place to see if it looks okay.
This is the window that had been partially filled in from the original design,
 which is why the shape is so irregular on the right side. 
 

Here is the other window also being tested.
 It needs some adjusting in the frame.
(Sorry about the dark pictures... 
I get busy and forget to get good shots!)


Oh what a difference a sunny morning makes!
The windows are just being tested for fit here.
 They will need to be held in place in the openings
 before gluing the frames to the Castle.


With the flash on, you can see the "sticks"
 on either side of the glass pane, 
which keep it from sliding sideways 
once the inner and outer frames are glued in.


Here you can see both glass panes are in place!
Now for the shutters....
 which requires that we add the "rock "trim first...
 

(with the stairs out of the way...)
 

And starting to fit the shutters!
(Just look at all those hinges!)
 

Because they will be split in half.
And we need to test them under the stairs...
The added thickness of the shutter
 makes the top one not open all the way.
But it is the best I can manage, so I am going with it!


This way you can have only half the shutter
 open on really cold and stormy days...


Here I am using the flash...
it is night and I have not even begun the other shutter!


And I haven't yet added the shutter "hinge straps" either.
But morning light gives it a wonderful feeling!


I am adding more stones around the windows,
 fitting them to the shutters and the stairs.


And here you can see the shutters mostly completed... 
with hinge straps made from sculpey.
And the stones are carefully fitted under the stairs.


And a closer view of the back corner with the seats beside the hearth
(not as they will be exactly, but to show the idea)


And in the morning light with the side wall in place,
 separating the room from the stairs below.
It makes a nook in the back corner beneath the second window.


And a little closer.
There is still so much to accomplish, Dear Readers,
but the windows and shutters are now finished!
It might look and feel like I hardly accomplished
 anything at all on my Vacation...
and even though it is just More of the same old Castle Building... 
I am loving this Lord's Bed Chamber construction!


Wednesday, February 16, 2022

Retro-fitting....


The Castle.... Again....

It was Twelve years ago, give or take a day or two, Dear Readers, that I began to build the Castle Dollhouse! And you must imagine my amazement to realize it has been this long and I am only about half way through building it! As I am sure you have noticed, there have been a few detours along the way.... I don't seem to follow a straight path to the end. But I have been feeling a certain urgency to get the building constructed... none of us are getting younger... so I had better just get organized and ... well... work on it! So I have been making an effort over the past few years to accomplish some of the many remaining tasks. And because I started the "shell" of the building so long ago, and it being my very first self built dollhouse... there are many ways in which it needs "improving" from the original plans. Above you can see the Lord's Bed Chamber in the very first stages of construction. This room is the top most room of the Lord"s Tower and is directly above the Lord's Council Chamber. It is the uppermost room of this Tower (I cannot reach any higher...!) and above this room is the open top of the Tower with it's crenelated battlements. In the original design, I intended the stairs to the battlements to go up the outside of the Tower from the top of the Great Hall. This meant that there were no stairs inside the Lord's Chamber. The more I have thought about this, the more I wanted to put a separate set of stairs just for the Lord to use that would spiral up in the corner inside the walls. This way he would always have his own escape route up to the topmost battlements. Suffice it to say that I had to give it a try and see if I could make the stairs fit into the corner! 

I started by constructing a spiral stair from blocks of 1x2 pine cut to shape
(I made a diagram of the steps and cut each block and fitted it into the corner.
Here you can see I am trying to make sense of the structural elements of the room...
where does the bed fit... where does the fireplace fit.....
The wall on the left separates the stairs from below...
And you can see the spiral stairs cut across
 the windows in the back corner.
But I can make the window smaller....
By just filling in a part of it...


Here you can see it in the morning light.... 
with the wall on the left removed.
(All the stairs in this Castle go up inside the walls.)


I managed to find the very same piece that was
 originally cut out for this window... 
and fitted the top shape correctly!
I simply made the opening smaller.
And the lop-sided shape will be corrected 
when the window glass is fitted.


Here you can see it from the back side....
Remember I painted the backside last summer?


In the bright morning light... 
you can see I am testing the arrangement
 of seats below the window beside the fireplace.
You can also see that the stairs will need 
to be shaped to go above the window.


I also filled most of the other window in the stairway...
 turning it into an "Arrow slot" window.
It was simply too large to keep it a regular window shape,
 and too close to the steps... 
anyone would be able to fall right out!
This way it gives light and serves a defensive purpose.
Once again... I used the very same piece
 that was originally cut out of this window!
 (Do not throw away those "scraps"! They are amazingly useful!)


Here you can see I am starting to shape the
 underside of the stairs to fit over the window.
It took a lot of gradual cutting... with my hand saw...!

I am thinking of adding another window on the other side of the fireplace....
And I am testing the spacing of those heavy columns along the wall...
The one in back is needed to close in the stairs...
and shouldn't there be some symmetry to the structure?
(I like my engineering to make some sense!)


Cutting the extra window required emptying all the parts
 and moving the Tower away from the wall...
because the saw wouldn't fit inside so the cutting
 had to be done from the back side.
And I was reminded that I had not yet glued the floor in!
It is the ceiling of the Lord's Council Chamber... 
which had only been completed last fall...
(and I needed to wait a while in case I had
 forgotten something important...!)
So I got out the glue.... and the heaviest Book I own.....


This is a Momentous Day!
And while I waited for the glue to dry... 
I started to cut the window frame sections...


Which you can see is carefully fitted to the odd shaped opening.
I cut two of these from thin plywood (1/8 inch thick),
 and once they are fitted to the opening,
 I cut the window hole out of the middle, 
and sandwich the glass pane between the plywood pieces.
None of the pieces are glued in until all the parts are fitted.
In this case, I need to get the back windows finished
 before I can attach the stairs.


Here you can see I have removed the ceiling.... 
(the floor of the Tower Battlements...)
in order to cut the opening for the stairs to access the Rooftop!
I have not been at all sure how this
 will be "covered" up on the Tower top.
 The weather would rain in if the stairs were just left open...
 so a roof over the stairs would be needed...?
And some sort of wall around the opening...?
But I started by cutting the hole as it would
 need to be for the stairs to land at the top...


And once I had cut the opening.... I had a brilliant idea!
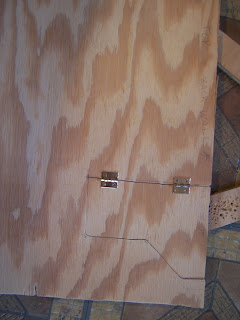
Why not just make it a Trap door... with Hinges???!
(Oh, I do LOVE hinges!


Here you can see the opening from below... 
(the side of the stairs will be walled below the opening)


And the open door from the Battlement side!


And closer... so you an see the top of the stairs....
 (the very top step has not been fitted yet....).
There will be a door at the bottom
 of the stairs to keep the drafts out.


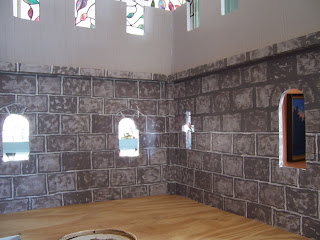
And I decided it would be easier to paint the "rocks"
before all the added pieces get in the way...
You have seen this before....


First I draw the courses.... 
then add the rough texturing...


By now it is late.... dark....
And I am too tired to add the grout!


Which Never ceases to Amaze me, Dear Readers,
how it transforms the painted surface into "rocks"!


One slow wall at a time!
Retro Fitting the Castle....
Again!


Tuesday, February 8, 2022

More Finishing....


Hardwick Hall Curtains...

Some of you, Dear Readers, will have noticed by now that when I don't have the answers to the problem I have been working on in my mini builds, I simply move to another project and work on it instead. I know this means I jump around a lot from project to project! And sometimes I have no idea why I jumped from one project when I finally return to it and easily complete it! This is the case with the curtains in the Parlor of Hardwick Hall. The windows that look onto the porch and the side windows at the front of the parlor have had their lovely black lace curtains in place for years already. But the side bay windows have remained bare! The lace for the curtains has been draped on the floor of this room for a very long time! The curtain rod has been fitted to the bay window alcove and is just waiting for the curtains. (I am sorry I could not easily find you a picture of this.) For some reason I cannot remember, I didn't finish putting up these curtains. And the windows of the bedroom upstairs have remained bare as well, probably because I could not find the right material to use. Then, last fall while I was searching for something else entirely, I stumbled upon the perfect lace for the bedroom window curtains!

Here you can see I am testing it in the bedroom
 on a beautiful sunny morning....
I think it will be perfect!
And there is just enough for the curtains
 for both the windows in this room!

And this discovery made me wonder why
 I had not yet completed the curtains for the Parlor...
And just how long would it take to finish them?

Here you can see the section of lace waiting to be made
 into the curtains for the bay window of the parlor.
All it needed was to be ironed and cut into four panels
 and have rings sewn at the top! 
And I even had rings the right size!
 

And here you can see the first one on the curtain rod....
or you would if it wasn't so darn dark at this time of year!
I will have to scare you with the flash...
 

It is a little hard to get the camera into a good angle
 without getting too much reflection.
I quickly added the other curtains too....
 

Here they are all in place!
Wow, that wasn't hard at all!
(I still need to finish painting these trees
 and get them attached too!)


These curtains were a little harder to finish, 
but only because I didn't have the right size rings
 for the larger curtain rods. 
I had to take apart some charm bracelets
 to get enough for both windows.
I just love how these curtains look like spider webs at the bottom!
 

And the other window. 
I know, it is a bit dark!


Here it is with the flash.
It doesn't really do it justice.


And here it is in the morning light... 
much better!


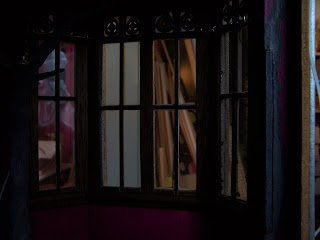
And the bay window downstairs too...!
 
I really must admit, Dear Readers, 
I have no idea why it took me so long
 to get these curtains finished.
And I am so glad they are finally done!