Showing posts with label Curtains. Show all posts

Thursday, March 9, 2023

The Doll Maker's Studio....


Just A Quick Little Project....

I Hope you will understand, Dear Readers, if I return to The Doll Maker's Studio after all my dithering. It sits right in the way of everything else on the corner of my work table, and truly, there is nowhere else to place it while it is being constructed! My house is small and already has mini houses in almost every room on almost every table and chair and it is a juggling act to have visitors and to access materials. And the Doll Maker's Studio was originally just a cute very small "vignette" kit from Sandra Morris of Tower House Dolls in England. As soon as I opened the kit it "needed" to expand into a small building of three stories and infinitely more details! It quickly became anything but a "quick little project"! But in spite of all my other distractions, I am making progress!

Most of my attention for the past year or so
 has been on the second floor studio room. 
Originally this was made from the "Sugarplum" kit made by Greenleaf, 
and like all their kits it is made of very thin plywood
 with tab and slot construction.
There has been a great deal of "adjusting" 
required at every single step of the project!
Very little of the kit is as it was originally intended.... 
with the exception of the ceiling construction in this room.
This is because the tab and slot method is actually
 structurally necessary in keeping the house pieces together properly!
So even though it is elaborately painted with clouds and cherubs
 and is being "supported" by billowing gilded floral swags....
Those "tabs" still need to go into the slots 
when the ceiling is finally glued in place.


And at the moment, none of it is glued in place!
(I apologize for the glaring flash pictures... 
this room is too dark to see details without it.)
And as always it is a challenge to figure out
 which steps are necessary to complete
 before the ceiling is glued in! 
 
 The gilded trim needs more coats of paint,
 in particular on the opening wall side
 which you can't even see except when looking in windows.
 
 
And before the ceiling is attached,
 I want to get the curtains for the window seat done,
 so I can be sure they fit around the cornice trim.
And the window seat alcove can't be attached
 until the ceiling is in place because that wall 
needs to remain "flexible" so the ceiling tab can be slotted in place.
Yes, it's complicated!
And I thought I had the curtains all figured out, Dear Readers,
 until I was searching through my boxes of material
 and came across a different scrap of velvet....
 

Which would be a Much better match for the wallpaper in this room!
I won't even show you the maroon velveteen I thought I was going to use... 
it looks terrible in comparison!
Here I am testing the gold fringe trim which
 I have used on so many of my velvet curtains.... 
and I just don't think it is right here.
 

Especially when I found this
 much more opulent trim in my supplies!
No Contest!
These drapes need the bold gold to balance the cornice trim!


Then it was just a matter of making the curtains.... 
and I like my curtains to be able to
 "open and close" as real ones would.
This means sewing hems and attaching
 curtain rings to go on the curtain rod.
I stitch florist wire into the hems
 so I can "shape" the curtains somewhat into pleats.


I didn't hem the lower end until the rings were attached
 and I could measure the actual length of the curtain.
Here I have pinned the gold braid on
 and am testing it in place on the curtain rod.
I use coat hanger wire for the rod
 and run it through two small eye hooks, 
one of which has been bent part way open
 so the rod can lift out to slide the rings on and off.
(In this case the partly open hook is the right hand one.)


Here the first curtain is done 
and I am beginning the second one.


Here the finished curtain is being tested in place.
I think it will do!
And when the other one is done, 
they will probably be positioned so they are mostly open... 
because one will want to see into the window seat alcove!
This will compress the trim into tighter folds.... 
We will see how it works!

Yes, Dear Readers, 
The Doll Maker's Studio
Was meant to be 
just a Quick Little Project!


Tuesday, March 9, 2021

Curtains....


Of Velvet and Lace....

I added the lace curtains to the two little windows on the opening wall, Dear Readers, and because they are so like the first lace curtain, I didn't take many pictures of them. But I did get a great shot of them through the window in the morning light! (I love the morning light in this house!) And because I was admiring the lace in the morning light, I thought I would show you the other lace curtains again, in the morning light, before they become partly obscured by the velvet ones.

I am sure I am not the only one who falls in love with the mini decor
 at every stage of its creation... almost reluctant to add the next layer...
(like my trouble with deciding to paint the paneling!) 
and yet eventually it all seems to come together
 and "be" what it was meant to be when you first dreamed of it...!
But that means you must persevere and keep adding new layers...
So I began the velvet curtains.

Velvet is a tricky material to work with, and strictly speaking,
 it is completely out of scale in mini rooms!
But I love it, and you might have noticed that
 I am not a "stickler" for perfect scale in all my minis.
I love the look that I think of as "antique dollhouse" 
which is more charming than perfect...
more "enchanting world" than museum piece.
And so I allow myself to use pieces of velvet for curtains!
I don't remember where or when I bought this cloth.... 
but it is the sort of cloth that I buy whenever I find it!
It is lush and regal and opulent and old fashioned.
(And I have been imagining it as dollhouse curtains for a long time!)
But you cannot use the "pretty pleater" methods on it.
 It will not work to wet it with glue or spray. 
So I use the wire in the hems method of trying to be
 able to shape the drape of the cloth.
In this case I am using florist's covered wire stitched all around the edge.

And because I like to be able to manipulate the curtains.... 
opening and closing them...
I have sewn tiny curtain rings to the top edge.


And we need a double curtain rod too.


And I know it is a little hard to see, Dear Readers,
 but if you look closely you will see that the rod support hooks 
on the left side have had the "eye" pried open part way.
This allows for the curtain rod to be slid in and out of the supports
 to change the curtain if I need to... and to work on it now.
There is no glue involved at all!


So I can test how it will fit as I am sewing it.


And with "pleats" caused by shaping the wired hem...


And both curtains...


Here I am pinning the bottom hems...
This is looking in through the side door to the tower stairs 
(not yet started...)


And because I have dreamed of it... 
there needs to be gold braid and fringe...


Which has to be tested in place...
(Lots of testing in place with these curtains!)


One curtain with the braid and fringe all stitched on!


Stitching the other one....


And both curtains are completed!
But of course, it has become late and is dark out.


And in the morning light, Dear Readers, 
I begin to feel that the curtains are right for this room!
They are bold and lush and Beautiful!
Yes, they dominate that wall.... 
but it is the side wall.... 
There will be many more things to rival
 the brilliant curtains before this room is done!

And that was all I accomplished
 last weekend, Dear Readers,
But now I have my beautiful 
lush curtains of Velvet and Lace!


Monday, November 13, 2017

Teeny Tiny Curtains....!


Pursuing A Dream....

Some of you May recall, Dear Readers, my mentioning that I was not satisfied with the paper curtains that are provided with the Secret Christmas House kits. To begin with, they are very "fussy" and are just not my style. But more importantly in my opinion, they are Flat! As you may have noticed, I have been trying to add a third dimension to many of the pieces that come in these kits...(thickness to books, roundness to teapots and candlesticks, depth to picture frames and door frames to name a few!), so it should come as no surprise that I would want my curtains to appear more realistic and have at least a little bit of dimension to them! How to achieve this and with what materials has been the pursuit of many hours both waking and asleep. There was no way to finish decorating the Secret Christmas House without adding curtains.... and they needed to be added before the furnishings could be put in place. And in case you had not noticed... the Christmas Season is fast approaching! Would I give up on completing this project this year? Or would I try yet again to make suitable curtains....
The above picture will show you some of my attempts. They are a bit embarrassing.... made from coffee filter paper smushed into a curtain-ish shape and painted a color approximating the ones in the kit. Even with lovely gold trim, they just looked horrid when tested in place...

No, this just would Not work!
I decided I was going to need to be very precise with the "folds" of the material... 
and I also decided I would prefer to use cloth if possible!
From there I tried many methods of making the material fold like pleated drapes.... 
I even tried winding the wet cloth through the teeth of a comb while it dried!
But none succeeded in giving me a small enough pleat.
Finally, last weekend I decide to try making a wire "jig" 
to hold the material in place as it dried.

I thought that perhaps if I made a frame of wires in a curtain-drape shape,
 and placed the wet cloth over the wires....
Using a method described by Elizabeth of Studio E Blog...
 (The material is dipped in a watered down glue.... 
thank you for the tutorial Elizabeth!)

And then laid more wires over the wet cloth....
 pressed into the valleys between the first wires.... 
to hold the wet cloth down while it dried....
Then maybe it would dry with small enough pleats!
I also tested the method of just using pins
 to hold the fabric in pleated folds.... 
(which you can see above to the right.)
This method left large pin holes in the cloth 
and not enough consistency to the pleats.
But the wires method seemed to work fairly well...!

You can sort of see the test curtains here.... 
I know they are very pale and you can hardly see the pleats....
 but it shows promise!

I tested more versions with coffee filter paper.... 
but did not like the results.
Paper is out... cloth is in.
I quickly made more with the cloth...

Well, not quickly... it takes a couple of hours for the cloth to dry!
Here I am using an antique silk charmeuse scrap...
it has a very fine weave and a soft and malleable hand.... 
and is also a cream color that could be painted if necessary....

Here I am testing one of the dried panels in the parlor..... 
I think I am getting somewhere!

How about two panels together....?
I think these could work!
Now, Dear Readers, I am getting Excited!!!

Here I am testing the pale silk in the Sitting Room again... 
but I am not happy with the color for this room... 
it is too pale. The curtain just disappears.
And I am not really happy with the way it looks painted... 
that will serve as a last resort... 
but first I want to try other fabrics.

Starting with a green silk....
 the very same green silk I used for the bed curtains 
for the Tree House bed!

Here you can see several of the different versions 
together with the original printed paper kit versions.
The green silk is too "yellow" for the Sitting Room... 
so I try them in the Dining Room....

Oh my...!!! 
What a perfect color match!!!
And the fringe even looks okay!!!
So now I need to make the curtain rods.....

Like so...!

And testing the Parlor curtains......
I have decided to go with the cream color in this room... 
it tones down the pink a bit and won't compete with the Tree....!

And now I have Glued them in place!

The Sitting Room curtains wanted to be a darker green....

Here you can see it drying in the wire "jig"....

And in place in the Sitting Room.
It is hard to get the colors to look the way they are in RL... 
this appears a bit too blue in this light.
But the "green" in this room is a very blue-toned green!

But I must say, Dear Readers,
 I just want to Crow about these curtains!!!
Even though they will practically "disappear" 
when the room is all furnished...
 I think they look Perfect!

See what I mean? 
You hardly notice the curtains!

Here, come a little closer.....

I just Love the way the Light shines through them!
Well, Dear Readers, 
I just can't tell you how Excited I am
 by these tiny bits of cloth...
Catching that Dream....
Teeny Tiny Curtains!

Tuesday, March 14, 2017

Cushions for Comfort....


Feeling the Blues.....

Not Very much was accomplished in my mini worlds last weekend Dear Readers, because most of Saturday was spent traveling way up into the mountains to attend a Memorial Service for a dear woman, a co-worker for twelve years, who passed away recently after a long struggle with cancer. The road was long and snowy and nostalgic, we used to go that way when I was a child and used to ski in those mountains. The weather was bitterly cold, not getting above 15 degrees F, and windy too. The tiny New England church in the Village was packed with family and friends, there to reminisce and say "good-bye" to a beloved woman whose life was too short. She is Home now. Back up in those hills where she was born and lived most of her life. We miss her. But life goes on. When I got home late in the afternoon, my eyes fell on a little pile of cloth scraps... scraps I had bought a couple of years ago on another terribly nostalgic trip to a different Memorial Service at another tiny New England church.... and had not yet made use of.....

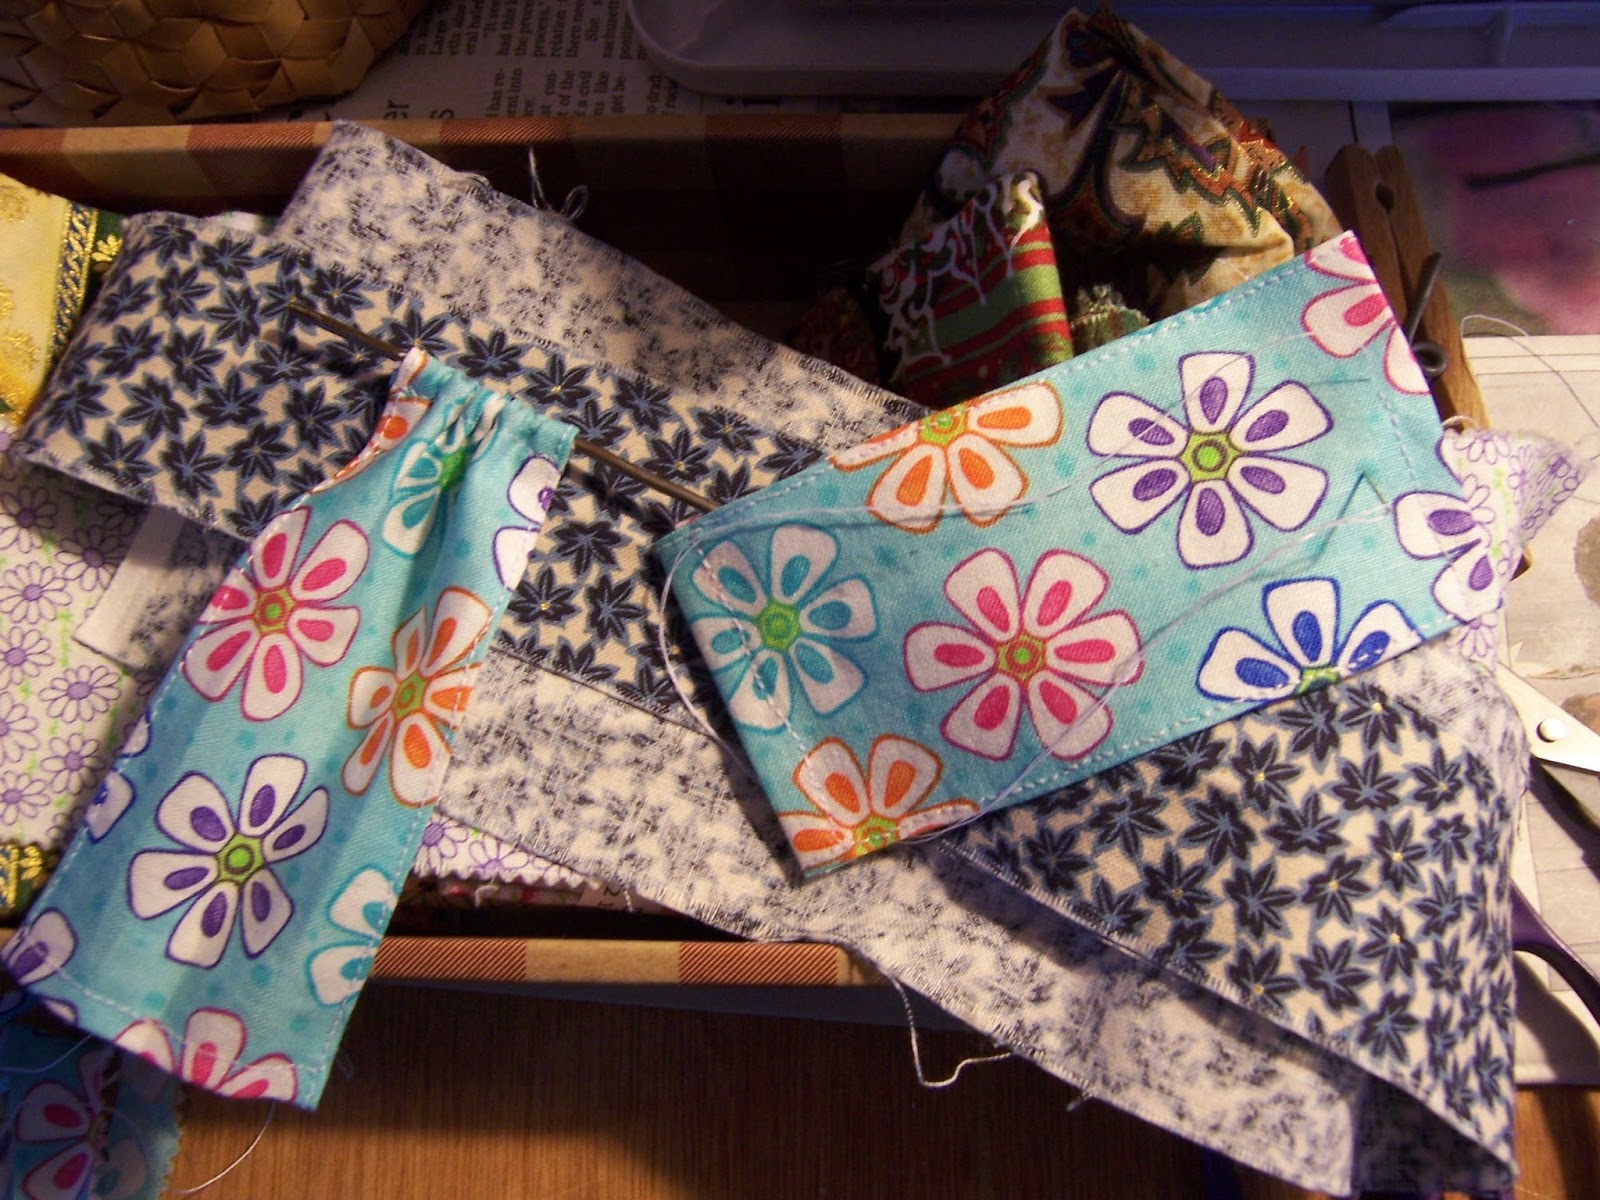
Something about the cheerful blue flowers called out "cushions" to me....
The scrap, bought at a little quilting shop in the back of beyond, 
was only 2 and 1/2 inches wide by 22 inches long.... 
just the right size to make mini pillows!
So I spent the evening stitching up a couple of tiny pillows 
with bright 60's era patterns on them,
 and then wondered where in my many houses they should go....

I had always thought the Attic of The Lovely Old Dollhouse 
should have an old "Hippy Vibe" to it...
as though it was decorated by a teenager in the 60's....
The cushions would be perfect!

And then I thought there should be curtains too!
But there was so little fabric... 
would there be enough...?
It is such a tiny window.... 
surely there would be enough....

So I cut the remainder of the cloth in half 
and stitched hems on all the sides...
Leaving a pocket at the top for the curtain rod...
made from an old coat hanger
 (just like all the other curtain rods in The Lovely Old Dollhouse!)


Can you Believe the serendipity of how the pattern aligns?
I think they look simply Gorgeous!
But that window was still unfinished... 
It was the only window in the house that had no trim!
So I dug around in my scrap wood...
 and found the remains of that lovely old lumber
 my brother had cut for me so long ago....
And sawed it into pieces to trim the window...

And glued them in place.
The window still has no glass....
But that will have to wait for another day...
building the glass windows is not a simple task!

The framing is rough as befits an attic.
I screwed in some tiny eye-screws to hold the curtain rod...

And hung the curtains!
It was getting dark, so the picture is not the greatest...
but I think they are the Perfect curtains for this attic room!
And the only other project I made progress on Dear Readers, 
was the petit point embroidery for the Tea cosy...

I completed the front side with the Blue Willow pattern.....
And started on the reverse side....
Ii know, it doesn't look like much yet.... 
I think it is a stylized Oriental Cloud pattern.....


 Anybody can guess where this Tea-cosy will end up....!
And speaking of Clouds.... 
We are under the clouds right now...
It is snowing heavily and blizzard winds are forecast... 
we are supposed to get a LOT of Snow!
I am home from work today... trying to stay cozy...


Perhaps I will stay curled up in bed with Cushions and a Book...
For what better comfort is there than Cushions, Dear Readers,
When feeling a Little Blue?