Monday, February 22, 2021

The Bay Window.....


 Structural Support....

You Might or might Not recall, Dear Readers, that the upstairs of the Dollmaker's Studio will have a lovely Large bay window with a window seat, overhanging the front of the building. I am using up random parts that I have in my stash, and this large "Houseworks" window fit almost perfectly into the space where the Sugarplum Cottage kit plans for a bay window. I toyed with the idea of using the Sugarplum bay window base and walls, but they really didn't match the grandeur of this window frame. I was going to have to build from scratch the "bump out" structure for this window to fit into. And it was going to require some fancy support where it attached to the main structure too. This took a LOT of pondering the engineering requirements!

To begin with, the Houseworks window frame is made for thicker walls that the Sugarplum kit's walls. And beyond that, I wanted a deeper window seat than the kit's frame would allow. I found a scrap of 3/8 inch plywood that had just the right dimensions and started there. 

The really tricky part was going to be joining this structure to the main building because it needed to attach right where the kit was "extended" by my addition of the base floor.


 And I needed to make the junction really sturdy!

Screws and glue would be needed!

This is the interior view showing the overlap where the exterior
"beam" will hold the kit wall in place.

These "beams" are going to be the Tudor Style
half-timber structure of the upper section of the house.


Here you can see I am adding the support "beams"
which extend off the front of the structure, but are 
attached with the screws through all the layers of wood.


These support the floor of the bay window seat extension.


The window seat aligns with the opening for the window frame.


And with all the parts carefully taped in place.....
you can get a sense of how it will look!
(Along with some glimpses of my messy workroom!)


Here you can see it from a different angle.


And the interior view of the window seat.
I think this is going to become one of my
 favorite window seats ever!


It's just the barest beginning, Dear Readers,
but the Bay Window structure
 will be Securely attached!

Tuesday, February 16, 2021

More Windows.... And Wallpaper....


 It Always Takes Longer....

I Painted the window frames before gluing them in the openings, Dear Readers, because the interior side of the wall is already "finished" and I didn't want to mess it up. Fitting the glass panes in place was a little tricky and required that I turn the structure on its side to work on the back window. I needed gravity on my side! You can sort of see the pane in the window opening below.

The walls on this structure are thinner plywood than those of the castle,
 so for the inner layer of the window frame, 
I was planning to use two layers of cardboard.


Of course, carefully cutting and fitting each layer
 of card took more time than I thought!
The inner layer I painted black... 
where it would show would mimic the "leading"
 on the outer side of the glass.


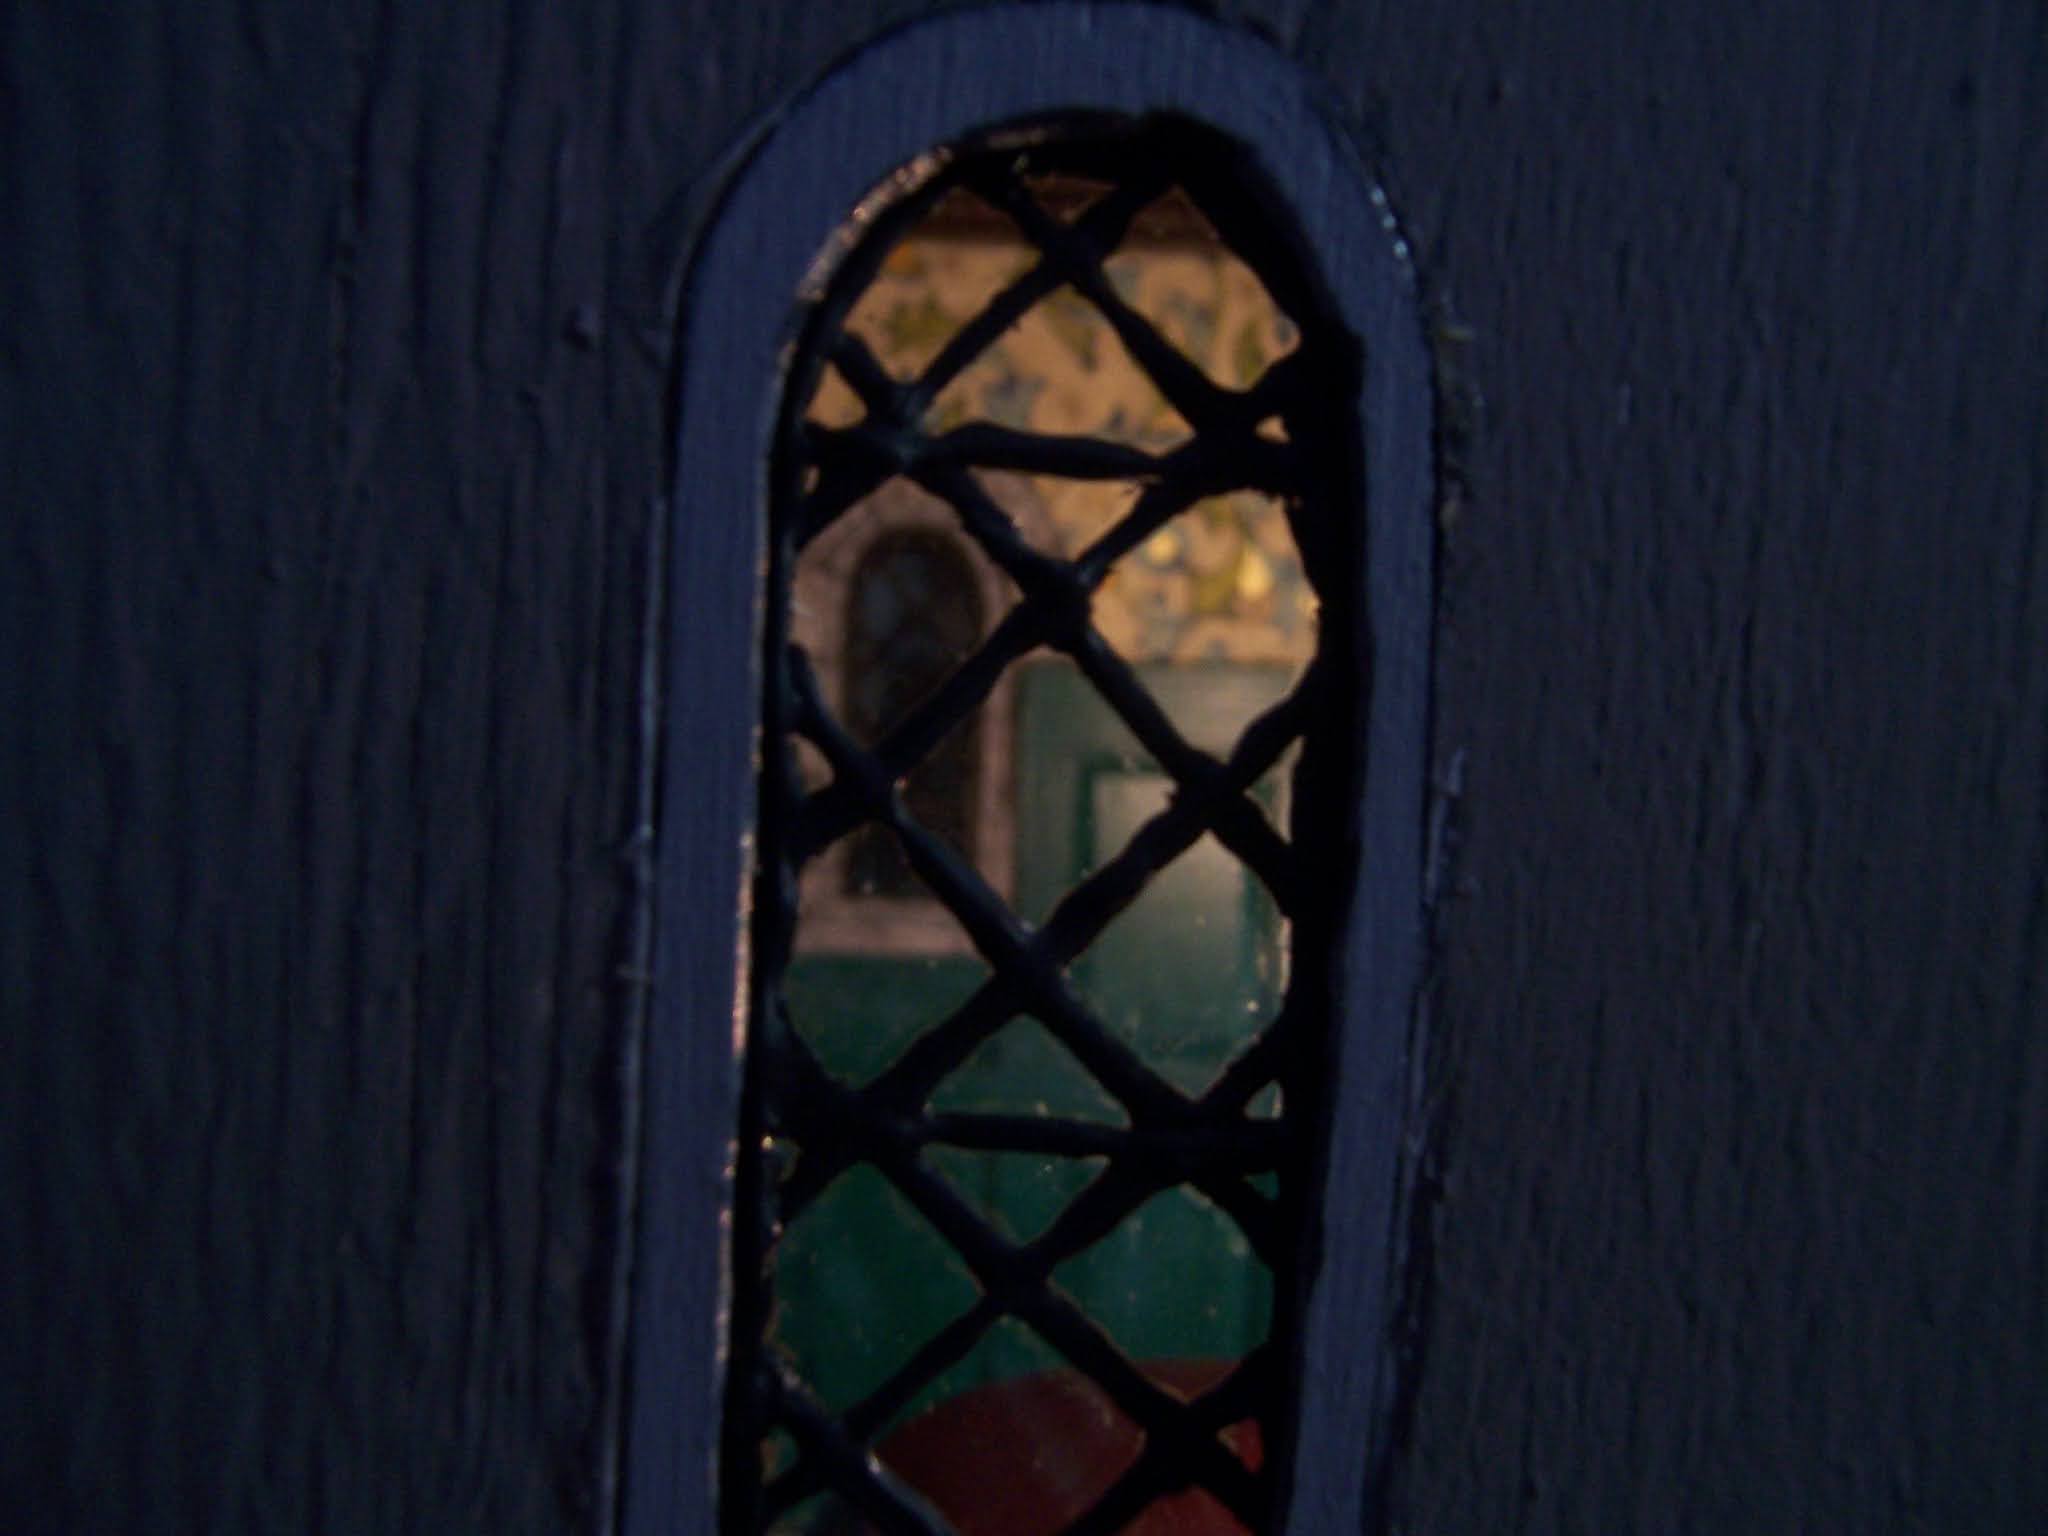
I know it is difficult to see... 
It has been really gloomy around here for a while!
The card frame needed to be wide enough to cover the
 irregular shape of the glass pane to hold it in place.
And then I made the second inside layer...


This thinner frame is painted to resemble
 the stone surround of the window.
I know it is not perfect... 
And is difficult to see properly!


I took the outer door off the hinges to work on it
 so you can see the layers better.
I tell myself that the imperfections will be
 hardly noticed once the entire room is finished!

And then, because I had a three day weekend, Dear Readers,
 I decided to get Brave and tackle the wallpaper right away!


I don't know if I have shown you this paper before, 
but it is old Christmas wrapping paper that
 my Mom used many many years ago,
 and I saved it because it was so beautiful.
I only had a couple of scraps of it,
 and this small room seemed the perfect place to use it!


First I made the patterns for each wall... 
the areas were somewhat irregular
 so I didn't want to take any chances and ruin the paper!


I spent hours cutting and fitting each piece!
Of course, this is really too dark....


I'm not a fan of flash... but in this case
 it is necessary to get the effect of the lovely gold accents!


And with the open wall visible too.
I think it looks just like I hoped it would!

And then this morning I couldn't resist
 pulling out the electrical extension cords...


Don't you want to peek into those windows...?


Oooh... the window actually looks okay from here...!


But you want to see inside....


With just a hint of what it will look like with lights in place.....

 
And the fireplace wall.....
There is still so much to do... 
but I feel as though I am Finally
 getting a sense of this place!
 
And even though it always takes longer, Dear Readers,
The windows and walls are worth it!


Wednesday, February 10, 2021

Windows.....


 You Know How It Goes....

Do You even Remember The Doll Maker's Studio, Dear Readers? That Quick little project I was going to embark on to stave off insanity while building the Never ending lilac bushes? And which project went so quickly from little and quick to Complicated and Elaborate that even I was astonished at the transformation? Well, you can see in the above picture that not much has been accomplished on it in the past year or more! My excuse is that I couldn't decide what method to use for the little windows in the lowest section of the build... the part that is the old "stone" part of the structure. You can see here the unevenly cut shape of the window openings.... (cut in a hurry by me when adding this opening outer wall to the "room box " that was the initial expansion of the kit..... it's a long story..... see earlier posts!) And to tell the truth, it was my spending part of last summer working on the larger but similar windows of the Castle Dollhouse that led me to the decision about these windows! So there is some reason to the madness after all! It seems obvious now to use the same method of making a glass "sandwich" out of thin wooden frames that fit the window opening. This makes it so the glass cutting does not have to be very fancy. The frames cover the imperfections and wood is easier to shape than glass!

I begin by making a paper pattern that fits the opening as nearly as possible.
Then I trace it onto the thin plywood and cut the frame out.
 

Of course, the frame never fits right at first
 and requires a lot of careful sanding to get close enough.
The bottom section will be added when the glass is put in.

I had some scraps of glass that only needed
 a little trimming at the top, cutting the corners off 
to make them fit the arched openings.
I also needed to draw the exact shape of the openings in the frames
 so the lead lines would fit in the opening.

Here you can see I have added the carefully measured lead lines pattern.


Here I have started to add the "lead lines" paint
 to the glass which is carefully taped over the pattern.


And for the third, smaller window too.
I think my "leading" got better as I went along!
But it still needs a lot of trimming up
 once it has "cured" for a day or two.
(You might remember that I discovered I could do this
 while working on the castle windows!)

And that is as far as I got, Dear Readers,
 making the Windows for the Dollmaker's Studio.
But I am sure the rest will come together quickly.
You know how it goes with Kit Bashing and windows!


Thursday, February 4, 2021

Snow....


Days....

It Snowed the other Night in my RL world, Dear Readers, piling up almost nine inches of fresh snow on top of five inches we had earlier in the week, which reminded me that you have not seen the Snowy Lilac bush in quite a while! And if I was going to take so much time and trouble to make the lilac all covered in snow.... I'd better be sure to trot it out at least once every year! So here you can see it just as the dawn is arriving....(this corner is a bit dark...) and it is still a gloomy day.

The snow has drifted quite deep in the corner by the Glass House
And no one has  been out yet to put tracks in the pristine snow.

Well, I know you probably don't remember
all the steps it took to complete even one lilac bush....
And my reason for having one bush for each season...
was Just so I could come here 
and Play in the snow in the Winter!


So I really hope you don't mind me indulging in a
Snow Day!
(Even though I am supposed to be 
at my desk working at home....
 I can take my lunchtime to play!)

Oh look!
 It seems I'm not the only one who wanted to play!
 
 
Mr. Greene has decided to try some "sledding..."
Mrs. Red is not so sure this is a good idea!
 

 And look who else is here!
It's "Cloude-with-an-e"!
And he is chatting with Ms. Blue....
I don't think they know about the sledding....!
 
Mr Greene is ready.....
 

Wheeeeee......!!!!
 

"Oooops....."
 

At least the snow is soft!
 

But getting the sled back up the hill.....
That might take some doing!
 

Maybe "Cloude-with-an-e" could help carry it!
 
Well, Dear Readers, I hope you
 enjoyed Playing in the Snow with me!
Even if it was just a short break from Work...
These days, even Snow Days aren't the same!
I Hope you all are staying safe... 
and maybe playing just a little with your Minis!
 
(And if you missed my Christmas Card...
 I posted a picture at the bottom of the Jan. 18th blog post.)