Showing posts with label Painted ceiling. Show all posts

Wednesday, June 9, 2021

The Window Seat Alcove...


A Twisting Tale...

Unlike the Dollmaker's Studio Vignette, Dear Readers, which went together flawlessly from laser cut pieces of the well made kit, the Window Seat alcove is cobbled together from scrap wood pieces found in my "bits and pieces" boxes. What seemed like an ideal piece of plywood, exactly the needed dimensions for the base, had a subtle flaw that only became apparent after the structure was glued together. It had a slight warp to the plywood! The result is that the base of the window seat doesn't sit square to the walls on both sides. On one end it leans away from the wall, leaving a sliver of a wedge shaped gap at the top. You can see in the above picture that I have added a sliver of plywood to fill the gap. And on the other side of the window, it is the window frame which doesn't meet the side of the wall!

  This is because the opposite wall leans out a little bit because the base is a little bit twisted. The piece of plywood is too sturdy to "untwist" by applying pressure and a lot of glue; it is 3/8 th inch thick and only 2 inches wide by 7 inches long. It is sturdy so the window seat will not be vulnerable to accidental breakage over the years, sticking out the way it does!

It is screwed to the supports that it sits on 
(I will glue it permanently when it is all finished)
and the supports themselves might not be entirely level or even.
 I am allowing that over the many hundred years of its life, 
it has probably sagged somewhat!


The structure from the interior will not show
 the patched pieces once the trim is all in place. 
And all the trim needs to be added to
 the window seat before I attach it...
starting with the narrow scrap of ceiling 
which is another serendipitous scrap!
 It is meant to be the roof (with overhanging eaves)
of the window alcove for the Sugar-plum Cottage kit,
 and fits just perfectly into the
 expanded size of the Window Seat alcove! 
Not a sliver of altering needed!
 But it also must first be painted...
 

With a sleeping cherub among the billowing clouds.
 
As always, it takes many layers to make it look right.
 

 This one will be difficult to see...


This is as close as we will ever get!


Because the ceiling of the window seat is 
tucked behind the supporting wall beam...


And there will be the gilded ceiling trim blocking the view...


And we will have to crane our necks to even get a glimpse...
But we will know he is there...
 asleep on his cloud pillow!


The gilded trim needs to be fit... 
but not attached until the wallpaper is attached.

Which requires that we get the whole end wall glued in place
 so the wallpaper pattern can match as well as is possible!


No, the pattern does not match perfectly!
I am using up scraps in this build...
 and argue that the discrepancies will be attributed 
to renovations made later.... or something like that!


And... Oh look! The baseboards have even been added!


And wallpaper on the sides of the window seat...
 so we can glue the gilded ceiling trim in place!


The window seat will have trim around
 all the edges once it is glued in place.
And I am using a very fine scrap of wood veneer 
(that came with the Willowcrest kit
 for making the mansard roof curved sides...)
to cover the back and surface of the window seat itself,
 because I don't want to add any thickness to the seat. 
It is already high enough!


Here you can see my trusty high tech clamps in action 
holding the side panel in place while the glue dries.
The seat surface cannot be added until the window seat
alcove is firmly attached to the supports and those screws filled in!


Here I am testing it in place... not firmly attached yet! 
First I must figure out how the ceiling of the room will "tab" into place
 if all four walls are glued and have no "flex" 
because of all the firmly glued alcoves....!
For the moment I have left one side of the end wall
 not yet glued to the support post... 
so it can be flexed as needed for the ceiling tab. 

So you can see, Dear Readers,
 it is a bit of a Twisty Tale...
 Figuring out how all the parts fit together...
 but I am making good progress!


Tuesday, May 18, 2021

Let There Be Light.....


Heaven Scent... Lilacs....

Yes, the Lilacs are Blooming, Dear Readers, in RL and in my mini world. But capturing the moment of sunlight in my dark corner of the work room is tricky indeed. The Dollmaker's Studio project is sitting in the spot where the sun shines more fully, so I must catch the few brief moments when the lilac is lit early in the morning if it is a sunny day! You can see the sliver of light reaching into the garden in the picture above.

Aaahhh.... it really is magnificent!
 (And worth being late to work to catch the best shots!)


It only lasts a couple of moments and then it is gone.


But the lilac is magnificent even in the gloom!

But I am sure what you really want to see, Dear Readers, 
 is what I accomplished on my Dollmaaker's Studio project.
You may recall that I wanted to get the alcove completed
 so I could attach it at the back of the room.
Once the wallpaper was attached I needed to add the baseboards
 and the ceiling trim, and the ceiling panel itself.


And I hope you are not surprised that I needed to paint the ceiling first!
You can see the beginnings here... a sky with rosy clouds...


And testing it in place.... 
but it needs the trim too...
 

Which will be gilded....


And with some cherubs looking over the worktable!


Can we get a sense of how it will look...?


And in the alcove with the lamp...
because we need to see if it adds enough light!
Because I have not figured out the lighting for this room yet...
This is the battery operated led lamp that comes with the kit.


I also needed to "beef up" the woodwork on either side of the alcove, 
to equal the mass of the rocks in the arch.
And finish adding the baseboard trim as well.
And while I was painting things....


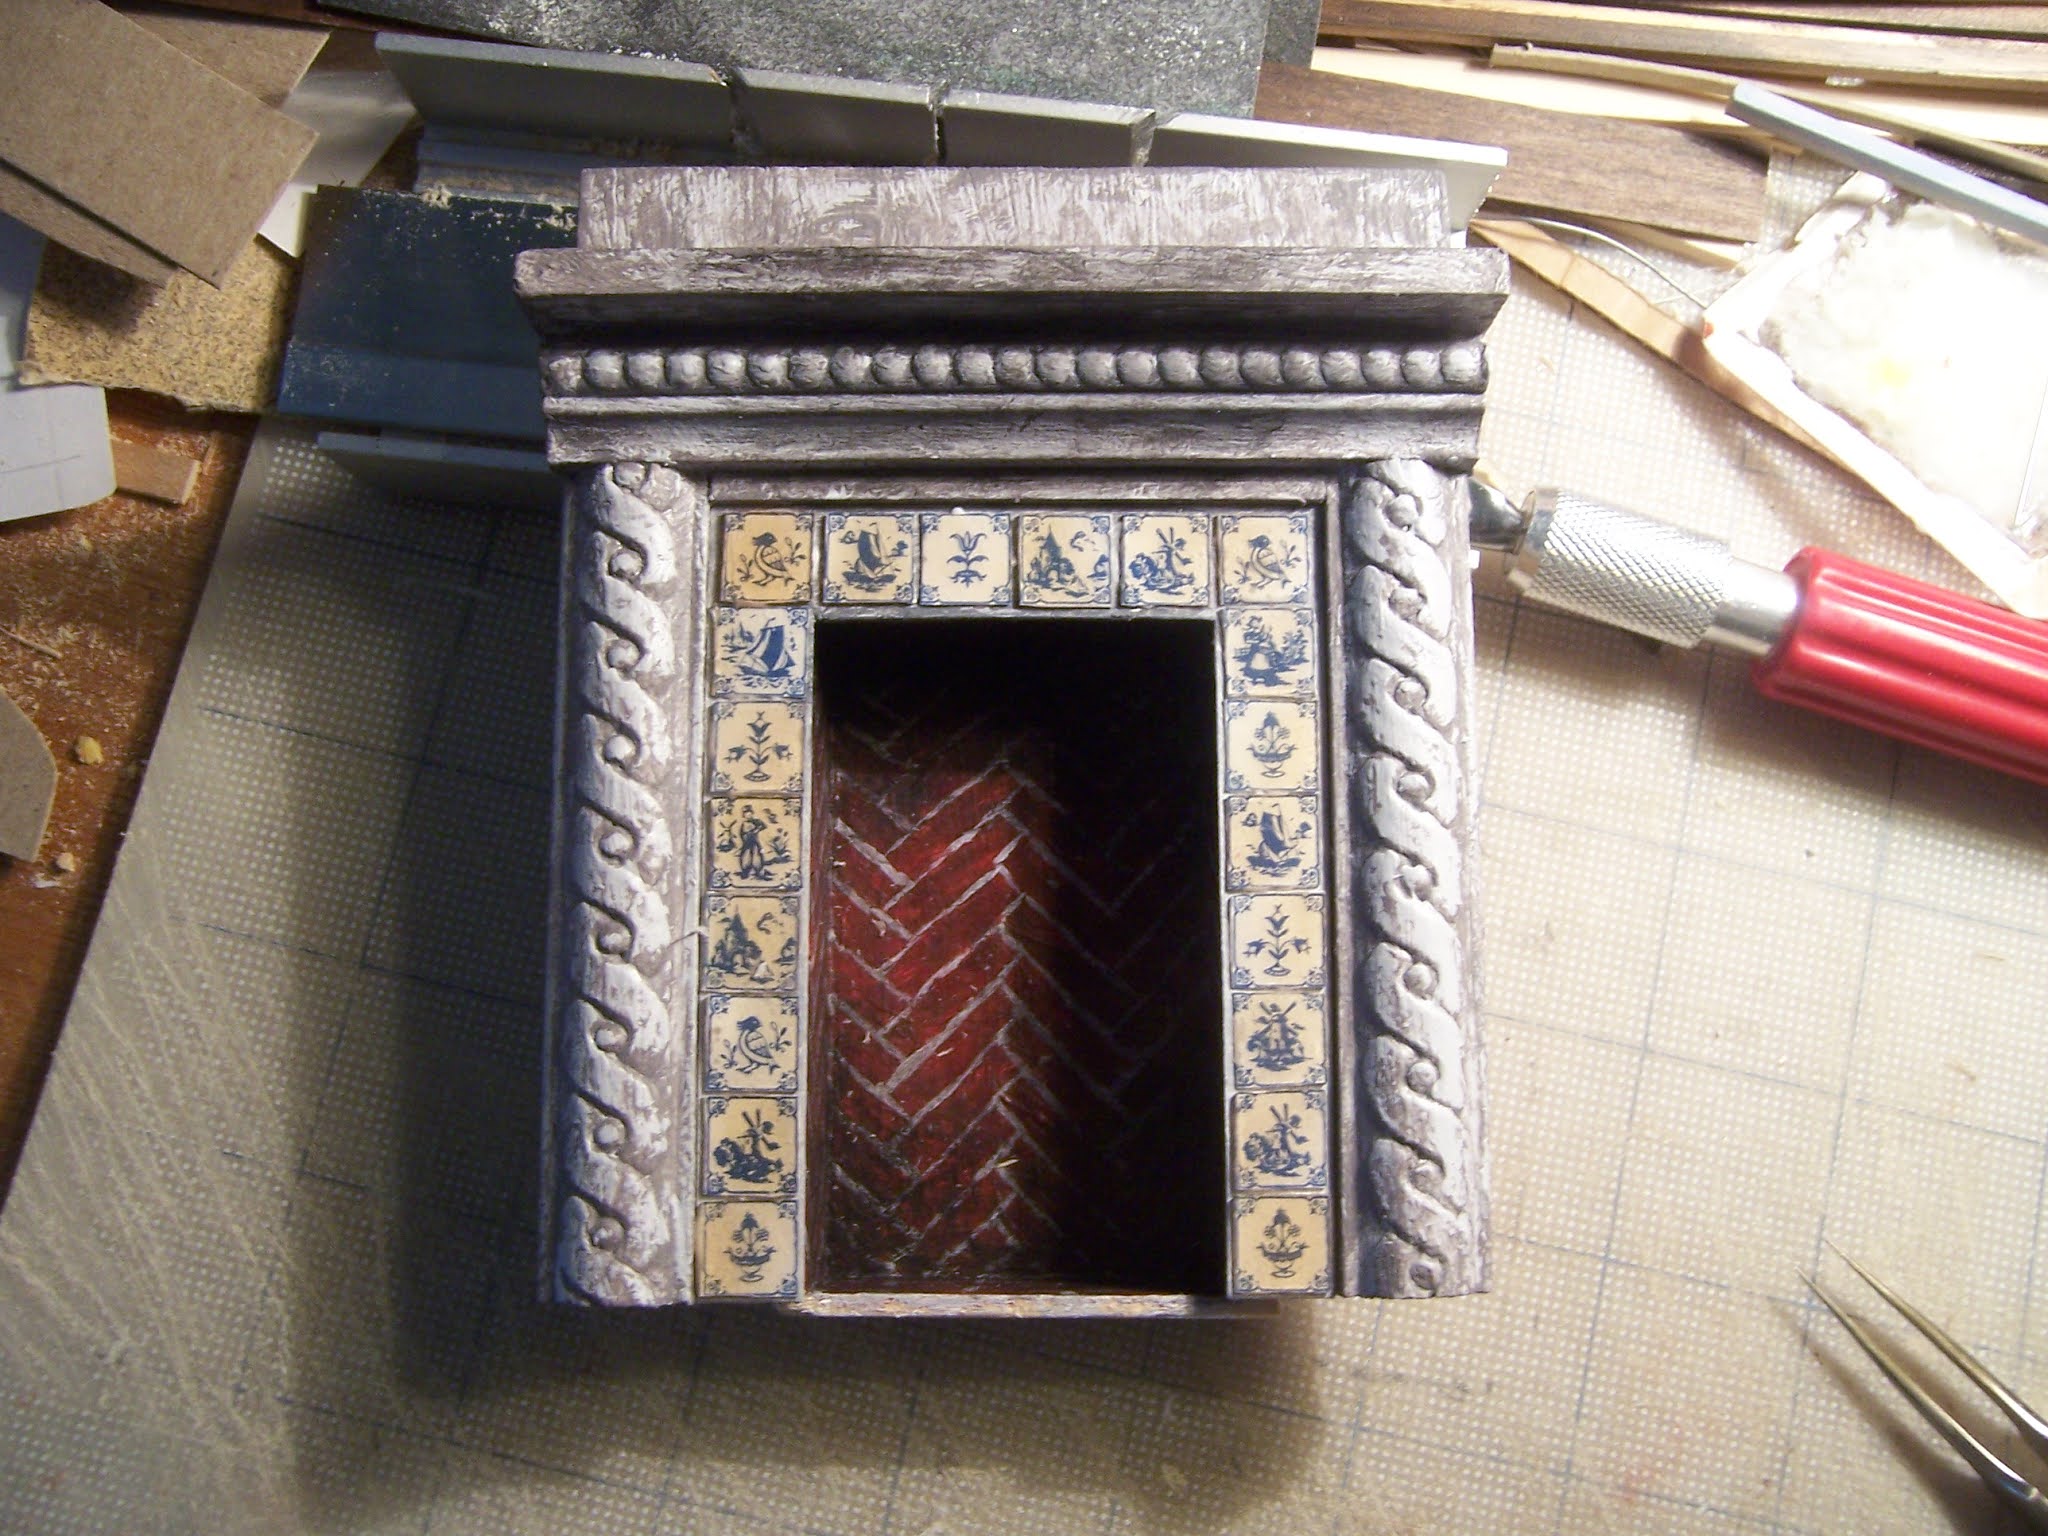
I was also working on the fireplace...
 painting the brickwork...
(This was surprisingly challenging to paint!)


With the morning light shining into the room 
I can see the  way the alcove is shaping up!


Even better with the light on!
(Forgive me, Dear Readers, this will be a long post!)


With the baseboards added, the alcove itself is complete!


And I must tell you that the tiles for the fireplace
 were bought a few years ago with a gift certificate
 given to me by a Secret Santa for our annual Christmas Party at work.
I think they suit this fireplace perfectly!


Testing in place..... I Know....
It is too dark!

But what I was really eager to get working on Dear Readers,
was painting the rest of the ceiling...
I needed to get it all done at once.... 
using the same paint mixtures and with the same "feel" to the painting....


I had already primed the board and added the blue sky paint... 
so it was just about the clouds...


And testing to be sure it works with the section in the alcove.


Then adding layering and detail to the clouds....
 

And the cherubs...!


You have no idea how many times I had to put the ceiling in place
 to see if I was getting the perspective even remotely right...


Because the angle of viewing does make a difference!


Testing in place.... with the flash...
 because it is late and getting dark and impossible to see...


But there has to be another cherub....


And another testing....
But I think the painting is finished....
(It took hours and Hours!)

And you must know those darling cherubs are holding the lamp!
(Where is that lamp....!)


This is another old salvaged item... 
two out of three of the lights work...
but I need to find my plugs in the light of morning.
So for now, all we have is the flash.


But with the morning light.... 
can you see the picture...?

Here, come closer!
But I must go to work... 
I will have to see about the lamp later.
 

 Ah... there it is! 


Can you see them now... holding up the light...?


Well, Dear Readers, whether you can see them or not....
We have light!
And we can even call it Heaven sent!
I hope you are all finding the light in your lives too!