There Is The Castle...
Always The Castle, Dear Readers, that Huge half-finished Behemoth that looms over my Little Worlds, still incomplete thirteen or is it fourteen years into the project. And it is never far from my mind even as I assiduously apply my attention to other demanding projects... for how else will They get finished? And somehow, over the years, I have come to think of Summer as "Castle Building Time", and I eagerly begin to plan this year's tasks... always with the awareness that I will not get anywhere near as far as I hope I will. But did you ever know of a Castle that did not take a long time to build? Even "mini" Castles apparently hold to this requirement. So here we are, on the Threshold of Summer, and I cannot wait to get going on building, starting up where I left off last Fall.... the Lord's Tower windows all need the frames built for the exterior. And this will Finally begin to define the Front Facade of the entire Castle! How I have pondered this!

As usual, I am torn between the accurate
Historical portrayal of a Castle,
and my well known love of intricate details....
This is designed to be a thirteenth century Castle,
well before the gothic excesses of the later designs.
It is supposed to be a very old, Norman style
with simple arched windows.
And yet, even in those times
the arches over the doorways
were quite elaborately carved,
and so were the window frames
especially on the upper windows.
And as always with this Castle, the place to start is at the bottom...
The Stables window, the only one in the Stables, is small and simple.
I copied on the exterior the same treatment
I had given it on the interior when
I was "rocking the trim" several summers ago!
And the same process was used for the Guard Room...
Copy what was done on the interior.
And while I was doing the basic simple windows
I started on the Kitchen ones too.
All the windows on the lowest level are alike.
The Dungeon window too.
Alas, I have already neglected to complete
the arch stones for this before racing ahead
with the more interesting upper windows!
I apologize for the dark photo.... lots of dreary days lately...
This is the beginning of the trim for The Lord's Council Chamber window.
And again, I copied the trim I already had used last Fall on the side of the Tower.
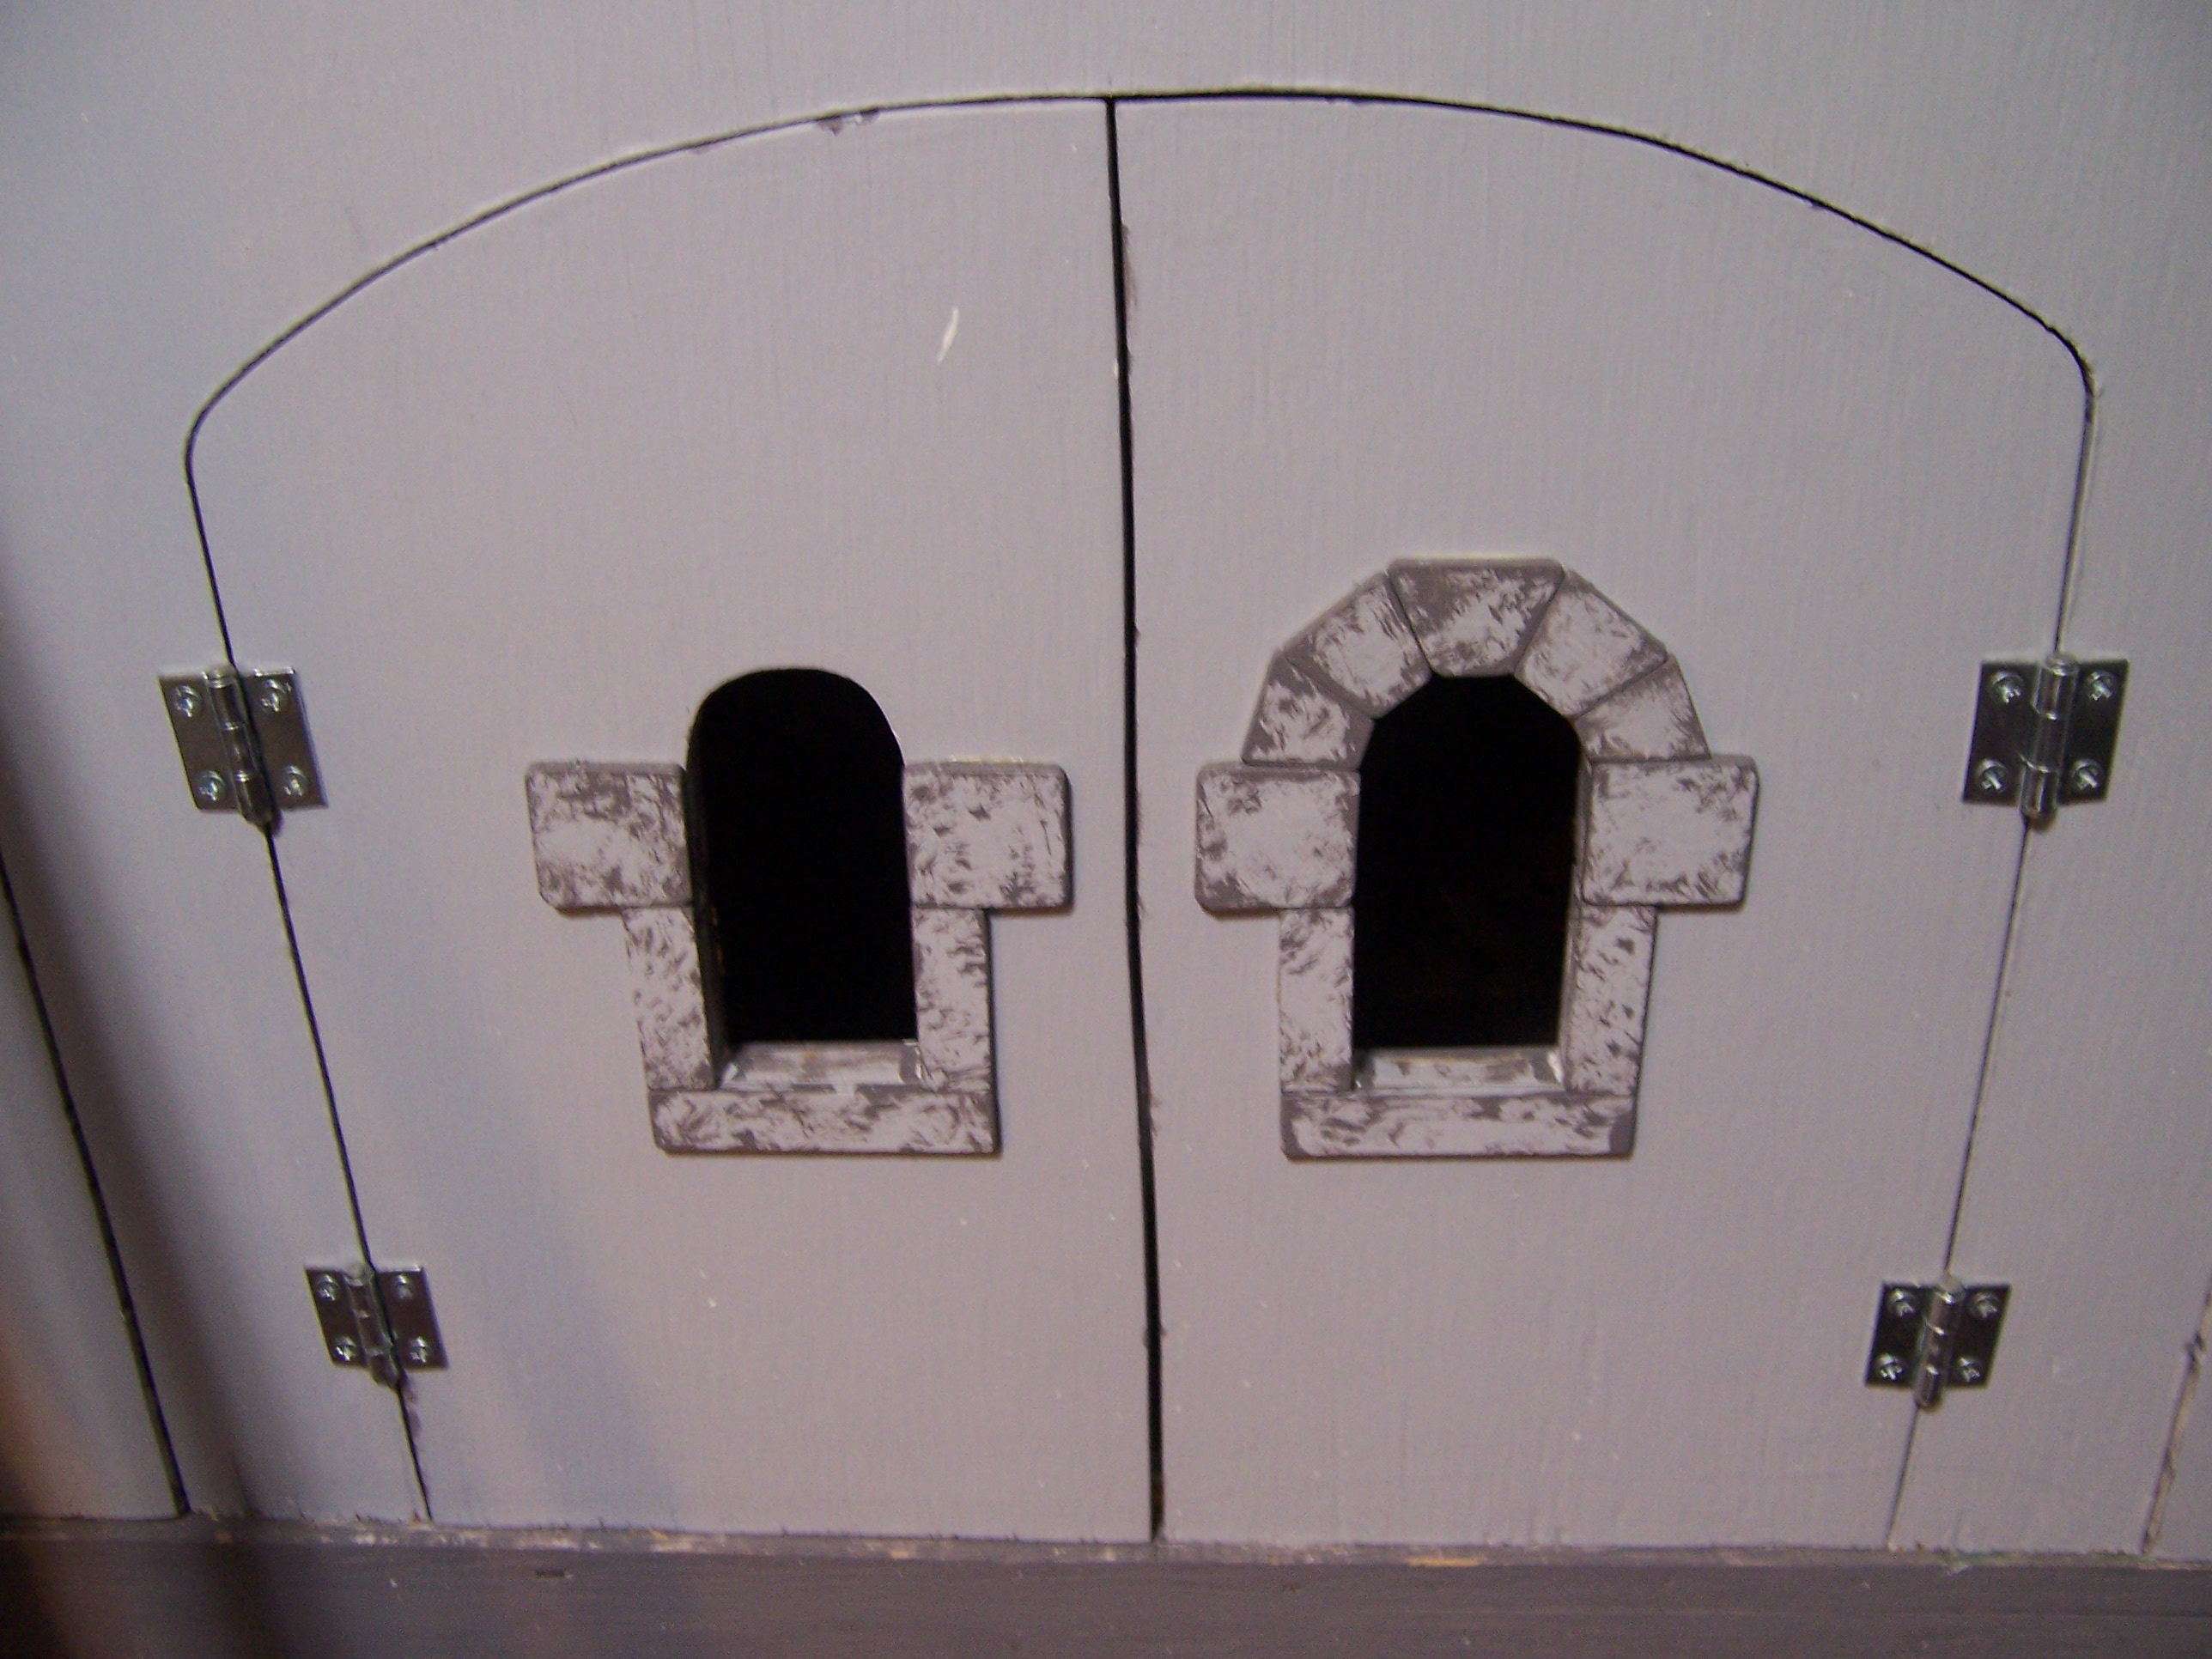
Here you can see the Stables and Guard Room windows finished.
They are your basic simple Norman window design.
When the Tower front is painted (which I eagerly anticipate!)
they will just look like tiny window openings.
Here the Kitchen windows are getting their arch stones.
And here I have completed the Lord's Council Chamber window.
And it opens to let the Summer breezes flow!
Here you can see I have made good progress
on the Lord's Bedchamber windows too!
But I confess, Dear Readers, what really has my attention
is the Windows for The Great Hall!
That row of Clerestory windows has been calling to me!
They need the frames built and the glass cut and leaded....
how hard would that be?
It will be the same process as all the glass windows before it...
You make a paper pattern to fit the opening as closely as possible...
(because all the openings were cut by hand with my saber saw years ago,
they are all hopelessly irregular in shape...)
Then you cut it in 1/8 inch plywood...
fitting it as closely as you can.
And another one for the interior side of the same window.
(The wall is 3/8 inch plywood so the glass pane
will sit neatly between the two frame sections.)
Here you see I have cut the window openings in the frames...
except for the very top part in the arch...
that will be a small quatrefoil window which I will drill out later.
Then they get a coat of primer...
Here I have drilled the quatrefoil window....
And you can see that both the inner and
outer frame have the quatrefoil window cut.
And the first frame has the gray base paint...
Time to start the second one!
And the third window under way....
And the fourth window as well!
Drilling the quatrefoil windows is quite tricky.
In order to prevent splitting the wood,
I start with a small drill bit and drill each of four holes.
I gradually increase the bit size up to 1/4 inch.
At that point the holes almost intersect
and I cut away the last pieces of wood with the exacto knife.
It is important that the two layers have the holes in the same place
so I have to adjust the shape if a hole is a little off.
This I do with my small round wood file.
I start to compare the layers as soon as
the holes are big enough to see through.
And the fourth one cut too!
I was about to start fitting the glass panes, Dear Readers,
when I remembered the windows all need
the bottom frame piece added!
Like this....
And this.....
Only two more to go...
before I can start to make the leaded glass panes.
Is it any wonder, Dear Readers,
that even in Miniature
it take years to build a Castle?