Showing posts with label Painting Saints. Show all posts

Tuesday, November 30, 2021

Progress....


 The Saints Again...

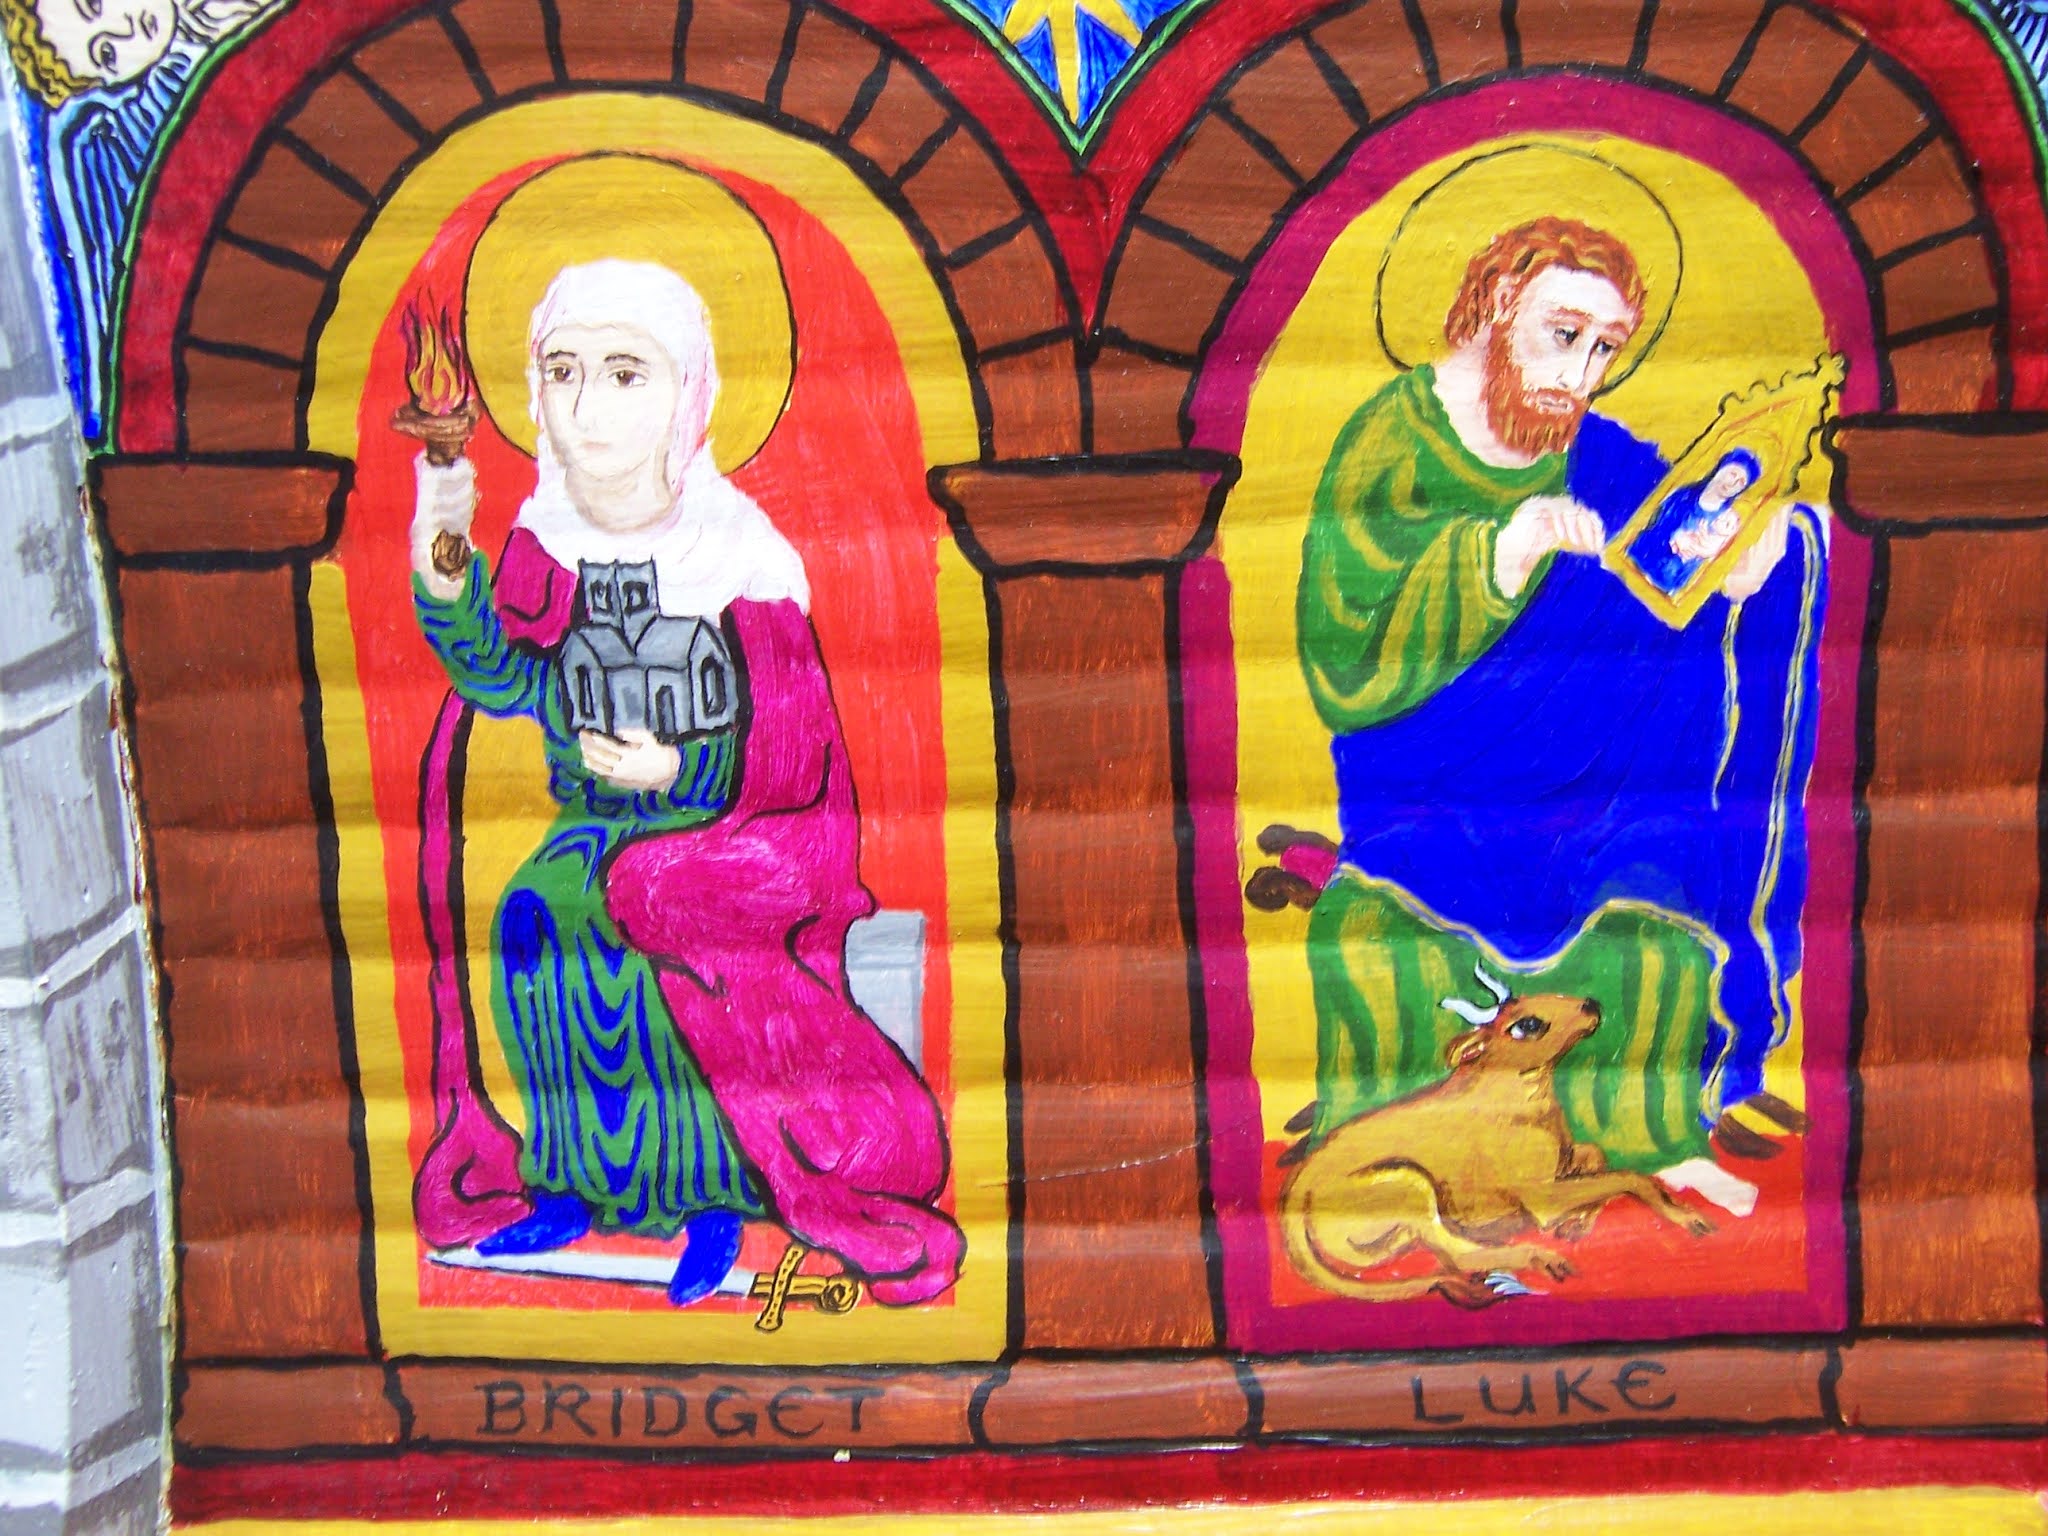
I had some Extra time off from work last week, Dear Readers, and was able to give the Saints my undivided attention for a couple of days! Above you can see the last two on the front half of the ceiling looking just as they have been for years. They both looked "almost" done, but in fact needed a great deal of work. I began with Luke because I was copying him from a Medieval original, and therefore it was easier to know what was needed. His paintbrush, the portrait of Mary he is painting, his robe, his halo, all needed work. The most obvious part was his arm which holds the picture frame, it was not bending in a natural enough manner... so I started there....


In order to make the wrist and arm align in a more natural way, I had to shift the outer edge of his "stole" so it fell closer to his body.


Then I repainted the robe and elbow. Of course, I neglected to take a lot of pictures.

Here you can see I have started to paint the floor under Bridget's feet.
I felt she needed to be better "grounded".


There had always been a need to make Bridget look more "medieval".
 She was one of the Saints that had no original painting to copy.
Even though she looks lovely as she is, 
I needed to make changes to her face in particular.
 

I changed the shape of her head covering and added heavier outlines.
One of the things to remember is that these paintings
 are hard to see in place... subtlety is lost completely! 

But meanwhile, I had also added more details to the other Saints...


Saint Lucia and Saint Nicholas still had many details to complete.
I got carried away with embellishing the floors...


I indulged my love of patterns.


Not that you can really see it when it is in place... 
but I will know it is there!


And the ground under Saint Cecilia
 also needed some softening with details...
So I painted blossoms...


Which you can see here.


And along the way I also completed Saint Nicholas' Croizier,
 and added layers to the Hunters in the border.

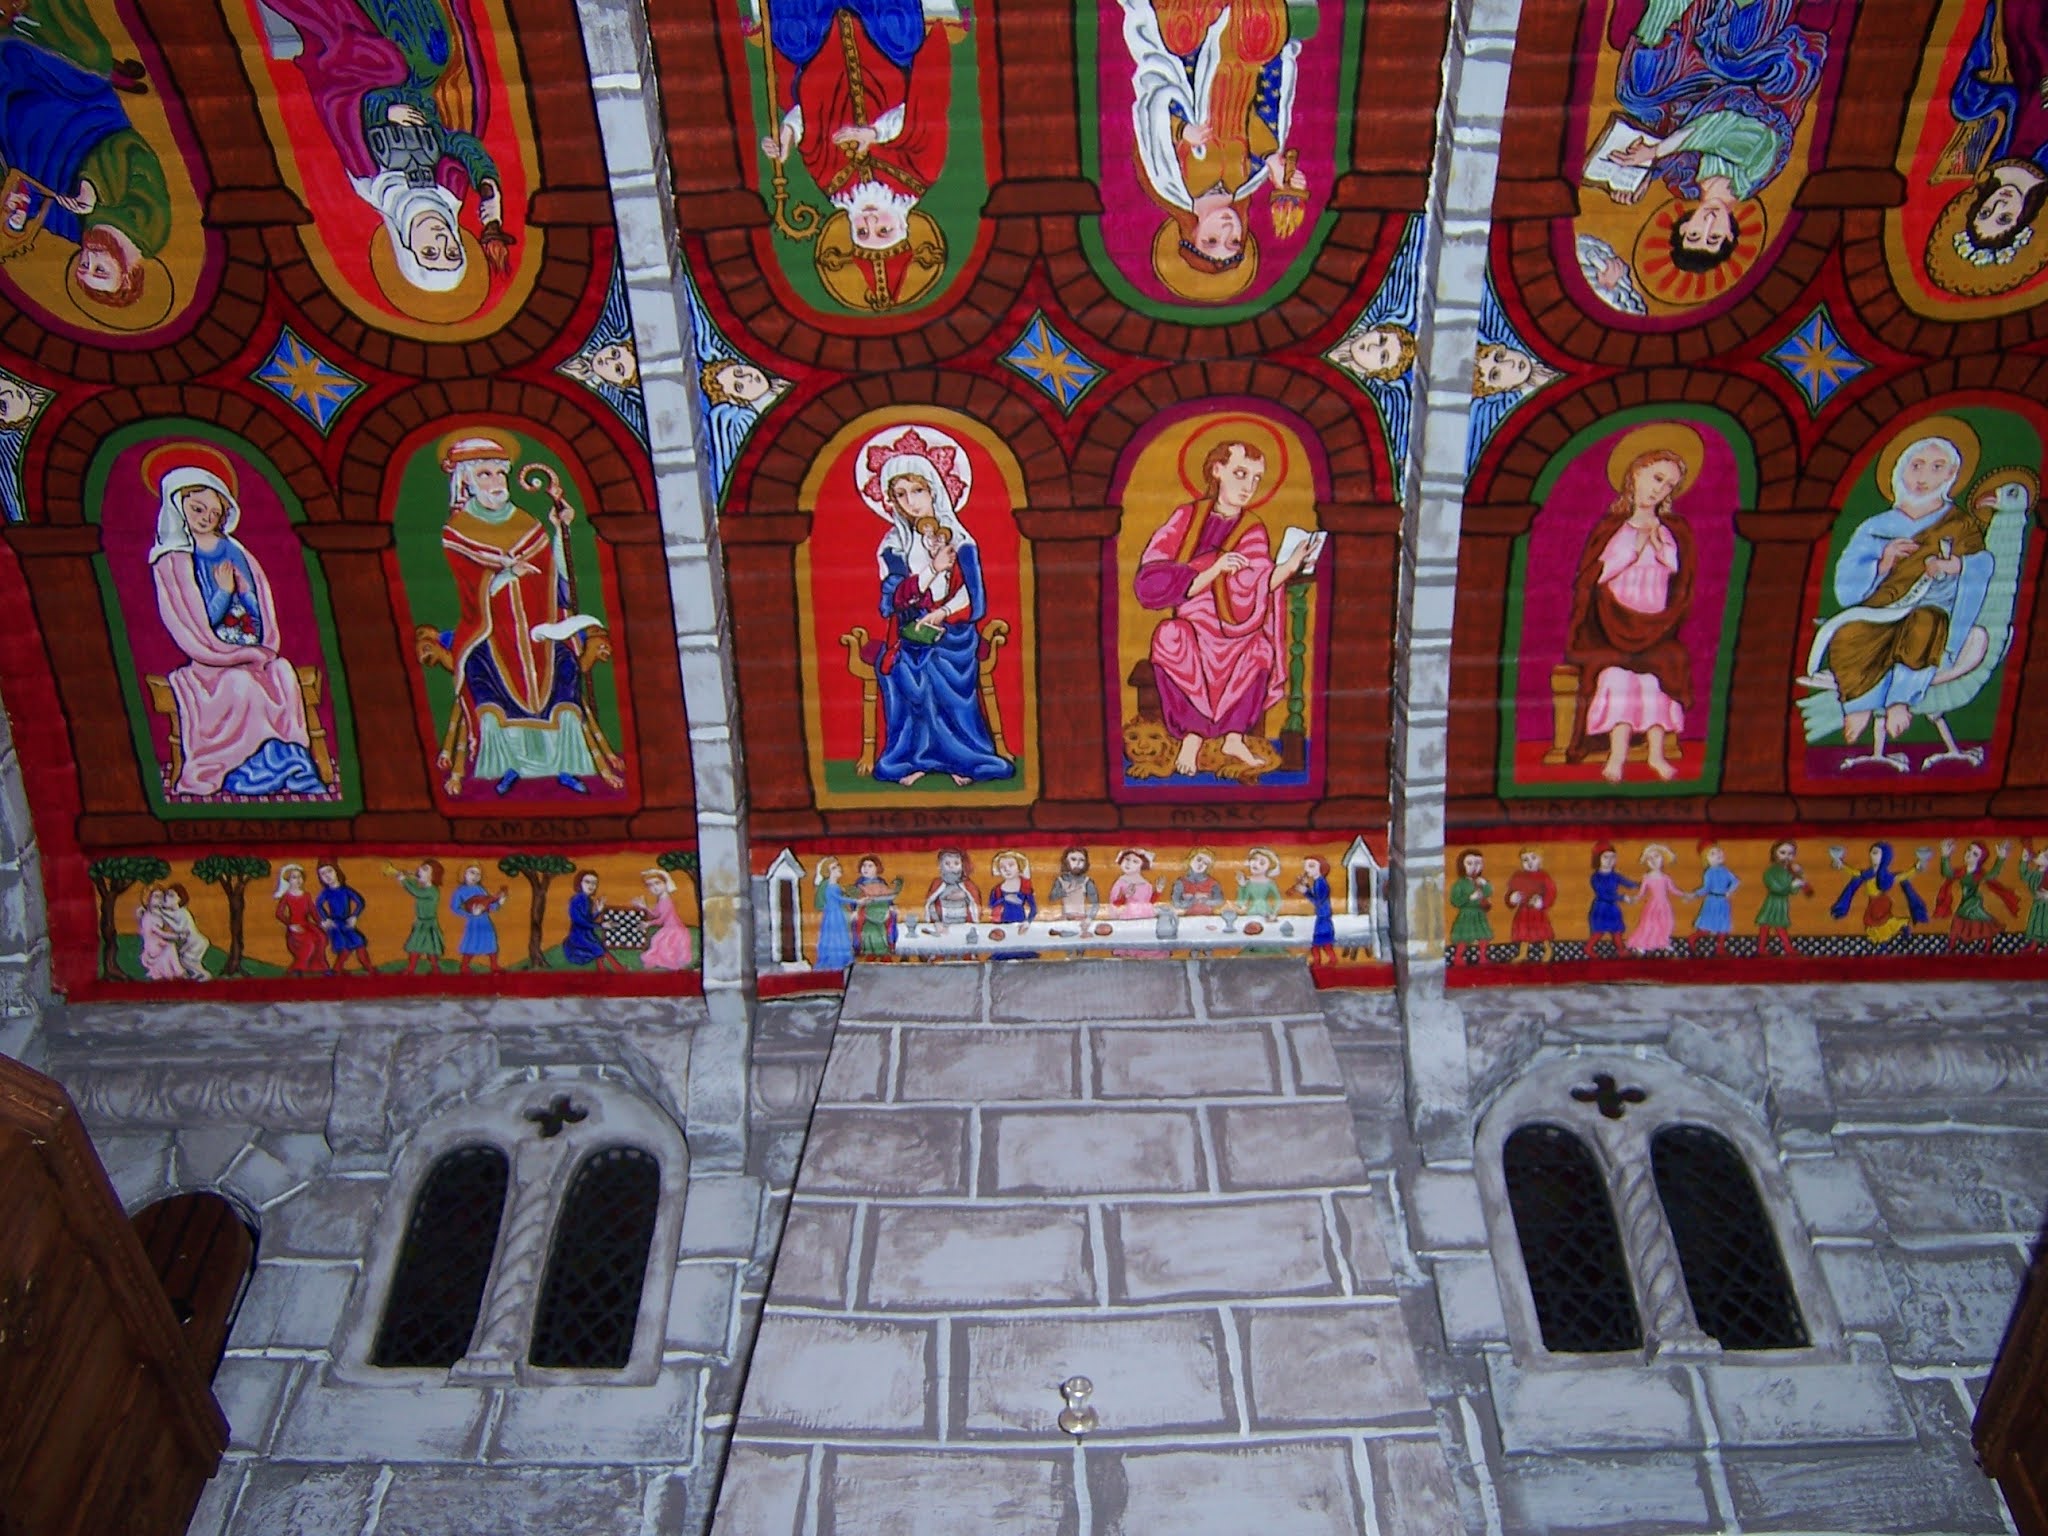
And I suppose you want to see it in place in the Castle Great Hall...
 

 It is really difficult, even with the flash,
 to get a picture of the entire ceiling in place!


At least this one sort of shows the floor details!

Well, Dear Readers, I made a lot of Progress
 painting the Saints.
And they might even be nearly Finished!


Tuesday, November 16, 2021

More Progress...


 It's All In The Details...

I know it has been a few weeks, Dear Readers, since I showed you the Carpet stitching. I have been working on it as often as possible because I am so eager to see how the design looks when the colors are in place. All I really have for a color guide is a blurry small picture of a completed carpet (this is a very old kit) and the printed on canvas, where you can see the colors are not accurate. So it is being a delicious voyage of discovery as each section and color of the design is added. In my haste, I have made a mistake or two... and only realized it when it was too late to unstitch the mistake. But they are small errors and can be counted as "authentic carpet variations" according to the experts on RL carpets!

I am loving every bit of the discovery!

But the main area of progress I want to show you
 is the painting of the Saints on the Castle Great Hall Ceiling.
I remembered to take a few "before' pictures this time!

Here you can see Saint Cecilia and Saint Mathew
 the way they have been for years as I dithered.
Saint Cecilia doesn't appear to need much... 
but I have never been happy with her appearance.
There are extremely few Medieval renditions 
of this Saint that I have been able to find. 
So I had to invent her.
 I am afraid I have failed to make her look Medieval enough.
(It is very difficult to paint in a more primitive style
 than the one you have been raised to know!)
It is mostly in her face...
 the expression is too modern... too personal... too something!
So I redid a lot of the expression.
 
I am not sure this is the final version... 
but I think she looks more intense.
Certainly she looks more serious.
Whether she is "medieval" enough I still haven't decided.
But I moved on to Mattieu.
He needed lots of details.... hands, feet, clouds above, footrest, robes...
Lots to fix!
The difficulty I have had with this one has always been
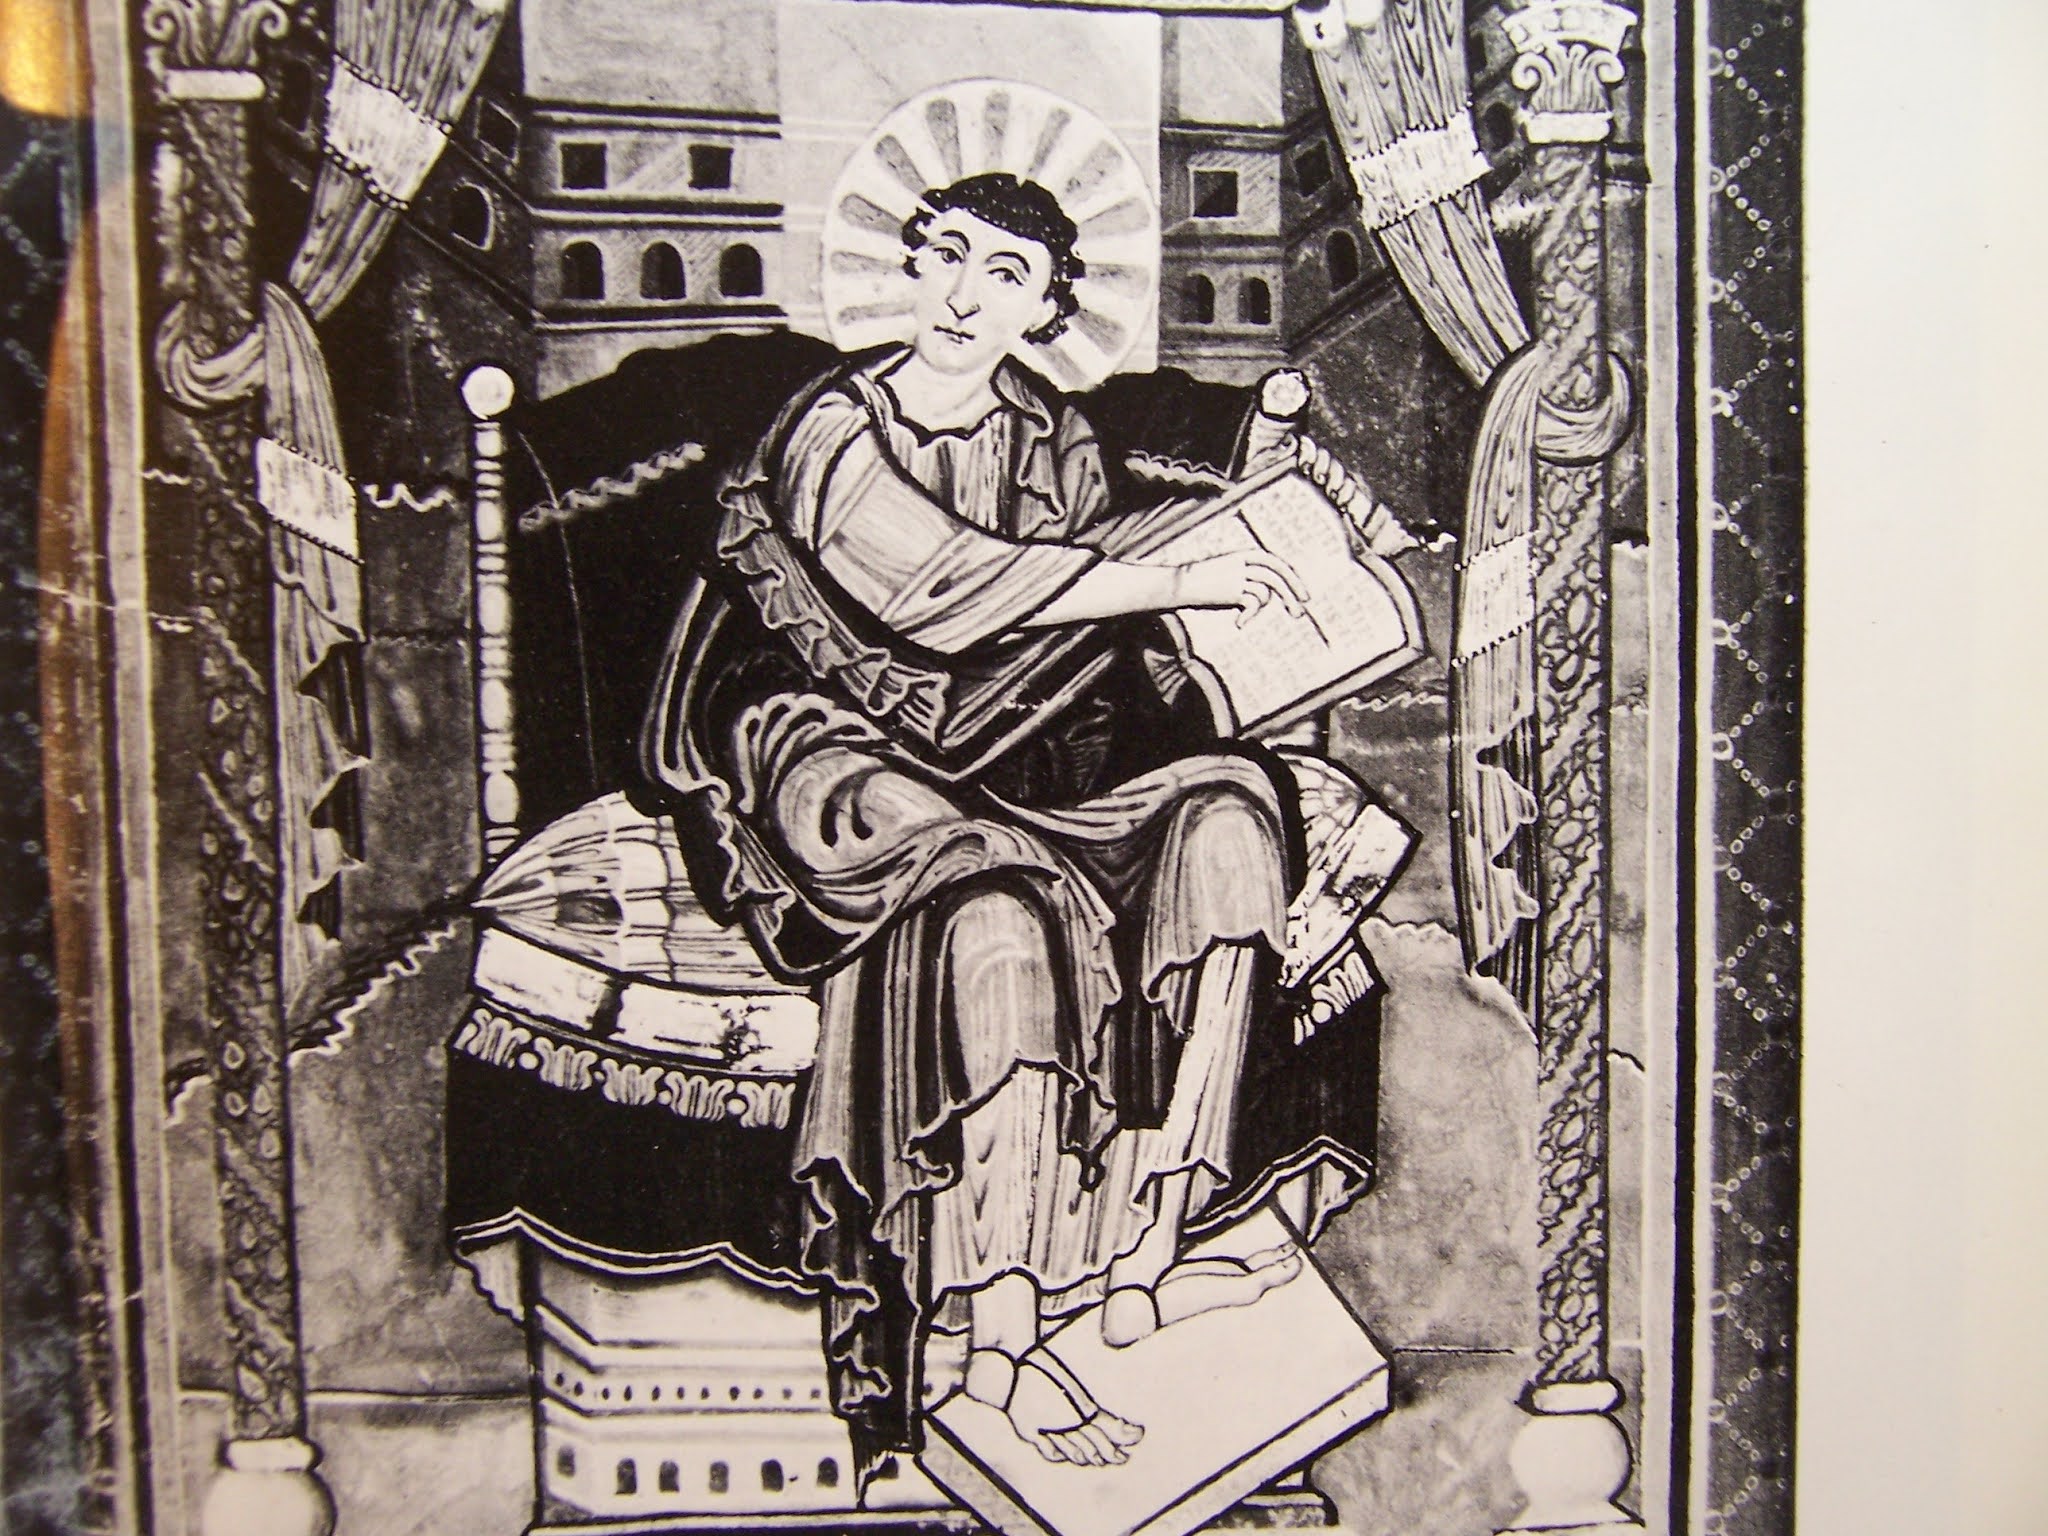
 that the original painting I am using as my reference
 is only a black and white photo in one of
 my older books on Medieval Art.
 

I know... my version doesn't hold a candle to him... he is so beautiful!
This is an illumination painted around 800 AD
 probably in the court of Charlemagne.
And the real challenge was to try and determine the original colors...
 or something that would "work" in a similar way.
The large areas that appear to be black are probably red 
(red photographs as black in a black and white picture)
but what were the other colors... 
the delicate contrasting colors of the rest of his finely folded clothing?
I could only guess.
 But we do know that the range of pigments
 available back then was very limited.
The colors most likely were pale greens pale blues, ocher (gold) and pale pinks.
Given the need to balance the colors overall on my ceiling,
 I chose green for his tunic and
 a combination of red and blue for the over robe.
 And the rendering of all that pleated folded draped material was a real challenge!
It is easier if you live with this style of clothes and you know how they fall and wrap...!
So forgive my naive attempts...


Alas, I did not take pictures of every step along the way.
For now... Mattieu has his robes completed....
And his feet hands and book...!
And I moved on to Lucia...


Here is the "before" of Lucia and Nicholas.
Lucia is another Saint with very few extant Medieval portrayals.
I thought the one in my "Hours of Catherine of Cleves" 
was a bit uninspired... and made no reference
 to her association with the Light (Candles or torch...)
So I again drew my own. 
I think I got a better "medieval" look this time,
 so she really only needed a tiny bit of ornamentation.


Her cloak, inside and out, needed details!
And her flame needed brightening...
Her seat needed details and her diadem needed color.
I am not certain about her gown....
 I may add a layer of something...
But for now I have moved on to Nicholas.

As you can see from the above picture
 before I added anything to him...
He needed his hands, hair, clothes, seat, gift, crozier, 
and especially his expression fixed!
Again, I did not take many pictures along the way.
My version is somewhat based on the one in 
The Hours of Catherine of Cleves, 
but only so far as his robes and crozier are concerned.
I needed to make his expression a little kinder...


Here I must point out the difficulty I have photographing this ceiling!
It is a curved surface... so the light reflects off the curves in a variable way.
And add in the ribbed folds of the corrugated cardboard.. 
and it becomes almost impossible to get a consistent light.
But perhaps you can see I have added his "gift" the golden coins,
 and added a layer of color to his miter and robe.
But mostly I have changed his expression so he is  smiling.


Here... come closer...
Just a little more shading and
 puckers at the corners of his mouth...
And he looks much kinder!
And that's as far as I got, Dear Readers,
But Progress is all in the Tiny details!


Tuesday, May 30, 2017

Patience Is A Virtue.....


Still Dreaming.....

I Bet you cannot tell, Dear Readers, whether I have added any details at all to Saint Bridget in all the time I have been on my "break"! It quickly became clear to me that just managing the essential tasks of each day was going to tax my abilities to their limit. The message was clear. I was going to have to be a "Patient".... and wait Patiently as my body healed! Not easy. Not fun. But necessary. Yet it did not mean I was unable to Daydream.... to add to my wish lists.... to think a thousand times "if only"....! And because everything takes twice as long to do with only one hand, I was really kept very busy... very slowly just getting the basics taken care of. I could not wait to get the cast off.... only to learn how incredibly weak my hand is now! I am slowly (Patiently?) gaining the strength and dexterity in my hand.... but it will take some time before it is as good as new. Even so, yesterday I decided to try to open those tubes of paint... the ones that get stuck tight if they are not opened frequently.... and to my surprise I was able to twist off the caps! I started with the black paint..... it has a large fat cap with a good grip.... and perhaps I could even remember a few places I needed to apply some black on the Castle Hall Ceiling.... still sitting there Patiently awaiting my return!
Ah, the Joy of it!

Perhaps you do not remember me mentioning that 
I still needed to add details to the trees where the hunters are riding.... 
Above you can see it before I added anything.....

And here are the Plowmen, needing details in their clothes.....

And the Shepherds too.... 
the trees and the clothes all need work.

And here you can see I have added black leaf details....

And in the grass I have added some daisies.....

And with the Huntsmen too.... leaves and daisies....
Such a trifling detail....

Here you can see it even closer...
I know it doesn't look like much.
But Oh, it feels like an enormous step!


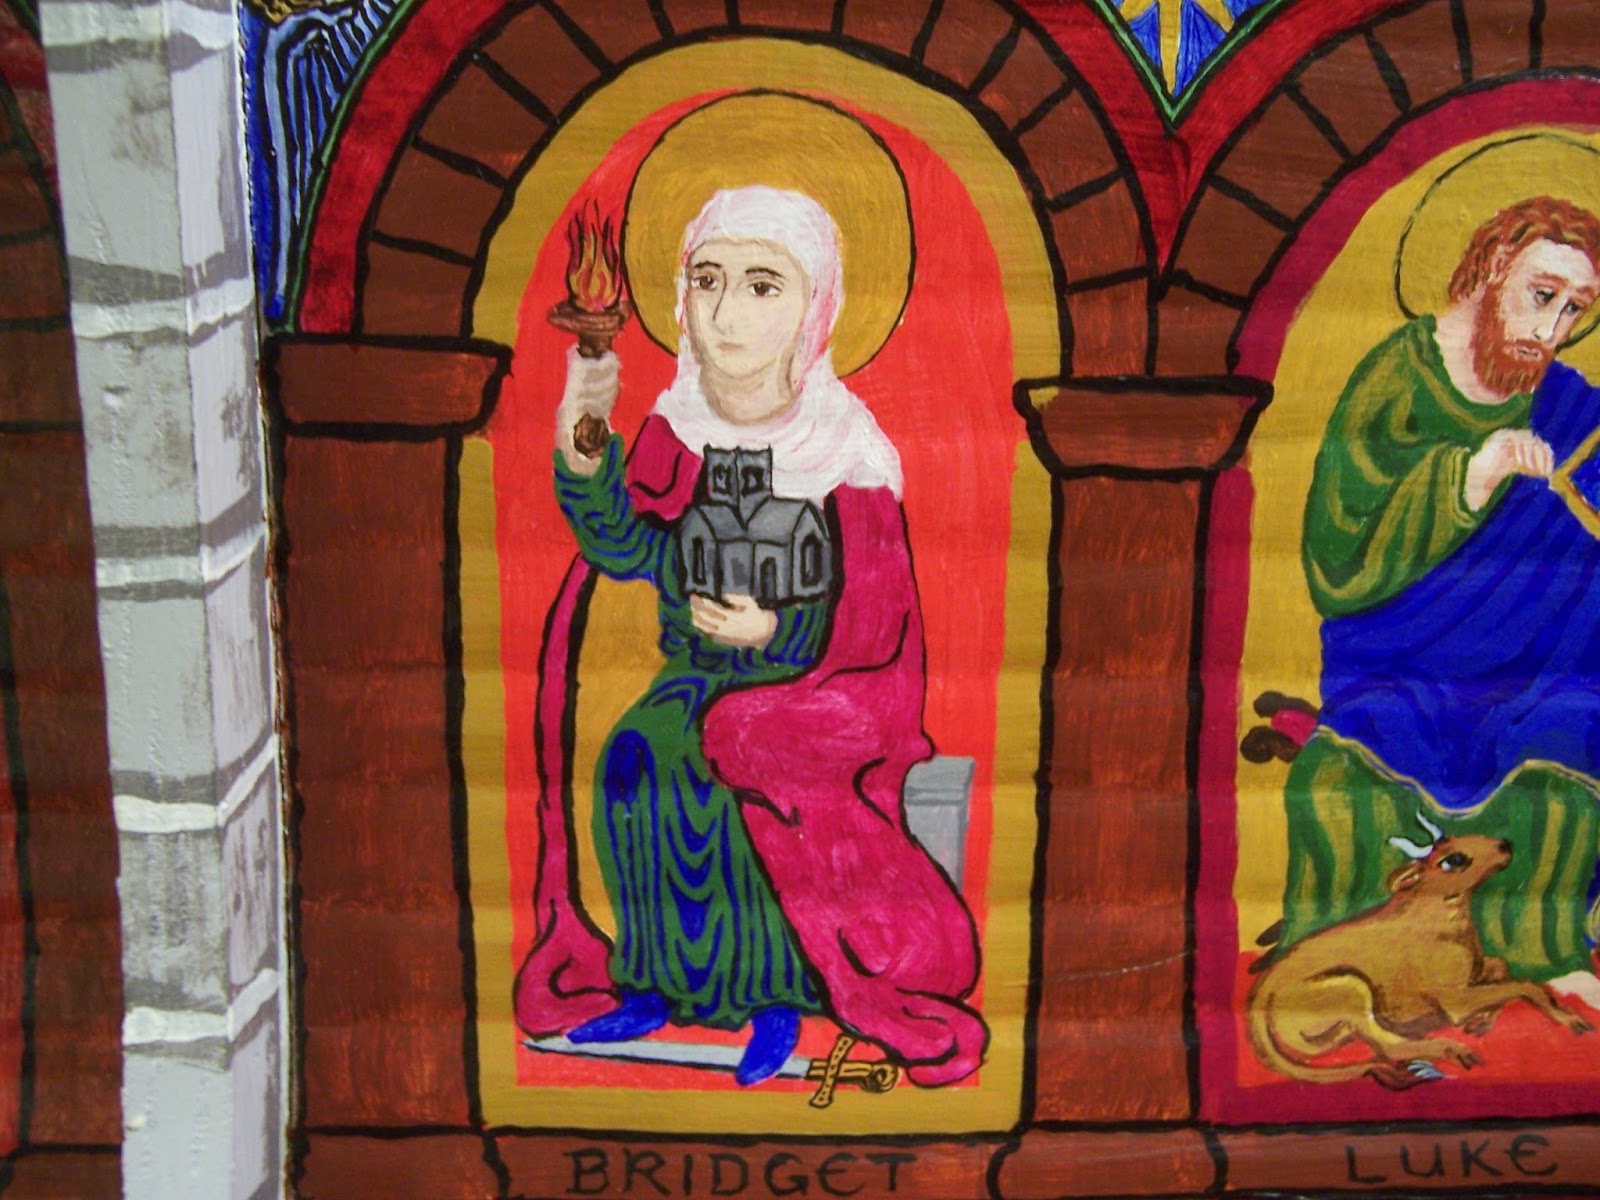
And yes, I added black to Saint Bridget too....
Outlining her halo, her torch, the church,
 and even the folds of her cloak!
I never would have Dreamed, Dear Readers,
 that so little would feel like so much!
And I am still Patiently Dreaming of all I will be able to do...
as I regain my strength....
Patience is indeed a virtue!

Tuesday, April 4, 2017

And The Saints....


Details Continued...

There is One detail I often forget, Dear Readers, and that is to take a "before" picture when I start to work on any project that has been languishing for a while. I wrongly assume that I will be able to find a picture "somewhere" in my archives that shows just where I was when I stopped working on the project. I started painting the Saints years ago and have only worked at them sporadically, and it is really difficult to find any good pictures of progress. Saint Cecilia, patron Saint of Music, was one of the last I started working on, and I have the fewest pictures of her. The above picture shows her after I had done quite a bit of work last weekend! The only starting reference picture I could easily find shows only a portion of her while I was focused on designing the border "people".

You can get a sense of some of the missing details... 
color on the cloak lining, harp details, the seat, the sword....
 and that is just the most obvious ones.
I added those details and then remembered to take a picture!
 
Several more small details have been added to this picture...
(Halo, harp, blossoms, cushion, hand....)
 
And then I needed to add some details to Saint Matthew too...

Even here I had added some details before I remembered to take a picture....
In particular, the hand from the cloud above.
The most notable part of Saint Matthew that needed work
 was the folds of his cloak....
 here just under-painted with the white.
This image is one of the most challenging ones for me. 
It is taken from a very old manuscript, 
from the beginning of the ninth century AD,
 probably made for the court of Charlemagne. 
And the only version I have of it is in black and white!
I must guess at the colors.... 
and try to emulate the graphic details....
Here, have a look!
There is just something about his expression 
that made me want to use this version!

Red colors tend to photograph as black, 
and I am certain his cloak would not have been painted in black,  
so I have chosen to make it red,
but the highlights are open for interpretation!
They could be a pale pink or a pale blue or even a green.....
But I have used pale green for his robe 
and I need to keep the colors balanced with those of
 the other Saints on the ceiling.
Mark is pink, John is pale blue.
And I wanted the details to contrast with the red, 
so I decided to use bright blue.

Here you can see it with only the first layer of blue added.
But it immediately presented me with another problem....
Once the folds were blue..... 
there was too much blue in this corner of the ceiling!

I plan to add some paler highlights 
to the cloak of Saint Cecilia, 
which will tone down the blue, 
and I like the bright blue on Saint Matthew's cloak.... 
(what other color would work here?)
The only solution I see would be to adjust 
the intensity of the floor under Matthew.....

Which is done by adding a grid of white and "checkers" of red oxide....
as if they are patterned tiles.
This shifts the blue just enough from brilliant to almost pastel.

And when I have added the paler highlights to the folds 
of Saint Cecilia's cloak, I think the effect will be 
to have tamed the rampant blue in this corner!

Here you can see the ceiling as a whole.....
And it is noticeable how much more intense the blue is
 on this half of the ceiling!

Meanwhile, Dear Readers, 
there are a few more Saints who still need attention...

Saint Lucia only needs a tiny bit of detail 
added to her seat and her cloak....

Saint Nicholas needs quite a few small additions....
His Crozier needs defining, 
his seat, his hands, his vestments, 
and his "gifts" all need attention.

And Saint Bridget needs many small details....
 her "church" needs definition, 
her cloak needs many layers, 
her seat is unfinished.... her halo too.

And finally, Saint Luke needs a few small refinements.
Most notably, the portrait of the Virgin, 
his paintbrush (missing altogether), and his foot.

And even though I have made progress with Saint Matthew, 
he is still far from done.
(That hand from the cloud!... the cloak..... the footstool....)

And Saint Cecilia too...
Her cloak and her gown and her seat all need layers.


But most of all, I am concerned that she looks too "modern" to me!
 I am sure this is because there are so few authentic 
Medieval images to use for her source. 
I could only find one illumination 
from the Hours of Catherine of Cleves... 
and because she isn't holding a harp in that picture,
 my version looks nothing like that one.
I might have to try to "age" her a bit!

So you can see, Dear Readers, 
when it comes to the Saints,
I will be painting Details 
for quite some Time!

Tuesday, February 17, 2015

Slow Tiles and Snow Tales....


Details and More .....

I was Home all last week on Vacation, Dear Readers, so I was able to (almost) ignore the weather and concentrate on some of my bigger more challenging projects! I say almost ignore the weather because it was impossible to ignore that it continued to snow and snow some more.... I was thankful that I did not need to go anywhere! We are not as buried in the stuff as they are in the Eastern part of the State.... but with several feet of snow piled everywhere... it is difficult to get around! So I stayed inside and tackled some of those big projects, and many small ones as well! It was Wonderful to just be able to dig in and jump from project to project! I have so much to show you, it is way too much for one post! The largest project was the tiles for the Conservatory floor.... I still needed to make more tiles, and paint them, and varnish them....

I needed to be more specific in the colors and patterns of the tiles than I was with the Castle Hall floor, because here I wanted to make an overall design that resembled a carpet. I repeated many of the patterns I had in the first carpet, but I also made a few new ones. And then I needed to make them into a design....

Here above you can see the basic design of the first "carpet" 
composed of all the left-over tiles from the Castle Hall floor.

And here is a view of the layout for the new "carpet".

I did end up swapping around a few of the new tiles with the old carpet.
I replaced a few of the central tiles to make the circular pattern complete.
And once I was happy with the pattern of the tiles, I needed to start gluing them in place!

To do this without losing track of the pattern, 
I lifted a section of three rows, in order, onto a piece of cardboard.
Then I glued them in place one row at a time.
After the first two rows were glued, I removed two more rows,
Being careful to keep them all in order.

This is a tedious and Slow process!
It took an entire day of gluing and shifting....
while the Snow piled up outside!
But eventually they were all glued in place
with space between for grout....

I let the glue dry completely overnight.
Then began the grouting the next day....

Of course, I was so busy adding the grout, 
I forgot to take any pictures until it was almost done...

Here you can see the grout only partly washed off the tiles.
As the grout dries you need to keep going back over them with a damp sponge.
You want to only leave the grout in the cracks, 
but if you rub too hard it removes too much of the grout.

Here the grout is all done and all dry.
But there is only one problem....
It looks too clean and new!!!
So I had to "dirty" the floor with several washes of 
watered down brown and black paint.

This also had to be left to dry in order to see if the color was dark enough.
And then I needed to decide whether or not to "seal" the floor with polyurethane.
I was afraid it would make it too shiny.... which it did!

But I figured I could always "scuff" it up again with an abrasive sponge.
Above you can see it before I did any scuffing.... it's a bit too glossy!
And while I was "muddying" the floor, 
I also dirtied up the base of the walls a bit too.
This is supposed to be an old and well used building!
This whole process used almost half my vacation time!
But I got it done!!!
And rather than leave you there, 
I will show a glimpse of a few of the other projects I worked on.
Beginning with the painting of the Willowcrest....

Yes, there will be more trees on the bedroom walls....
Eventually they will look more like Spring than Winter!

These wall murals need to be finished before the walls are glued in place!

I also added a light over the door on the front porch....

Which I realized I had to do before I closed off 
access to the upstairs Hallway....
because the wires needed to be run across the floor 
and down the kitchen wall, same as for the inside hall light.

And while I was tackling Big Old Unfinished Projects...
I decided to make the Ceiling of the Castle Great Hall a priority!

Yes, those Saints are patient....!
I have removed the ceiling and set it up on my "easel"
really just a chair with arms which can hold the heavy roof panel!
This is really difficult to photograph... 
it is a curved surface, so the light reflects off it 
no matter where you position the light.


I worked a lot on Saint Hedwig.... 
here is a "before" picture.....

And here is an "after" picture!
I don't know why I am so concerned with 
making these Saints so detailed....
It is nearly impossible to see them on the ceiling....
But I guess it is a case of "I will know it is there"
so I must make them as detailed as I can!
The Saints on this side of the ceiling are now pretty much done...
it is the other side where the Saints are still very incomplete!
 
Believe it or not, Dear Readers, These were Not 
the only projects I worked on this week!
I really astonished myself with how much got done!
But I think the rest is better left for another post....
but before I go, I just wanted to show you more of the Tiles....
And the Snow....

Because surely, one of the Great Pleasures of being Home all week
was being able to play in all that snow when the sun came out!

Piled high around the doors....

Burying everything  in white...

But perhaps we can just have a glimpse inside....
at the sun on those amazing tiles....

And somewhere in there the seeds are still sprouting...

And we are so busy admiring those tiles,
we have no time for re-potting the seedlings!

And just in case you need to see the real life snow....
My garden gate barely shows above the drifts!
So there you have it Dear Readers,
Slow Tiles and Snow Tales, or Snow Tiles and Slow Tales....
Details, details, details!
I have been busy on my Vacation!