Showing posts with label Folly Bed Nook. Show all posts

Tuesday, January 5, 2016

Picky Picky!


Little Details.....

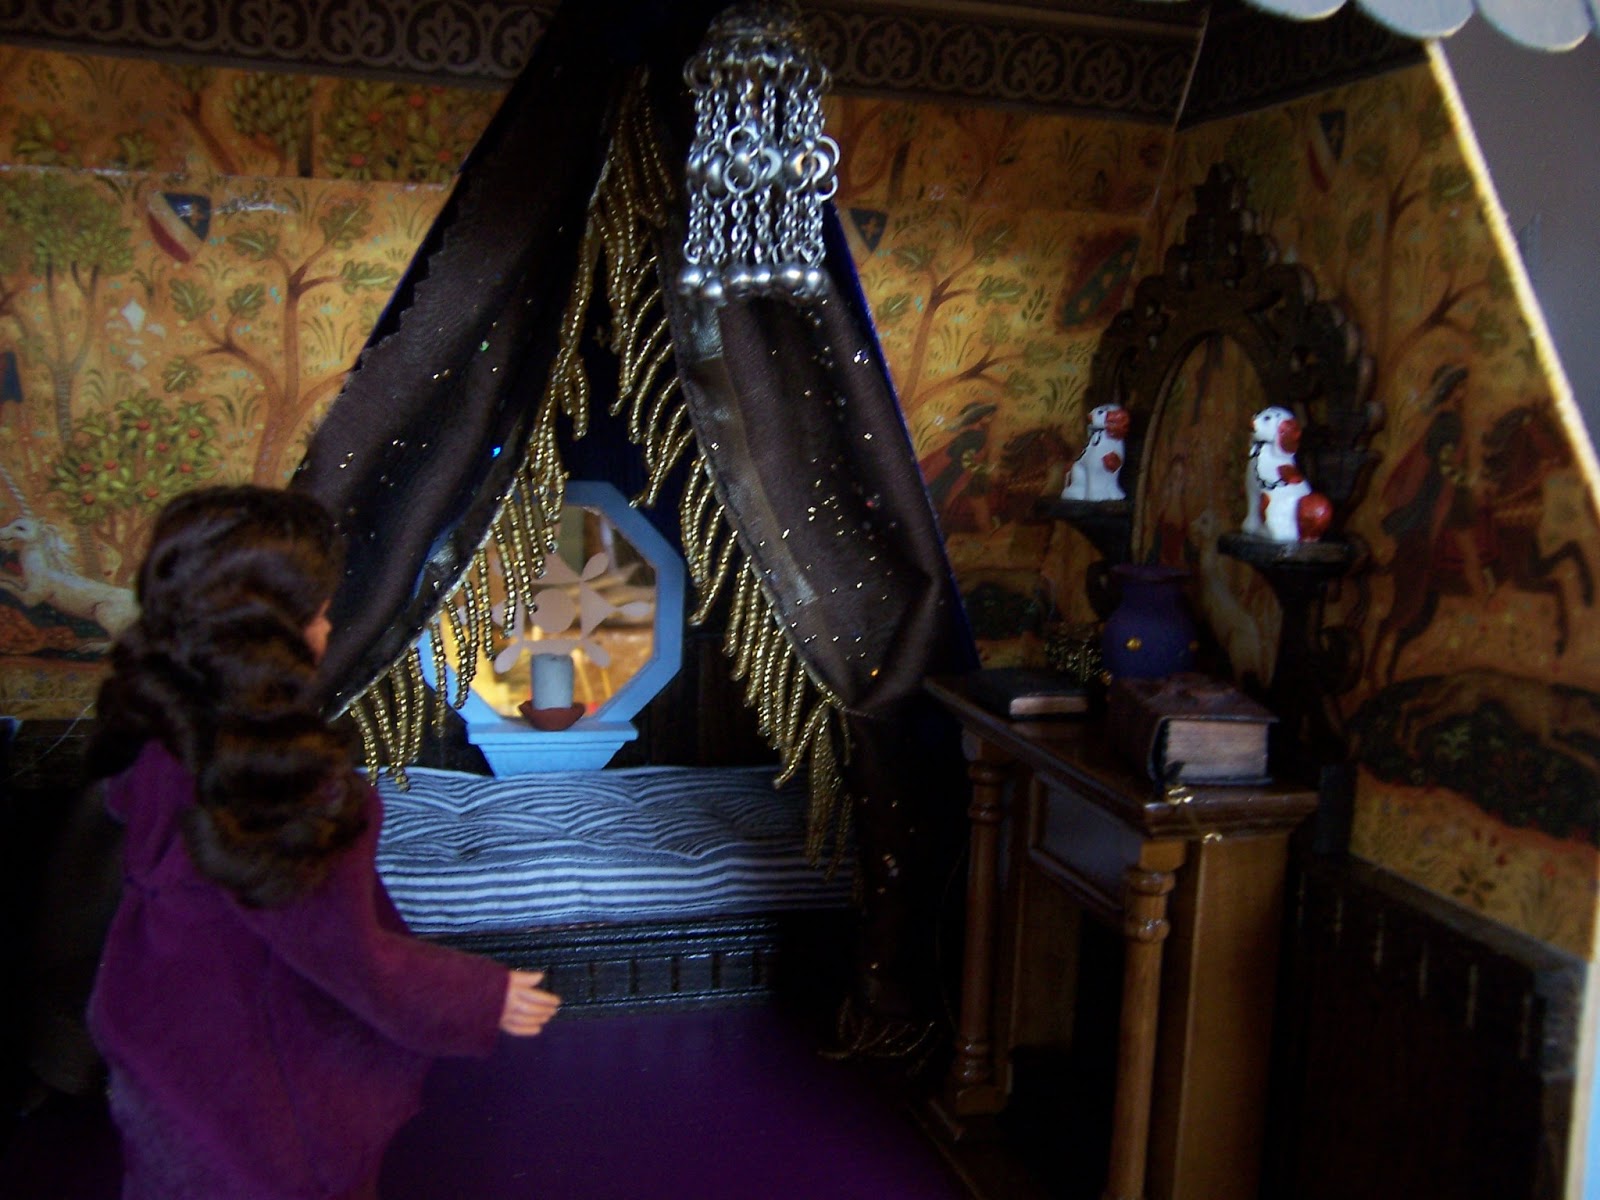
I had a couple of days of Holiday Time left, Dear Readers, after I had finished painting the Christmas Card (see previous post for a picture!), and had hoped to get a Great many things done on All my mini projects! But, as often happens, every little thing takes longer than you could imagine to complete.... and the Indecisive part of my Imagination prevented me from Choosing the best projects for the moment.... so I did not get very much done at all. But I did get a few Little Things done.... even ones I had almost forgotten about! I hope you can recognize, or even Remember The Folly Bed Nook in the above picture (It is so dark at this time of year it is difficult to get a good photo!) Long ago I had started to sew a pair of bolsters for either end of the bed, but I was not at all satisfied with the way the first one was turning out, so I put them aside and forgot about them! Well, for some reason, I decided it was time to finally finish them!

I had sewn one of them but did not have the right material to stuff them. I wanted to try sand or beads so they would look heavy and sag in the middle. They are sewn the old fashioned way by hand, and at first I thought they would be too large and bulky for the bed nook. But then I decided to over-stitch the ends, making a welt around the end seams, which gave more shape and definition to the pillow. I had bought some bird gravel and used it to stuff and I really liked the way it came out after all! Then I tried to make the second one to be just like the first one, and even though I had cut the pieces at the same time, the second one did not turn out right at all! I had to pick it apart and re-stitch it more than three times! (This never happens to me!) Eventually I got it close enough to the first one....

When they are in place on the bed they are almost impossible to see.... 
(Maybe the next time there is a sunny morning.....)
But I know they are there!

And because one is at each end of the bed.... 
you don't notice any difference in size at all!

Another Tiny little detail that I worked on was the Curtain rods in the Willowcrest.
It bothered me that it was impossible to remove the curtains from the rod once the walls were all in place! This is because the rods are made to slide out the ends of the eye-screws that hold them to the walls.... but you need enough length of the wall on either side of the window for this to work!  Which just isn't there in these small rooms! I decided I would need to open up one of the eyes on each set of curtain rods.... so that it was a hook instead....

This way you could lift one end of the rod out of the holder 
and slide the curtain off the end!
So while I had taken the Willowcrest mostly apart.....
I fixed all the curtain rods!
And while I was at it I worked on those pesky window sills....
remember the problem with the muntins abutting the window sill on the exterior?
When I fixed the exterior side.... it left an unfinished strip visible from the inside!

Here you can see I have covered three out of four of the panes... 
that little white stripe at the bottom on the right 
is the exterior frame showing on the inside.
(Sorry about all the reflections!)
You can also see I have added the under-painting for some more flowers
 on the wall murals along the bottom edge.
And once all the window frames had been fixed... I added the interior sills.
It makes the windows so much more realistic!
(The kit design does not include any interior window sills!)

Here you can see the window sill added to the interior of the window.
(Sorry it is so dark.... night again!)
And the exterior window sills that had not yet been attached I fitted and glued in place.
It takes quite a bit of picky carving away at the notches in these pre-cut pieces 
to get them to fit flush to the frames and the wall!

These also required the exterior window frames and muntins to be added.....

And I had Almost enough already painted pieces 
of the very fine silver trim I am using....
But not quite enough! 
I will have to cut and paint some more pieces 
in order to complete all the windows.

And yet another small detail I worked on 
was the fireplace for the Willowcrest bedroom...

I had not been happy with the way the paint looked 
the first time around, so I re-painted it!
It is made of wood, but I wanted it to resemble carved stone.
(I also added a thicker wooden base for the hearth.)
And painted the bricks on the hearth interior....
And tested the look with the Regency Fireplace insert....

It looks lovely, but Much too clean!
So I added a lot of "soot".

Which really doesn't show well in this photo... 
the light is too glaring!

Maybe you can see the soot a little better in this view.
I have not attached the plug to the wiring for the fire yet.... 
so we cannot see it lit.
But you can sort of see the additional tiny flowers 
I added at the bottom of the murals....
(Very picky little details!)
Tulips, violets and dandelions....

So hard to imagine at this time of year! 
(And there will also be a baseboard added at the bottom.)
I will have to get some better pictures for you in the daylight!

And Another project I picked away at was the 
Painting of the rocks on the Cloud Palace Tower!

Believe it or not, Dear Readers, this is a part of the project 
that one could never possibly be satisfied with the results!
The rocks are fine.... but they are all different
 from the ones painted on the lowest section of the Tower!
It is like when you buy yarn and you get two different dye lots 
and don't notice until the project is all done and you can see where one color is off!
The paint batches for the rocks will never match the older part!
So I have decided that it is "good enough" and moved on 
to gluing the parts together!

Which means I can construct the beds 
for the Guy Bearys.... in the "Bear Racks"!
(Otherwise know as bunk beds and a loft!)
Once I get the interior structure glued 
I can add all the rest of the "Rocks" 
to the outside of the Tower!
 
And one more thing I want to show you, Dear Readers, 
is not a project at all....
But a Gift I received for Christmas from my Dear Niece!

She sent me this fantastic roll-top desk 
and the beautiful painting and the bouquet of flowers!
Thank you, Hali!
The only way I can be picky with these is Where to put them... 
and I think the roll-top desk might just belong 
here in the attic of the Willowcrest!

So Dear Readers, I hope I have not bored you 
with all these Picky Little Details!
Sometimes you just have to be Very Picky!


Monday, April 8, 2013

Curtains!


The Well Dressed Bed....

I was Procrastinating, Dear Readers, so what I have to show you this week is not at all what I had Intended to be working on! But since the results of my Procrastination were SO pleasing to me...... I couldn't wait to share them with you! Some of you may have noticed that I have not mastered the art of making Curtains for my dollhouses.... and this is in part because I love the way windows look with no curtains... and so my attempts are mostly just lace scraps pinned over the windows! And while I like my windows to have no curtains.... I think all beds should have them! I can blame it on my Medieval Tendencies.... because when you think about it, Historically they put curtains on the beds Long before they started putting curtains at the windows!So it is that I have from the very beginning envisioned the bed in The Folly tucked into that nook and draped with sumptuous curtains! I even knew exactly which Fabric I wanted to use.... and I was pretty sure that somewhere in all my "supplies" I had a beaded fringe that might be perfect for the trim!
And because I was procrastinating, I thought I needed to find that beaded fringe.... 
just to see what it would look like with the fabric... 
It took a while, but I DID find it!

 
 Here I am "Testing" the fit of the fringe 
on the quickly thrown together "Test" sample of the fabric,
and because I was just testing things, I didn't take many pictures of the process.... 
It was just slow and careful stitching of slippery fabric to wiggly beaded fringe, 
after all... just "Test" stitching... 
to see if it would work the way I hoped... 
The stitching was very slow and took much of the afternoon....
(This is that glitter strewn gauze that I use so often for my "Smoke effects" in my fireplaces...
 and the glitter pieces for candle flames....)
You can imagine my surprise when the beaded fringe turned out to be EXACTLY the right length!!

So then I had to do a "Test" of how it fitted in the opening for the Bed Nook......
Just thumb-tacked in place temporarily....  
And, of course I just Had to see how it would look pulled back to either side....


So I quickly wrapped a fine piece of gold thread around the curtains 
and attached it to the thumb tacks...
And then I thought we should see it with the lights on... 
even though it is the middle of the afternoon.....

Aaah..... that is Really looking Just the way I had Imagined it would!!!

Even though it is just Temporarily pinned in place...... 
because the bed still isn't even made up....
Can you imagine sleeping there?

And I had to take more pictures the next morning.... 
because the sun was shining into the room.....
Would you close the curtains when you slept...?

And let me bore you with some more pictures.....
I was procrastinating.... so I had to play for a while.....
and added some trinkets to the mantle...
(the books are some of Dark Squirrel Victoria's Divine creations...!)

And then Joanna heard there was work being done on The Folly.....
So she had to come and have a look....


She noticed the decorations right away.....

I has been such a long time since she visited at The Folly....

She really couldn't remember whether the curtains had been there before.....

But she was fairly certain she would have remembered such a Gorgeous Fringe...!

And the mattress.... as old as it looked... 
she was sure it hadn't been there when she last stopped by...
It was surprisingly soft for such an old mattress!

But after so MUCH Procrastination, Dear Readers, 
I Did finally get started on the project I had been intending to work on! 
And what was that, you ask?
Curtains, of course! 
Tiny Bed curtains for the Pagoda bed in the Tree House! 
But it already has curtains, I hear you say.....! 
Alas, those are just the lace Under-curtains.....
I really wanted it to have embroidered silk curtains... 
And I wanted to use that green silk.... 
in particular I wanted to have the gold fringe edging of the silk be the edging for the curtains!
Which meant carefully figuring out How I was going to embroider the silk!

Here you can see I have basted the green silk to a piece of muslin.... 
so the whole piece can go into an embroidery hoop.....

And if you look very carefully you can see that I have added some stitched guide lines.... 
so I know the area I am to embroider within....
And then I dug out my Treasure worth almost more than Gold itself.....
I inherited some of my Grandmother's sewing things....
These are Antique Wooden spools of Silk Sewing Thread!!!


In a lovely assortment of Rainbow colors.....

And because I have not Embroidered anything in Quite a few years....
I am just Testing....
(Which really means making it up as I go...)
Starting with a vine in green silk... using a simple back stitch....
 
I started with the curtain that will face the back wall.... 
so I have room to make mistakes...

And I added the flower "branches".....

And started on the flower blossoms.... 
in red, mauve and coral.....
Using a simple satin stitch....

It is supposed to end up looking like "Crewel" Embroidery... 
a style often worked in wool and having varied and exotic flower and plant forms...
So I am just making the shapes up as I go.....

One flower after another.....

Although I did make myself a rough sketch as guide....
To keep the stitching at the right scale.....
Each curtain will be two and a quarter inches long....
But because I Procrastinated so long in starting... 
It is a long way from done!
But I am really NOT sorry that I was procrastinating.... 
especially when at the end of the afternoon as the sun was setting, 
It reached all the way across my house and shone into The Folly.....

A slice of sunlight just hitting the Window Perfectly.....

Casting the beaded Fringe Aglow....
Oh, I LOVE that magical light!!
And even though they are not Finished....
Neither the Tiny Embroidered ones, nor the Sparkly Beaded ones....
Yes, I  do think Every well Dressed bed should have Curtains!