Monday, January 28, 2013

Building Up The Fire!


Baby, It's Cold Out There...!

We have been enduring a Cold spell in this part of the World, Dear Readers, and while it has in No way been Record setting, it has nevertheless stayed below freezing for more than a week! So it can be no Surprise that I begin the decor of the Tree House Bedroom by building the Fireplace! I wanted this Fireplace to have a very Roccocco  feeling to it... and at such a small scale, I was not sure I could pull it off! But I found an old piece of decorative moulding that seemed to have the necessary proportions and so I decided to give it a try! To begin with I cut several cross section pieces about 3/16ths of an inch wide....
Here you can see me beginning to test them against the already painted fireplace opening....

And here you can see I have cut two of the pieces short to meet in the center.......

I wanted the curves to be softer so I took my smallest round file to the edges......

And I also cut a top surface out of thin 3/8 inch trim and shaped it to fit.....

And then painted it all black and "marbled" the surface with white.... 
I think I will try to make the veining of the marble a little finer... 
it looks so coarse in these pictures!

I attached the mantlepiece to the wall section that had the brickwork already painted.... 
Oh, and I also painted all the room walls a lovely soft Grey-green color.....

Then I glued it to the "Marble" hearth slab... 
and attached the painted brick fire-surround to the back side.....
And then I had to test it and see how it looked in the Room...

Of course, it was Dark and Late... 
and we are at the stage when all the walls are just propped in place 
so if you even Think a jumpy thought... everything falls apart...!
But I couldn't leave it there.... 
I Had to see how it would look with "Fire" burning in the hearth....

Of course, I completely forgot to take any pictures of the process of Building the fire itself!
So you will have to bear with me while I just show you the end product...

From as many angles as I can.....

And more shots in the Bedroom....

And a glimpse through the Balcony doors.....

Well, it's not quite finished... 
I still need to add glowing coals and andirons and a fender... 
But it's a Start!
So, while you're waiting, Please come on in and Help me build up the Fire.....
'Cause Baby it's Cold out there...!


Tuesday, January 22, 2013

The Next Room


Ready Or Not....!

There are still a few items I want to make for the Tree House Library, Dear Readers, but they will have to be added later because I just Could NOT wait to start on the Next Room in the Tree House! There have been several things about this next level that have been unresolved in my mind as I try to envision the structure I will need to build. But then one night I had a Dream, and in the Dream I could see the room so clearly, it was as though I were walking around in it...! So is it any Wonder that I had to get started right away? For this next room will be the Master Bedroom....
In the picture above you can see that the beginning is much the same as for the last two rooms....
I cut the walls out of very thin plywood and loosely taped them in place while I decided the position of the doorways..

The room will be entered from the hall at the top of the stairs.... 
which runs at the back of the room....
And on the right side where the stairs usually go up in the lower rooms, 
in this room the door will lead not to the stairs, but into a dressing room instead. 
The stairs will take a different path upward..... 
but I will have to show you that step when we get there!

And as usual, I have started on the design of the room by working on the outer door wall first.....
And rather than have windows, like all the other rooms, 
 it will have doors that open onto a little Juliet Balcony.....
Here below you can see the roughly cut doors.....

And here you can see the Hinges being added.....
 
(And you KNOW how much I LOVE Hinges...!)

Because it means the Doors Open and Close...!!!!

And here you can see the rough framework for the Balcony floor....

And the Outer Door is attached to the Frame of the Tree House.....

Which is starting to look quite tall...!!

Oh, I think I am going to LOVE this little Juliet Balcony.....!

With the doors that swing wide open to let in the fresh breezes.... 
(I will need to patch the wood on the insides of the doors....)
And the view through the room to the hallway door beyond.....

Please Forgive me while I play with the Hinges...!!!
Because Ready or Not.....
We're in the Next Room!

Thursday, January 17, 2013

Hiding Wires


Tying Up Loose Ends......

You May remember, Dear Readers, that it was AGES ago that I began to try to complete the wiring for the Lights in The Folly! The difficulty is that this kit has Very Thin walls! There is no room to bury the wires in channels cut into the walls themselves, and so I am having to be sort of Inventive with ways to conceal the wires and still end up with lights where they would be most practical and realistic! I have decided that this is a step that has been delayed long enough, as all the rest of the decorating depends on the lights being in place. There are still several lights I have not decided where they will go.... particularly in the kitchen.... but I have decided to at least Finish the ones that I do have in place!
For the Upstairs bedroom I have made a very Bohemian Style ceiling fixture out of a jewelry piece... a Silver bangle from India.... and you can see (in the picture above) it is attached in the topmost peak of the roof. I ran the wire across the wall inside the peak and will hide it inside the roof edge over the stairway....
where you can see it here still dangling loosely....

It is really difficult to get pictures of this... 
so you will just have to use your imaginations....
Eventually it will run in a channel down the edge of the kitchen wall..... 
I haven't finished this yet!
But I did hide most of the wires for the Sconce in the Book Nook.....

I forgot to take pictures of the process.... 
but the wires run down under the decorative wood trim below the light.... 
and come under the window beneath the baseboard trim. 
See... you can't see the wires! 
They will also get hidden in a channel along the kitchen wall... 
and so reach the plug strip in the cellar below the house!

For the rest of the upstairs lights, 
the candle in the bedroom nook, and the wires for the Porch light, 
I have run them through the wall into the bathroom......


Where I have had to hide them under the baseboards running around the bathroom walls......


Here you can see the wires where they come through the wall....

And here the baseboard on the right side is in place,
 and I have started the process of trying to glue the wires in place neatly enough that they can eventually be covered by the baseboard.... 
which I have carved out on the back side to accommodate the thickness of the wires....

I glued them one wire at a time... one section at a time.... 
taping them in place until the glue dried...

And even this way the thickness of the wires is such that I will have to gouge more out of the back of the baseboard for it to really fit snugly.....

I will also add a section of baseboard over the wires at the far end.... 
although with the sink and tub in place they are hardly visible!
The overhead light in this room (when I decide what sort of light is needed...) 
will run down the roof panel the same way the Bedroom light does....
But already it is looking So Much more organized!

And while I was tying up loose ends.... 
I decided that the time had come to bury the wires on the Tree House too! 
I probably haven't shown you what a terrible mess the wires were on the back side of the Tree House...!

Keep in mind that the Tree House is run on battery powered LED's which means they have polarity and so it is very important to keep the red wires and black wires separate! If they touch... they blow the bulb... and I am NOT replacing any of the lights in the Tree House! So I have been treating them VERY Carefully while I try to figure out just How and Where I am burying their connections!!! These kits from Evan Designs are Wonderful and very easy to use... and it says you can join up to ten LED's on one battery. I have used nine LED's so far in the first three rooms of the Tree House... so I decided it is time to fix this circuit grouping in place. The lights for the next rooms will go together on another battery and it will need to be kept separated from this first circuit so no wires can get mixed up in the wrong circuit.!
I started by deciding that the red wires and black wires needed to all meet up at the base of the tree in two separate spots.....

Of course, it is really difficult to see these clearly...... 
but I had to shorten the wires that were close to the base, 
but still leave enough length to manipulate them and twist ends together securely.... 
And because the wires from the higher rooms would not reach the base junction spots... 
I decided to join them together higher up and run single wire extensions down to the base joins...... 
Here you can see the upper wires joined together before I added the extension wires....

And I have carefully covered all the junctions with shrink tubing..... 
which you can see here below before the shrinking.....

And here it is  with the wires all joined..... 
I have taped them in place with masking tape 
which will all be covered with more paper mache when the outer layer of the Tree is built.....

And now for the Really big question.... do the lights Work...???


YES!!! They do!!!
All neatly connected to One battery pack.... 
with long lead wires so I can adjust them later...!

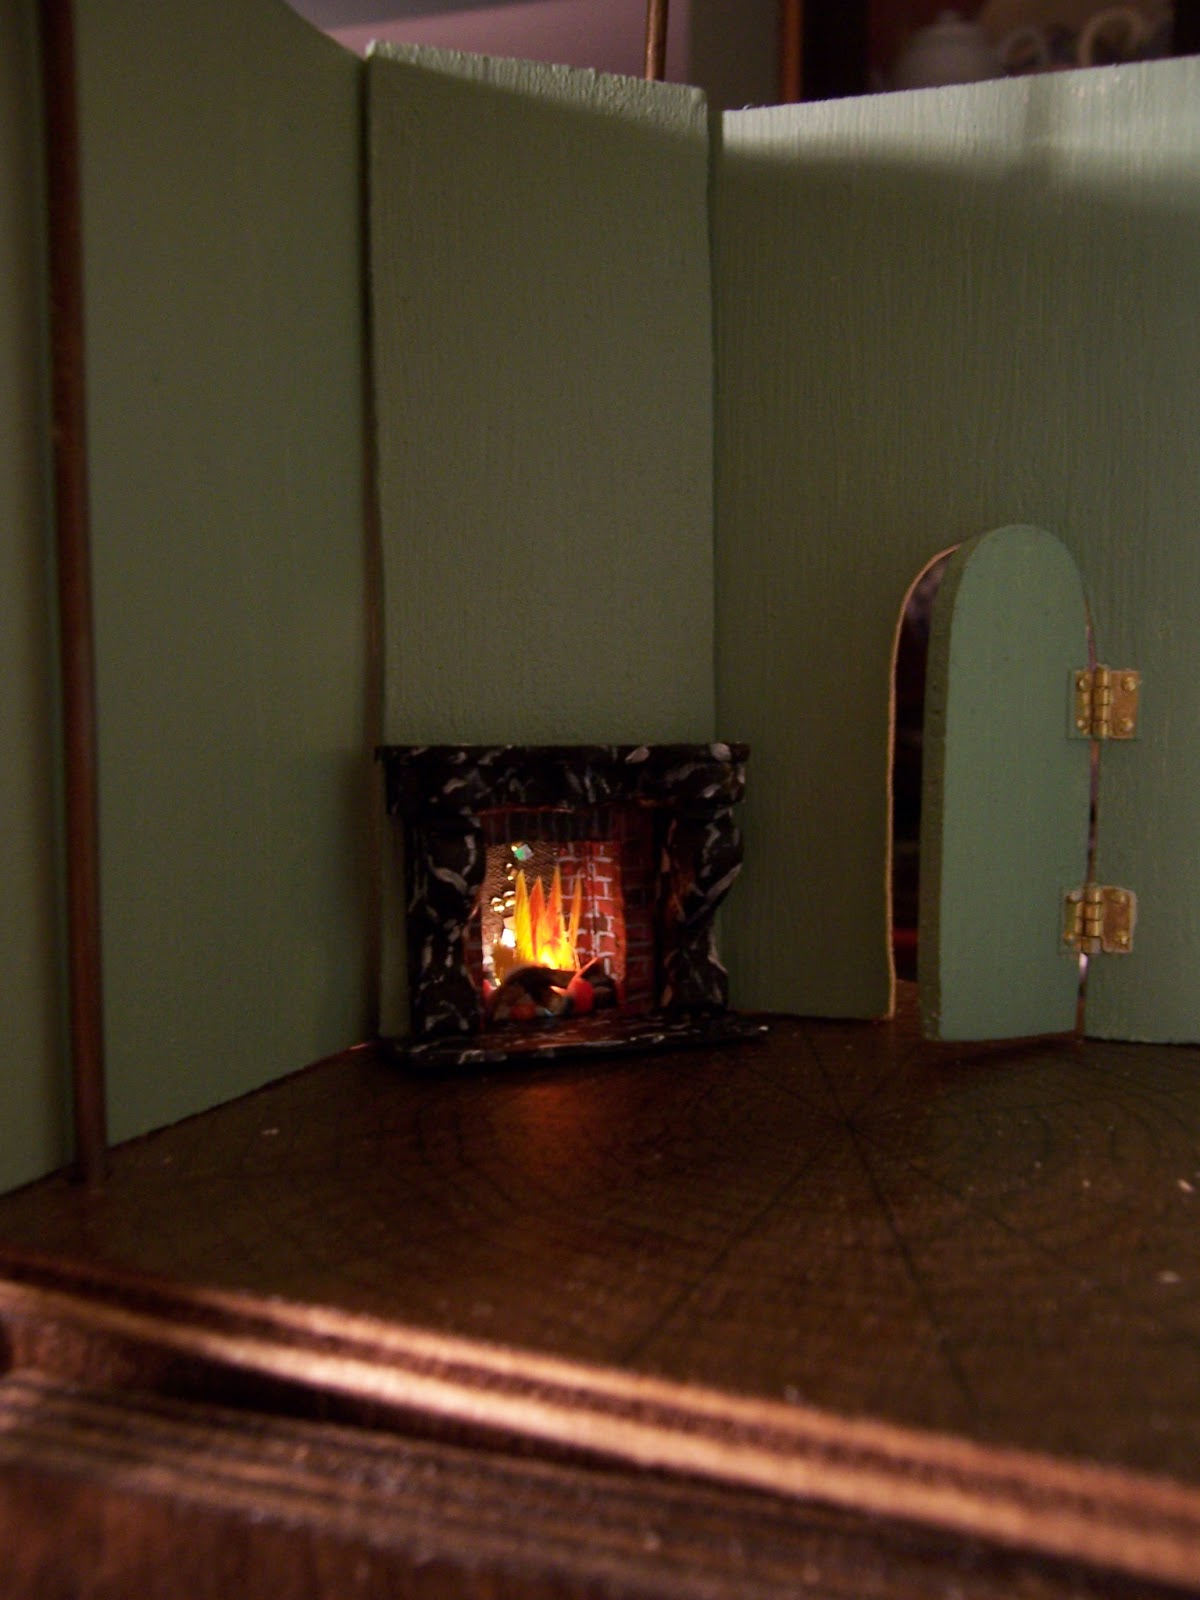
And The Folly Too....

The wires have been covered with a piece of cardboard to make the surface of the bed nook.... and in the corner where they go through the wall they are painted brown to camouflage them! There is an outlet in that corner too in case a table lamp is needed as well....
And when the lights are on....


It's starting to look ready to finish decorating .....


I've made some real progress.... 
But there is still a ways to go with hiding all the wires!
Just a Little Tying up loose ends....!

Tuesday, January 8, 2013

Sealing.... And A Little Bit of Ceiling....


More About Grout..... 

There has been very Little added to the Tiny Tree House recently, Dear Readers.... because I have been so preoccupied with the Bigger issue of the Castle Tiles and whether or not to use Grout! But I have managed to fit the final section of the Library Ceiling.... that Incredible Blue with the Glittering Gold Stars just takes my Breath Away!!! So I couldn't resist showing you a view of the entire ceiling .... before returning to the comparatively boring subject of Grout!
The Grout on the Castle Floor is nearly finished.... I am just not sure yet whether to darken the tiles a little more before I apply the final coat of "Sealant" over the whole floor. I have been waiting for a day when I am home and the daylight is good enough to judge the darkness of my "aging" of the tiles. I think there are a few places where the grout is still too light.


 I am pretty sure I am supposed to "seal" the grout after I have reached the desired color... and I plan to use regular polyurethane sealer. I have even tested it on the sample tiles and it looks good... so why am I worried? Well, I don't want it to look too "glossy"! Which is what happened to the Chimney bricks I have also been working on for the Folly Chimney! Here below you can see the egg carton bricks I have been (slowly) adding to the chimney... I started it last Summer!

And after a Marathon session of cutting bricks and gluing them on New Year's Eve while waiting for the Ball to drop.... I was ready to paint the bricks! Which you can see below....

The chimney is in two parts... 
divided where it passes through the roof....

And you must NOT look too closely... 
it is a bit crooked and will need some adjusting when it is attached!
You can also see the white base of the central chimney that has not yet had any bricks attached...
And having painted the bricks with acrylic paints, I decided to seal them with the polyurethane sealer before applying the grout.... only to have it make them Very Glossy!!!
You can see in the picture below how shiny and un-brick-like they look!!!
 
And another view...... although part of the problem is the lighting..... 
and the fact that it is so Dark this time of year....
But Really, that is Way too Glossy!!!
So much that I decided to paint them Again with acrylic... 
Over the polyurethane....
Which really made almost no noticeable difference!
So I decided to apply the Grout and see what it looked like after.....

And the Grout seems to roughen up the glossiness.....

So that the chimney actually looks Remarkably realistic......

Even if it still IS a bit crooked....

So.... do I Dare to apply more Sealant Over the grouted chimney????
Is that the normal method? 
Do I have the wrong kind of Sealer..... it says matte finish...?
I guess I could always "scuff" it up after sealing.....
I need to figure this out!!!
But while I am looking into That question....
I am soothing myself with looking into the Infinitely Beautiful Blue of the Library Ceiling....

And even though I still have not glued the ceiling in place...... 
so there are a few gaps.....
I think it is one of the most beautiful ceilings I have seen!!!
Just a Tiny Bit of Ceiling!