Showing posts with label Vaulted Ceiling. Show all posts

Wednesday, April 13, 2022

Vaulting...


Finished....

I Left you last week, Dear Readers, with the "vaulted" ceiling in the back corner just begun. As sometimes happens, one forgets to take any more "in progress" pictures until the job is completed, and then suddenly the work appears finished as if by magic! In this case, it was not a lot of work, and not interesting work, cutting stone pieces to fit, stacking them so they cantilever over the open space, and painting them to turn them to "rock". It was done in no time! Above you can see the results in the morning light. They are not "shaped" to make a smooth continuous arch, but are more rough and step-like as they stack upon each other. But the principle is the same. Gravity keeps them from falling because most of their weight stays on the rock below, and with the decreasing size of the opening as they close in at the top, their "lateral force" keeps them in place against the other side of the vault. Simple physics! (But I did use glue!) Here, I will show you a closer shot....

Here you can see the first two layers stacked
 and the ceiling and arch out of the way.


And with the third layer in place.
All that was left to add in this corner
 were the stones at the corners of the window.


Which you can see added here.
It took longer to fit those corner stones 
than the entire vaulted part!

And the other corner, where the tower stairs spiral upward
 only needed a few small details.


With the door wall removed you can sort of see
 that the "doorpost" on the left was very uneven
 where it tucked close to the stairs.
(The flash was needed again)
There was a lot of carving off millimeters from edges
 of the door frame where it meets the stair wall to make it fit well.


And the hinges needed their sculpey "hinge straps" added.


And the brass parts painted black.
And I needed to finish all the parts of this door
 before gluing the wall in place.
Including a "ring handle" on the inside.
I couldn't find a plain simple one in my stash,
 so I improvised with a jump ring and some wire.
(And neglected to take a picture!)


Here you can see the door wall is finally glued in place!
(Yikes!)
And I have begun to add the stones which surround the door.


And here you can see the door opens!
(Yes, it needs some touch-ups!)


And if you look closely,
 you can see the improvised ring handle.
I still need to complete the stones that surround the door frame.
 And a few more at the top where the wall meets the stairs.
But I believe I can say the Tower Spiral Stairs are Finished!
Of course, the access at the top of the Tower is still not done....
but it will be a while before I get to that step!
I am So glad, Dear Readers, 
that I decided to try to make these Spiral Stairs work!


Monday, July 6, 2020

More Little Bits......


Details....

I am Sure Most of you, Dear Readers, will Not be surprised to see that I did add another plant to the Cottage Tea Cosy garden! I added a Pink rose to the gap next to the delphiniums. I do like my gardens filled to overflowing with blossoms! And then I started on the background cream color. It did not take me long to complete it. And all the while I was stitching this cottage, I was thinking what an utterly charming Dollhouse it would make! A little thatched cottage amid a bountiful blooming garden... I was so tempted to start one! Then I remembered I already have one unfinished Thatched Cottage... without the garden... *sigh*..... so I contented myself with Dreaming of a thatched cottage garden in all it's glory (a little like my RL garden at the moment!)

Here I have finished the stitching... 
but have not assembled it yet.
And then because I really am addicted to the stitching at the moment, 
I dug through my stash of kits
 and started on another Janet Granger Christmas Stocking...
(Not because I am starting to prepare for Christmas, you understand...!)

This time it is the Three Kings!
And I must say going from stitching 32 count
 to 40 count cloth is a noticeable change!
 
I am really enjoying working on this one!

And while it is a Boring detail...
 I have also added the arch stones to the Guard Room windows.

Just the key stone is still needing to be added to this window.
And then I will need to re-attach the shutters too.
(And the opening wall window is done.... but I forgot to take pictures...)

The key stone has been added here...
 and while I am looking at all the Details in this room.... 
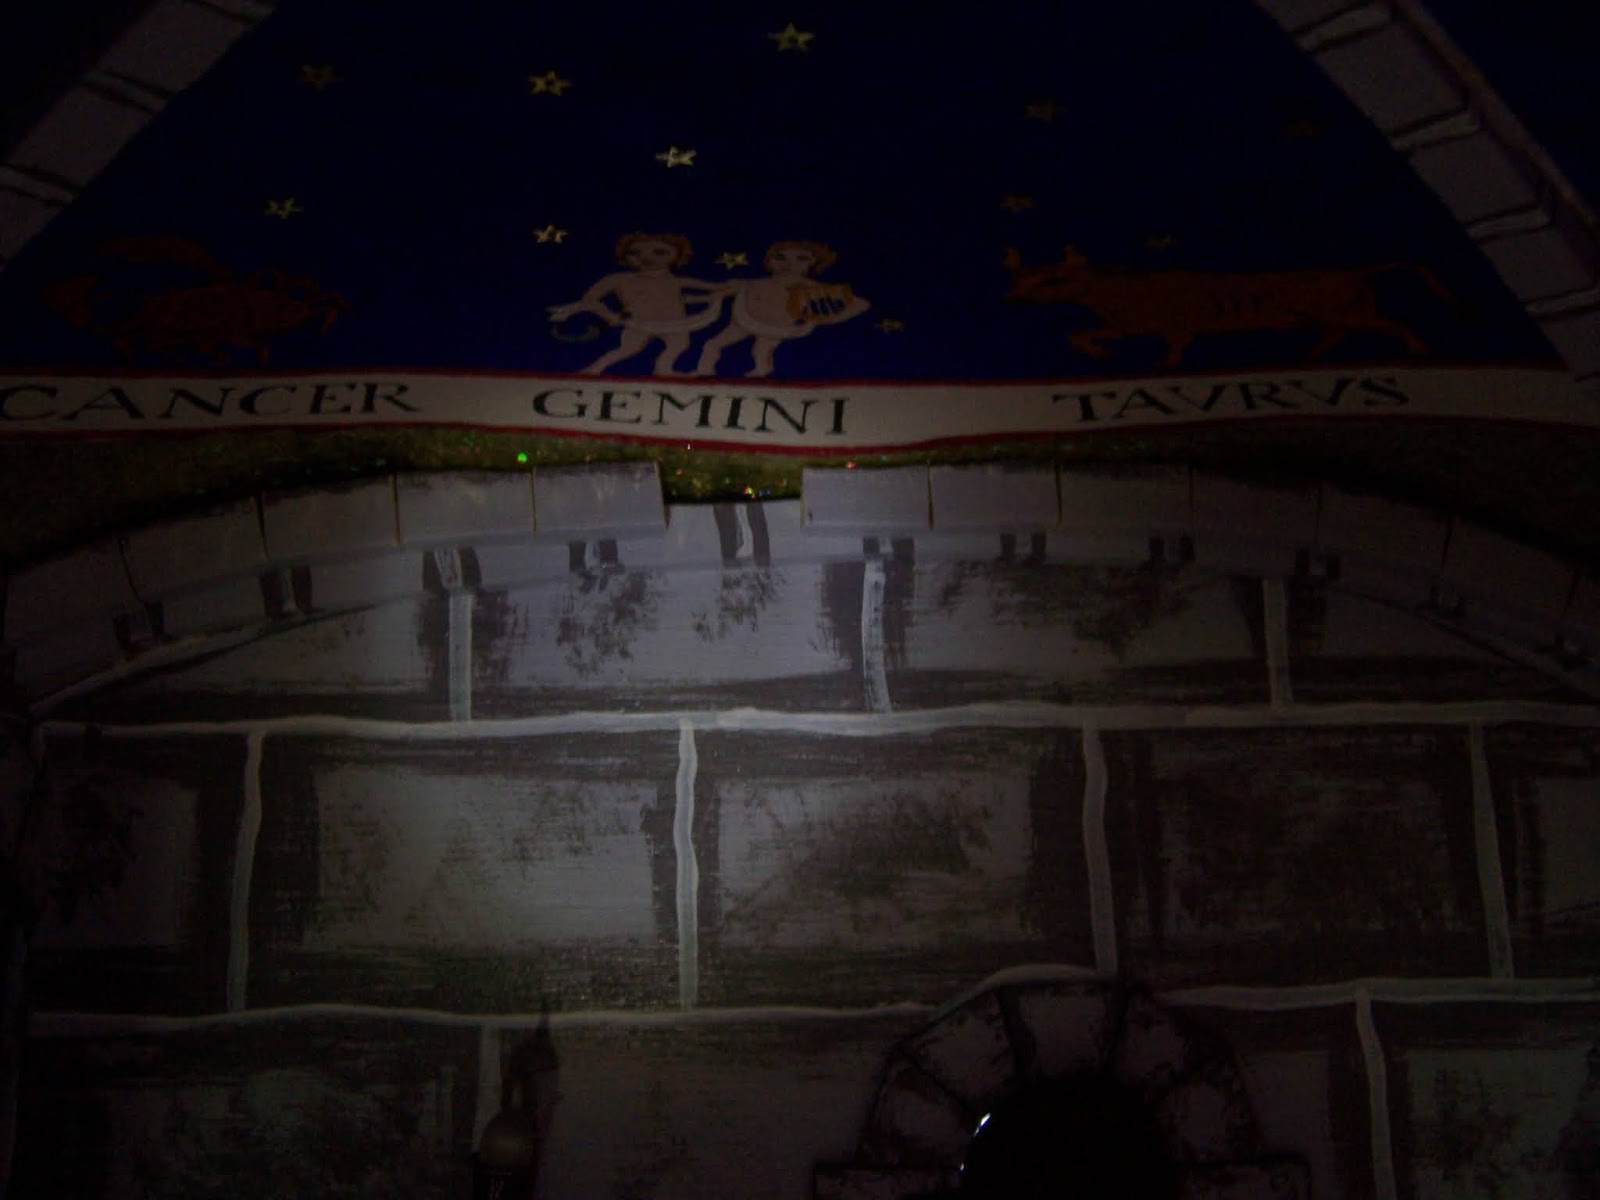
I am reminded that the junction of the wall and ceiling has always bothered me!

See the uneven crack between the poorly fitted
 arch support stones and the vaulted ceiling?
I have been pondering how to correct this problem for years and years!
And because I had resolved to add these supporting arch stones
 to the Great Hall Ceiling before I Attach that in place....
 I had already painted the strip of wood I thought would work.
 But the Great Hall Ceiling is not ready... 
so I thought I would test this method here... 
and correct this problem at the same time... if it worked.
Which you can't be sure until you cut and attach the pieces....
I have made a start in the above picture... there on the left...
(I know it is infernally dark in there even with the spotlight!)

Because I am cutting one stone at a time, 
I can fit them closer to the ceiling...
 and with a little gentle carving and trimming 
I can even out the disparity in the main archway....
 at least mostly!
And it covers that awful gap!

I will re-paint the spacing of the "grout" lines to match the cut pieces.

But first I have to also add these stones to the side wall.

And these required extra trimming
 because the ceiling design is closer to the edge...


I wanted to make sure the "stones" 
did not cover any of the painted design.

It just squeaks by!
(But I rather like the way the Circle and the Arch just touch!)

And I told you I would repaint the Vault Stones "grout" lines...
Starting with the dark shadow line over each stone junction.

And along the side wall too....

And with the lights on.... well, Some of them!
The "grout" lines have all been painted...
 even between all the stones added to the doors and window frames.

Now the torches are lit.... can we see the details...?
(Darn Castles are so Dark!)

I do think it makes a Vast Improvement! 
Even though it is something nobody will ever ever notice!

And as always, it is hard to see the ceiling!
But at least it now looks properly supported!

(I do need to admire this ceiling a little bit!)

I am So glad this "fix" worked!

Eventually I will get the shutters re-attached.... 
and build the ones for the Front window!

It took a whole Pile of Little Bits of "stone", Dear Readers,
but these little Details make a Huge amount of difference!
(Now I just need to Finish painting the Great Hall Ceiling too!)


Tuesday, July 13, 2010

Welcome Followers And Other Musings

Welcome Giveaway!

Dear Followers, one and all! Welcome to my blog!

In honor of passing the 50 followers mark I have made a little something as a giveaway prize. Having never done a giveaway before, I really don't know WHAT I am doing! Nevertheless, if you leave a comment on this post before Saturday July 16, indicating that you wish to be a part of the drawing.....one of my nieces will be visiting this weekend and SHE will have the pleasure of drawing the winner from the hat!
As you may or may not know, we have been suffering a heat wave in the New England region in the past few weeks. Temperatures in the 97 degrees F for day after day! Too hot to do anything! It is cooler now, thank heavens, but at the start of the heat wave on the weekend of July 4, I was watching the number of my followers climb steadily towards the 50 mark. Who would have EVER thought I would find so many followers? Certainly not me! But having witnessed other bloggers honor their 50 follower mark with gift giveaways......I felt I should make a stab at it myself. And immediately felt that old anxiety.....what should I make? I can't make anything really nice.... I'm too much a beginner....I don't know what anyone else might like to have ......I don't have time for this.... I don't know HOW to do a giveaway....and SO ON! To quiet that little voice I went and sat in front of my Lovely Old Dollhouse.....just to LOOK at it and be soothed. And then I noticed the little L.L.Bean "catalogs" I had cut out last summer as I was starting to work on the dollhouse. And then I noticed a few tiny seashells I had lying around the dollhouse just waiting for something........ Hmmm....then inspiration struck! I had always wanted to try my hand at decorating a piece of furniture with seashells. I had even bought bags of the tiny shells from craft stores years ago. They were just waiting for me to remember them! What better way to honor the start of this HOT summer than by making something out of seashells? So I quickly assembled a mirror frame from scraps of wood and a tiny mirror, and then spent a DELIGHTFUL day carefully glueing every tiny seashell in place on the mirror frame!
It and the tiny catalog will go to the winner of the welcome followers drawing!

Welcoming followers with gifts is an ancient tradition. But when I think of welcoming people into my life and my world, the most powerful image that always comes to my mind is gathering around the hearth and sharing the warmth of fire and food. So perhaps it is no coincidence that the other subject of this post is the most basic hearth of all.....the kitchen hearth....this time the one in my Castle Dollhouse. Now, as you already know if you have been reading this blog, I came to build my Castle Dollhouse at least in part from seeing the very inspiring work of Nina and the Knitwits on their Tudor and Medieval Dollhouse Project. When I started to build my Castle in February of this year, Nina had not yet started on her very amazingly awesome kitchen wing of her dollhouse. And you will remember that I had decided right from the start that my Castle would have the kitchen BELOW the Great Hall, in the cellars as it were. So I find it really interesting to see just how different our castle kitchens are! And I must also confess that when Nina DID start her kitchen (almost the SAME week I had gotten mine mostly painted) I was constantly torn back and forth thinking "ooooh look what Nina has built! Now why didn't I do it that way?" or "maybe I should tear mine out and start again"! But fortunately I did nothing so drastic! And actually, it really helped me to see that I was following the inner prompting of my OWN Muse and just needed to pay attention to what I was dreaming about.....no matter how quiet that little voice became!.

So here you can see the basic shell of the Great Hall (where Ken (or is it Sir Kai?) is standing) above the kitchen area and the storage areas. There are two storage rooms, one on the right is the Pantry (from Pannetry or bread room) and the one on the left is the Buttery (not from butter.....but from Butts of wine or beer! - and hence the term for Butler being the one who looks after the wine).. ...

(*please notice, Sans!, my antique sewing machine in the background at right) :)

Here you can see I have painted the entire area the light gray base coat (after giving it all a coat of primer). You can see I have built the fireplace, and for inspiration on it's shape and scale I referred to many of my Medieval Illuminated texts. I really must learn to assemble a few of those picture references and include them in my posts.....

You can see here a closer view showing the base covered with the "Bondo" - our version of Polyfilla, and the shapes of stones carved into it before it dried. (Please refer to Nina's blog for EXCELLENT tutorials about this!) I was carefully following her suggestions for this part! And here you can also see that I have attached two doors between the kitchen and the storage rooms. So far, I have been using the cut-outs from the plywood walls as the doors wherever possible. Once they are painted and trimmed they serve very well.


Below you can see the basic stonework painted in. And I couldn't resist painting a "trompe l'oeil" fire in the hearth. After all, it was winter as I was building this, cold and dark here in the North and I couldn't know how soon I would get to putting in the electrical fire. I was AMAZED at the immediate difference it made in the kitchen! It brought light and warmth and a focal point even though it was just illusion!


Here is a closer view of the hearth and the still rough painting.......


And the beginnings of the vaulted ceilings for the kitchen and storage areas.......


And here the ceilings are painted and loosely placed (NOT yet glued down!)


It was at about this point in my construction that as I was researching medieval castle hearths on-line that I realized I had left out an important element! The Bread Oven! Now, you must realize dear readers, that at the time my Castle was "built" maybe in the eleventh or twelfth century, they did not even have chimneys as we know them! Chimneys came into fashion during the thirteenth century. Before that, the fire was in the center of the hall and the smoke rose up and found its way out through openings in the wall near the roof. And at that time, the bread ovens were a separate structure outside the building, often a free-standing bee-hive shaped structure. So it is ENTIRELY authentic that my Castle would have added the ovens to the kitchen later, even after they had added the chimney and hearth against the wall as we see above.
Here, therefore, is the newly re-modeled MODERN kitchen with the convenience of an interior bread oven, fully smoke-removing chimney, hearth with more than one pot chain and shutters on the arrow-slit windows! This view is with the vaulted ceiling removed and the beginning of the painted stone arches where the vaulting meets the stone walls. The building overseer is inspecting the workmanship..... :)


Here the vaulted ceiling is in place.

Now, Dear Readers, you must realize that I was about this far along in my construction when Nina started blogging about HER Tudor Medieval Kitchen! And Oh what a kitchen that is! The details! The creative tutorials! The polyclay pheasants and potato barrels! The fires and spits and charcoal burners! I was BLOWN AWAY! Every day was some new GREAT idea! And the whole becoming such a richly authentic period room! IT stopped me in my tracks! Well, for a few days at least! :) I had to come to the realization that MY Castle kitchen WANTED to be a dark and moody STONE place! It was in the Cellars, after all, and OLD and the whole image for me had always been more cave-like than the clearly Tudor era kitchen Nina was building! So I made my peace with the differences in our kitchens, and stored up in my mental wish list all sorts of good ideas which will arrive in my Castle Kitchen in good time. Because, I also realized that there is no point in hurrying this project! The pleasure is at least as much (for me) in the doing as in the having.....so I have AGES of pleasureable mini-building ahead of me!

So the details continue to be added... the shelf along the wall for platters and jars....... the wooden table that happens to be one I built in my teen years........ the cast iron cauldron and pot that also came from a set I had in my teens and is PERFECT for this kitchen......... And a detail that I am proudest of is the "smoke" rising from the fire on the hearth..... with the glitter of cinders rising in the smoke....... made from a lovely gauzy smokey colored glitter strewn fabric...! It may be a long way from finished...... but it is coming together just the way I have imagined!


So, WELCOME to my Kitchen, One and All!


Welcome Followers and Other Musings

Thursday, July 8, 2010

Working From The Bottom Up

I left you last week with the promise of showing more of the vaulted ceilings in a later post. So that is where I will begin tonight. First let me remind you that I jumped in to building my Dream Castle Dollhouse after finding Nina's very inspiring blog about her Medieval Tudor Dollhouse Project. I must also credit her with the (to me) very brilliant idea of completing each room starting at the lowest level BEFORE adding the ceiling (which is obviously the floor of the above level) because it is so much easier to manage all the details while the ceiling is out of the way! I have always been inclined to think in terms of completing the whole shell first - more of a working from the outside in method - so it was truly a novel and EXTREMEMLY useful idea! But it really is a completely different way of thinking about the project for me.......I just have to learn to plan and think through and build or buy ALL the parts of each room before moving on up to the next one.

As I mentioned in my last post, my castle is made up of two tall towers, each with four floors, flanking the central Great Hall which is three stories tall, but only has two floors as the Hall itself is two stories tall. I began work on the towers first, beginning with the dungeons below the Chapel, and the stables on the bottom level of the Guard Room Tower. Now, in my imagination, neither of these rooms was where I had invested a lot of fantasy over the years. But once I had decided that the Great Hall would be above the kitchens, I realized that the chapel and guard rooms would need a "basement" level below them. The obvious choices were the dungeons and the stables. And because Nina's method makes SO MUCH SENSE to me, I was determined to get those useful rooms built and move on to the more "interesting" ones as soon as possible! So I jumped right in. But here I will have to confess that I have not REALLY stuck with Nina's method......I have MOSTLY finished the first level of rooms before moving up to the next ones....but not really in all their details. And I have cheated by moving on to the next room on the BOTTOM level before completing any of them! And I really bend the rules by leaving the ceiling removable for a very long time......! But more on that later.

So It was while I was trying to quickly get the dungeons (and the hidden postern stairs) built so that I could move up to work on the chapel where I had all kinds of exciting ideas roiling in my head, one of which was to paint a beautiful frescoed ceiling in the chapel, with vaulting and carved stone ribs and.....and ....and......that I realized that the dungeon level was going to NEED to be vaulted like a stone cave in order to be at all realistic. In fact, it was going to be the perfect place to PRACTICE making vaulted ceilings! In one of my books I found a beautiful photograph of the magnificent vaulted ceilings of the cellars of Fountains Abbey in the North of England. It had just the stone ribbing and brick infill look I was imagining. My version is only a pale imitation of the real one if you ever get a chance to compare.


So here are the beginnings of the vaulting. I cut arched shapes from plywood the length of the diagonal dimension of the room, intersecting at the center of the room. Here they are notched on the ends to fit around the beam that supports the floor above, and they only extend to the edges of the interior walls of the dungeon and stairway. But they are angled to appear as though they continue through the walls. I glue them to the ceiling board, leaving the whole piece removable by sliding it out. (So you can continue to work on it easily!)

When I was making this I had no idea I would be a blogger soon, and even less of doing a tutorial -so there aren't enough photos to really show the process. :(
Here you can see the corrugated cardboard cut to fit between the ribbing and glued in place. The corrugations allow you to crease the surface in the direction you want the rows of bricks to appear to line up. It is important to position the corrugations in the right directions relative to the vault ribs.

The ceiling was then given a coat of primer and a base coat of paint. I am using interior latex house paints because of the quantity needed and because I already have it in the colors I want to use. In this case I started with a light gray, but then realized the "mortar" would need to be a darker color to look realistic ie. old dirty and maybe mostly missing....you see, I couldn't decide if my ceilings were "dry stone" with no mortar - a really old method....or just really dark old mortar between the bricks. Either way it needed to be dark. So here is a shot of the dark lines painted on the corrugations, and the cross lines for the bricks. I really like the graphic quality of this shot........


Then I added the brick colors.....using a full range of earth tones mixed randomly to get a brick look.........


And I painted the mortar lines in the stone walls of the dungeons....and dirtied them up a bit. I think I will need to go back in and add another layer or two of grime at some point.....

Meanwhile, I was also starting on the stairs up to the next level, because you can't "finish" the bottom level until the stairs are done! And I realized that the inner walls for the stairs would need to be painted before the whole section could be closed in with the wall to the dungeon......So here is a view from the Great Hall through the doors at one end. The right hand door is the one down the stairs to the kitchen and dungeons. The center door leads to the chapel. The left hand door will lead up stairs to the ladies Solar. When we get there that is!


This is a view of the rather complex stair construction with the inner walls and dungeon ceiling removed. You can also see the first attempt of mine at making a faux stone floor on the dungeon level. Nina says to use "polyfilla" - a substance not available here and the closest I could approximate was to use "Bondo". I debated with myself long and hard about the need for that level of realism on the floor....and eventually decided to try it. I'm very glad I did! The layer of realism is really good! More details later......not sure I have a closeup of that! Anyway, you can see the hidden back Postern stairs in the corner, and the back dungeon in this shot.


This shot shows the same thing from a different angle, with a better sense of the two floor levels. The above level is the Chapel, in the back corner will be the Monk's cell with the hidden trap door to the Postern stairs. The Chapel floor level is lower than the Great Hall - allowing for the ceiling in the Chapel to be higher.


Well, you can ALMOST see the scribed stone shapes in the floor! When it is painted they show up better.........


Yes, I did upload this photo twice......sorry...... you get to see this ceiling detail again......


Meanwhile, I was also beginning the bottom level room in the Guard Tower. This was to be the stables. After all, every Knight must have his horses, a castle kitchen must have its chickens and cows......so a stable was in order. Here I must say I have indulged another very old passion of mine.......toy horses! I LOVE horses. Next to dollhouses (which I had) horse stables were the thing I most wanted to make when I was little. So once I got started the dreams all came rushing back to me......Stalls all lined up in a row, mangers for hay, tack hanging on the walls, and of course, the necessary steeds in residence!

Here you can see the beginnings taking shape, including the vaulted ceiling because this is on the lowest level of a big old stone tower!


Oh, and of course, first Ken had to bring the horses in to test the space for size.............

The noble steed..........


And the gentle palfrey.......


Before you know it the stable walls and the vaulted ceiling have been given their coats of paint. The stall partitions and mangers have not yet been attached.......


Even though the doors are still not done, the horses are right at home in their new stables.


They still don't have their tie-ups in place, so I'm afraid they are making good use of their freedom while no one is looking........


There are still a great many little details that are not completed in these lowest level rooms that will take me a long time to accomplish. But they will come to me in time. I am not in a hurry. Because I still have more bottom level rooms to build.....and none of my ceilings are attached yet......so I'm not REALLY moving up to the next level just yet........

but this is where I will END for now!


Vaulted Ceilings from the Bottom Up!