Showing posts with label Wyvern Tapestry Cushion. Show all posts

Sunday, September 21, 2025

Stitching Update....


Tiny Progress...

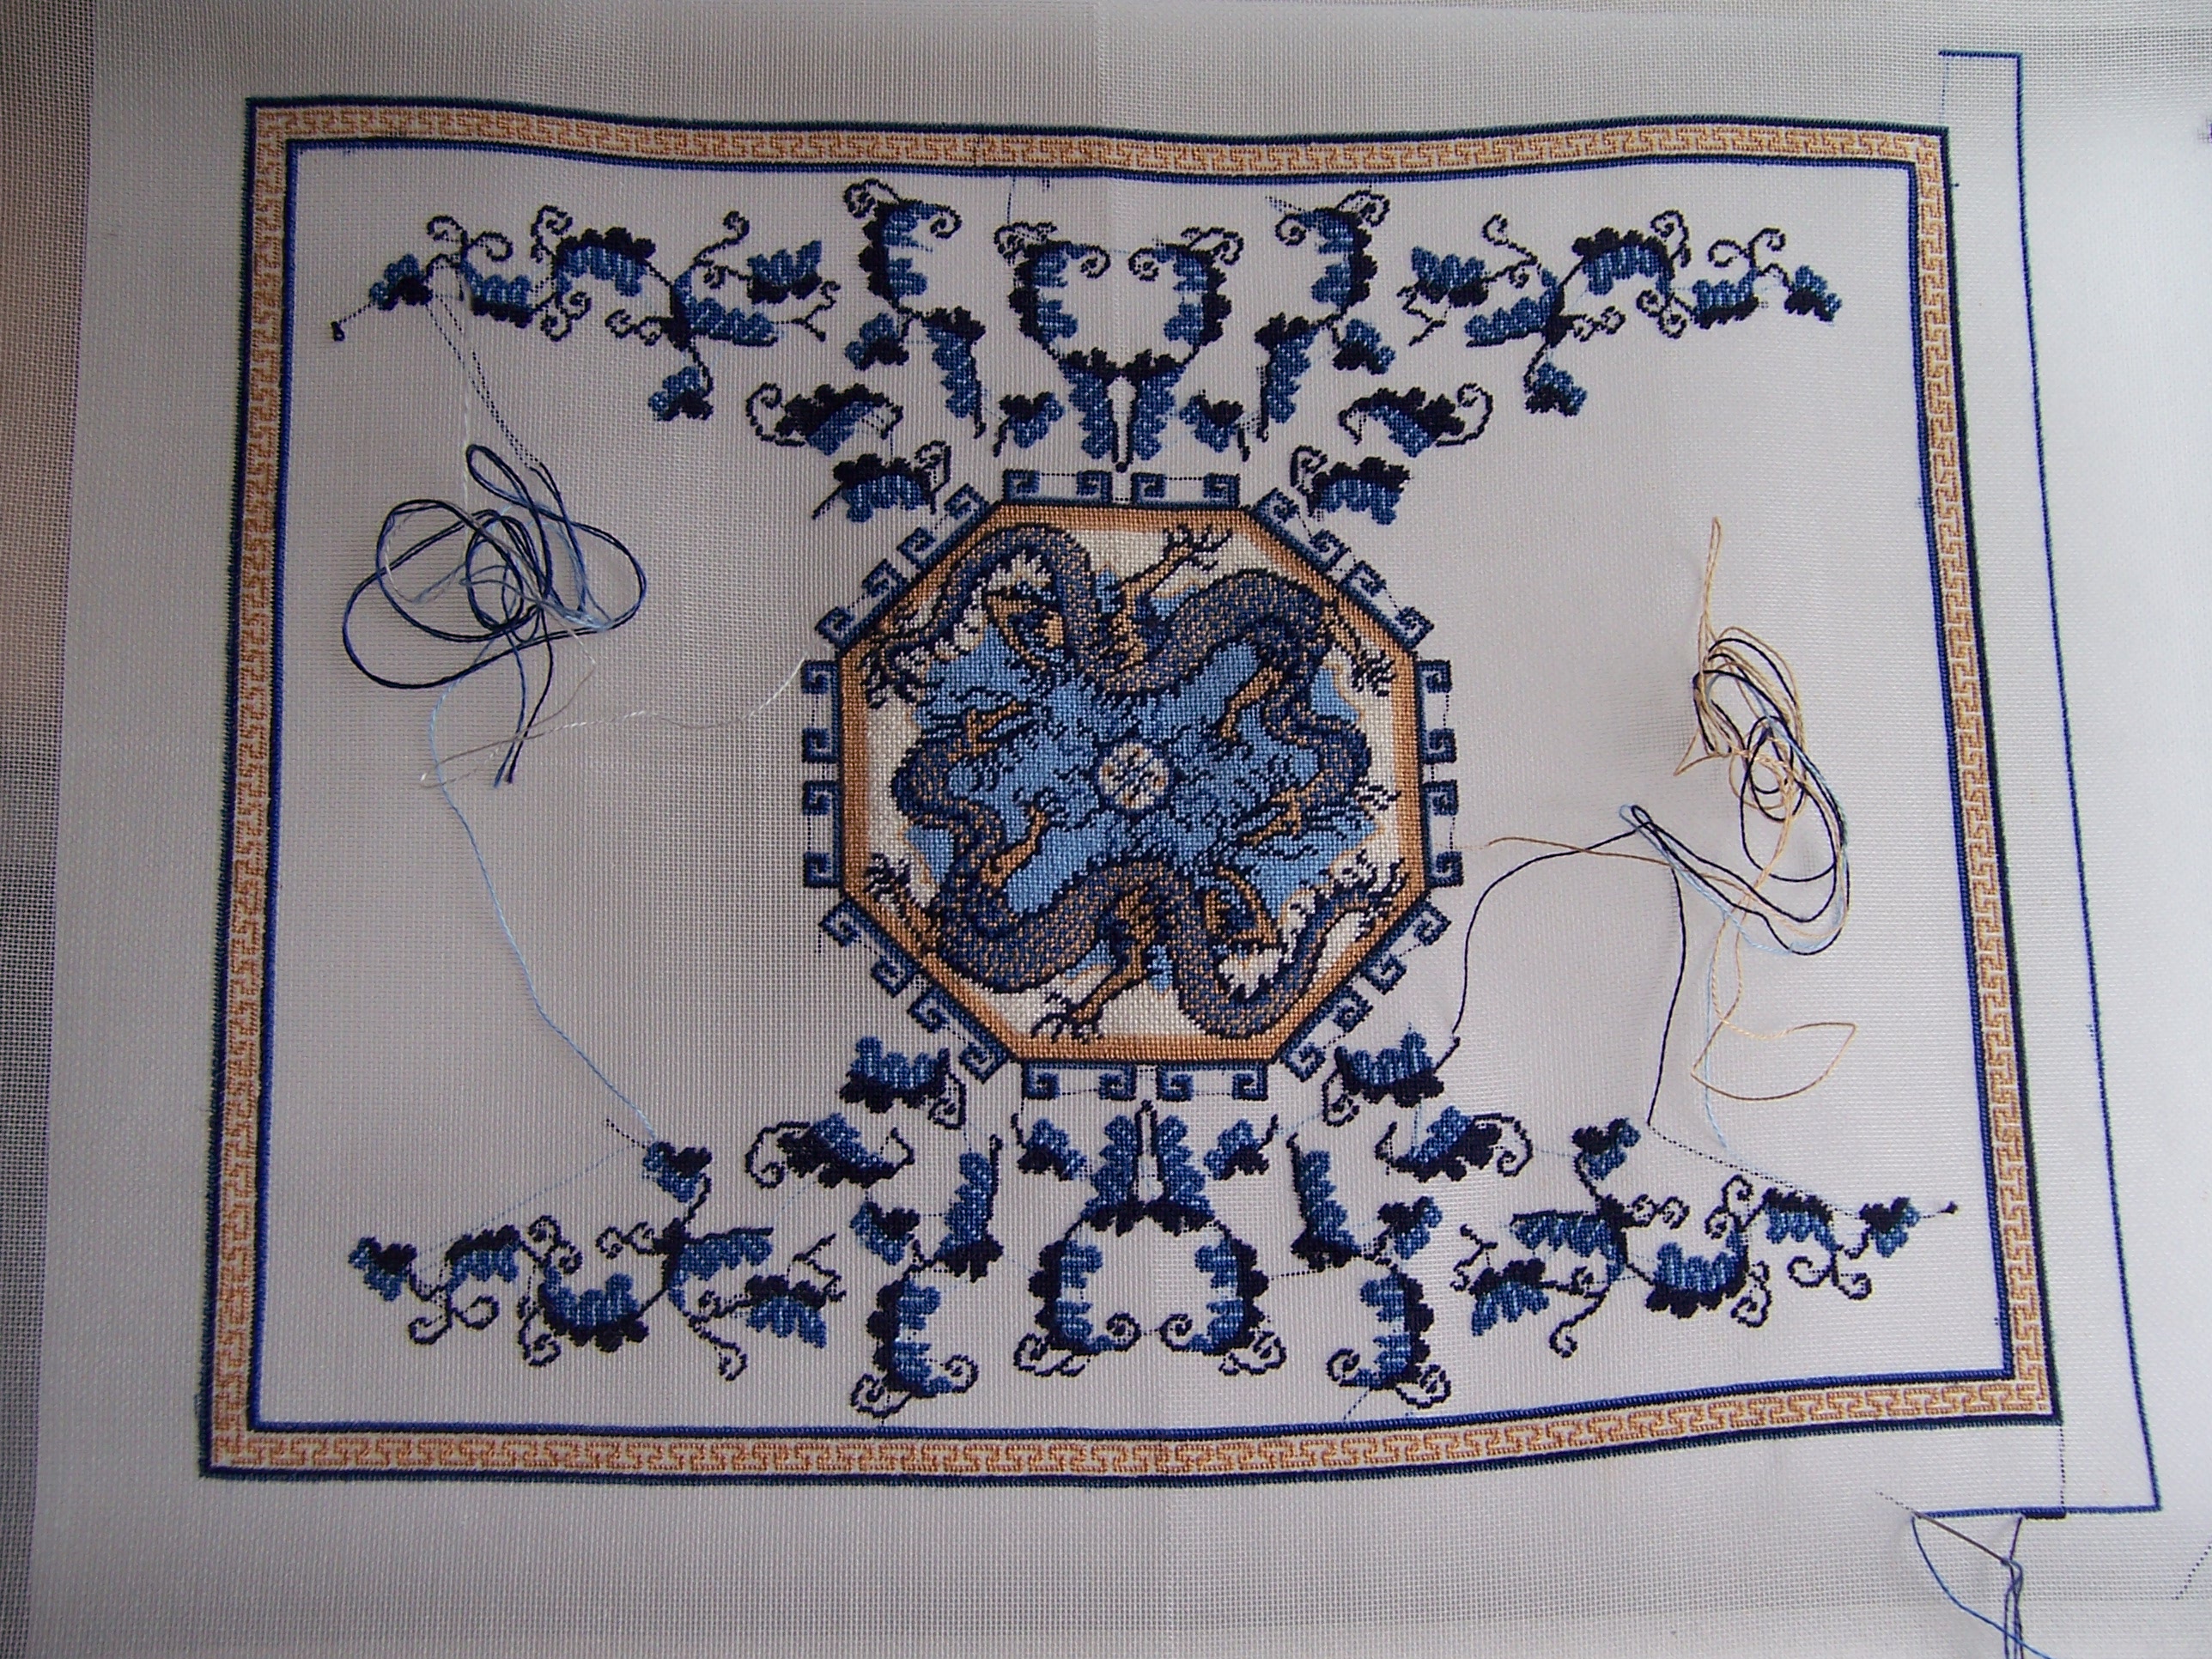
As I am sure you are aware, Dear Readers, Autumn is Upon us, and the chief manifestation of this in my neck of the woods is the disappearing daylight hours! The temperatures have cooled somewhat and we are seriously lacking in rainfall, but it is the shorter daylight that I feel most keenly. It is dark when I get up in the morning and almost dark by dinner time too. But that is not the main subject of this post other than to lament that it is harder to stitch the higher thread-count projects in artificial lighting. At least I have been doing a fair amount of stitching this summer while the daylight seemed to be endless. I wanted to be sure I "plugged away" at the Chinese Dragon Carpet while the lighting was good and I managed to stitch most of the leaves on the original chart that I did not need to alter from the original placing. Because I added the central dragon motif, it caused an avalanche of changes in the original design all across the central section of the carpet! And then I needed to decide just which parts of the original design could be shifted to where... depending on how they fit and the overall balance of the design. I decided that the  simplest thing would be to mimic the arrangement of the leaves at the sides of the central octagon...

 
As you can see here I have begun stitching the left end leafy section. 
The motif is not exactly the same as the one on the side... 
but I am actually using the one that is in the chart for this end of the carpet...
 but shifting it closer to the central octagon,
 positioning it the same as the side panels already are. 
The remaining "spaces" will be filled with other small leafy pieces....

 
Sorry for the dark photo.... 
yes, Autumn light is in short supply...
but you can see the leaves that have been added.
 Most of these were in the chart... 
but the ones closest to the Octagon have been positioned by me....
 it is a nerve wracking process trying to imagine 
what they will look like before they are stitched! 
But I have been making progress!

 
And some of you, Dear Readers, might have wondered
 if you would ever again see anything of those
 Tiny Cushions I was stitching way last spring...!
 Well, I did manage to stitch them all and cut them apart from one another
 and even started the process of stitching the pillow backing
 and turning them right-side out....
 but I neglected to take any photos and even then
 I didn't finish even one of them until this morning!
 After turning them in-side-out I realized
 that the silk mesh showed along the seams more than I had expected.

 
I was going to need to stitch on a "cording"
 (I was planning to do this anyway actually) 
using some perle cotton that I had in my stash... 
but I thought the black sewing thread would not look right over the blue cording...
 and I didn't have any blue thread the right color....!
 So I left the project mid stitch.... 
and this morning I decided to use the black thread anyway
 and see how it looked.....

 
Well, you might think I compromised my standards... 
but I think it looks fine... 
the checkered pattern is what is supposed to stand out...
 not the blue cording. 
 
And since I was zipping along now,
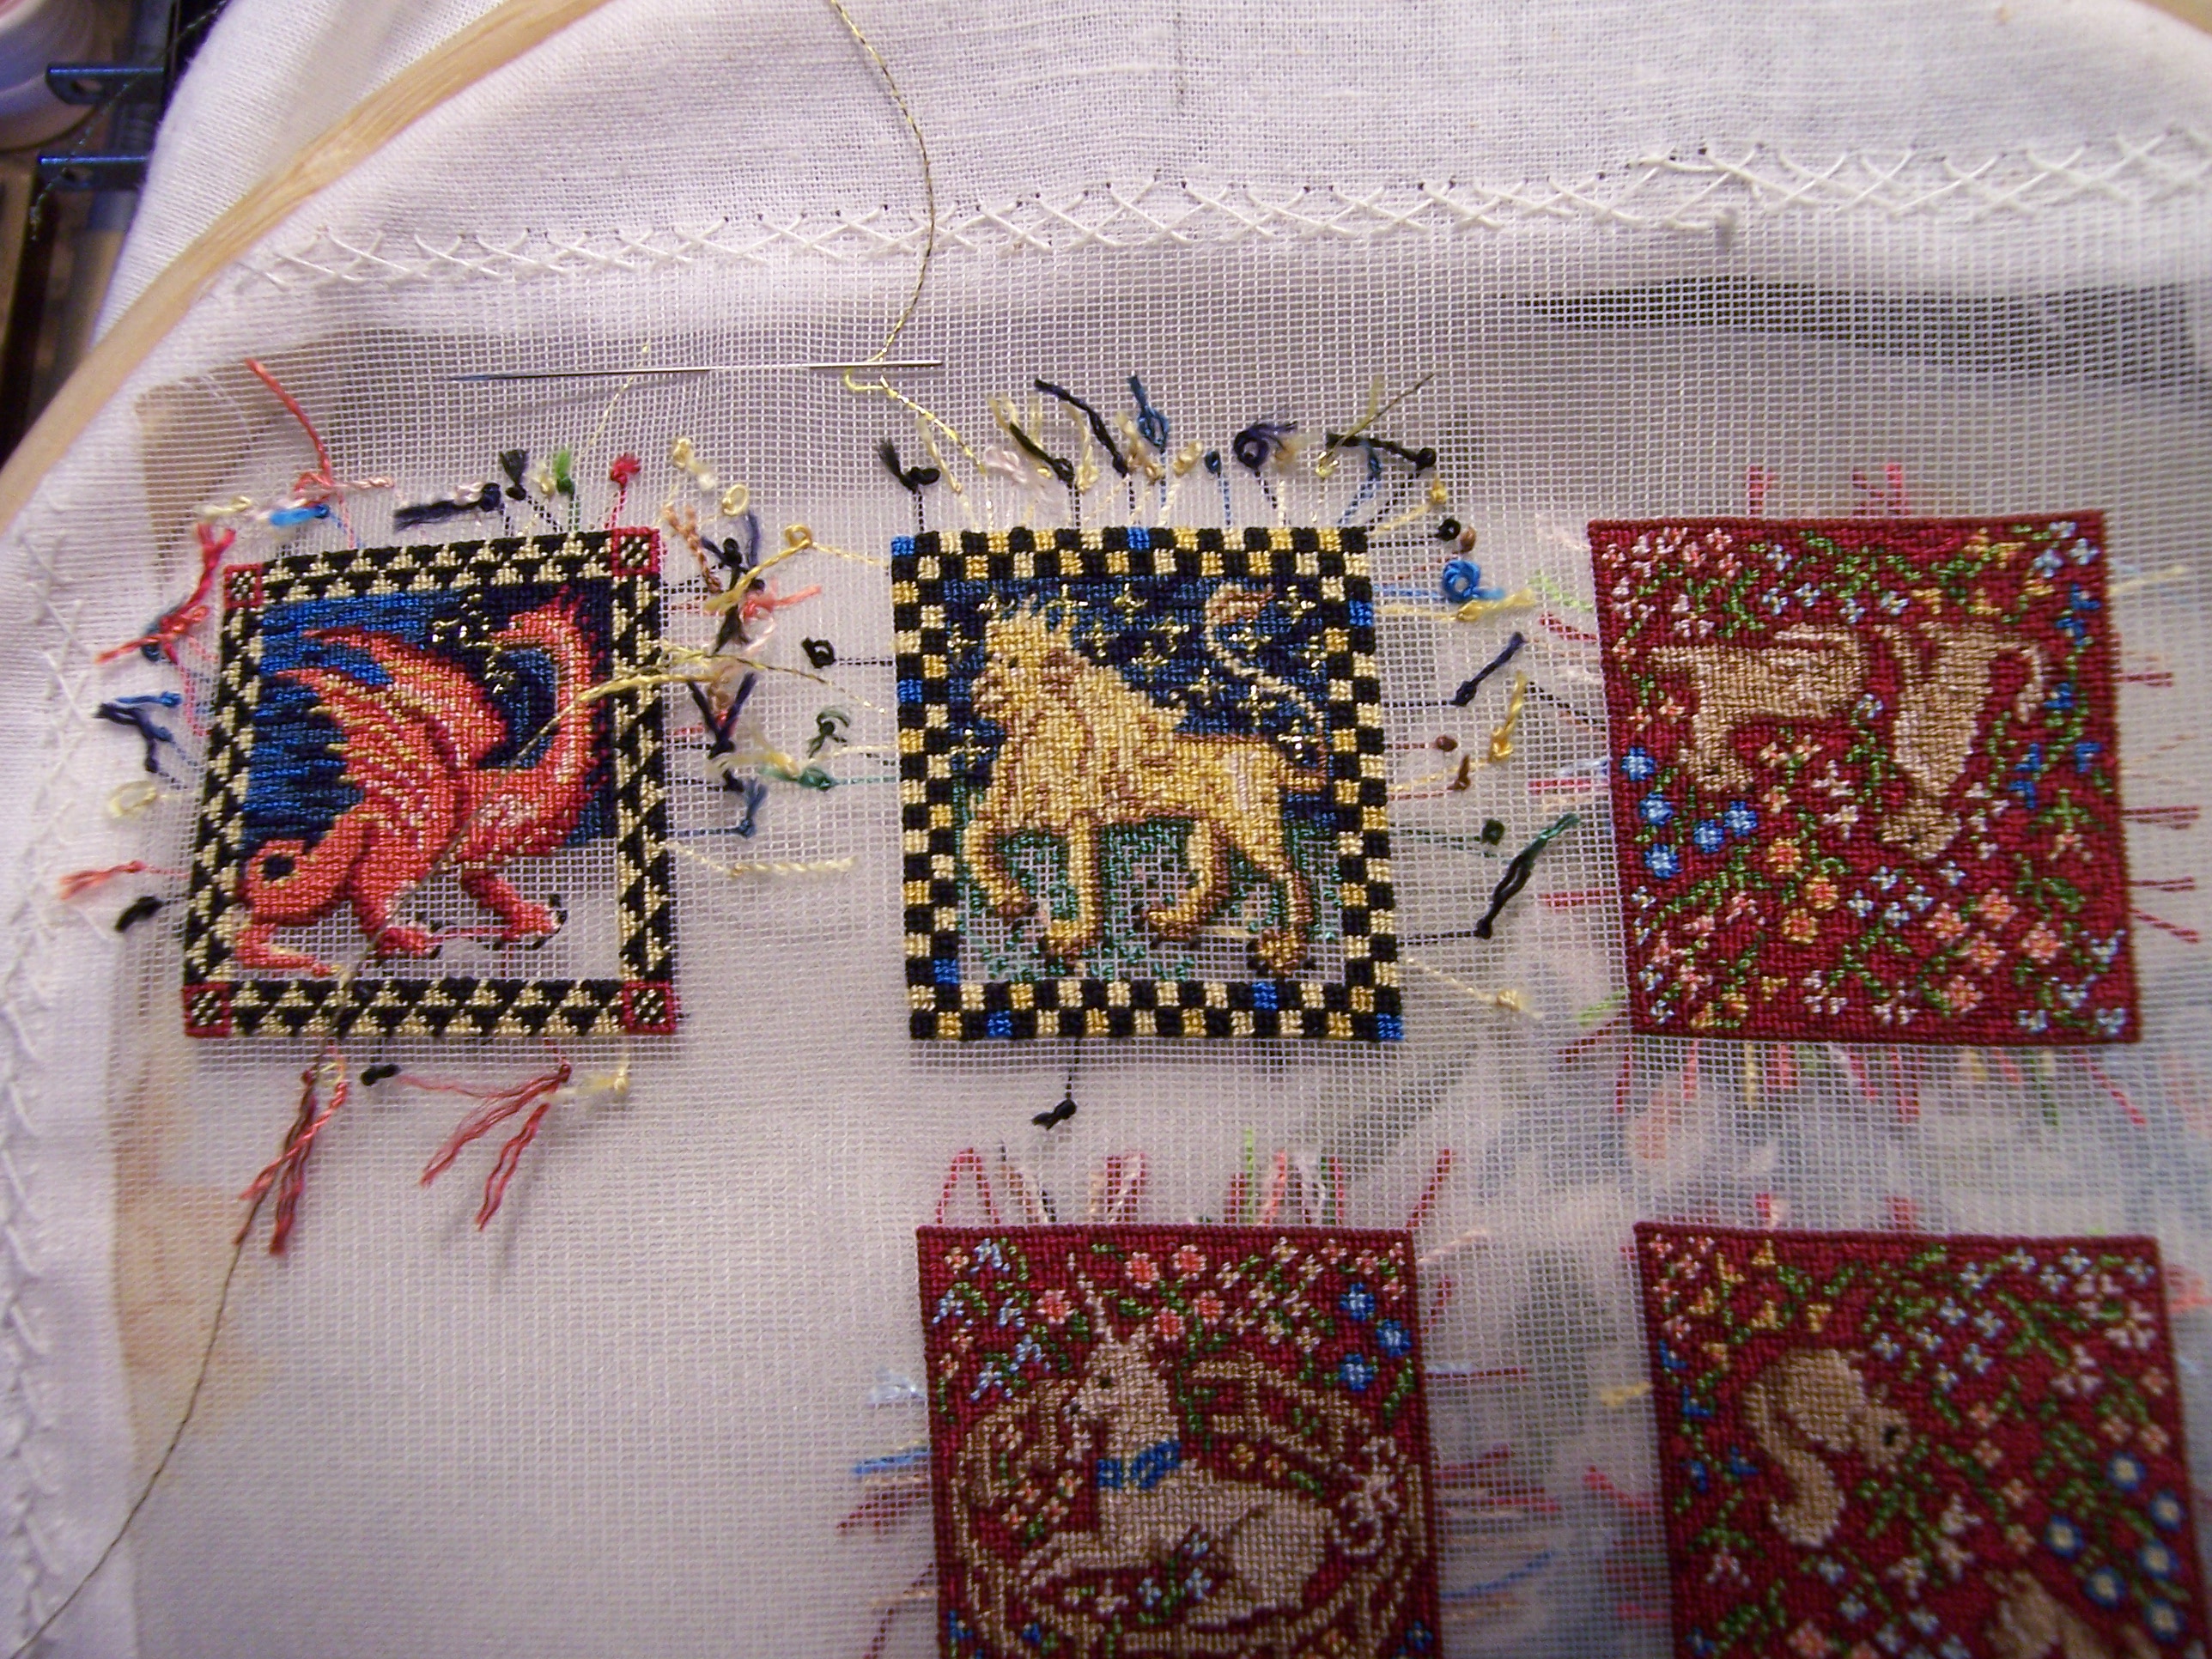
 I started right in on the Leo Cushion....

 
Here you can see it already stitched to the backing
 and turned right side out. 
The bottom is open for filling the cushion 
(I am using seed beads to give some weight to the cushion)
 and then I will add the cording as before.

 
Well, that was quick!
  
And Then the Wyvern Cushion....

 
Here you can see it already stitched to the backing material
 and trimmed prior to turning right side out.

 
And here I am adding the cording
 the same as for the other two cushions.

So, where are these Beauties going to live...?

 
Well, I can't say this will be the permanent spot for these tiny cushions....
 but I have always thought they would be right at home
 in the attic of Hardwick Hall! 
 
So you can see, Dear Readers, 
I have not forgotten the many
 stitching projects I have under way...
 And I even have made some tiny progress! 


Tuesday, July 29, 2025

More Stitching...


The Astrological Cushions Continued... 

I Left you several weeks ago, Dear Readers, with the not quite completed Wyvern Cushion and the beginnings of the final cushion framework. You can see above that the Wyvern is very close to completed, and even would fool most viewers into thinking it was all done. But I am still waiting for the purple thread I ordered... there are only about 25 stitches to fill with that color.... (mostly along the beasts neck) but I am not giving up yet! The green ground has all been completed. As for the choice of which of the four cushion designs to choose for the final cushion, it was an easy one for me. The Goat and the Bull were both too similar to the Leo I had just completed. I wanted a challenge and chose The Pisces cushion! I was really looking forward to testing my skills and my patience with that elaborate gold thread background. And besides, my birth sign is Pisces. The usual difficulties with matching thread colors from the original chart gave me some challenges too.


 Here you can see the chart with the accompanying list of threads. These are all for DMC threads, not the silk I am using. And there are no comparison charts to rely on. So I am doing my best as I did with The Leo cushion, and making some inevitable compromises. The biggest difference is once again with the gold threads.... the ones in the border squares, not the metallic threads in the pattern. The two golden yellow threads I have are the very light gold and the mid range gold that you can see in the border on the Leo Cushion. But I think the pale yellow is too pale. When I compare the picture of the finished embroidery in the book, the darker yellow is really almost a rusty color, not a gold. It is similar to the ocher color we did not have for the Leo cushion. Because it was so difficult to decide, I left the yellow border squares for last and started right in with the Fish!


 I started with the dark Navy Blue....

 
Followed by the Medium Navy Blue... and then the Bright Blue...


And then finally the Pale Powder Blue....
They did not take too long to finish.
And then for the metallic Gold Thread....
 
 
It was a bit challenging to follow the pattern... 
a very random swirly pattern inspired by
 the gilded backgrounds of Medieval Miniature paintings.

 
The most challenging part was trying to see the stitches you already had sewn...
 because the light glints off the thread... 
sometimes it looks like no stitch is there when one is already sewn!
 
And here the gold thread is nearly all stitched...
I know it is difficult to identify the patterns,
 partly because the thread shines through the cloth!


And here the metallic thread is all done,
 and I am starting to add the darkest of the red background threads. 
This is where the stitching gets really tricky!
If you look closely at the chart above, 
you can see that there are four colors
 of background "reddish" thread in the mix.
 Isolating the particular red you are stitching
 and finding all of those little random stitches
 in the already stitched pattern of gold threads
 was quite absorbing!
 Yes, I said I wanted a challenge!

 
Here the darkest red has all been stitched....
 or so I thought...
 I did find missing stitches as I sewed the next colors!
 
 
Here the dark red and the bright cherry red have been stitched.
 Sometimes it was really difficult to tell
 the middle two reds apart in the chart.... 
and because it was so challenging, 
I stitched the lightest color next... the coral color.

Here you can see it has all been stitched....
 
 
And finally, stitching the mid-range lighter red...
 really a very burnt orange color.
This is where I fill all the empty holes... 
unless I realize they were supposed to have a different color...
 in which case I go back in and add the missing color!
 
 
Until all those missing stitches are found!
And now I can go back to the the border 
and try to make the colors either match the chart
 or the stitched one from the book...

 
Which you can see here.... 
the darker of the two border "gold" threads
 looks almost like the orange... 
it really is the "missing" color,
 and I have to compromise!

 
I started with the darker yellow of my threads..... 
which is for the lighter yellow squares in the chart...

 
And then the medium range orange.
 I thought the two yellows would be too different
 from the rest of the design
 and would look too discordant.

 
As for the Wyvern and the missing purple threads, Dear Readers,
 I am happy to report that the purple threads arrived at last!
 Here you can see the Wyvern before the purple has been added....
 (just look carefully under his throat and along the side of his neck)...

 
And  Ta Da...!
 Here the purple threads have been stitched! 
There is also a small section below his breast 
and two dots above his tail 
if you want to try and spot them all!
 I can personally see the difference they make in the shadowing... 
so I am glad I persevered!

 
I don't know whether this is a better shot... 
but I thought I'd include it anyway!

 
Now, all I have to do, Dear Readers, 
is make all these little "designs" into tiny cushions!
 And you can rest assured....
 I have plenty more stitching still to do!


Monday, July 7, 2025

Green.....


Grow the Leaves... Oh!

Can You remember, Dear Readers, about a year ago when I first posted the "Summer Green" Rhododendron shrub at the Folly Garden and wondered if it really had enough leaves to qualify as "finished"? Well, as some of you might realize, I decided it needed quite a few more leaves to really look right as THE evergreen shrub beside the Folly Porch. It is Evergreen, after all, so only steps aside briefly for the Blossoming version which takes a week or so, and for the Snowy winter version which comes and goes quickly only in Winter, so it had better be really worthy of all the rest of those months of viewing! Above you can see the "revised" version, newly "completed".... even though there are probably a few more leafy stems I will add, in particular in the corner by the Tree House. If you can't remember exactly how it looked before.... I have added a photo from Last Year....

 
And I know the lighting is different, 
which makes it really hard to judge.... 
but I also know that the newer version has nearly 400 leaves
 more than last year's version!

 
Here you can see it again... this years (version #3-2) 
from the side of the Garden near the Tree House. 
It definitely looks "denser" to me.... which was the whole point!

 
 The "trick" was to add the "understory leaves" which are
 the previous year's growth still attached to the shrub. 
And believe me, this was tricky to do! 
And very time consuming. 
And as some of you know, last years "green" shrub
 got a coating of "snow" during the Winter 
and is now the "Snowy Winter" version (#2-2)!
 So nothing was wasted after all!

 
And yes, Mr. Gnome is hoping that some of the disruptions
 to his usually quiet neighborhood will be finished for a while.

 
And maybe I can get working on some of my many other
 unfinished projects.... the list is Looooooong!
 
And Speaking of Green, Dear Readers,
 some of the threads I had ordered arrived
 and among them was a blue-green shade
 that I could use in my Astrological Cushions! 

 
The Leo Astrological cushion design
 was asking for four shades of green and one of gold
 for the ground below the Lion.
 The darkest green had arrived a while ago,
 and finally the blue-green arrived.
 Until it did, I did not want to start stitching
 until I could be sure it would work with the rest of the greens.
 As you can see, it does! So I got stitching right away!

 
Here you can see the Leo Cushion before starting the greens...
 but with the night sky completed. 
These kits are designed for larger scale, 
so the details are quite intricate for this tiny scale.
 I was not sure the two blue colors would be needed... 
but I have decided they work out okay....
 Just the darkest blue would have been
 too much like the black border squares.
 And once the ground is stitched... it makes beautiful contrast...

 
This is just the first two greens...

 
Here you can see the stitching beside the chart... 
it is sometimes difficult to tell which color the printed square is...
 they are very similar shades.
I start with the colors that are clearest to follow....
 the darkest and the lightest,
 and gradually fill in the more confusing ones.

 
Here I have added the golden wheat color....

 
And here the Leo Cushion stitching is finished!


And because I had also been waiting for
 that blue-green for the Wyvern Cushion... 
I got busy right away with the Green ground. 
This chart only needed the four green shades... 
no golden color is needed.

 
More of the Greens have been added...
 only the last one is still not stitched.

 
And of course, I have started the border for
 the last little Cushion for this piece of mesh....!
 
But I will Leave you here, Dear Readers... 
Wondering what the final cushion will be.... 
because I do have just a few more Leaves to grow
 on the Evergreen Rhododendron Shrub! 


Wednesday, June 18, 2025

A Question of Color....


 Blue... Gold.... Green...

As You might be aware, Dear Readers, I have been wrestling a lot recently with Color choices for my many various stitching projects. This is in great part due to my tendency to change the designs that were the original kit specifications, but also due to the change of thread type being used due to the changed scale of the project. The threads specified for the Wyvern (and the future Lion) cushion, are all intended for DMC cotton pearl thread and the projects were scaled for RL products. When I noticed that the number of stitches for the Wyvern design was exactly the same as that for the Milles Fleures Kits I had been stitching, I assumed I could just use the same Milles Fleures kit silk threads for the Wyvern. And I could for the most part, but there were not enough colors in the Milles Fleures selection to match all the colors in the Wyvern design. So I set about ordering the missing thread colors... but this is very challenging when you don't have a chart to compare the colors across different manufacturers. And the availability of the silk threads here in the USA is hindered by the fact that they are imported so not all stores carry all or any of them. And trusting to the pictures of on-line ordering is also risky... they even don't recommend using the colors shown as a guide! You need to know the number of the color you want... which I have no clue about! So I have been ordering anyway... a kind of thread roulette... I assume I will eventually use the silk even if not right away on this project. For the Wyvern, I got lucky and could use two of the darker blues I ordered for the sky. You can see I have finished stitching that part in the above photo. I am still waiting for a blue-green thread, a purple thread, and could not use the only orange-ish color I ordered as it was too dark for the highlights on the Wyvern's scales. So meanwhile, I have started stitching the frame for the Lion cushion...

 
This is another of Candace Bahouth's designs.... 
one of a series of astrological-inspired motifs. 
And one of the things I love about these designs is that
 she actually designed them with glittery
 metallic gold thread for the stars and the Wyvern's fire! 
I didn't have to change that at all!

 
And yet again, I don't have enough colors of gold
 to complete the design as is....
 so I have ordered some more.
 We will see if they will work!
But the real color challenge I wanted to talk about was
 the still undecided background color for the
 Chinese Dragon Carpet golden border motif!

And I am not entirely to blame for this challenge, even though I did drastically change the kit design by adding the dragons as a central motif. The design had specified two colors of gold for the border that were so close to each other in hue that you could not tell there was a pattern at all! When I added the central motif I used the picture on the kit, showing a lovely gold band, as inspiration for the gold octagon surrounding the dragons. Only to discover once I started stitching that gold band that it was supposed to be a beautiful golden Greek key pattern,not a solid gold band. And in order to decide what color would work best for the background of that key pattern, I started stitching small "samples" along the side of the silk mesh.

I had shown sample of the options I tried so far... a paler gold background.... (bottom) the kit threads as specified (next above) the cream background (third from bottom) the dark blue (fourth up) and the navy blue (top option). And by then I had realized I really needed to include the dark blue outlines for this band in order to get the real effect. I had not intended to try the pale sky blue that is the background of sky with the dragons in the center.....(a piece of the design added by me) because I was pretty sure it would not work at all. But when a Dear Reader suggested I could try it, I thought that this would be a great example to use to show how some colors just do not play nicely with each other! Rather than just try to describe why... they are too similar to each other in intensity (or tone, both being mid-range) and too dissimilar in hue (they just cancel each other out!)..... I should show why by stitching a sample.... 

 
Can you even see the stitched sample above the navy blue one.....?
 It was extremely difficult to get it to show up in photos!


Here you can see I am adding the blue edges to all the samples...

 
Here is a closer view of the samples.... 
trying to get them in enough light... 
but I swear, the gold and the sky blue just swallow each other up! 

 
Here it is even closer... 
and you can see that the design and the background are too similar in intensity,
 neither one dominates, so they just cancel each other.
 And viewed from a distance, they combine to make a slightly green hue....!
So you can see my dilemma, Dear Readers,
 in needing to choose an alternate color than the kit specifies, 
without changing the original design color balance.... 
I am still undecided. So I am stitching the parts I do know first! 

 
Maybe by the time I am done with the outer borders, Dear Readers,
 I will have answered the question of which Color to use...