Showing posts with label Unicorn Tapestry. Show all posts

Tuesday, June 10, 2025

And More Stitching....


No End In Sight....!

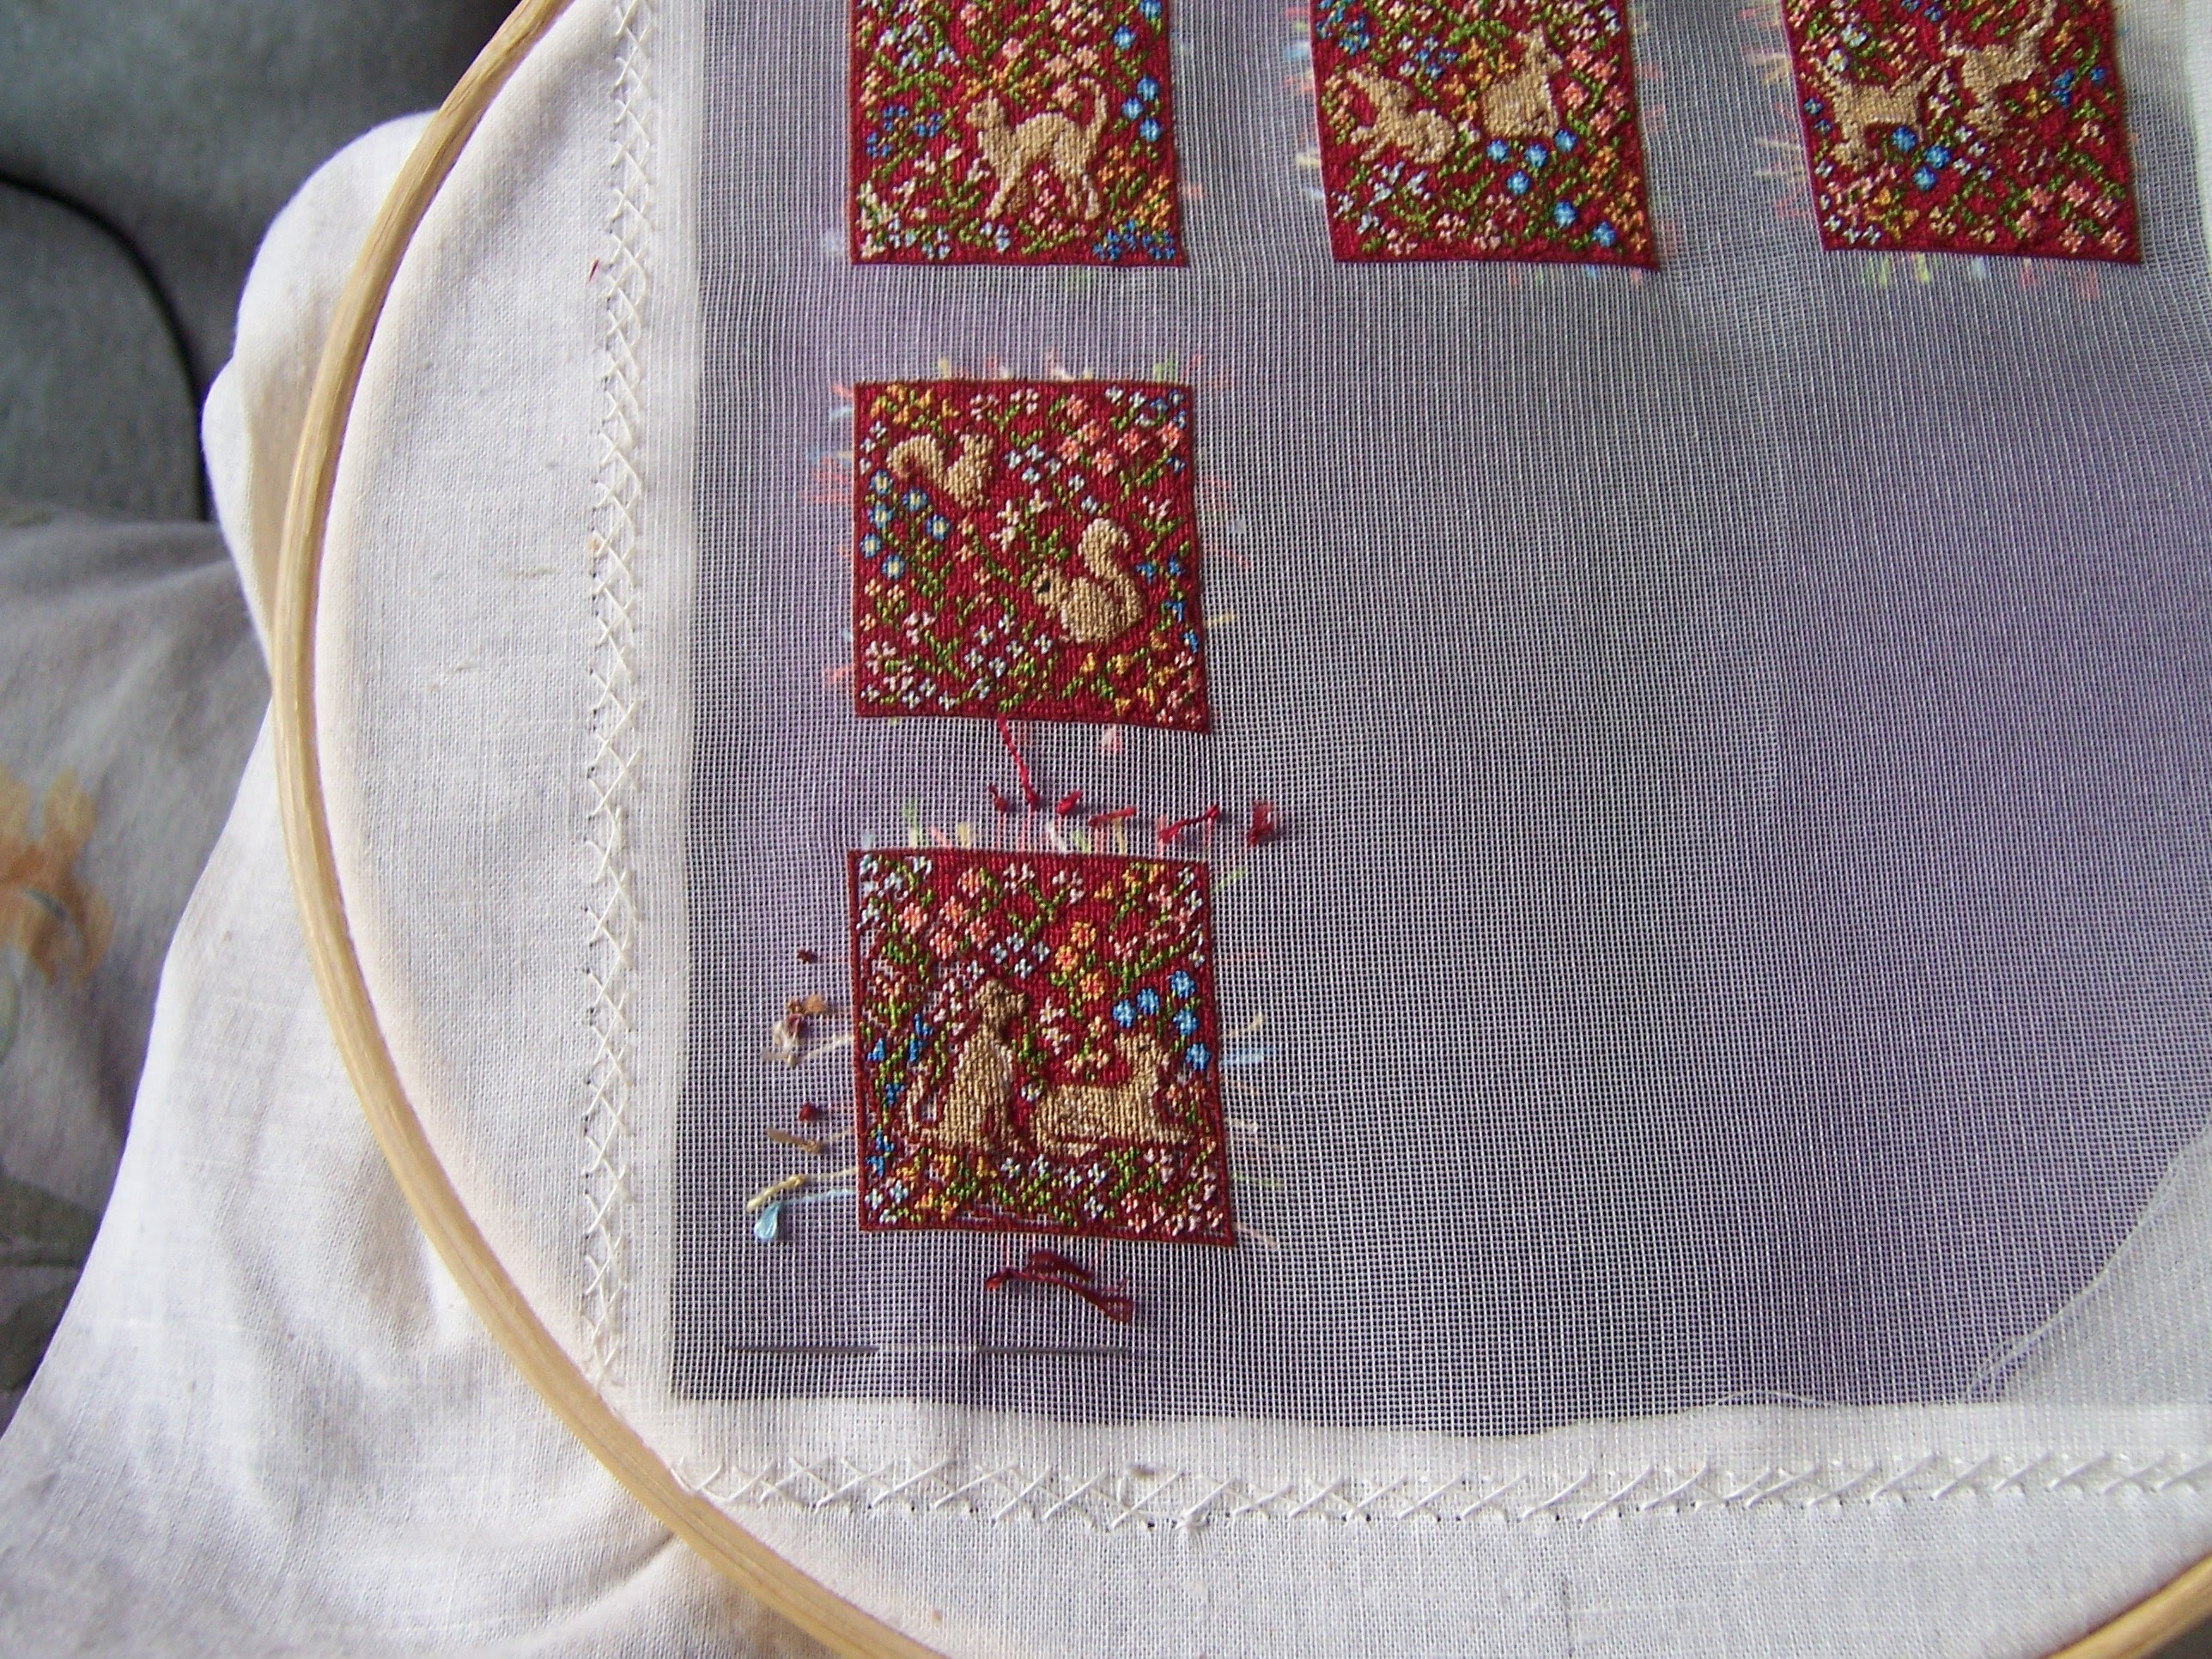
I Have been stitching a Lot, Dear Readers, as I find it a soothing activity in these Troubled Times. In the above picture you can see the cushions I have been stitching, and the Unicorn cushion has had the dark red outlining completed. It really makes the image clear, and reveals the places where the design just might have a few problems... like around the beast's tail and the fence... but no matter, those cannot be corrected at this stage of the work! And you can also see the incomplete Wyvern cushion, waiting for new colors of silk threads to arrive... some are on back-order and have a long travel to get here. As you might imagine, it did not take me long to add the red background to the Unicorn cushion. But having made so many in this series, I was neglecting to take progress photos.

Here you can see the Unicorn cushion is nearly complete... only one corner still needing the bright red! Of course, I finished it and neglected to get a good finished photo... because I'm stitching a lot! And the next cushion design (those two spaces need to be cushions...!) was probably going to be another of Candace Bahouth's designs... but I hadn't decided which... and did I have the right threads? Still to be determined. Which left me with a couple of my other not-yet-finished stitching projects, either the Chinese Dragon carpet or the Medieval Cluny Merchant Tapestry.... neither of which had been worked on in months.

You might recall that I was trying to decide which color thread to use in the "golden" border of the Chinese Dragon Carpet in order for the lovely Greek Key pattern to show. The thread included in the kit was so similar in hue that the design was not apparent. I had done several test samples, without being able to decide which would suit the overall design the best... you can see them here along the edge...

And then I realized that in order to really see what they would look like, I had to include the dark blue outlines too. On the one with the navy blue ground it just tones the contrast down a bit, while on the one with the darker blue ground, it visually widens the band and makes the dark blue more powerful. This looks great in isolation... but would create a very strong dark rather than gold feeling to the border! Hmmmm.... still not clear! But the one thing that is clear... is that if I keep stitching the gold... I make progress!


 (Sorry the picture is dark... we are having a lot of dark rainy days again...)

 
Look at all that progress!
 It felt like I would never be done with that pattern... 
but the gold is done! 
And there is plenty of stitching to be done before
 I have to know the color for the background of this border.

But do you even remember the Cluny Merchant tapestry, Dear Readers?

(I will be calling him a Lord, not a Merchant...!) 

 
This is one of Janet Granger's kits for Medieval style Tapestry.
(She has retired and closed her shop)
But I was never happy with the costume for this fellow. 
It was way too Tudor Era and not Medieval enough for me. 
I had already stitched two of her tapestries, the Medieval Ladies,
 and had radically altered one of them. 
It was time to tackle this fellow's costume problems! 

 
Here you can see the original chart 
and what I had stitched already that I was not going to change. 
(After I had un-stitched what I could!) 
The position of the hand and the drape of the sleeve
 needed to be a little different.
 And his under-tunic would not be visible at the neck. 
The collar would be wide and closed.

 
The era I am using is more 1430 than 1500... 
The belt is very low on the waist and the tunic very pleated
 and the sleeves and hat are emphasized and outlandish...

 
I needed to actually chart the new design....

 
Gradually adding the details... coloring in the squares....

And beginning to stitch the changes... the new hand position....
 

 Adding the fur to the collar....
 

 And beginning the hat.... and needing to alter the colors somewhat!
The original greens provided for the kit were too similar in the darker tones...
 
 
 I swapped the mid range one for a more olive green... 
and the lighter one for a more apple green.
 
And started the sleeves...


 Adding more fur on the sleeves....
 

And adding the belt and purse and starting the tunic pleats....
 
And here you can see him placed next to the
 Medieval Ladies Tapestry I stitched a few years ago. 
I have been "assuming" from the start that these tapestries are all 
fragments of a much larger original tapestry.
 The Lord's section is taller than the Ladies one,
 but it will not matter because they will not be in the same room... 
you will never see them side by side. 
And in the Medieval era they did not change the size
 of the figures for proportional reasons, 
but more for the importance of the figure itself.


Here I have finished the fur at the hem of his tunic
 and am working slowly on the pleats.
There is still a long way to go,
 and eventually I will get his horse charted too... 
but first I have to decide the colors for him...
 
Meanwhile, some of the threads I ordered for the Wyvern arrived...
Here I am adding the dark blue to the sky.
The charts for this are not easy to read... 
some of the printed colors are very similar in hue and hard to tell apart.
 Also the colors on the chart are not all close to the real stitched colors. 
When in doubt, I have been relying on the photo of the finished project in the book...
 and that one shows the sky as dark.


Here you can see I have begun to add the mid-range blue to the sky...
and I also stitched much of the bright coral color of the body.
The "fire" he is breathing is gold metallic thread. 
It was very challenging to stitch but it makes a great impact!
Oh, and you can see the completed Unicorn too!
 
So you can see, Dear Readers, 
I have been stitching a Lot...
And there is Still no end in Sight!
 

Tuesday, May 20, 2025

Stitching And Stitching...


And Still More Stitching....

It Turns out, Dear Readers, that stitching is almost the only thing I got done in my Mini Worlds over the past few weeks. I realize now that it is so comforting to have something small to pick up and apply creative energy to between phone calls and doctor appointments. It was way back in April that I had shown you the beginnings of the Hound and his Mate on the fifth cushion in the series. It did not take me long to get all the blossoms stitched around them. I have really enjoyed the wonderful variety of blossom arrangements and different types and colors that are the "Mille Fleures" of these kits. Every one of the backgrounds is different, even though some of the flower types are repeated. Once the blossoms were all stitched it was time to outline them all in the darker red. This takes quite a bit of very careful stitching.


And once that is finished the bright red background is added.
 I am always surprised at how much difference the bright red makes!


It really tightens up the pattern and "cheers up" the appearance!
 And while I was still adding the background color,
 I was starting to plan the next stitching options...

Because all that remaining silk mesh was going to need some stitching to fill it!
 
And I had some good options to work with! You can see the beginning of another square cushion design in the upper corner. This is taken from a book I bought many years ago of medieval tapestry stitching projects by Candace Bahouth. Her designs are for RL size projects, but a few would translate really well into mini cushions at this scale of thread count!


This design is for a small bag or purse in RL size.... and it happens to be 60 stitches to a side, exactly the same as the squared cushions! How easy is that? And even though the chart calls for more colors than the Mille Fleures kits came with... I have ordered a few extra colors, hopefully to fill the gaps in the color range. So I started in with the stitching....


But several of the threads I had ordered were on back order...
 and might take weeks to arrive... so I didn't get very far with the Wyvern. 
But I had started another cushion outline as you can see in the hoop..... 
along the same pattern as all the other cushions 
because I was going to design one of my own! 
And this one would be a replica of a RL cushion I have had for years...

A version of the Unicorn In Captivity
 taken from a Medieval Tapestry in the Cloisters Museum in New York.
 Although the original tapestry has a green verdure background
 rather than the red of the Cluny Tapestries.
 
I had to do the complicated part of trying to get the graph paper chart drawing to fit the printed backgrounds to see how the figure would need to be placed among the blossoms.
But it also needed the complex fencing.... I decided I needed to chart the entire thing myself.


And part way through the process I realized I had to work within the circle formed by the original kit outline... which I used to help me keep the count of the stitches correct.... so you see here the fence fitted into the circle as best I could.


And I started in with the stitching!


Because I wasn't confident of my design details, Dear Readers,
 I decided to stitch all three of the "basic" unicorn colors simultaneously...
 the lightest one in this case is the body color and the darkest is the dark shadows and the middle is for lighter shadowing in the coat and mane. I needed to be able to see how they looked as I went along in case I wanted to make changes... but it looked pretty good as the chart was drawn.


 So I just kept on going!


Here the Unicorn is outlined. 
I needed to do this right away so the background elements
 would stay separated from him visually.


And because I wanted some of the flowers to be
 in front of the fence in the foreground... they had to be stitched first.


 And bit by bit the fencing is added and the flowers too.


And I needed to expand the flowers into the corners too...


Here you can see most of the fencing has been outlined too.


And the outlining has been completed. 
Now all that is needed is the bright red background color,
 but that will have to wait for another day.
As you can see, Dear Readers,
I have been finding Comfort in stitching
 and stitching, and Still More stitching!


Monday, June 18, 2012

New Door, New Floor And More

I LOVE Tiny Hinges!

I Wanted a New Door, Dear Readers, that would be the more Formal Front Door and open into the Main floor of the Tree House, rather than into the below ground Kitchen level. I don't know how it is in your neighborhoods, but around here in New England, people almost Never use their Formal Front Doors! Sometimes they are even nailed shut against the cold Winter Winds and are never opened again! But nevertheless... there IS a Front Door.... and so I wanted one for the Tree House! Figuring out Where it would fit in was a bit tricky and required quite a bit of odd angles and tiny spaces... but I have managed it! It opens at the top of the kitchen stairs into a tiny vestibule off the "Salon" (which is what I am calling the Formal Living Room!) Here below you can see the door and the tiny bit of vestibule flooring....


And here you can see the door from the other side.....
I have made the door handle out of a bit of root.. 
and the end sticks out to act as a lever so I can operate the door from the outside of the house.... !

The tiny vestibule wall is "hung" with a piece of the Unicorn Tapestry.... 
which is Just visible through the door into the Salon....
And the floor of the Salon is made of a marquetry patterned paper.......

Here below you can see the outside of the vestibule wall with the door on the left..... 
and you can see I have started to add the paper mache to the lower level for the roots of the tree...
(I have put a layer of plastic wrap between the damp mache and the wooden floor while I am working...)

More of the paper mache being added to the Kitchen level........
This is not the final shaping of the mache but more of a strengthening base layer.....

And more of the mache layer.... 
this will form a level base for the next floor to attach....


And here you can see the rough framework of the Salon loosely set in place for fitting purposes.... 
nothing is attached yet! You can see the front (opening) wall has a window cut in it....

And I just HAD to add Shutters!!!
These are interior shutters as were common in the eighteenth century around here....
Please forgive my crooked hinges and the ratty edges to the wood... 
But can you Believe there are Hinges that small?!!

See, they open and close!!!!

And here you can see I have added more of the interior wall layers, creating a deep window embrasure.... 
It will eventually be painted, hiding some of the flaws in the wood.... 
and there will be more paneling at the bottom of the wall for wainscoting....


And here you can see the window "glass" panes have been added! 
I used the same technique as before with the painted gold mesh, only this time I used a lighter gray paint and lined the panes up vertically so they would look more like the "sixteen over sixteen" type of colonial window frame which is typical of the elegant older houses in this area.


Here is a view from the outside with the interior shutters partly open....

Meanwhile, for the interior of the Salon I have built a fireplace and mantelpiece in a style I think is sort of "Georgian" what we call "Colonial" over here! It sits on a diagonal wall between the door to the vestibule and an alcove on the left hand wall which is not yet built...... and on the opposite corner there will be an ornamental "Niche" for some statue or elegant china.... whatever I can come up with in such tiny scale!!

Here below you can see the mantelpiece in slightly better detail...
 made of tiny bits of wood and tinier bits of thin cardboard....

And here below you can see the Mirror I will be using.... 
I know it is a bit much... but I will probably tone the gold down a tiny bit.... 
and I think it will do well enough...! 
I also added a "marble" hearth... painted cardboard of course.....
And would you just look at those Tiny Hinges on the door!!!!


Here you can see I have added the painted brickwork to the fireplace...... 
yes, there will be a fire!!!

Here is a slightly closer view of all those painted bricks....!


And here is a view of the "Front" Door from the outside....... 
it will eventually be much more closed in with tree roots....

And an overhead view looking down at the opening wall with the window.... 
this will not be viewable from this angle once the ceiling is in place....! 
But I love how it makes me able to imagine standing at that window looking out at the little brook down below.....

And a view from the "front" where the walls open... two floors tall...
Eventually these opening doors will be covered in paper mache "tree bark" to match the rest...

Oh, and I almost forgot to show you the last Tiny pieces I made for the Kitchen......
I had to make a copper Tea Kettle.... (for how else can one boil water for tea?)
I also made a tiny trivet for it to sit on in the fireplace.....

And here you can see them by the fire......


And there HAD to be A Robins Egg Blue Teapot on the kitchen table.....!

So there you have it...
A New Door, a New Floor and a Whole lot More!