Showing posts with label Lord's Bed Chamber. Show all posts

Tuesday, October 4, 2022

A Few More...


  Stitches And Rocks...

I Had nearly finished the stitching, Dear Readers, on the background of the Medieval Ladies Tapestry before I left for my Travels all those weeks ago. And once I returned, it was not difficult to complete. I don't know about you, but I do get so absorbed in these projects, I almost don't want to finish them! Except that I know I will Love looking at them when they are finished and installed in their home. And I must confess, that the final steps involved in order to truly be "finished" with these tapestries, adding the tabs for hanging them and sewing a backing, do not excite me one bit... and tend to take a loooong time to get done. But meanwhile, let me show you the completed stitching!

I think it turned out as well as could be expected of a "hybrid" design!


And here it is with the other Ladies Tapestry... 
so you can see just how well they go together
 and suggest that they were once all one Tapestry!
All I need to do is hem the new part, add the tabs etc.
We can pretend that I'll have it done in no time.... 
while I go sweeping off to stitch my current obsessive project....
The Baktiari Carpet.


You might be able to tell I have been attempting to get
 all the outlines complete for the "lozenges" 
in the middle of the carpet.
And as I was working on the ones at the bottom,
 I noticed that I had counted wrong on the "legs"
right below the "knot" where they join each other...
most of the lozenges have only two stitches before they spread apart....
 but on the bottom row they need to have four stitches!
(If you need to see a reference picture,
 the partly stitched beginning in the previous post will show you!)
Fortunately, I was able to un-stitch the parts that I had done wrong!
Above you can see it after the removal of the mistakes...


Here you can see I have started to lengthen
 those "legs" to four stitches long...
(If you get out your magnifying glass and count very carefully!)

And while I was wrestling with those few stitches, Dear Readers, 
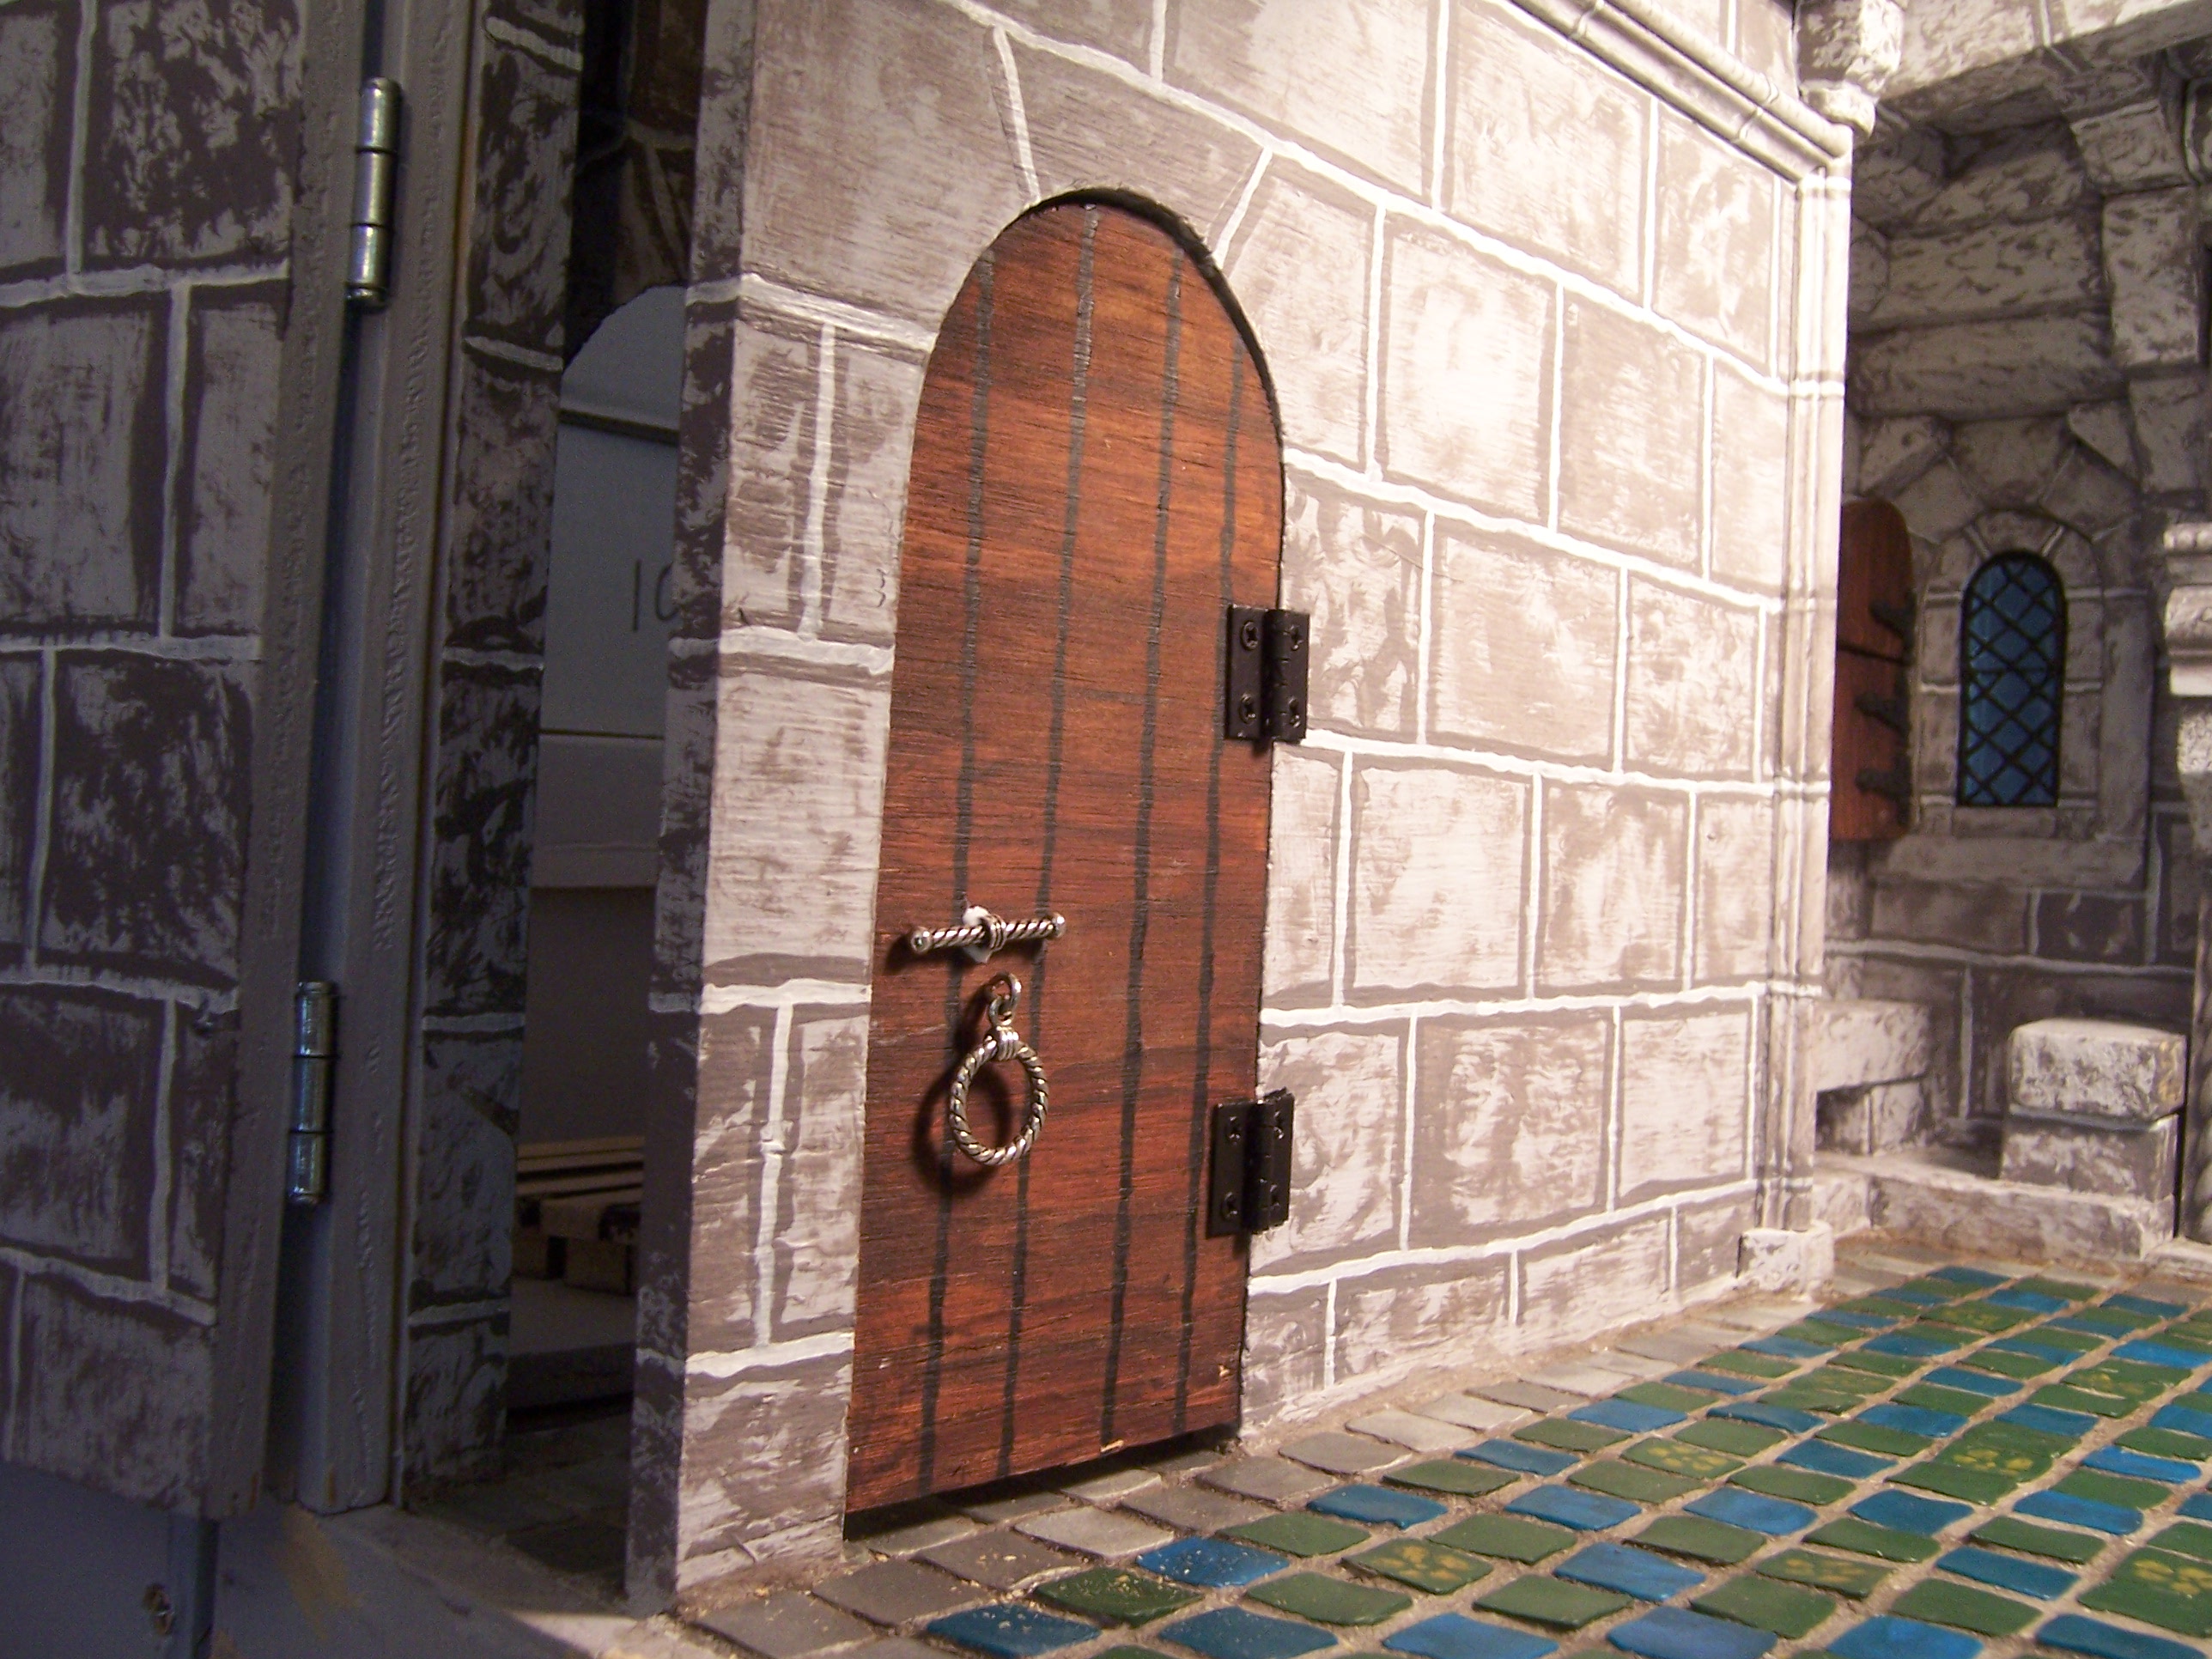
I was also trying to reacquaint myself with the rock-painting process
 for the door surround on the Lords Bed Chamber door!


Here I have glued the vertical pieces in place already....
 (you didn't need to see them being painted, did you?)
But those were the easy ones...
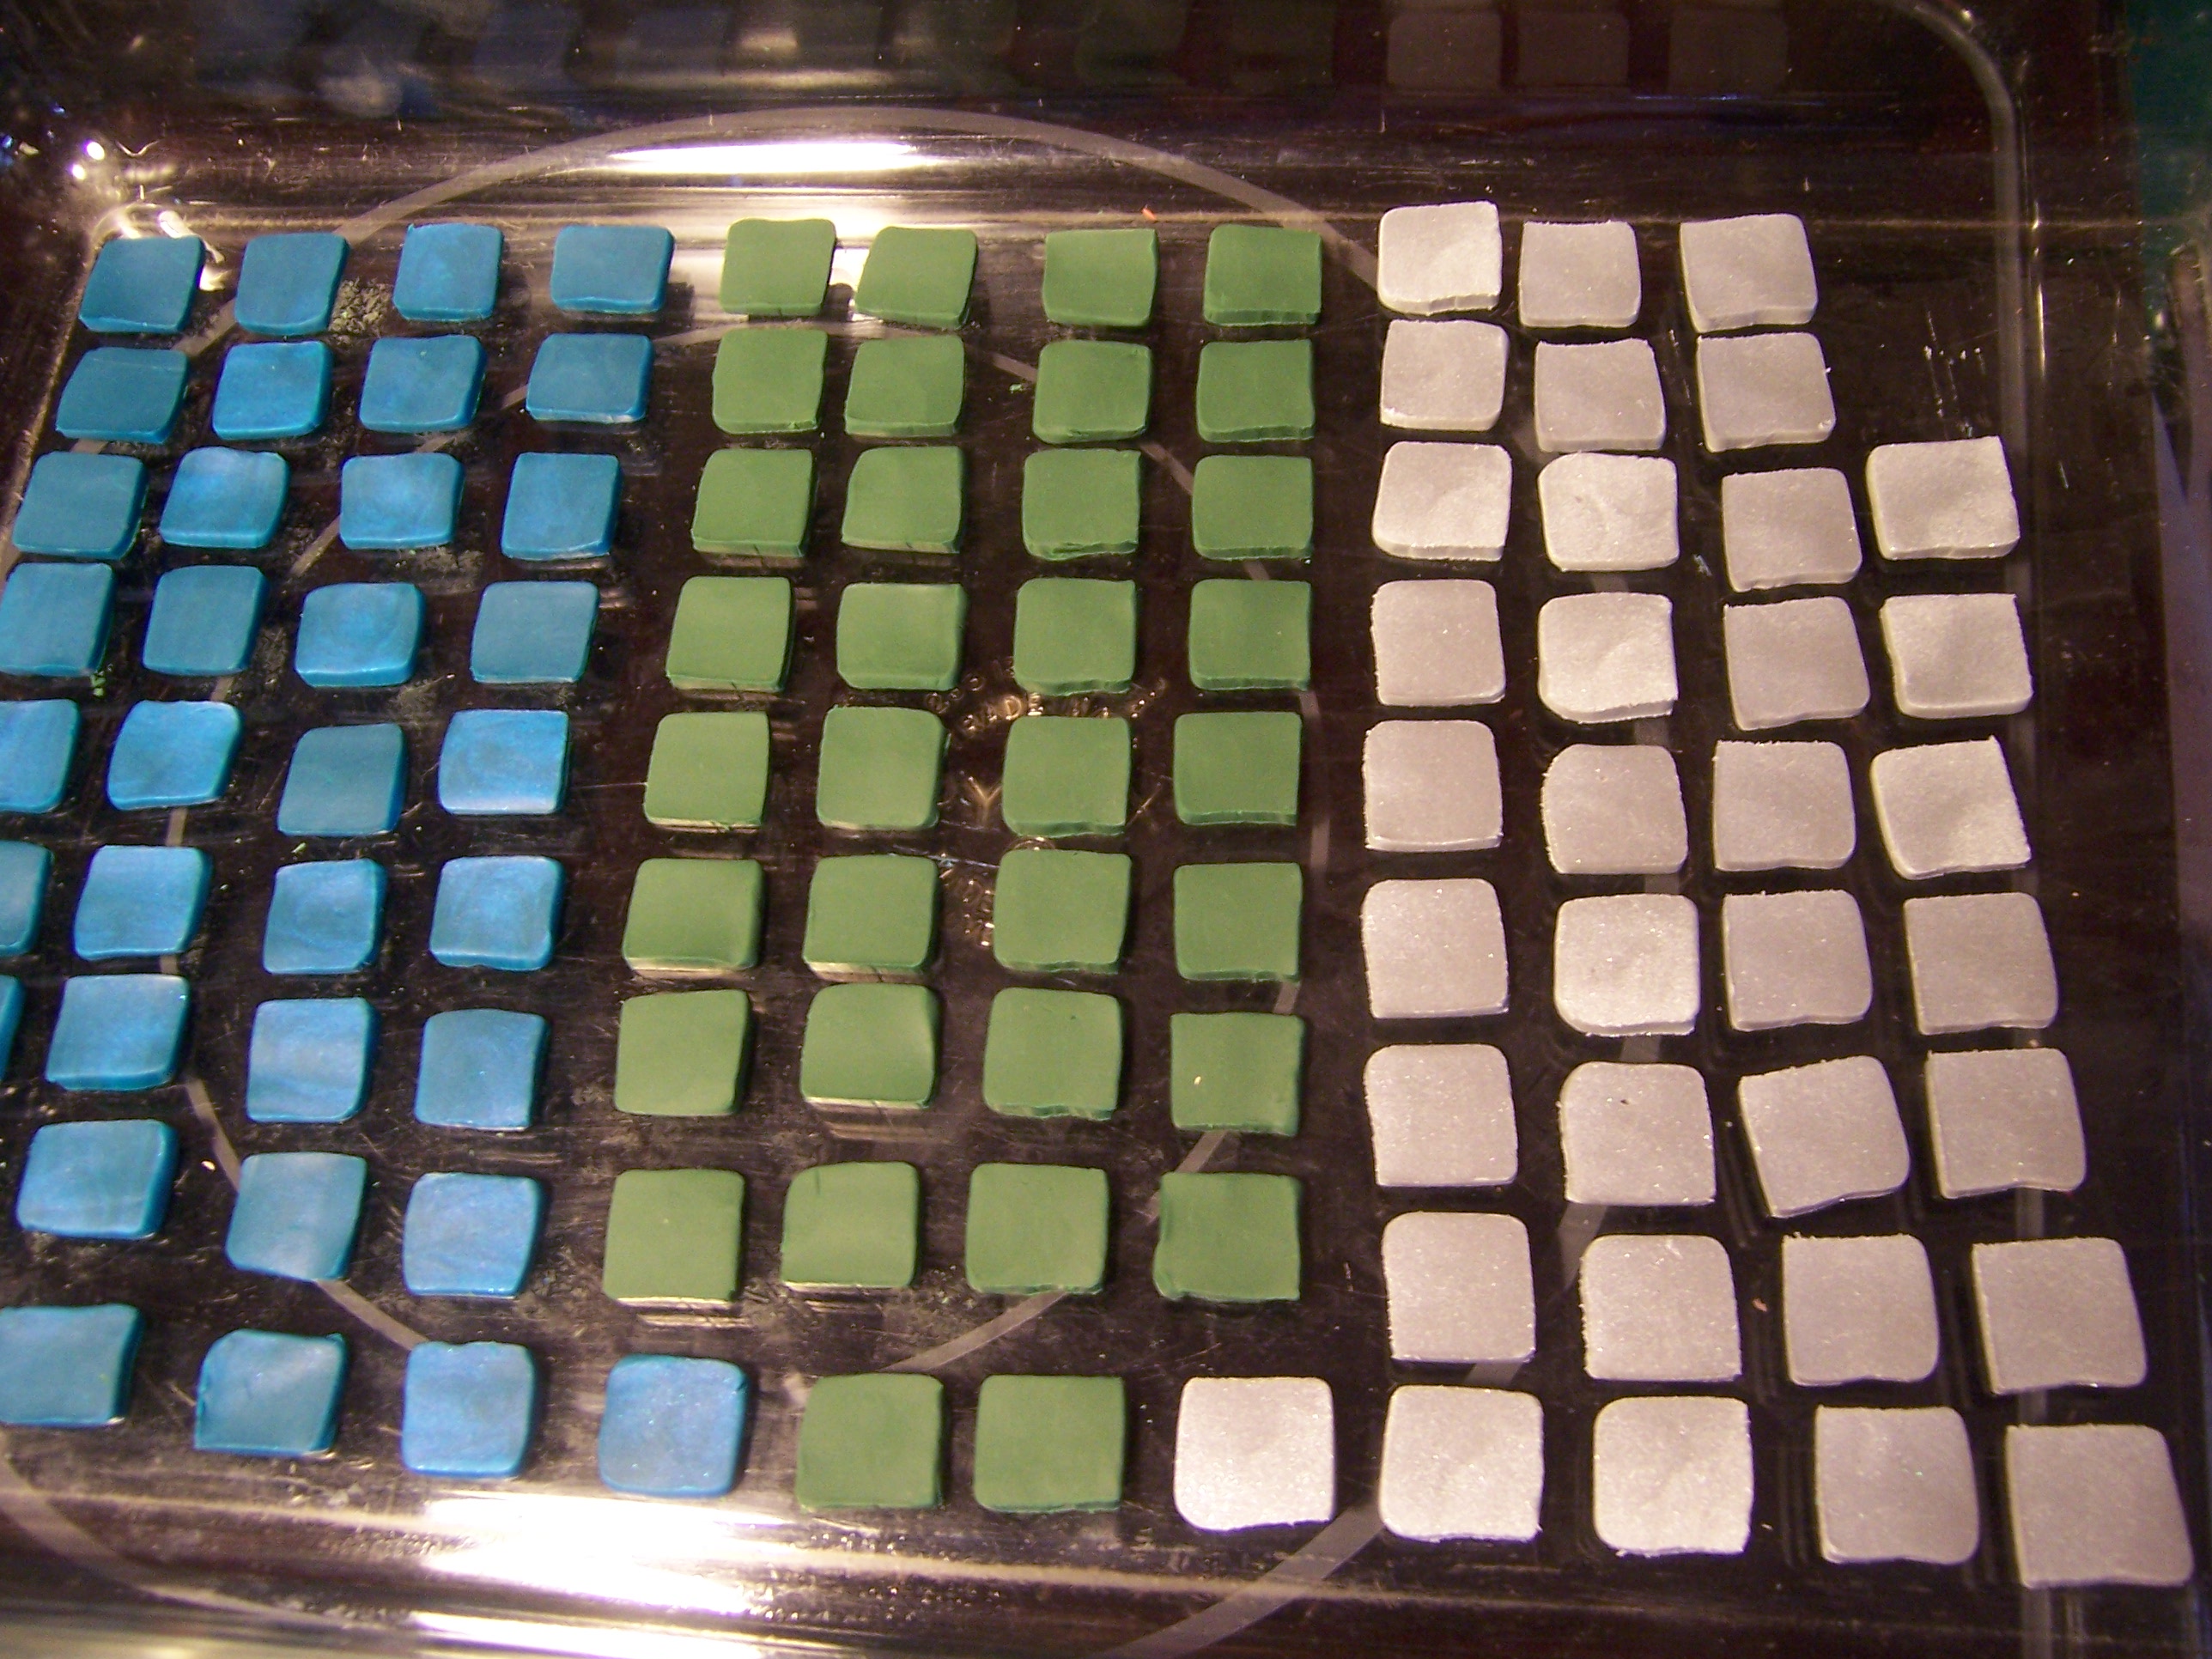
It took the entire next day to cut, fit, prime, paint
 and glue the remaining five rocks!


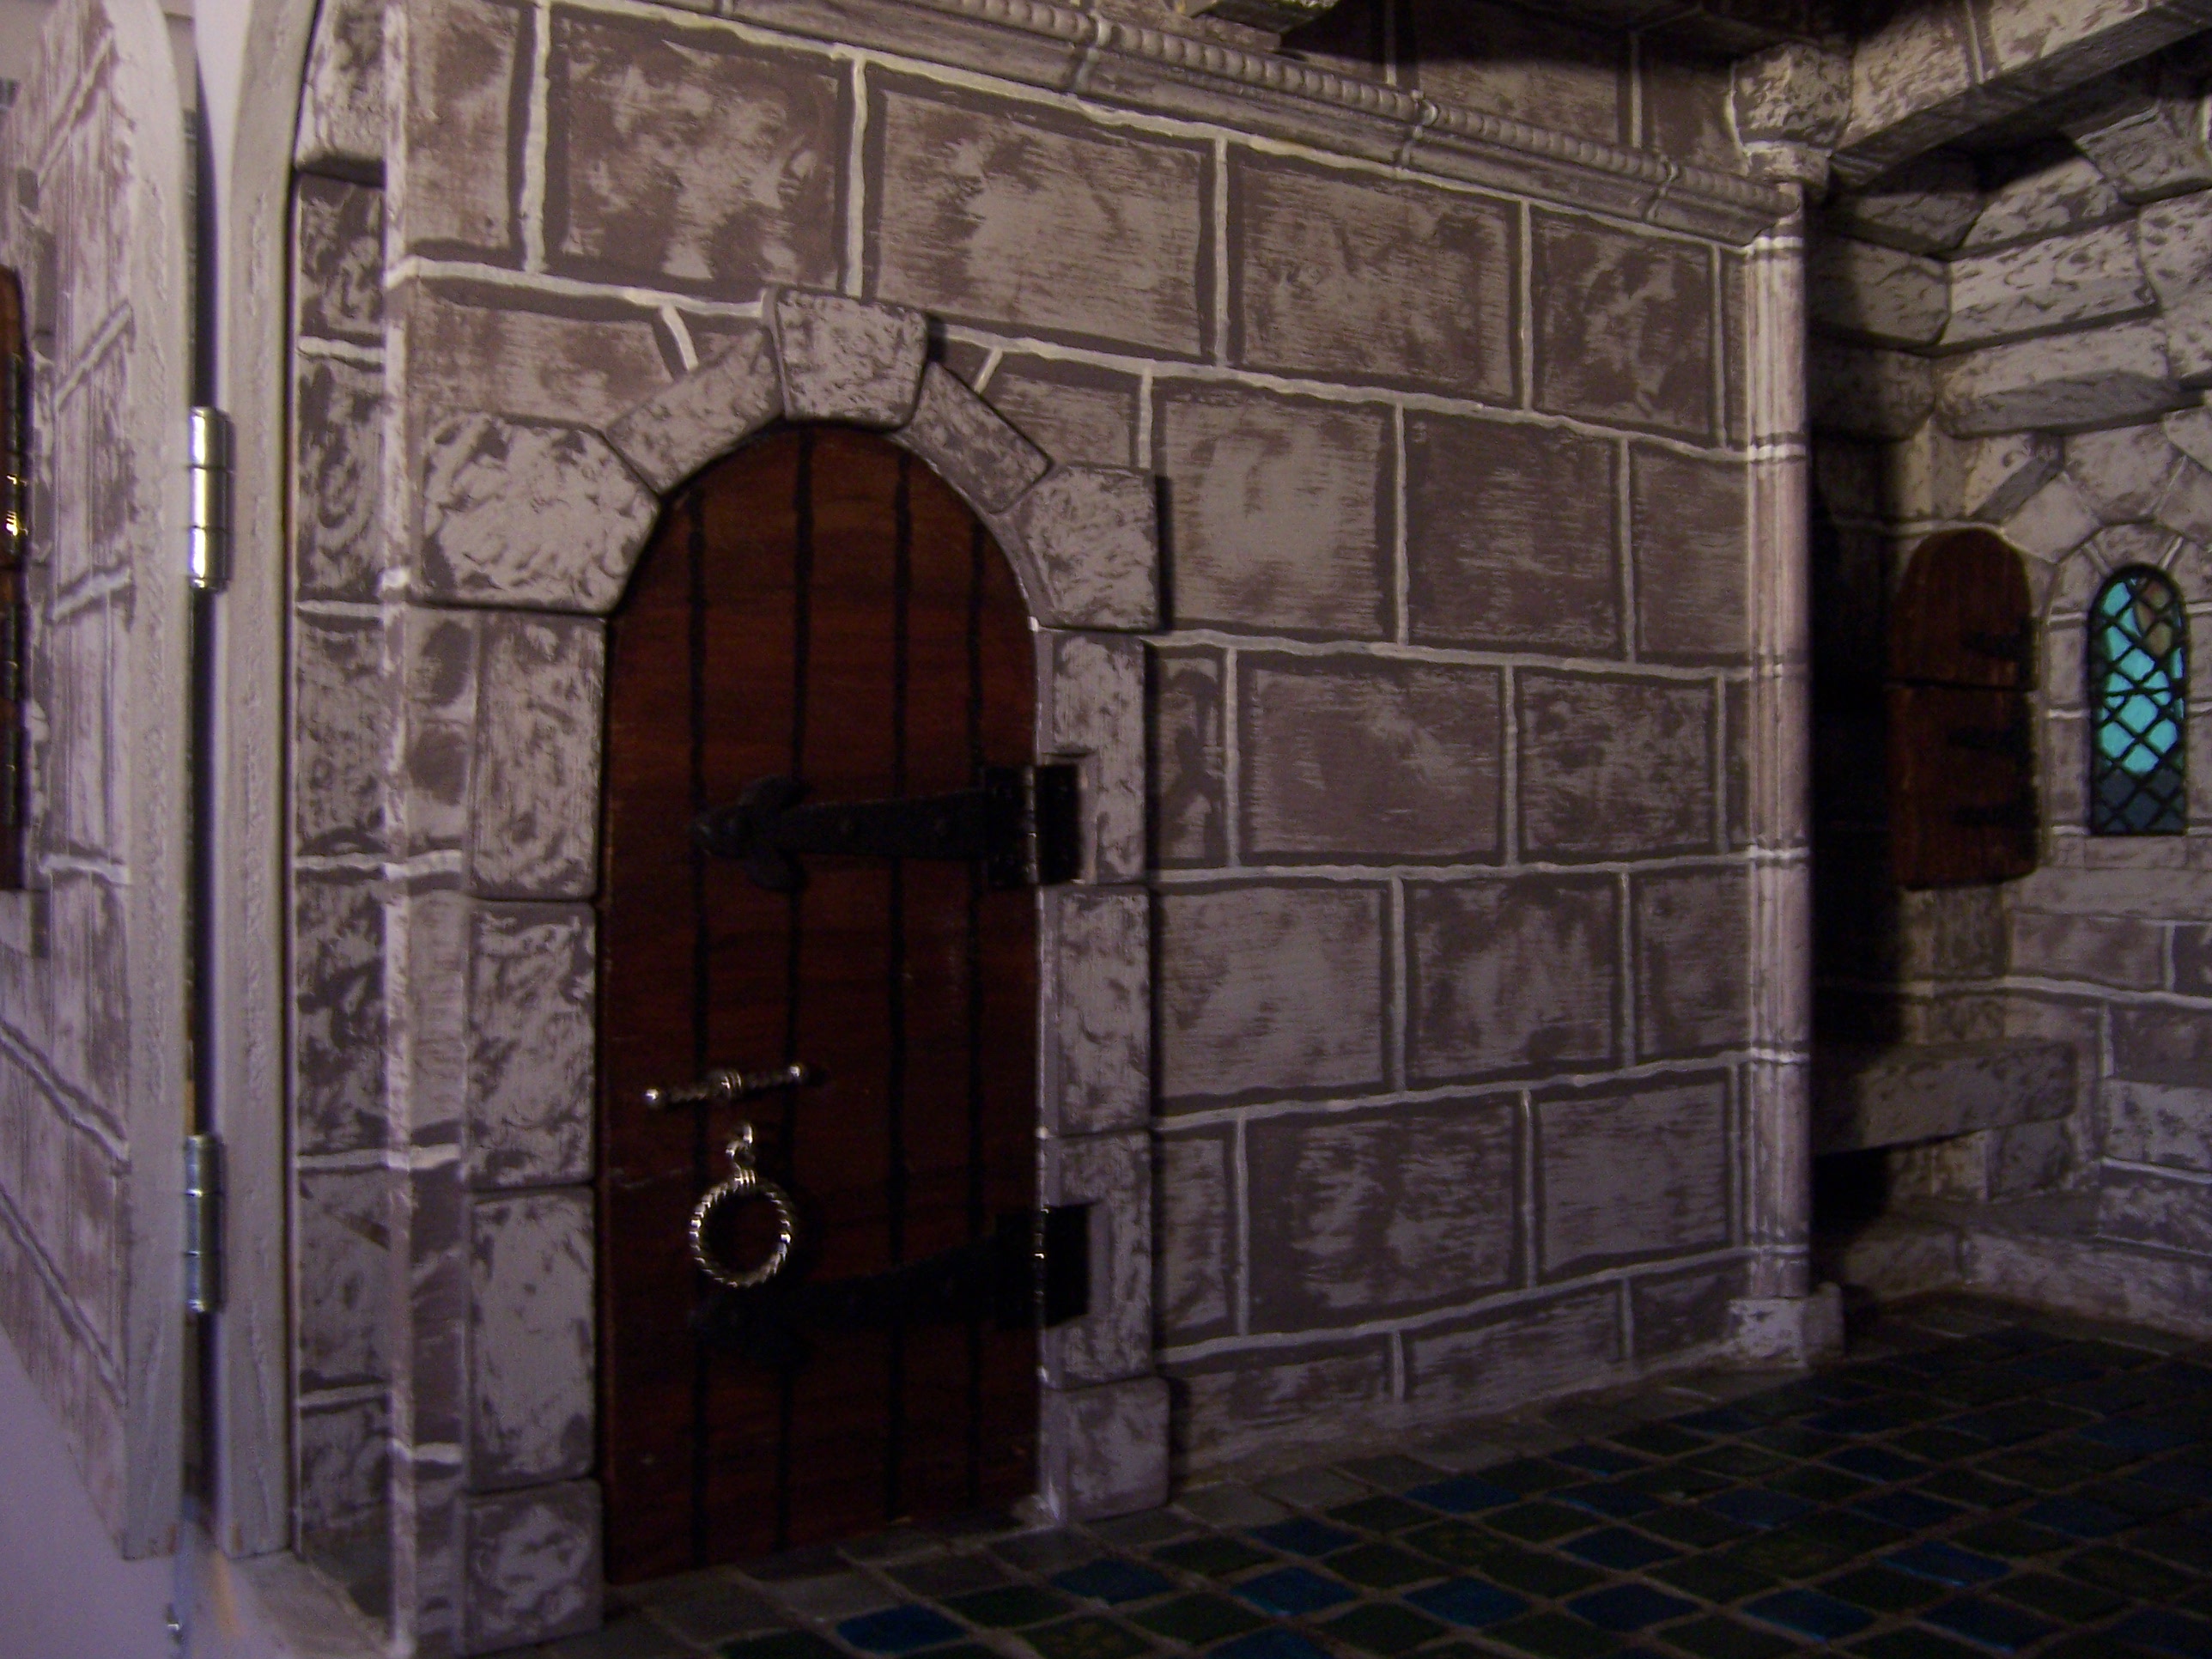
And I didn't get to the grout painting, 
which needs to be done to tidy up
 the courses of the rocks.
(Dare I say the rocks for the Bed Chamber are done?)

And as for the few stitches on the new carpet...


I finished fixing the Lozenges and then some!
As I am sure you have noticed, Dear Readers,
I find it impossible to only sew a "few" stitches!
Just a few more.... 
and a few more..... 
and a few more....


Wednesday, August 31, 2022

Fixing The Floor....


 And Other Details....

I am Happy to tell you, Dear Readers, that fixing the floor of The Lord's Bedchamber was not all that difficult to do. It just required some courage, some time and some better weather! I was able to muster all three last weekend. I decided that I had nothing to lose by simply applying a coat of polyurethane varnish to the entire floor. It already looked damaged so anything I did was unlikely to make it look worse. But first, I did go over the gold roses where they had scraped away with the grout. Then I waited for the weather to become cool enough that I could open all the windows to ventilate the fumes of the polyurethane. Usually I either spray the varnish outside on my porch, or take the items to the cellar to be coated by paintbrush. But in this case, The Castle is way too big to take anywhere! I would need to apply the varnish in place. Late in the evening as the temperature dropped into the 80 degree range I opened all the windows and doors and applied the coat of varnish. Above you can see the floor still wet from the application. I did not pause to take any progress pictures. And then I left it to dry overnight.

And the following morning, I came to see how it looked....
I had used a matte varnish, and my biggest concern
 was that it would leave the tiles looking too "flat" and drab.
But I actually think it has given them just the right amount of smooth patina!
And the grout is not noticeably darker either, which I am glad of.


And it is not obvious where the gold roses were repaired,
 which is also a good thing.


The teal tiles may have lost a little of their Iridescence...
but I suppose we can attribute that to the aging of the tiles....
and I don't suppose anybody would notice
 the lack of something they did not know was supposed to be there...!


So can we call it fixed?
I am calling it fixed and possibly better than before!

And while I was fretting about the floor, Dear Readers, 
I realized I had skipped a necessary step
 that should have been done before I grouted the floor!
And needed to be taken care of now....


The front wall of the room below the Lord's Bedchamber,
 the framework for the opening doors that I call the "proscenium"
 had never been glued in place!
I needed to carefully unscrew the screws and gently pull the wall off
 (where the floor grout had attached itself I had to carefully cut apart)
And then I applied the glue and screwed it back in place!


Of course, you can't tell it's been glued!

 
And then I applied the wood filler over the screw heads....
and will eventually repaint them...
so it is clear that the wall is no longer removable!

And since I was taking care of so many unfinished bits....


I added the door hardware to the Bedchamber door!
(Yes, I know, I still have not added the "rocks" that surround this door!)


And some huge hinge straps made from sculpey....
Nothing delicate about these!


I painted all the brass hinges on the window shutters black
 so they resemble iron not brass...


And I even got around to hooking up the wiring
 for the fire in the Lord's Bedchamber fireplace!
(It might be hot now, but Winter is not far off...!)

 
 I know it is really hard to see, Dear Readers,
 but I wanted to show you the Bedchamber lit at night...
with only the fire and the two candles...
The Medieval Castle is a dark and moody place...
but I think I can say the floor is fixed!

Tuesday, August 2, 2022

The Lord's Bed Chamber Floor...


Tiles....

Way back in the Springtime, Dear Readers, as I was contemplating the future flooring for the Lord's Bedchamber, I could only imagine a deep rich agate-esque green tile floor. I was envisioning a forest glade in springtime with dappled sun on green! So I bought sculpey in various green and blue versions, not being sure how they would combine or look when baked. In the above picture you can see the first run of green, teal and silver tiles. The silver are so beautiful and glittery, I couldn't resist. And once the teal ones were baked, they revealed a lovely iridescence too! But how would they look in the dark gray rocky walled chamber? Well, I had to do a sample test run.

Here you can see a batch of the tiles, on a sheet of cardboard....
Slid in on top of all the construction debris....
 just to see if it looks about right...
And I think it is heading in the right direction!
But I needed to design a "pattern" for the colors...
Not just an ordinary checker-board bicolor scheme.
 

And after some experimentation, 
I arrived at a basic green,
 crossed with diagonals of teal,
and bordered in silver.
But it still lacked something of sparkle....
 until I decided to paint a gold rose
 in the center of some of the green tiles.
As if the blossoms were strewn on the forest floor!


Here you can see them from above...
 all laid out for testing the spacing.
The gold roses are in the centers
 of the diamonds formed by the teal tiles.
Sorry, I don't have any pictures of the "before"
 with no painted roses.
As far as I was concerned, 
it looked good enough for a bed chamber!
So all I had to do was glue them all in place!
This is harder, and slower than it sounds!


First, you have to have enough light, and room to manouver,
So I removed the ceiling and propped a lamp in place.
And spent the hot days of the weekend slowly gluing tiles.
In order to keep the pattern correctly laid out,
 I remove several rows of tiles, in order,
 onto a strip of cardboard...


Here I have already glued all the rows
 from the hearth forward to the open section.
Two rows of tiles are on the cardboard.
 I glue the next row in place, 
then slide the remaining row up
 and remove two more rows onto the cardboard,
 keeping them in order as I go.
Then I glue two rows in place...
 slide the third row up and repeat....! 
It took two days...
But it was hot... and I took breaks....!
 

Another view from above.
I left the tiles in the side alcove unglued until the end.
It was harder to reach into that space 
and the tiles needed careful fitting.


And eventually I got right up to the front...


And realized there was a gap where the floor
 should meet the "proscenium" of the room below... but didn't quite!
I needed to add a sliver of floor to keep the grout in place!
Which meant removing the proscenium of the room below....
(good thing it is still just screwed and not yet glued!)


Here it has been removed...
And because I have saved all sorts of those slivers of trimmed plywood.....


I had a decent selection to choose from!


I think this one looks usable...!


There! Now That is satisfaction!!
(Compulsive savers are vindicated again!)


And with the front row of tiles glued in place!


The bed alcove carefully fitted and glued!


And the chapel niche too!
All we need now is the Grout!
 

I don't know about you, Dear Readers,
 but I love how it is looking!
And I can't wait to see how it looks with the grout!


Tuesday, June 7, 2022

Details, Details, Details......


The Things We Almost Forget.....

As I Was Eagerly rushing to begin gluing most of the loose Castle parts, Dear Readers, I had one of those "But Wait..." moments that stopped me from getting too far ahead of myself and taking steps I would regret later. I was looking up at the bare ceiling, starting to think about what would be the best way to attach the many beams I was planning to have spanning the gap between the arches, and I realized that trying to cut and fit all those beams to the exactly correct length to keep them from falling off the ceiling while in construction would be a challenge I did not want to attempt! (I have had this problem when making the first room of the Dollmaker's Studio!) My cutting skills are not that good! The beams would instead, need to be notched into the arched ceiling supports, and those notches needed to be cut before I glued the arches in place!

I was relieved to discover that it was easier
 than I had thought to cut all the notches. 
The grain on this wood is lovely and even!


Here you can see the notches have been cut and I am testing it in place.
The stair wall and ceiling have been removed.


Here I am aligning the beams between the arches
 to make sure the spacing is right.


Here you can see all the beams are cut
 and the notches in the arches too.
The beams will each need to be "notched" on the ends 
to fit into the corresponding notch in the arches.
But this will be done after the arches are glued in place.
In the meantime, they sit too "high"
 to have the ceiling board in place.
Now, at last, I could glue some of those "rock" pieces in place!


Starting with the final section of "rock" ceiling above the hearth.
This makes all the area behind the arch part of the stone vaulting.
The wooden section of the ceiling will be over the middle of the Tower.


And the Arched section is glued!
And as I was about to rush ahead and glue the Stair Wall in place,
I remembered that the back corner 
had a small Niche built into the wall....


Back in the far corner where it is impossible to see!
There is an ornate Cross,
 for the Lord to make his private Devotions...


It is a bare corner except for this Treasured symbol.
And as I was pondering the Darkness of this corner,
 and wondering where the Lord would set his candle....
(indeed, I have been pondering that question
 for this Chamber for some time...!)
I thought I had better test some lighting
 before I got too far ahead of myself!


There really are only a few options for this Chamber!
One of them is near where the bed will sit...
(Here you can see me trying to hold a light
 and take a picture at the same time!)
 But I am concerned about the (future) bed hangings 
and candle flames being too near each other!
The other option is on the opposite wall... 
but I hope to hang a Tapestry there!
So how will I light this chamber?
In the Middle Ages, people were
 accustomed to the darkness of night.
The Lord most likely came to his chamber at bed-time
 with a single candle in hand and set it on one of the rock "corbels"
 which were placed to be useful that way.
He would have had enough light to see himself to bed!
No chandeliers! No great branched candelabras! No reading in bed!
Candles were expensive and not wasted.
But if he were going to say his prayers before sleeping... 
would he not set the candle near the niche? 


How far around the corner and how high should it sit....?


This would be unnaturally high... 
it is about 7 inches from the floor...
He would be annoyed to have to reach so high for his candle!


Here we can see what it illuminates... 
(getting my camera way back in the corner!)
but it is too high.


And if we lower it a little bit... 
build in a corbel  for it to sit on....
(figure out how to run the wires out the back...!)


Well, Dear Readers, I don't know about you, 
but I am liking the way this looks!
And I did get the Stair Wall glued in place!
But it is Remembering those last minute little details
 that make all the difference!