Tiles....
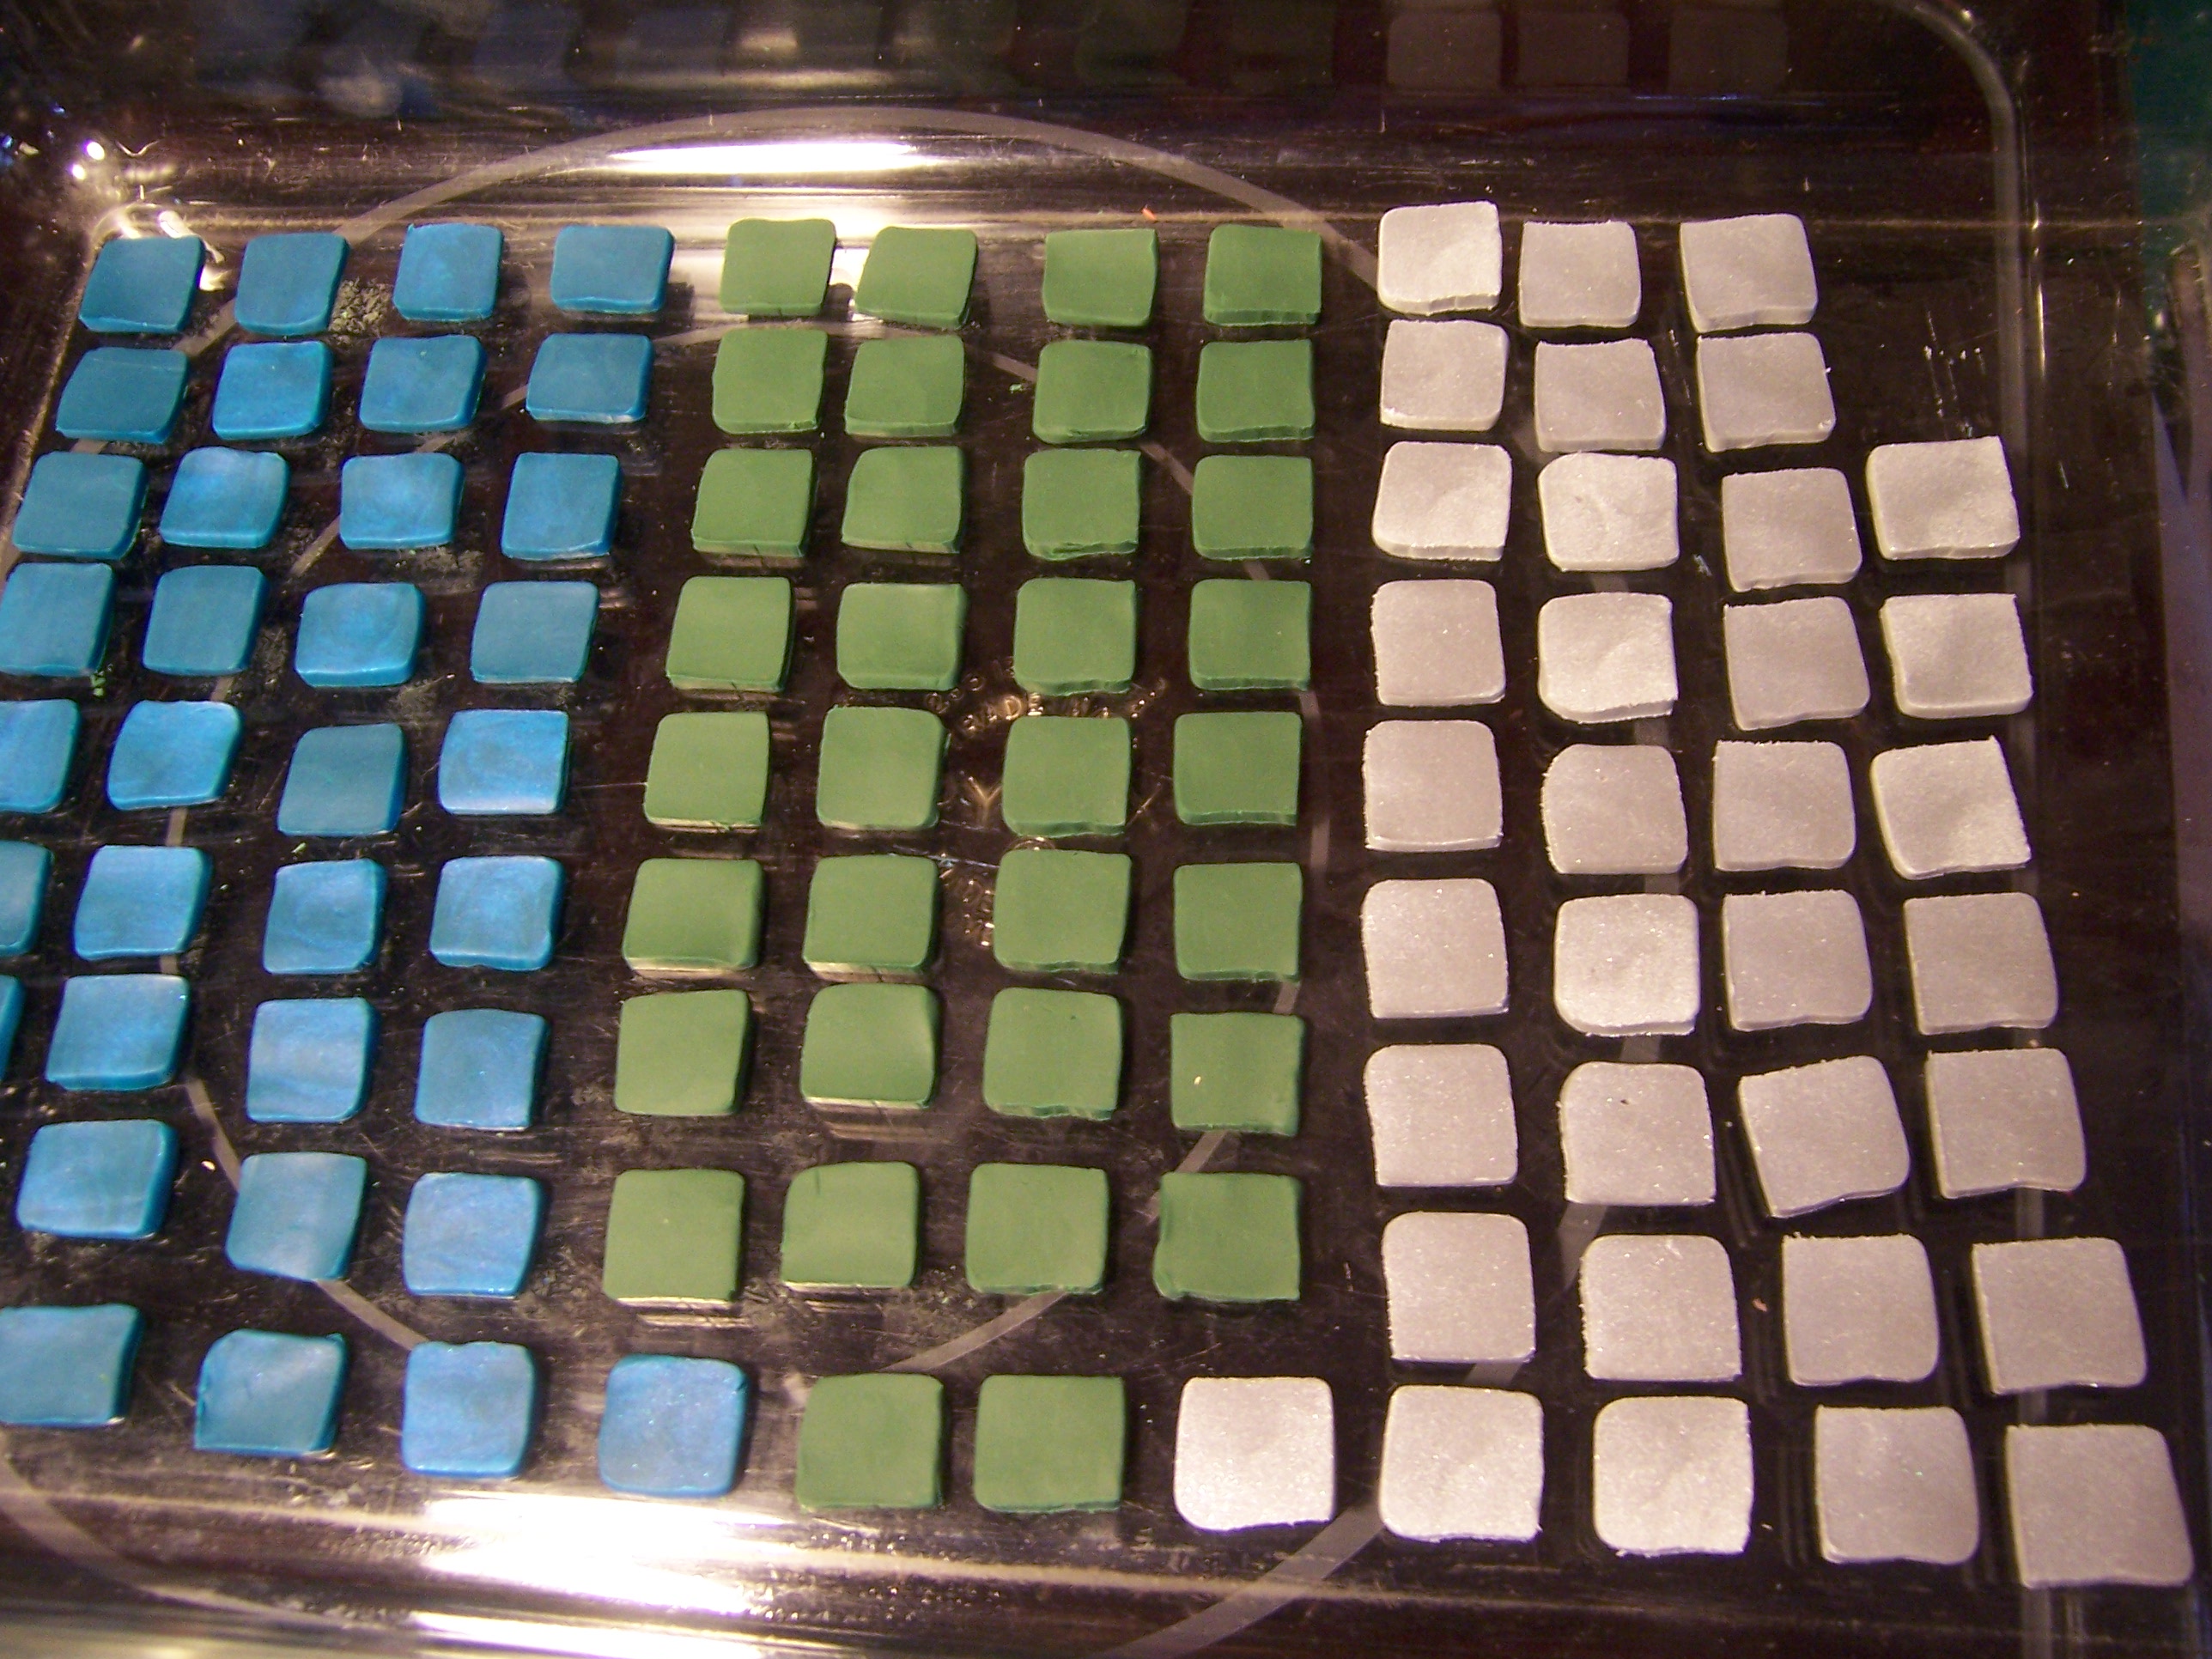
Way back in the Springtime, Dear Readers, as I was contemplating the future flooring for the Lord's Bedchamber, I could only imagine a deep rich agate-esque green tile floor. I was envisioning a forest glade in springtime with dappled sun on green! So I bought sculpey in various green and blue versions, not being sure how they would combine or look when baked. In the above picture you can see the first run of green, teal and silver tiles. The silver are so beautiful and glittery, I couldn't resist. And once the teal ones were baked, they revealed a lovely iridescence too! But how would they look in the dark gray rocky walled chamber? Well, I had to do a sample test run.

Here you can see a batch of the tiles, on a sheet of cardboard....
Slid in on top of all the construction debris....
just to see if it looks about right...
And I think it is heading in the right direction!
But I needed to design a "pattern" for the colors...
Not just an ordinary checker-board bicolor scheme.

And after some experimentation,
I arrived at a basic green,
crossed with diagonals of teal,
and bordered in silver.
But it still lacked something of sparkle....
until I decided to paint a gold rose
in the center of some of the green tiles.
As if the blossoms were strewn on the forest floor!

Here you can see them from above...
all laid out for testing the spacing.
The gold roses are in the centers
of the diamonds formed by the teal tiles.
Sorry, I don't have any pictures of the "before"
with no painted roses.
As far as I was concerned,
it looked good enough for a bed chamber!
So all I had to do was glue them all in place!
This is harder, and slower than it sounds!

First, you have to have enough light, and room to manouver,
So I removed the ceiling and propped a lamp in place.
And spent the hot days of the weekend slowly gluing tiles.
In order to keep the pattern correctly laid out,
I remove several rows of tiles, in order,
onto a strip of cardboard...

Here I have already glued all the rows
from the hearth forward to the open section.
Two rows of tiles are on the cardboard.
I glue the next row in place,
then slide the remaining row up
and remove two more rows onto the cardboard,
keeping them in order as I go.
Then I glue two rows in place...
slide the third row up and repeat....!
It took two days...
But it was hot... and I took breaks....!

Another view from above.
I left the tiles in the side alcove unglued until the end.
It was harder to reach into that space
and the tiles needed careful fitting.

And eventually I got right up to the front...

And realized there was a gap where the floor
should meet the "proscenium" of the room below... but didn't quite!
I needed to add a sliver of floor to keep the grout in place!
Which meant removing the proscenium of the room below....
(good thing it is still just screwed and not yet glued!)

Here it has been removed...
And because I have saved all sorts of those slivers of trimmed plywood.....

I had a decent selection to choose from!

I think this one looks usable...!

There! Now That is satisfaction!!
(Compulsive savers are vindicated again!)

And with the front row of tiles glued in place!

The bed alcove carefully fitted and glued!

And the chapel niche too!
All we need now is the Grout!

I don't know about you, Dear Readers,
but I love how it is looking!
And I can't wait to see how it looks with the grout!
It will look stunning with the grout.
ReplyDeleteAdding one little golden flower to some of the green tiles was a good idea. I'm looking forwards to see the finished floor.
Hugs, Drora
Oh Betsy! The tiles are wonderful! They are such a great way to bring life into a castle in a time before wallpapers and other colorful interior designs were common. The colors are so pretty and I love the flowers you painted! Such a lovely accent! I am really impressed by the painstaking process you went through to lay them. The set up alone would scare off most of us, lol! And your ability to carve-to-fit a perfect piece of plywood for the gap is a masterful skill, indeed! The Lord's chamber is going to be spectacular, and I can't wait to see the grout, too! Hope you get some cooler weather to work in!
ReplyDeleteHi Betsy,
ReplyDeleteAs you know I love encaustic tiles. And this colour combination shouts luxury to me. Luxury is exactly what the Lord would allow himself for his private chamber. A great choice. I look forward to seeing them grouted.
Hurrah for compulsive savers!!! It helps so much to have all sorts of bits an bobs saved. You never know when you need them. In my experience, uualy the week after you cleared stuff out. Alas.
Huibrecht
I have to say Betsy, that your floor tiles and the pattern you've settled on, AND your method for laying them is BRILLIANT!
ReplyDeleteI clearly remember when you were laying the patterned tiles for your Conservatory and how Lovely the end result was, but the effect of these bright solid tiles against the towering grey stone walls is Absolutely STUNNING!
But to have worked though a heatwave, IS equally IMPRESSIVE to me too!
it looks amazing!
ReplyDeleteIt's great to see you in the tiles again... the result is STUNNING!!! I really love the colour scheme. The silver "floor frame" is a brilliant accent and the strayed gold roses are for sure the cherry on the cream. And I join Huibrecht in shouting "Hooray for compulsive savers!" *LOL* There's nothing more satisfying than finding just the right piece in your Sometime-for-Somewhat-boxes.
ReplyDeleteBut I had to smile about "All we need now is the Grout!" Easier said than done... but as you have loads of grout experience I suppose you have all the courage that's needed. This floor in the Lord's chamber is another extraordinary floor in a range of outstanding tiled floors you've made before... and it will be even more awesome with the grout. Let's hope temperatures will allow you to do it soon.
Hugs
Birgit