Friday, June 30, 2023

Roses And Thorns...


Gypsy Wagon Sleeping Nook... Take Two...

Some of you, Dear Readers, might recall the Gypsy Wagons and might, with reason, wonder if they would ever get worked on again, let alone completed. And it would even be reasonable to think that they are so small... what could possibly take so long to finish them? (Yes, "them"; there are two wagons, each with a distinctive decor and history.) And both incomplete! The above picture shows the second wagon, which quickly took on some extra characteristics that made it a bit more complicated (and more interesting!) with its body mostly taken apart. You know almost nothing is glued together yet! This wagon had to have an extra window in the rear wall, and also an entire "menagerie" built onto the back wall. For the goats and chickens, of course!

And these menagerie compartments were desperately dark 
and in need of some "airier" coloring.
So I started with the primer on the interiors.


And of course, while waiting for the primer to dry,
 I decided that now might be the right time to paint 
the underside of the sleeping compartment too!


The sleeping compartment at the rear of the wagons
 is high enough to allow for another sleeping area beneath it,
 like a bunk bed, but enclosed like the upper one.
It is darker and lower, and I assume
 it would be the sleeping space for children.
You might remember the lower area of the first gypsy wagon,
 painted a long time ago (look it up in the blog list at right)
 and you might remember that the Gypsy child, Rowena,
 grew up alone with her father in that wagon.
 But when she became a young woman, 
she had to go live in her Grandmother's wagon instead.
This would now be her sleeping space,
 no longer a child, but not yet grown up.
In the above picture you can see the walls
 were painted pale green a long time ago.
It only remained to decorate them.


Of course, it begins with a soft green grass...
 
And rose bushes.... 
for the sweetness of love...
 

And a white rabbit...
(because Time is passing...)
 

Or three....
(because, Time.... you know, does not stand still)
 

And we mustn't forget the thorns!
Because Life is no longer so simple...


Or the leaves....
To hide among...
 every bunny needs a place of refuge!
 

And surely we want to see what it looks like all together... 
(I apologize for the dark shot... 
a thunderstorm had rolled in...)


Here you can see the flash turned on...


Here you see the compartment wall also in place,
 with the upper and lower spaces and their doors open.


And lest we forget, the menagerie interiors
 have also been painted inside, a lovely sky blue.

But that is not all, Dear Readers, 
you must know that I can't leave a ceiling unpainted...
So the following morning I continued the roses..


onto the underside of the upper bed compartment.
(There is also a pull-out table section, but I painted it too!)


Here the platform is removed while I painted it.


Here you can see it from below with all the walls together, 
as if you are lying under the roses...

And because I was painting things.... 
I decided to (Finally!) finish the painting
 on the walls of the upper compartment too.
What was missing, you ask?
 

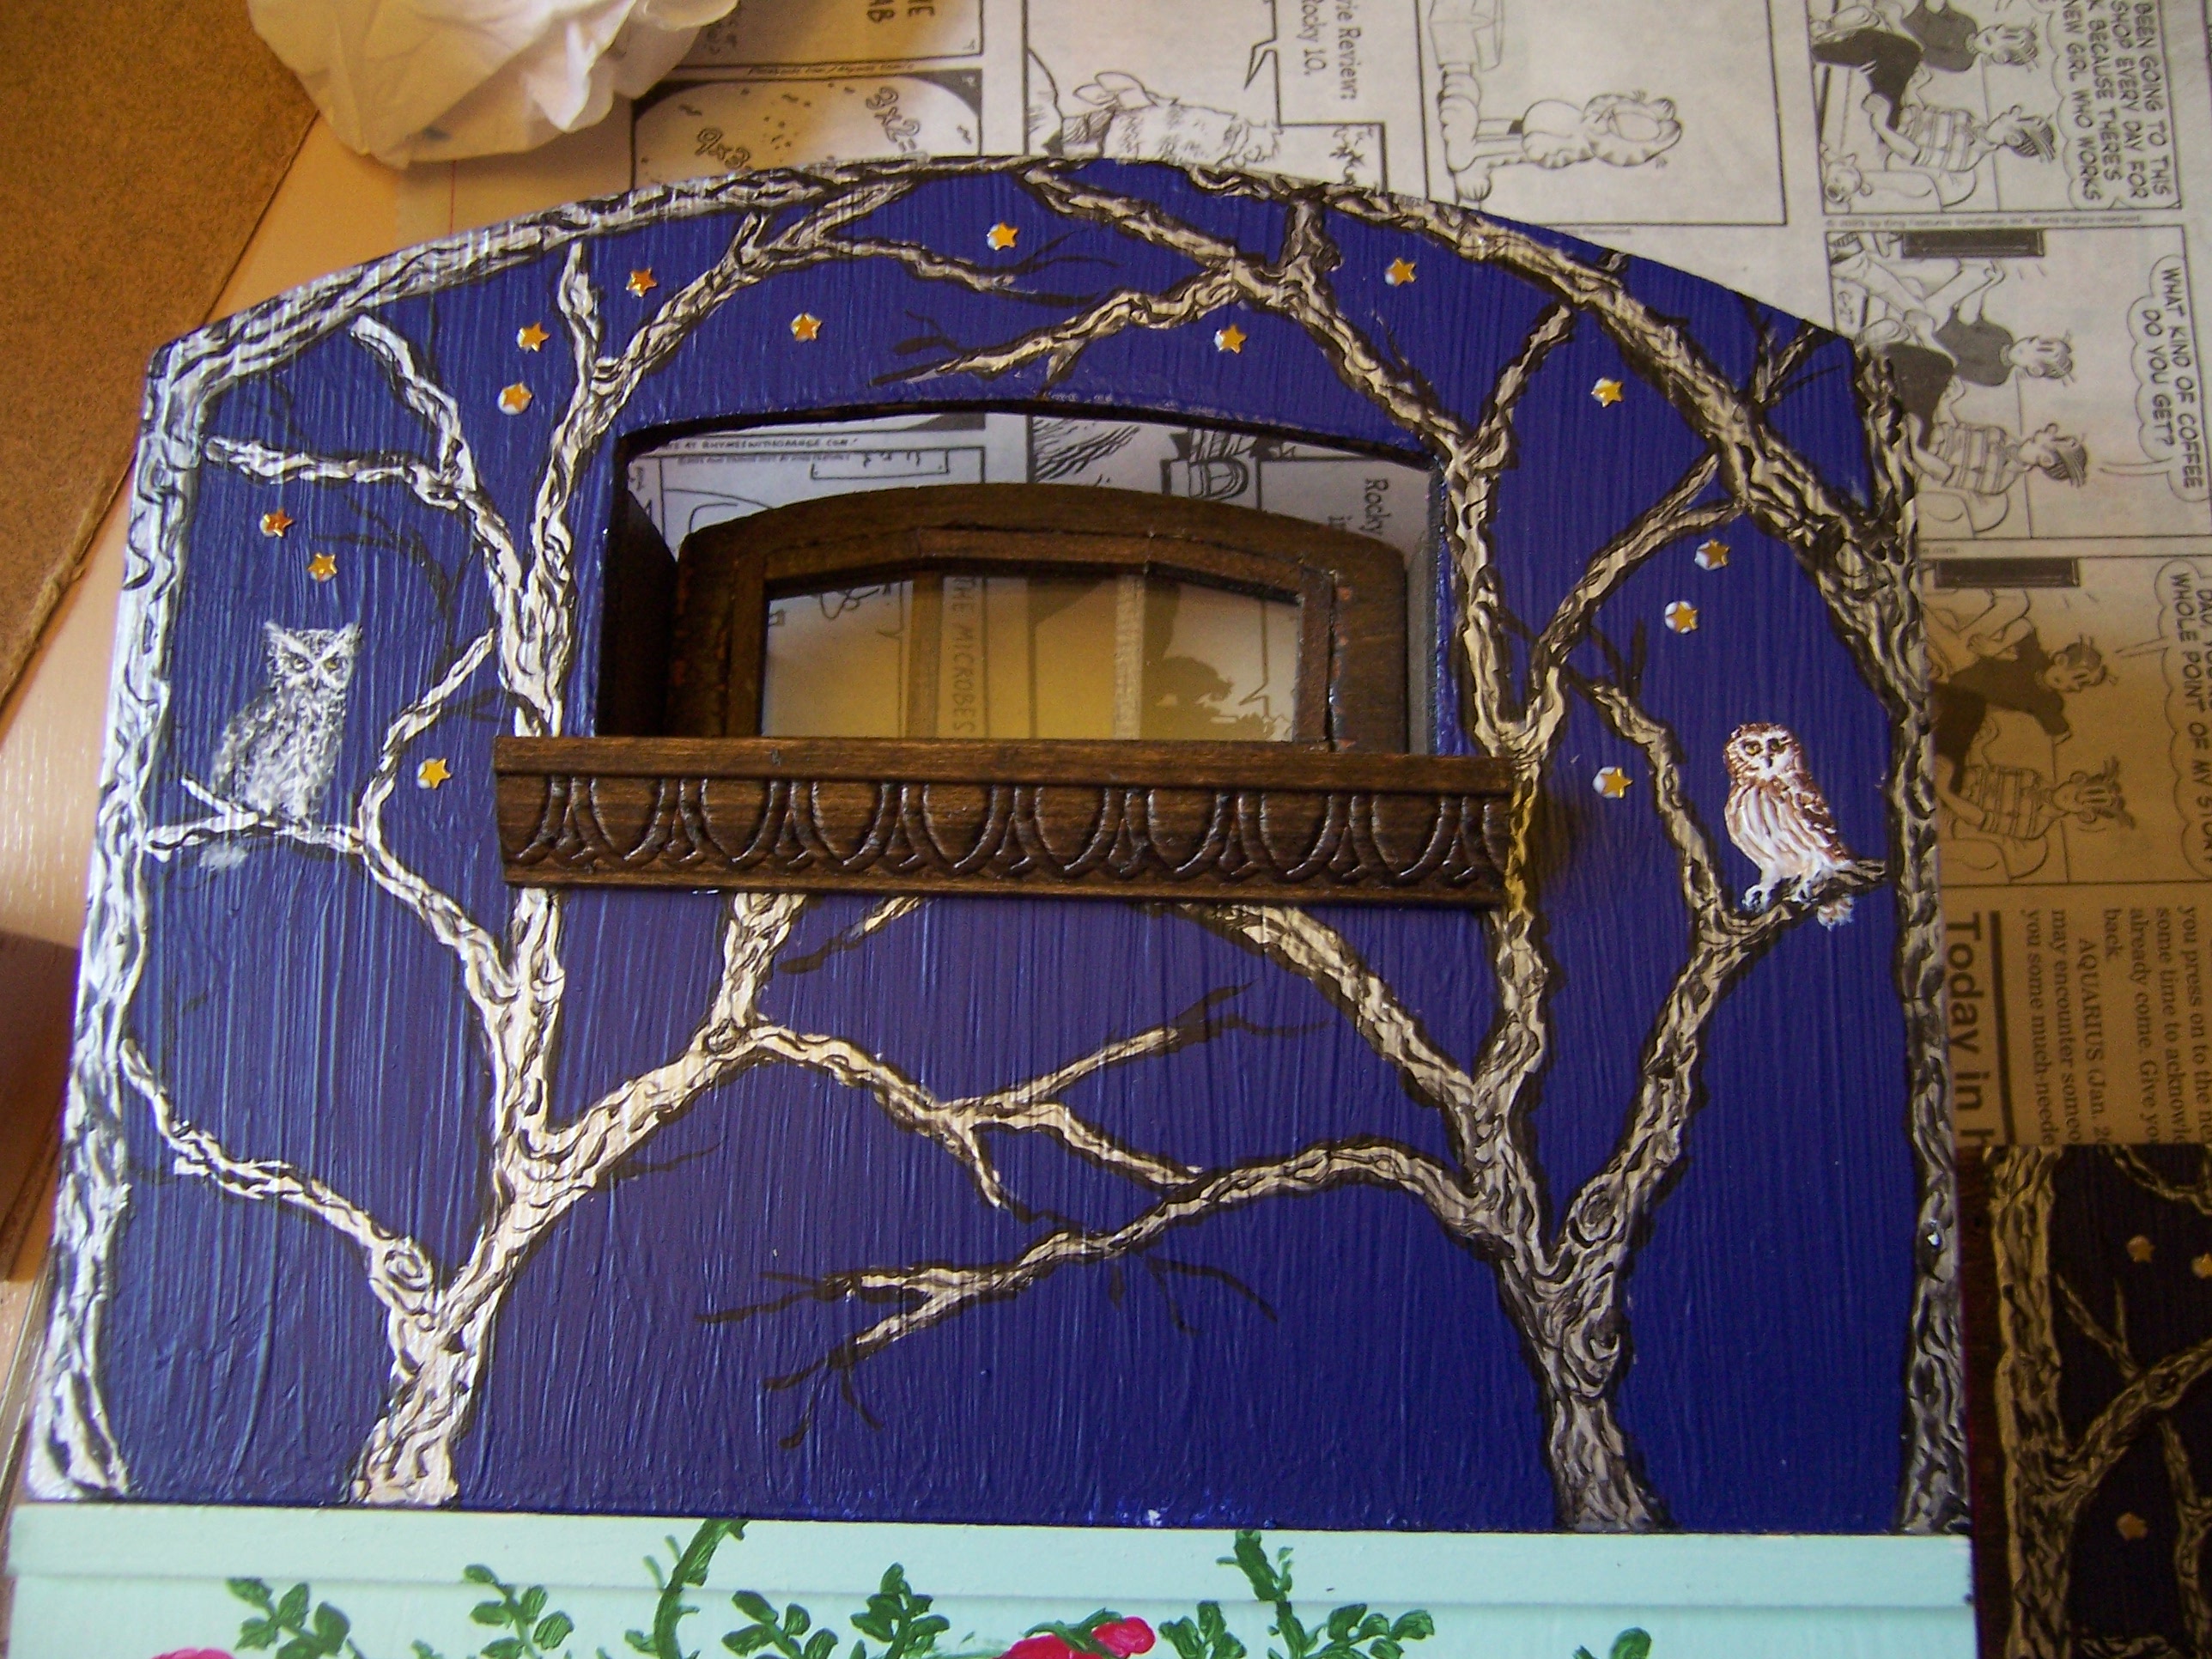
Well, really just a couple of owls!
Here I have under-painted the shapes.


Here the Saw-whet Owl is done
(I know, it is a too dark shot!)


And the Common Screech Owl too.

And then I had to sprinkle a few stars across the dark night sky...


And can we see it all together....


Of course, it becomes difficult to see 
and difficult to photograph...


But it is supposed to be the night sky!
And it is getting late again...
And I have been following white rabbits, Dear Readers,
 into thorns and roses...
and listening to the owls
 begin to call in the night sky!

Wednesday, June 21, 2023

Summertime.....


Reruns.....

You Might recall, Dear Readers, that the Lilac beside the Folly door only blooms briefly in the Springtime. The rest of the Summer it is clad all in green and goes largely unremarked as it stands in quiet leafy abundance beside the tiny patio. The morning sunshine fills this corner early on sunny days and often Will and Gabrielle sit outside for a few minutes at the start of their days. 

Their lives are often too busy to linger, 
so they try to grab the minutes they can.


They are often in too much of a hurry
 to stop and notice the little worlds they rush past...


The dew spangled summer spider webs in the bush....


Or to glance down as they step from the porch....
is that a fairy mushroom circle..... 
hiding under the lilac?
 

 Can you see them tucked in under the lilac stems...?


And is that a tiny fairy chair left under the cobwebs....?
Or has the sunlight dazzled our eyes and played tricks....?


But, lo! When a cloud momentarily blocks the sun,
 we can still see the tiny mushroom circle and the abandoned chair...!


But Will and Gabrielle have not noticed at all!

And as for the question, Dear Readers, 
of where the little TV will find a home,
 the answer to me was obvious!
You have not visited Sally May and Chip's house,
 The "Shabby Sister House" for quite some time,
 but I assure you Time has not stood still.


Sally May did a little shopping a while ago.
 She found this charming shelf with storage baskets
 which fit perfectly in her still unfinished living room.
And you can see my first "large" stitched 
petit-point carpet has found its home here.
Chip's folks, Ernie and Blanche, have been
 hanging out here since early in the pandemic... 
they are quite at home by now!
 
 
And if you look in the back corner of the room,
 you will see an old TV set.... 
well, it is supposed to be a TV set!
(This is the only one of my dollhouses to have a TV set!)
 
They only needed to rearrange things
 a little bit for better viewing!
 

Ernie doesn't like to admit how much he likes the old summer reruns!
(Do you even remember Summer Reruns?)


Well, Dear Readers, ready or not,
 it is Summertime....
The season of dew spangled spiderwebs,
Fungus fairy circles....
and Re-runs!


Thursday, June 15, 2023

The Mini TV....


And Rhododendron Details....

I Hope you will forgive me, Dear Readers, for not hurrying back with more details about the fascinating Mini TV set. I really have no excuses except that Time Flies! I had to learn how to charge the little beast, and then I had to learn how to scroll through the menu.... but I am gaining in confidence! The cabinet, as near as I can tell, was a ready made item that was modified by the miniaturist (I have no idea who but the lady who was selling had several models to choose from) to hold the magical inner device which is simply a small MP3 player. They provided an uploaded menu of shows and movies.... all old TV standards... Bugs Bunny in "Rabbit Hood" is the one you see here...


Well, first, here is a view of the cabinet with the player inside.

And here you can see the player has been turned on...
but it is easier to scroll the menu with the player pulled out...
 

 Here you can see the cartoon has started... 
I can't take photos fast enough....


I know... it is too dark for you to see the inner shelf
 and foam padding that hold the MP3 player in place...


Yeah... it's that Pesky Rabbit up to his tricks!
(I Love Bugs Bunny!)
So that's the secret of the mini TV, Dear Readers,
 I wish I could tell you more about the maker,
 but the Lady (I didn't even take her name!) I got it from had bought "several"
 at one of the larger shows and was retailing at Sturbridge Fair.

And as for Progress on the Rhododendron blossoms... 
it's a slow process!
I am trying to work out an "assembly line" approach.... 
how many to make in a batch, 
how long does it take for each step and so on.

The really time consuming part is the stamen clusters! 
There needs to be five stamens and one pistil for each cluster
The thread needs to be cut and the tip dipped
 in the right color paint and allowed to dry.
Above you can see the start of ten blossoms.... 
the trimmed petals have been glued
 to a stem and the stamens painted.


Once the glue and paint have dried...
 the stamens are glued into bunches
 and the petals are wrapped around the stem
making a blossom shape and glued again.


Then the blossoms have to be painted on the inside and allowed to dry.


And then painted on the outside and allowed to dry.

The best timing, it turns out, is to get this far
 and let the stamen clusters dry overnight!
If you try to assemble them in the blossoms too soon,
 they are vulnerable and don't hold their shape,
 become mushy and fall apart.
 (This is very frustrating, having already 
put so much into each cluster!)

So the next morning....


All that remains to do is add the dark details inside each blossom...


Add glue to the blossom center and fit the stamen clusters in....
carefully shaping the petals around the stamens....
and let them dry.

And then start the next batch for tomorrow....


And then there is the process of assembling the blossoms into the cluster.....


And making and adding the leaves......
All of which is way behind the blossom assembly line.
I have not figured out a method of gluing
 the blossoms together that I like.
But I am working on it!


And building the bushes themselves.
I have a long way to go, Dear Readers...
But that's what makes it interesting!
Figuring out the Details... 
whether of blossoms or bushes or tiny TV's!