Showing posts with label Castle Tower Painting. Show all posts

Wednesday, October 9, 2024

More Painting...


The Boring Kind...

Way Back at the beginning of Summer, Dear Readers, I mentioned that over the years I had come to think of Summer as "castle building season". This is mostly because the light is better at his time of year, and the windows can be opened to easily ventilate the paint fumes which arise with the larger painting tasks. Some of you might remember that it was a few years ago already that I realized the plywood exterior of The Castle really needed to be painted to protect it from becoming too dry and brittle... and even so, I was not able to accomplish painting all the walls inside and out that summer nor the next and so on! The last two completely unpainted rooms remained in the "Lady's Tower" above The Chapel, as you can see in the above photo taken last June. July was spent working on the Great Hall windows and August saw much progress on The Chapel interior. September was mostly consumed by travel (preparing, going, returning and recovering!) and suddenly here we are in Autumn. The days of open windows were quickly disappearing.... 

                                 Was there still time to get the Tower rooms primed and painted?

                                                     There was only one way to find out... 

                     And that was to start painting.... primer coats on everything... both sides...


 Sorry about the dark photos....

 it was hot and the blinds were closed...

(Blogger has been giving me trouble with the line spacing... no idea why!)

As you can see, The Towers get used for storage

 and I had been avoiding clearing it off...


But I wanted to paint the crenellations too....

The placement of the interior stairs wall was going to

 be too close to the back window... 

and I was resisting the idea of fixing it....


 I decided to paint the rocks while I debated.... first the rock outlines.....

 Then the texture...


 But the window would have to be reduced in width!


Fortunately, I still had the original cut-out 

and was able to reshape the opening.


For both windows!


And with primer on the inserts....


And the rock texture added....


Every now and then a flash photo... 

here with the smaller windows...


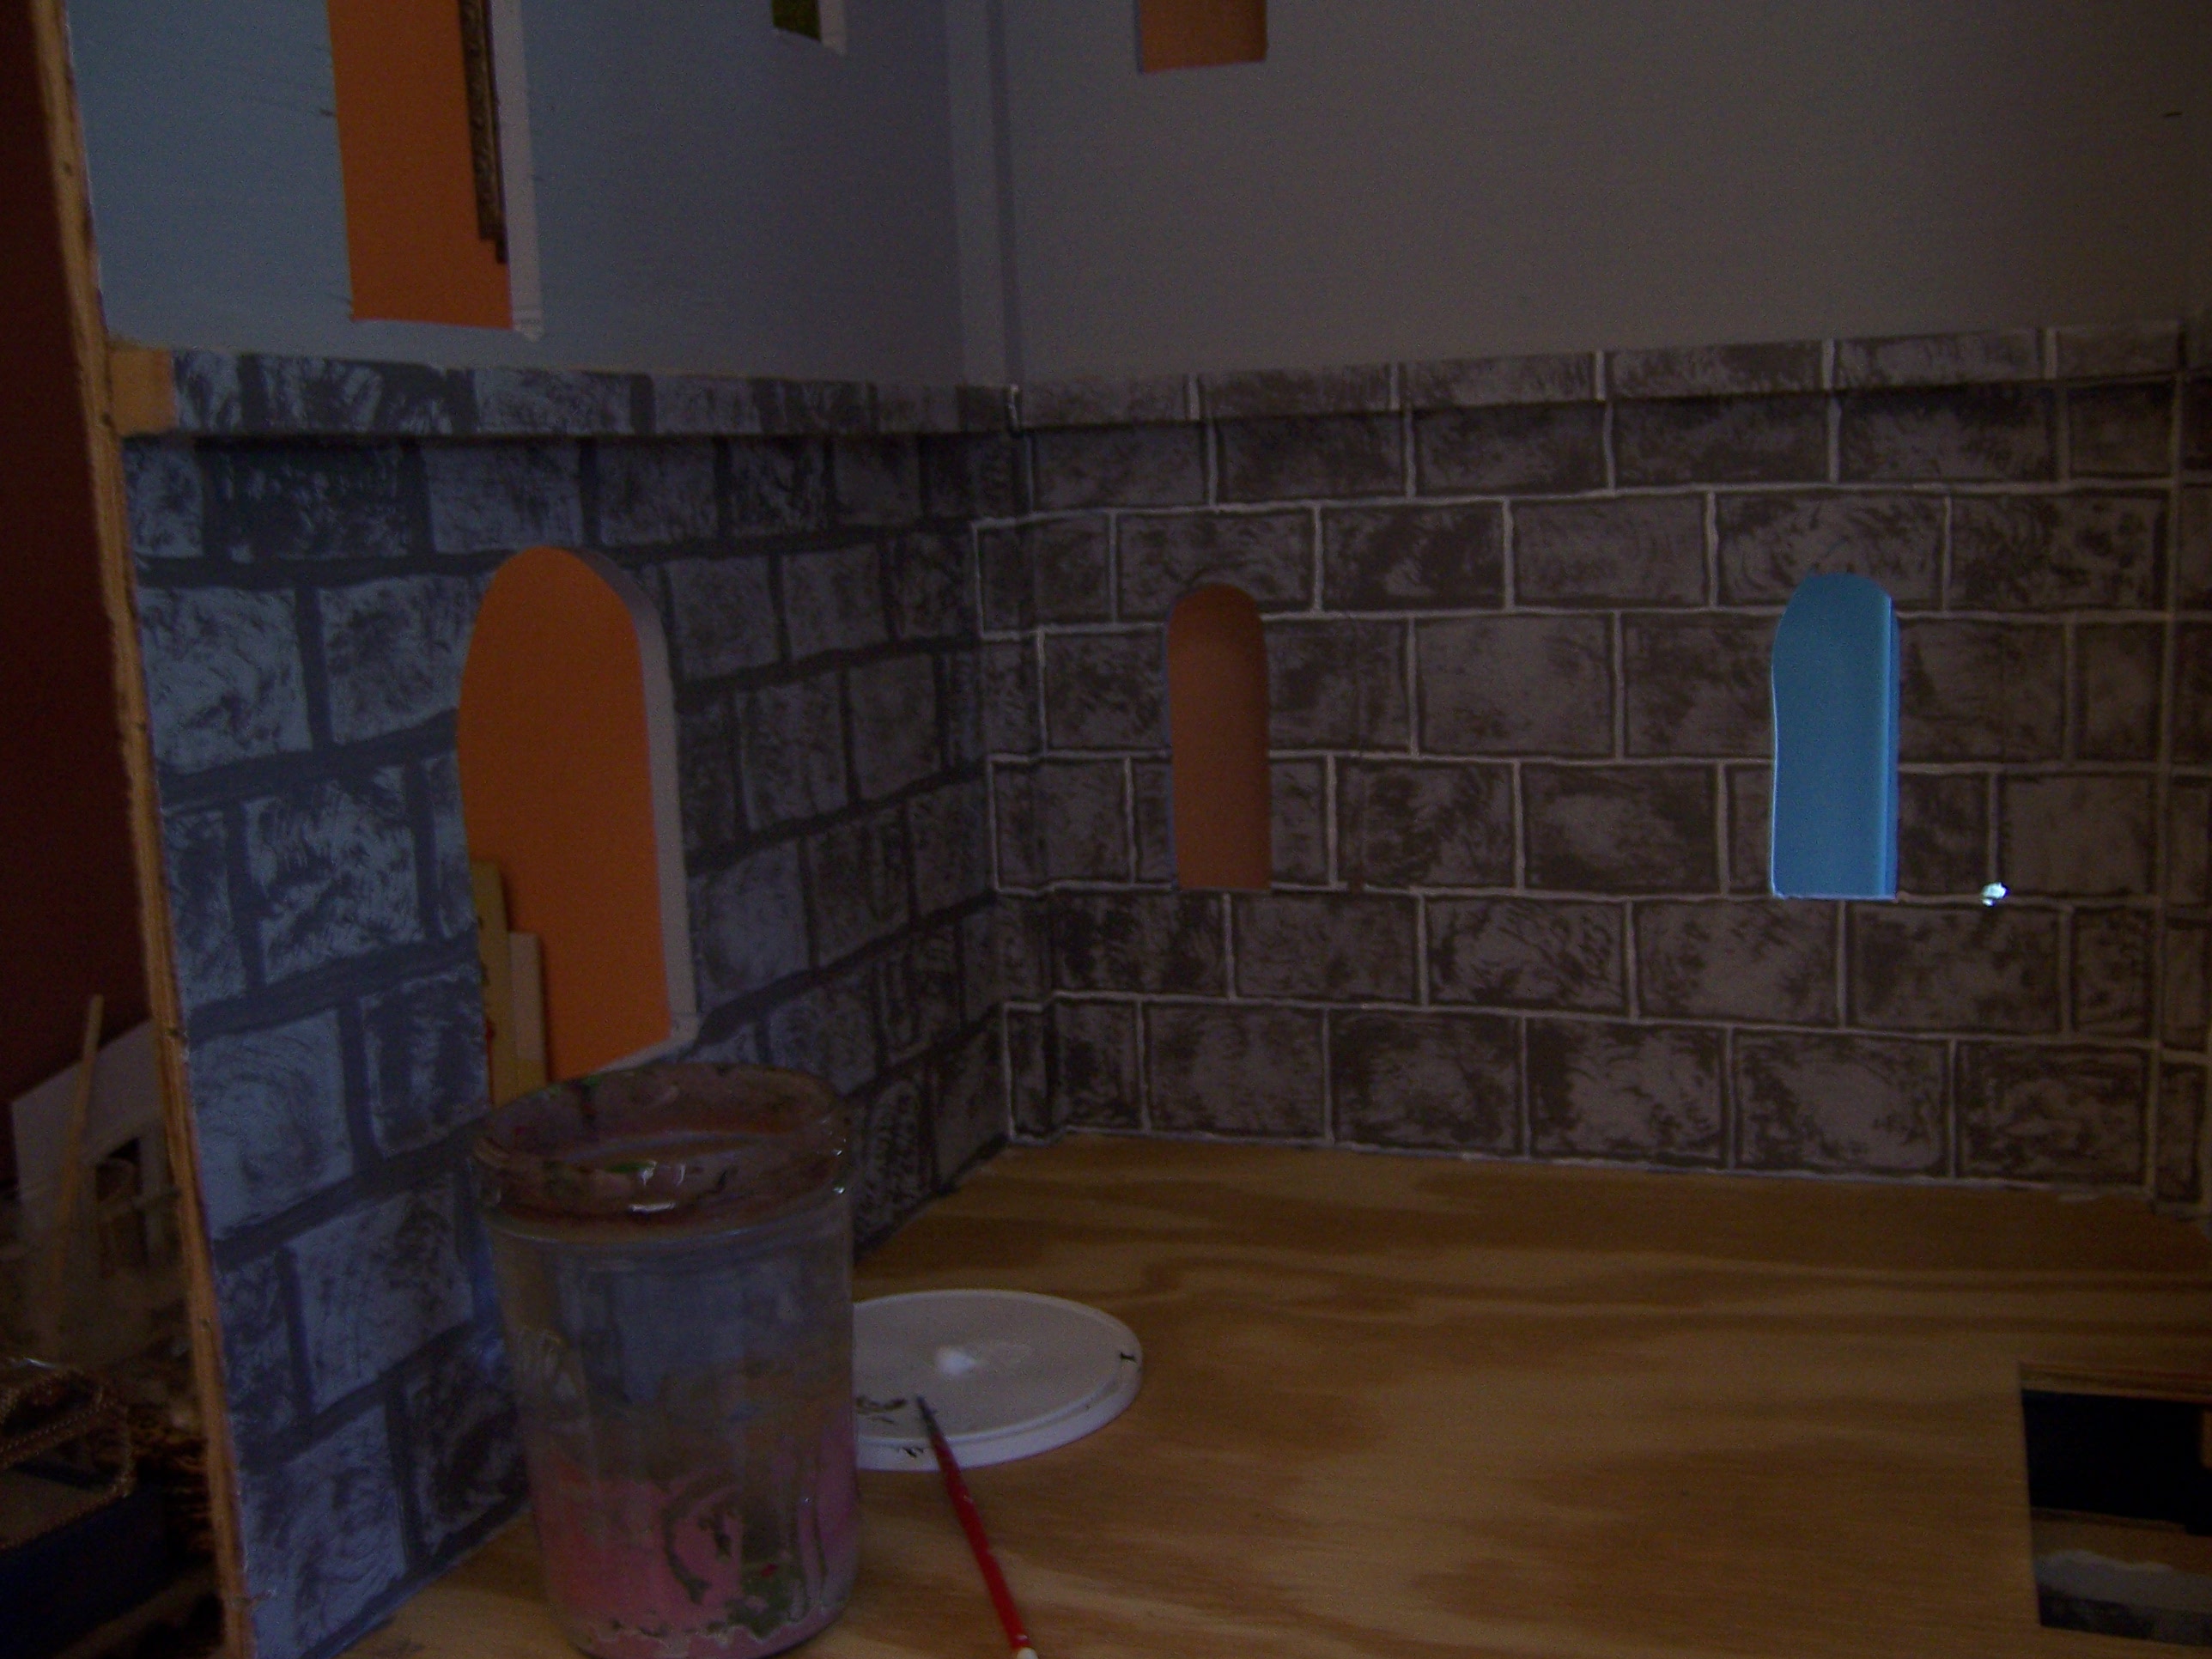
 And finally painting the grout lines!

And the grout lines on both walls!

And the whole exterior with the doors attached...!

                                               Well, Dear Readers, it would appear that I did have time to paint the two remaining rooms... even if I was not able to paint the exterior of the Tower's last side wall. That wall will need to have the wiring and a buttress added before painting it. And since I have not been able to figure out blogger's line spacing problem.... I will leave it here... Just the boring kind of painting!


Monday, September 6, 2021

The Boring Part....


 But it's Progress...!

It was a busy Weekend, Dear Readers, with too many tasks and not much mini time, so I don't have much to show that you haven't seen before. Yes, it is the boring stuff, carving the channels for the wires across the back of the Lord's Tower and starting to glue them in place. You will remember that I was about to work on painting the back of this Tower weeks and weeks ago when I realized that all the wires still needed to be buried in the walls, while they had already been finished on the back of The Great Hall portion of the Castle. And that led me to work first on painting the back of the Great Hall and then on The Chapel Tower (fewer wires to bury!) and now, finally I am facing the Lord's Tower wiring. Maybe because I had practiced on The Chapel Tower, it wasn't as bad as I thought it would be carving all those channels on The Lord's Tower! Jodi of "My Miniature Madness" blog had suggested I try a chisel to carve these channels, but years ago I actually broke a very good wood carving gouge on this plywood. So I am just sticking with the exacto knives which have a replaceable blade. It is slow going, but they are sharp! Because the "plug box" will go on the side of the Tower where it is accessible (also still needs to be built) all the wires from the back needed to go through the corner onto the side of the Tower. I drilled all those wire holes through the corner. You can see in the above picture that in order to work on the back, I had to turn the Tower around. The entrance door on the side wall is now facing out. You hardly ever get to see a view of this side of the Tower! (I also still need to attach the stairs that go up to the Main door...)

I know that it is difficult to see, 
but in this picture most of the wires have been 
brought through the holes on the corner of the Tower.
From here they will run down to the plug box 
in yet to be carved channels.


And here you can (almost) see the
 wires are being glued into the channel...
(It was a very gloomy rainy day...
 and I am sure you don't really want to watch the glue drying....)
This is the back of The Lord's Chamber where
 the wires from the fireplace mantle come through.


And since the goal is to get the paint on the back side of the Castle... 
I painted the primer as soon as I was done carving all those channels.
I even carved the one for the room at the top which I have not built yet.
This will carry at least the fireplace wires when that gets built.
There will need to be more channels carved on the side wall
 to get all the wires to the plug box.... 
but we will work on that later... much later!


And then the first coat of the gray paint... 
I know, it is such a dark day, this looks way too dark!
And some of the wires are not ready to be glued in yet...
 I have to make sure their lights
 are just the way I want them first.
 But at least now the channels are ready!


And that's all I have to show, Dear Readers,
You've seen it all before...
The boring part of the back side of The Tower.
But it is Progress!