Monday, February 25, 2019

Snow.....


Winter Woes....

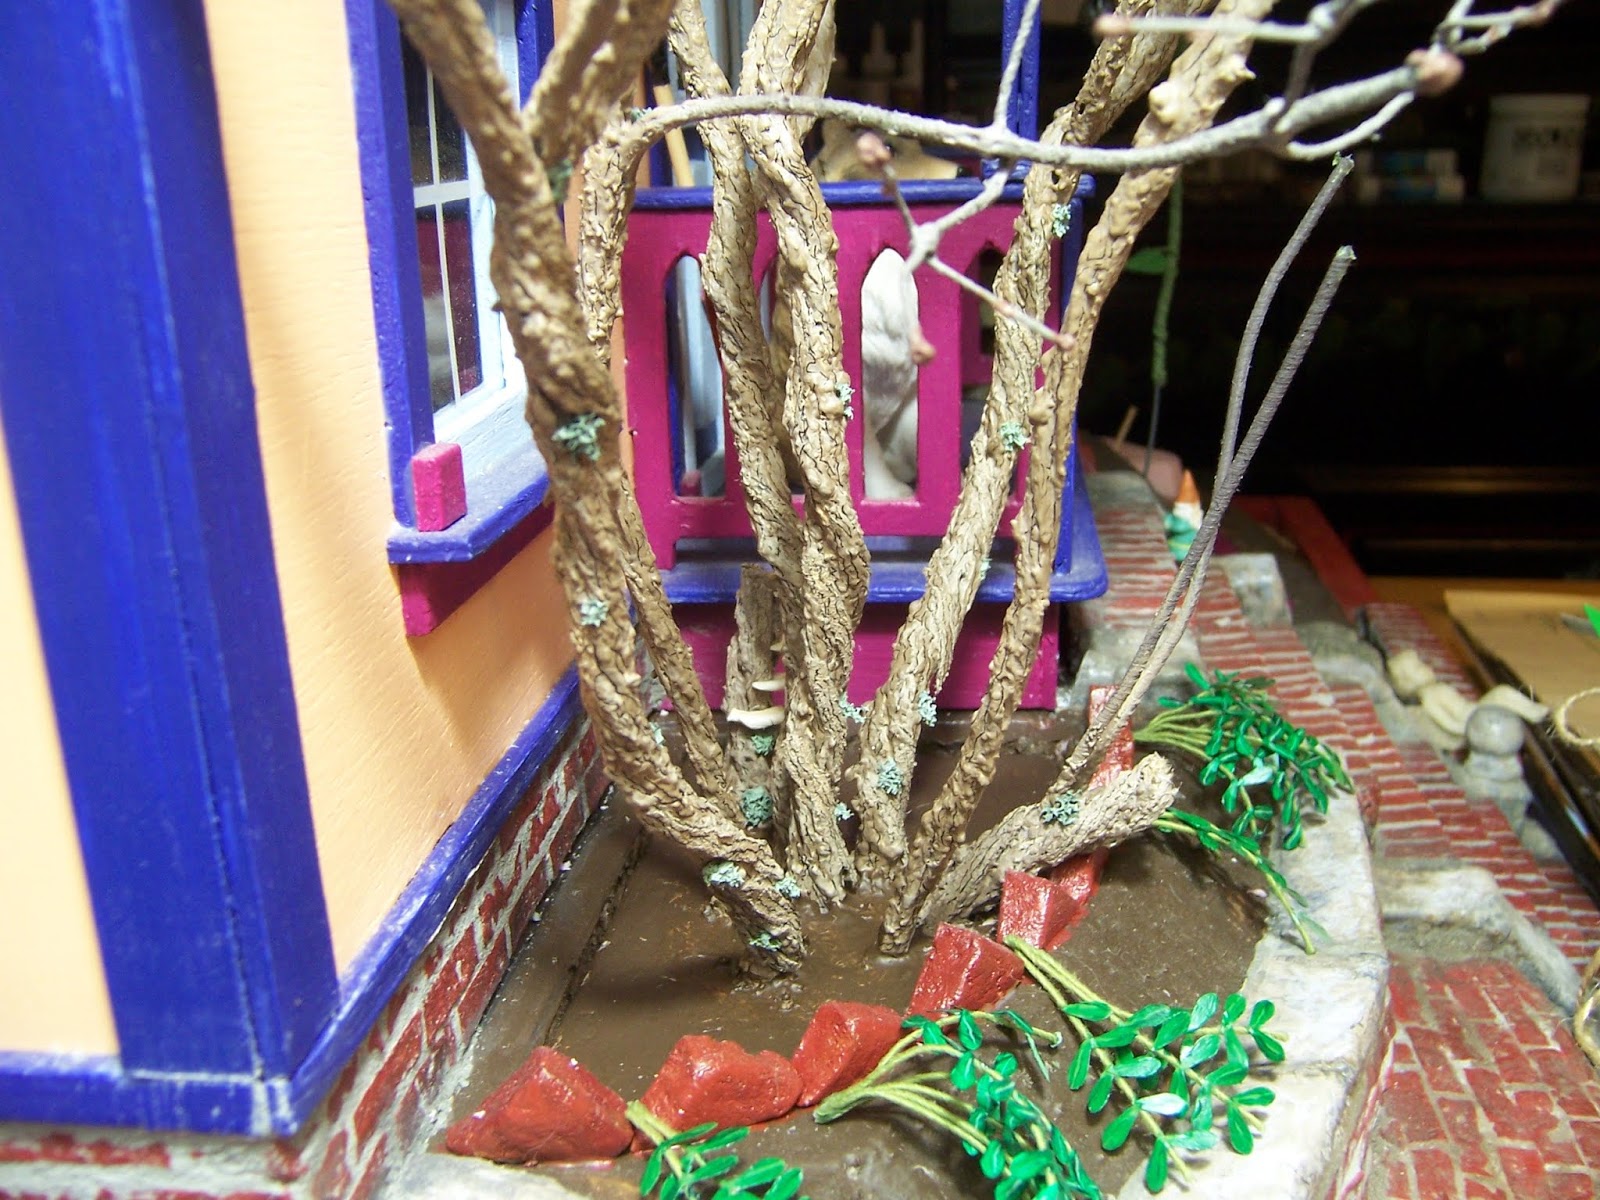
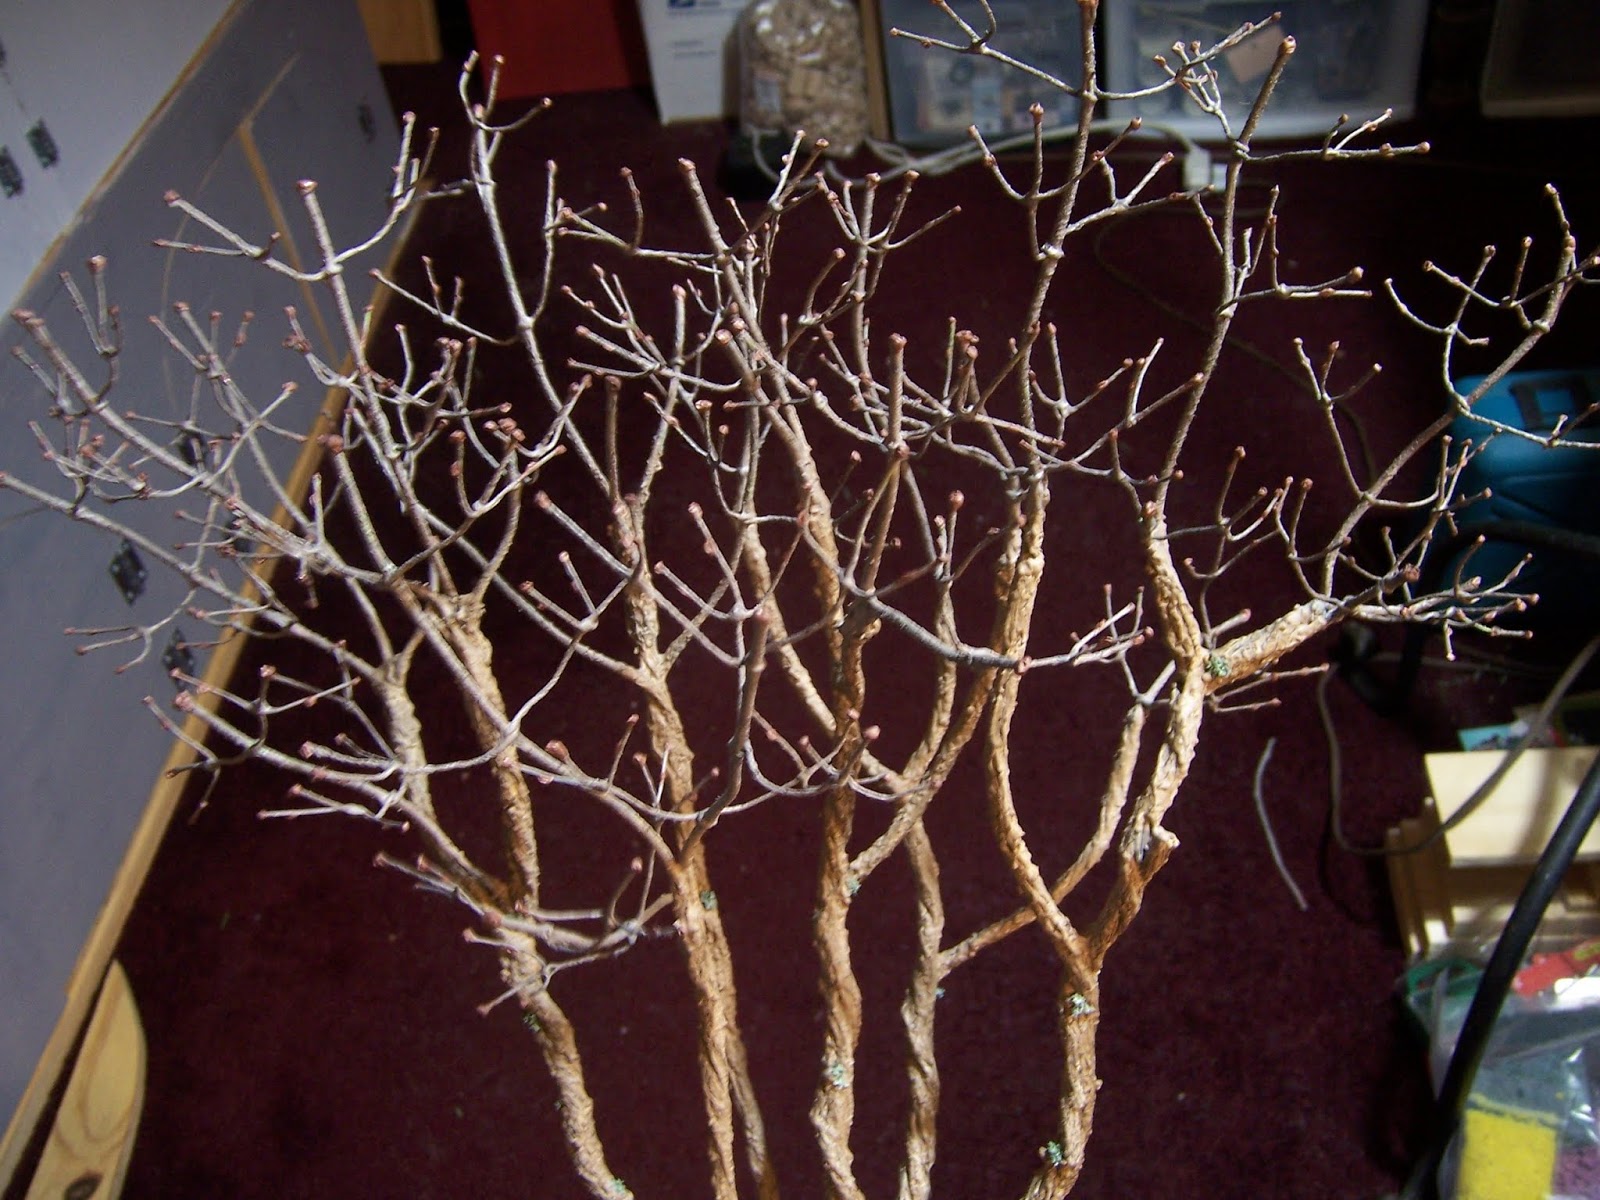
From the Beginning, Dear Readers, I have been planning to include Snow on one of my Winter lilac shrubs. Because I live in the North, and Some amount of snow is inevitable at some time during the long six months of Winter at these latitudes. I am sure that if you know snow the way I do... a deep acquaintance for all of my life.... you will know that there is no such thing as just plain snow! There is light fluffy snow, heavy wet snow, icy pellet snow, perfect snowflake snow, sleety mixed snow, crusty corn snow, sugar snow, concrete ice snow and so on. Some snow sticks to everything, and some just blows away or melts the minute it touches anything. So when it comes to adding "snow" to one of my lilac shrubs, I realized I was going to have to decide what kind of snow I was making in order to get it to look right. If I was trying to make heavy wet snow, it would need to bend all those branches.... if it was going to be just a dusting of snow.... it would not lie smoothly along the branches.... and maybe would not stick to the stems either. Could I make it somewhere in between? And could I find the right kind of "snow"?  I tested a number of different "snow" products and was not entirely satisfied with any of them. But before I even got to the snow, I needed to add some of those "suckers" I had mentioned in a previous post. If you look closely at the above picture, you will see four (only four for now!) additional skinny stems at the base of the lilac. I added the buds too. And then it was time to get brave and make snow!

I am using DecoArt Snow Tex....
It is not very easy to apply!
It has to be dabbed on and doesn't stick right away
(sort of like real snow!)
But once it sticks and dries it is solidly attached.
I tried to build it up from the bottom.... 
working up the main stems....
Imagining where it would land....
I am not done yet, it is a slow process!

I needed to test it in The Folly Garden....
Parts of the shrub are under the roof overhang
 and would not get as much snow...
 only of it was blowing in as it fell.....
(I apologize for the poor lighting... night has fallen in RL)

But if it is snowing... 
we need to make it look like it is snowing!
(Another thing I didn't think of....
 what the "blanket" of snow would look like
 next to the snowy shrub....)

Especially if you were trying to look closely....!
(Perhaps I can find better "snow blankets" for the rest of the landscape...)

And certainly, I didn't even finish adding the snow to the branches..... 
(I had to go make dinner.... the Vacation Time was all run out!)
 
And if your Winter is anything like our Winter this year, Dear Readers, 
you will have seen plenty of snowstorms which end with sleet and rain... 
making a serious concrete-ice mess!
(Not very pretty to copy in miniature.)

So It's not perfect... but it is a start!

Oh, and I almost forgot to show you blossom number Forty-five!
(Or is it Forty-six?!!)


And here it is in the box with the rest of them!

Well, Dear Readers, Winter in The Folly Garden 
may not be going quite as I planned....
But that's often the Way of Snow.....
A Slippery cold frozen Beautiful Mess!
Winter Woes are here...

Wednesday, February 20, 2019

One More Little Thing....


Can You See It....?

I am in the Middle of a week of Vacation, Dear Readers, and in spite of my best intentions, so far I have had next to no time for minis! The list of things I hoped to accomplish is long.... and the Time allotted is speeding by with very little to show. But I have managed to add one little detail to The Folly lilac shrub. Can you find it in the picture above? I know it is not fair that I have not told you What it is.....

Perhaps you can spot it from this angle....?

Or now.... Can you spot it now...?

Well, I suppose the Birds would be glad that it was so hard to spot!

Because, I am sure you will agree that there had to be
 a bird's nest hidden in the branches....
built in the Springtime when the leaves hid it from view...
and still there in the Winter when the leaves have fallen.

Here you can see how I constructed it, Dear Readers,
 starting with some tiny twigs and bits of rough twine.

I separated the strands of the twine and cut it into short lengths
 and glued them in a circular shape, leaving rough ends sticking out, 
hoping this would look like stems and grasses in mini.

I tried to keep it about the size of a Robin's nest....
 our American Robin is a larger bird than the European Robin,
 so the nest would be roughly six to eight inches across.
The American Robin uses quite a bit of mud in the building too....

Of course, I needed to test it in the shrub.... 
to see if it was going to fit right....
(it needed adjusting...!)

And eventually I "aged" it with a wash of brown acrylic paint.

Here it is up close!
I think it will pass as an old Robin's nest!

 
And then I made three more.... one for each of the Seasons......!
(They are not yet completed....)

But now that you know what you are looking for.... 
Can you spot it now?

And Meanwhile, I have not forgotten the blossoms!

Here is blossom number Forty-four!

And in the box with the rest of those Beauties!

As for the rest of my Vacation, Dear Readers,
I hope to make much progress on my list of Little Things...
And that there will be plenty to see when I am through...
Even if some of it might be hard to spot!
 

Monday, February 11, 2019

Retro-Fitting.....


In With The Old And Broken.....

You Might not think it necessary, Dear Readers, but I found myself wanting to add a few more stems to the ancient lilac shrubs. It has always been part of the plan to add "suckers" around the base of the shrubs, but those are some of the last pieces that will be added because they will get in the way of working on the main stems. But in this case I am not talking about suckers, but a couple more of the old twisted and broken stems. It just seemed to me as though the very front of the shrub had too large a gap... where there should be a stem... and it would have to lean out over the path which means that it would probably have broken in a harsh icy winter a year or two ago.... and then the broken end would have sprouted new growth... which would fill the empty spaces just perfectly! So I started to twist together a new old stem. You can see the very beginnings above.


And of course, I had to make one for each of the shrubs....
above are the first two just starting...
And I neglected to take pictures of all four together.

And while I was thinking of old broken stems,
 I also decided to add an old "stump" at the very back of the shrub.
 There was an empty corner where perhaps the original shrub
 was planted a little too close to the foundation, 
a little too tucked under the porch eaves... 
and over the decades the shrub grew farther out
 into the garden and the oldest stem eventually
 became light starved and ceased to thrive.

And here the new old stems have been attached
 onto one of the garden "pods".
Because of the angle of the one in front, 
it is really difficult to get a good picture of both of them.

Can you see them better here?

And then I had to replicate all the steps 
I had taken for the original stems.....
It's a good thing I could look them up on this blog!

First a coat of acrylic paint to "seal" the paper wires... 
acting like a primer.

Then adding the textured paint......
 (It was a good thing I still had this in a jar all mixed up!)

Then adding the modeling paste for texture...
And between each step there was time to wait for things to dry.

And adding the first coats of paint.....
(I was so relieved to find my cups of mixed paint had not dried out yet!)

And then adding the little strips of painted sandpaper for the peeling bark....

And wanting to test the new retro-fitted stems
 in place in The Folly Garden.....
You can see the one in front that leans out over the path,
 but the one in back is hidden in this shot.

And while I was Dreaming of these new old stems Dear Readers, 
I imagined them covered in fungus and lichens....

So I made a few squished blobs of sculpey to look like fungus, I hope....
and started to attach them to the old rotting trunk at the back of the Garden...
I have not completed this step of adding fungus and lichen.... there might be more!

You can sort of see it here....

It is tucked in the back and will hardly be visible
 when the suckers are all added... 
and probably not visible at all in the leafy season..... 
But yes, I will know it is there!

And you can see how the new sprouts
 on the old broken stem that leans out in the front
 will fill the front of the garden with new leafy growth 
without obscuring the path.

Here you can see it from a better angle....
( sorry about the glaring light....) 
As I said earlier, there will be more suckers
 to fill in around the bottoms of the stems.
 And while these additions were certainly not necessary... 
 I do think they add a layer of "history" to the shrub!

I think it is Finally beginning to look like I hoped it would!
And lest you fear I have forgotten the blossoms.... Fear Not!

Here is blossom number Forty-three!

And in the box with the rest of them!

Now All I have to do is complete
 all those retro-fitting steps 
on all four of the shrubs...
Well... and a few more tiny details...
Because those Old broken stems 
have a Story to tell!


Monday, February 4, 2019

More Buds And Blossoms....


Not Very Exciting....

I am Sure you will be getting tired, Dear Readers, of seeing nothing here on this blog but endless lilac blossom updates and the occasional dot of glue, interspersed with a stray paper leaf.... but such has been the Nature of this project! I spent my weekend applying little dots of glue to one of the shrubs, striving to only put the glue where there would really be a bud on a lilac bush! (They are not as random as one would think!) Above you can see the shrub with about half of the branches sporting little white blobs! It actually went a lot faster than I thought it would! (Yes, I had been dreading this task.) Of course, it is difficult to get a good picture of these blobs....

Can you see them here?
 By the time I had finished applying them, 
it was late and dark....

Here you can see them a little better... 
except that the focus is not great....
No I did not count them!
And the following day when they had all dried thoroughly... 
I began to paint them....

I know it is a lousy picture, Dear Readers, 
but about one third of the stems to the right have been painted....
Once the glue has dried, the "buds" become much less visible....
If you poke the picture you might see them.

This step did take several hours...
but even it went faster than I thought it might!

Here they are all painted..... for the first shrub at least!
In case you have forgotten, 
the shrubs are going to be the different seasons....
One with blossoms, One with only leaves
 and two with bare branches...
because winter lasts a long time around here
 and offers a variety of "conditions"!
Only the two bare branches ones will need the buds.

Here it is in The Folly Garden....
And yes, there are still a few details missing....!

But meanwhile I was also completing 
the Blossom number Forty-two
 (I do believe we can only count the finished ones!)

And with the rest in the box......

They are becoming quite a collection!
But I really must get started on the leaves....!
I will need to add them to the shrub branches
 at the same time as the blossoms....
(It is a little hard to tell which to do first!)

So that was my weekend Dear Readers, 
More Buds than Blossoms...
And Not very Exciting...
But Slowly and surely the shrubs are getting Done!