Showing posts with label Spiral Staircase. Show all posts

Monday, April 20, 2020

Waiting For Supplies....


Lacking Focus....

I Thought I would be starting on grouting the Castle floor, Dear Readers, but when I looked at my grout supplies, I began to worry that one package of the material would not quite be enough for the entire floor! And what if I got most of the way done and ran out? I didn't even want to think of that, so I decided to order more and while I was ordering some grout, I could get a few other little things too! So I made up a little list and called in my order to Hobby Builders Supply. But imagine my dismay when I discovered that of all the things on my list, the Grout was on back-order...! Time of arrival unknown! It was to come from China as so many things do. So I have to wait. And while casting around for what to focus on instead, I realized that I also needed a small project that I could work on during my regular "commuting hours"... my drive is normally about 45 minutes each way which adds up to a lot every day. I was finding myself turning on the computer and "getting to work" too early and wasting time. So I pulled out the many kits I have for petit-point... and chose another one by Janet Granger, and started the design. At this point in the project it doesn't look like much! And then I remembered that I never showed you the completed Santa Stocking I was stitching in the Winter....

I don't recall exactly what I showed you last, 
but I was working on the background.
The kit design would have you stitch the
 entire background with the blue....
But I thought Santa needed to be 
a little more "Grounded" than that!

I wanted him walking through the cold snow... 
not drifting in the sky!
So I made the bottom of the stocking white
 with pale blue shadows...

And here it is with the stitching done.
Of course, I have not stitched it
 to the back of the stocking yet!
 
 
Just for reference, here is the stocking next to the design chart.
But that was already months ago!
 
And I am sure some of you are wondering
 what has happened with The Dollmaker's Studio Project 
while I have been busy in the Castle Council Chamber....
 Well, not much! 
 
I spent a good bit of time testing out different pieces of furniture...
 to get a feel for what would Fit in this small space... 
you will recognize some of the "visiting" pieces... 
just being borrowed to test the ideas.
The idea is that this little building is a converted carriage house... 
or a "sleigh house" if we are to think of it as a "Northern Themed" project.
(See how I got around using the "C"word?!)
The ground floor was made into living space
 with sleeping space upstairs.
 The stairs will be in the tower.
And now that it is a "Workshop" or "Studio"... 
the living space has to have a worktable
 as well as the minimal cooking facilities...

This is not the stove that will be here... 
but just here for size and position....
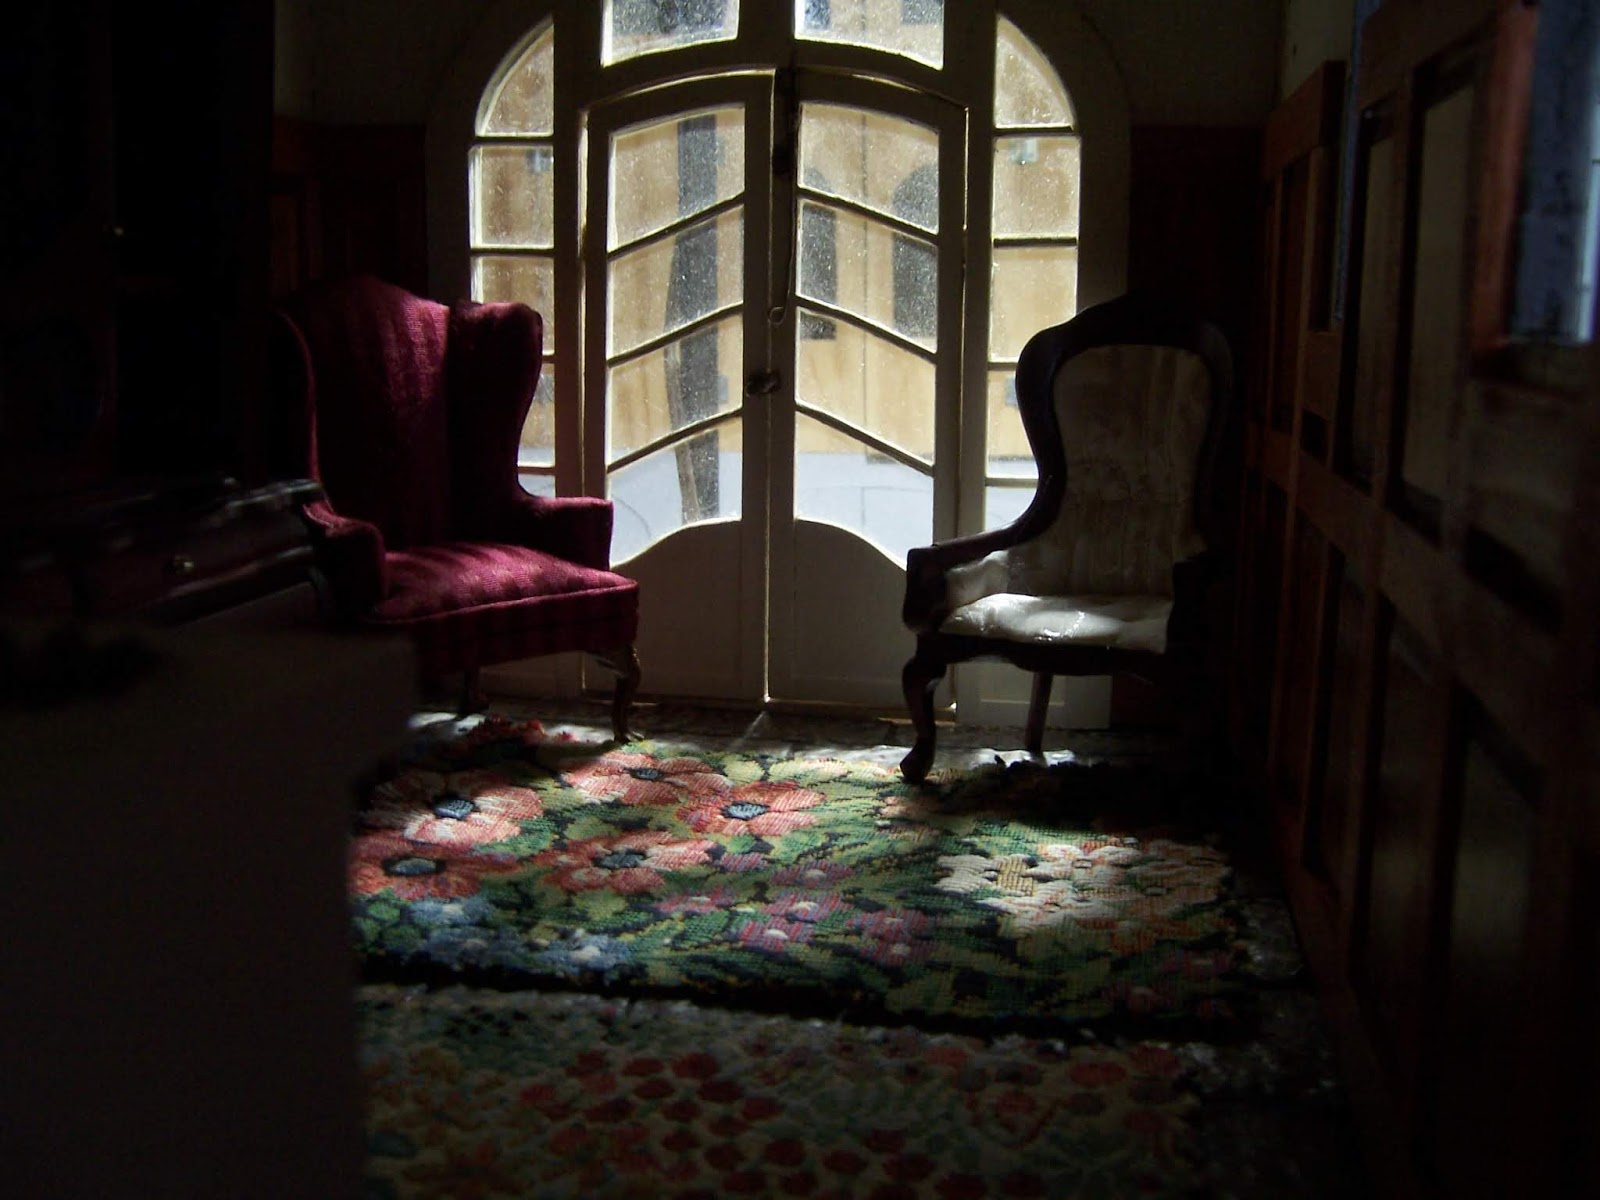
There has to be seating by the big door 
so needlework can be done in good lighting.

The upstairs will also have worktables and sewing supplies...
The original purpose of this project was an expansion
 on the "Atelier de Poupee" kit from
 Sandra Morris of Tower House Dolls.
The beginnings of her kit are tucked into 
the alcove at the back of the upstairs room.
And the attic... not shown here 
will have a sleeping nook for weary creative types.

A Smaller table fits better... but doesn't allow much surface space...

A Larger table dominates the space....

And some carpeting samples.... 
old ragged pieces.... nothing fancy....
But setting the tone...
So where is the problem? I hear you ask..?
The problem is that I never expected to
 keep the paneling that sienna color!
I was intending to paint it a rich dark green... 
in keeping with an over-all red and green color scheme....

Like this.....!
But I am having a terrible time giving up the paneling as it is!

Even the door frame is supposed to be painted!
I just can't decide....

So I wandered off to the Attic of Hardwick Hall... 
because you will remember I had "borrowed" the fire
from the unfinished fireplace to use it in 
testing the fire in the Castle Council Chamber...


The fireplace needs to be fit very snugly beside the Spiral Stairs...
And there is a "Tree" growing up the stairs... 
it's branches supporting the stairs...
 I was just getting going on this when 
the Lilac Mania took over... two years ago!

I had to clear everything out of the attic....
There is so much that is unfinished in this House...
  and most of it is waiting for the electrical work in the attic to be finished....

And a closer view of one of my favorite reading nooks....
(Sorry... the lighting is poor...)

I spent some time wrestling with the tree and the stairs
 and carving off pieces of the chimney...
Because until we get the fire wired in place... 
all the rooms below must remain unfinished...


And the stairs have to end up landing at the cupola....

Which also is not part of the original kit structure... 
and has to be constructed from scratch...!

 So, There you have it, Dear Readers, 
I am not sure I accomplished anything at all....
While waiting for supplies....
and Lacking Focus!

I hope you all are keeping well and staying safe!
And making minis too!


Tuesday, February 20, 2018

Building The Built-in Shelves.....


And the Spiral Stairs.....

I had a week off from Work, Dear Readers, and I can assure you that I spent as much of it as possible reveling in my myriad mini projects and I have So much to show you that I don't quite know where to start! But I think it would be unkind if I did not show you the second set of ornate brocade curtains that I did complete for The Folly Living Room! Above you can see the panels completed, with their wires sewn in the hems and the gold braid fringe added. These are for the larger window, so they needed to be wider and show more of the blue flower pattern, which works perfectly with the colors in this room.

Here they are installed with the pelmet which has the wider design too.
I may need to make the pelmet trim go "around the corner"....
 because you can see that side from this angle.

And with more furniture... 
I think it adds to the cozy feel of this room 
and brings the blue into balance.
Without a Doubt..... 
these curtains transform this room!

But the real project I want to show you, Dear Readers, is the building of the Shelves for the Hardwick Hall Attic Reading Room! I had ordered the wood to build these shelves weeks ahead of time, but it was on back-order and did not arrive in time. I was forced to make do by cutting my own wood strips out of basswood sheets, which actually turned out to be for the best because it allowed me to build  deeper shelving units for the far wall, which would be useful for holding larger sized books. So I cut 1" strips for the back wall shelves and 3/4' strips for the side shelves. The whole process was very time consuming because the attic is not exactly square.... (you have to love these kits!....) which required cutting and testing for fit every step of the way!
 And while I was doing that I also had begun to glue the spiral stairs together... (until now they had been temporarily strung on a thin dowel... and fell apart with every shift!) This was also a complicated process of gluing one part then waiting 'til it dried thoroughly before gluing the next one!

This was especially necessary when it came to attaching the spindles to the stairs because they were wobbly and had to align exactly with the curved railing that would go on top.... but the railing couldn't be attached until all the spindles were firmly and precisely in place. And because it was a curved shape.... spiraling upward.... just supporting two ends wasn't enough.... you had to have a middle-point also supported at the same time. I managed to get the bottom two spindles glued in while the railing was balanced on the upper spindle.... but you had to add the spindles one at a time and wait for the glue to dry.... or it all would fall apart! I would add a piece every two or four hours....!


 Meanwhile I was building the bookshelves....
Starting at the back in the darkest corner of the attic....
where I had to measure and fit and test and then glue...

The gap you can see between the side of the shelves and the wall 
is to allow for the depth of the side wall shelving.... 
I made a drawing first so I could do the math 
and get the general measures worked out...
 but all the pieces needed adjusting to fit the actual space.... 

Here you can see the top shelf which
 covers the distance all the way to the side wall....
 and needed to be just the right length and angle.....

Here I am building the basic unit....
 with my cutting mat to help keep them square.....
 (except that the walls aren't square....)

And slowly adding spindles to the Spiral stairs.....
 that folded paper is being a force to push 
the spindle against the railing while it dries... 
without exerting too much force which would make the railing fall off....
 because it is not attached  but is only there for alignment purposes!

Here is the Attic with morning light.... 
showing (sort of) the back two shelf units in position.
 And Madame Durant has come to inspect the work....
there is still a long way to go!


Here you can see an overhead view of the two back units 
and the two sides also begun....
(I know.... it is dark.....)
And then I had an idea.... 
one of Those ideas that wouldn't go away.....
How could we get more light into those back corners? 
Could we add mirrors behind the shelves...?
Or perhaps some glittery silver paper????

Which I had several sheets of.... purchased long ago.....
Shouldn't we at least test it out?
At first, Dear Readers, I thought it was too much....
But the more I looked, the more I liked it...

Especially when the outside spotlight was not shining directly in!
But what about with the books in place... 
would they block too much of the paper...?


Well, we had to try a few books....
(Gosh I am going to have to make/acquire/buy a lot of books!)

Ohhh, I am liking this!!!
And even though the books will eventually cover much of the paper...
 I think it will still be lurking there... a presence... 
like a mist on a meadow at dusk....!

And in the morning light.... with no additional lighting.....
It is simply radiant!


Here you can see the side shelving also completed
 and the top edge trim has been added too.
But all the side trim and end trim has yet to be added....
especially where the shelves meet the bench alcoves.
 
Meanwhile I have completed all the spindles on the Spiral stairs...

And it is time to glue on the handrails
... a much easier task... but still best done one rail at a time!

The shelf units are getting their facing trim....

Always testing the fit of every piece.....
The units will not be glued to each other
 until they are glued into the Attic... 
because of those crooked walls!
And once they are... 
you will not be able to get close enough
 to see this top view.


The trim on the ends has been added too....
 
And Finally, Dear Readers, 
I take my courage in my hands
 and Glue the Shelf units in place!
Because only then can I start to add the trim
 around the alcoves where they meet the shelves.
I have pulled the curtains away to keep them from the glue... 
and I know you can't see it, but I have added the trim in that dark corner!

And the alcove trim on the side alcoves is also being added....

Here you can see where the shelves and the alcove have a gap....

And here you can see all the trim has been added....
Except for the near side of the alcove... 
because those shelves have not been built yet!

And let's not forget the Spiral stairs railings... 
another section attached!

And the attic Shelves are very nearly done....
 (except for those aforementioned units at the front of the attic)
And we can revel in those amazing shelves.... 
and the contemplation of all those books....

By Day and also by Night.....

Especially by Night.... 
can we admire the brilliance added by those silver papers....

And perhaps with the fireplace too.....
Yes, those back corners are going to be hard to see...

Dark and Sparkly and Mysterious!

But my Vacation is quickly winding to a close....

Even the Spiral staircase is Almost complete... 
only the finials left to add....

And I must say, Dear Readers, 
there was even more that I accomplished...
 but I will show you that another day. 
Right now all I want to do is 
Revel in that Attic with those Built-in shelves... 
and Contemplate the next parts of those Incredible Spiral Stairs!