Showing posts with label Hardwick Hall Foundation. Show all posts

Monday, August 1, 2016

Painting Bricks and Stone....


Do Not Panic.....!

There is only One Way, Dear Readers, to get all those egg-carton gray bricks to look like "real" bricks and that is by painting them. You can imagine how eager I was to get started with this transformation! To begin with I painted them all with a coat of primer and then with a coat of ordinary latex paint in the same red as the walls of the base. I forgot to take pictures of the bricks with only the primer, and I warn you that the red painted bricks look rather alarming! I was going on the assumption that the red undercoating for the bricks would allow me to save a little on the cost of the acrylic paint used for the final color of the bricks. And once the red paint was applied, there was no turning back!

Yes, I know.... it is rather shockingly red! 
I left the "stone" portions white.... and underpainted them with a tan color 
and then a layer of gray stippled over that....

But it is very difficult to get good pictures of the colors here....

I have started to darken the bricks with a more realistic brick color.....
But it is really hard to see the difference... 
partly because the red is so bright....
and also because the "grout" spaces are still the bright red....!
I kept trying to judge the color I was painting.... 
and it kept looking wrong!

Adding more light just makes it look... More Wrong!
So I placed the Folly on the base 
so I could try to match the brick colors I had already painted on the foundation.....

And on the side wall of the garden too.... 
trying to darken the bricks....
And the sheen of the paint doesn't help either! Too much Red!!!

So I decided to work on the "stone" portions for a while....
Trying to make them look like stone....
And adding age and dirt to the places that would be dirty....

Especially at the base of the door.....

And on the steps......
I spent Hours and Hours painting.....

And darkening bricks.... 
and trying to tell if they were dark enough.....
Because before I could start with the Grout, 
I would need to seal it all with a coat of polyurethane....!
This is so that all that grout won't scrape off all the paint.....
And because I was having a hard time trying to tell if my paint was the right color....
I decided to start doing the grout on the foundation of Hardwick Hall.....
(remember that is where this all started....!)

Because one thing to remember about the grout 
is that adding it makes the color you think you have painted the bricks 
appear to be lighter than before you added the grout.....!
And then I added the grout to The Folly Foundation too...

Here the grout is still wet, so it doesn't make the color look lighter...
Only when it dries it will turn white....

So now I took my courage in my hands, Dear Readers, 
and started to add the grout to the Folly garden walls!

And I have to tell you Dear Readers, I really thought it looked horrible!
I thought the red was Much Too Red! I thought I had completely ruined my bricks!

But I decided there was nothing I could do now except keep going with the grout....
I could always add layers of darker washes of dirt later...
So I kept working on the grout. 
As it dries you have to keep sponging away the excess...
without removing too much from all the cracks.
It is a slow and messy process!

With plenty of opportunities for seeing all the places you didn't paint right.....

And comparing the parts that don't match up right.....
Here you can see where The Folly still is separate from the base....
eventually when it is attached I will have to add a little bit more grout...
(These old foundations always need some "work" after all...)

I consoled myself that eventually most of the bricks would be 
covered with garden "stuff" and dirtied corners and moss between the cracks.
And then I realized that the grout was going to look much too "new" anyway. 
It would need several layers of aging 
to bring it up to the 150 years old it is supposed to be!

At least the "stone" was all looking quite convincing to me!

And I really couldn't judge it correctly until all the grout was dry.

And once again, it was getting late....

I was just going to have to be patient, Dear Readers, 
and let it all dry before I could tell what the bricks looked like.

Of course, taking pictures in the daylight would help...
except we had an uncommonly gloomy and rainy day!

But the grout has all dried.
And the bricks and stone are painted.
And the only thing I can say, Dear Readers,
is "Don't Panic"!
It will surely look better in the morning light!


Tuesday, July 19, 2016

Bases, Bricks And Beyond....


Follow That Paper Brick Road.....

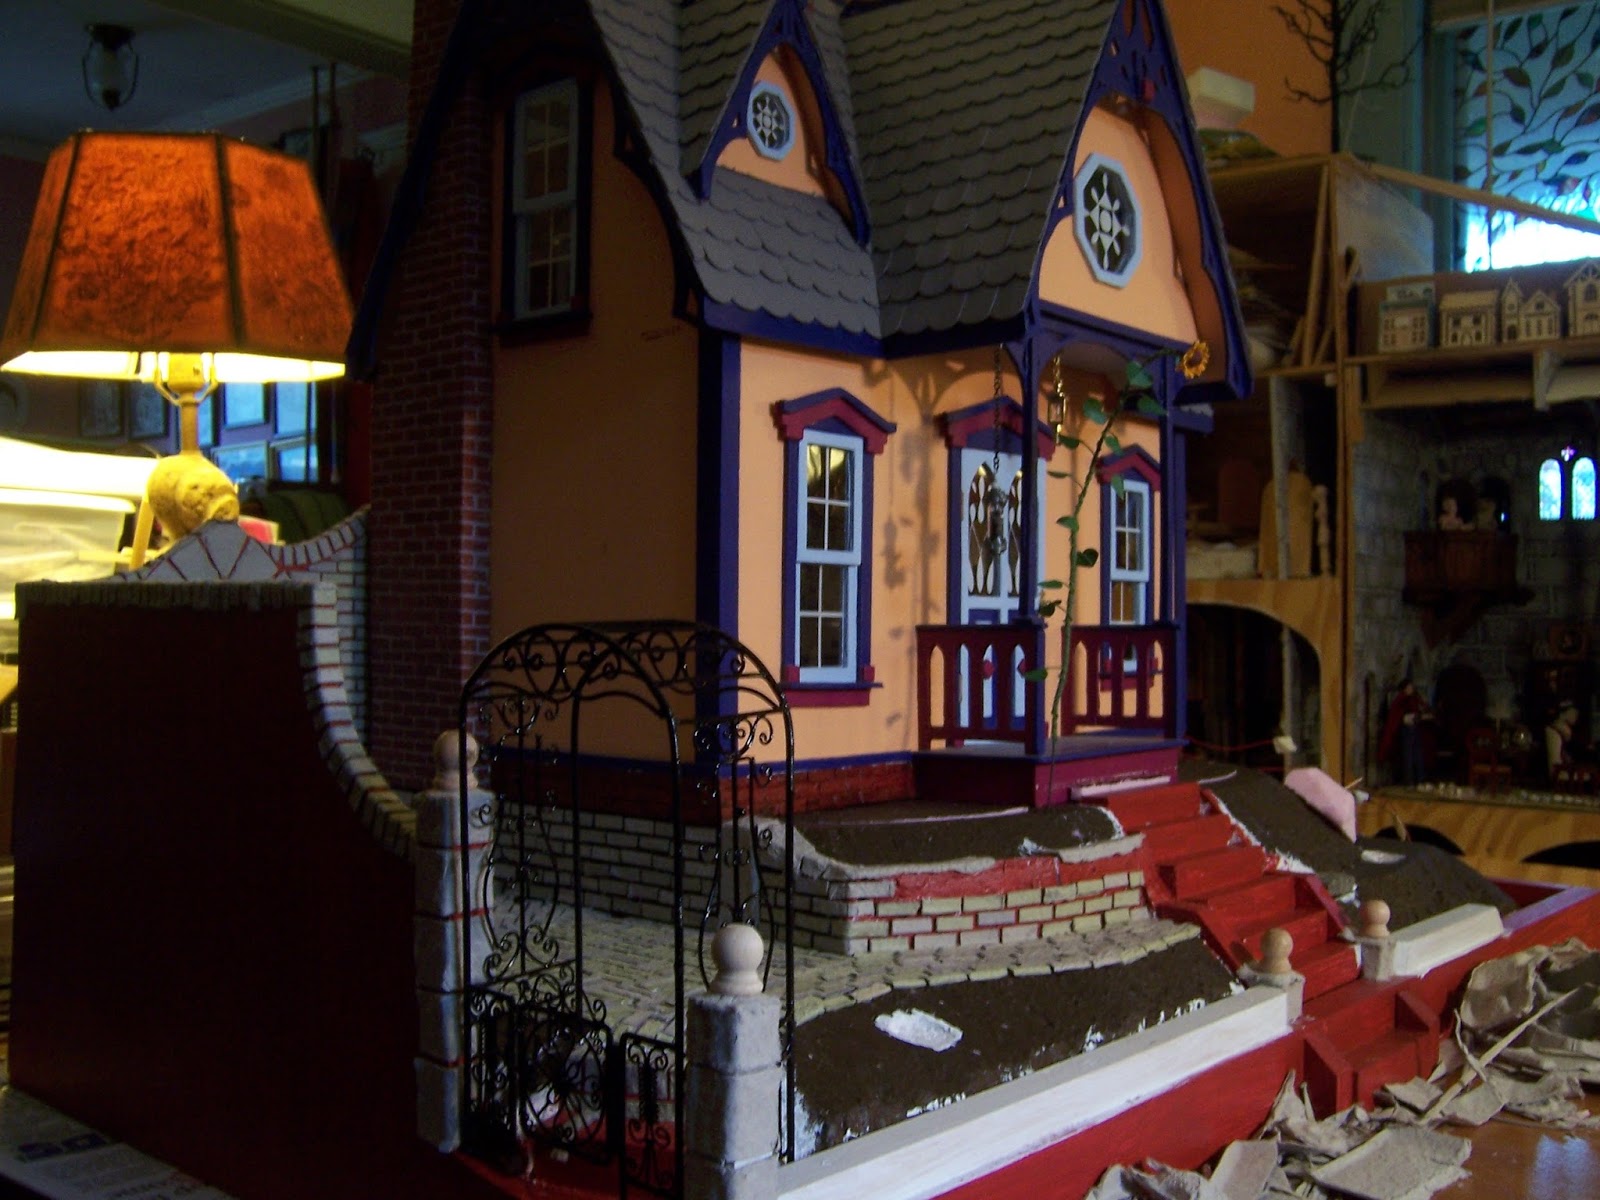
While Daphne and Renee were sleeping, Dear Readers, I was busily applying bricks to the Folly foundation. I had a whole week of vacation to use, and while I was not able to spend the entire time working on the bricks, I did make a great deal of progress on the base for The Folly! You might recall that I had recently "upgraded" the builders foam "ground" that The Folly sits on, shaping it more carefully to allow for an entire "Garden Room" on one side of the grounds. Here you can see I have started to add the bricks to the "cellar wall" at the side of The Folly foundation. It was at this point that I realized I would need to continue with the "upgrade" to the base so that the brick work could be designed for the entire landscape! This is Not a small task!

To begin with, I needed to test the position and spacing for the front porch stairs... to make sure they would "land" at the edge of the property with the right amount of height for each step. I have this problem with my "properties"... I want them "elevated" which only means they need more "landscape" around the building for the stairs to land on... which requires a bigger base... so I was trying to keep The Folly base in the size I had originally made! It looked as though I could make it work.... so I started to build the steps and inset them into the "ground".

Well, really, they Almost fit.... that bottom step is a "doozey"!
So I ended up adding just one more step on the outside of the walls.

I also started to build the side entrance steps that lead to the side garden.....

Which would also need the extra step on the outside of the base walls!

Here you can see I am testing the extra step at the front too..... 
yes, I think they are absolutely necessary!
And then you must Forgive me, Dear Readers, 
because I went off on one of my crazy little tangents....!


I decided that I needed to make the little "gardens" on either side 
of the front porch of The Folly be removable from the base.... 
so that I could make "seasonal" versions 
that could be swapped out from time to time....!
So I cut off a corner "slice" of the pink foam ground.....

Making the bottom cut as close to one inch deep as I could 
(so I could use one inch thick foam boards to build my interchangeable "pod" gardens)...

I carefully cut the front edge of the "gardens" and glued it back in place on the base. 
This will provide the framework for the "pods" to sit within.

Then I glued a thin layer of cardboard to the bottom of the opening 
so the base would be as level as possible for the "pods" to sit upon.

 I did the same for the other side of the porch.
Now I can make the "plantings" be changeable according to the seasons!
(Yes, I know, I am a bit over the edge with the Seasons!)

Here The Folly is back in position... 
and you can just see the edges of those Garden "pods" beside the porch!
(You can have no idea how excited this makes me, Dear Readers, 
to have a Garden that will be changeable!!!)

So with that problem settled, I could continue with the mission of attaching all those Bricks!

Starting with the walls for the Side Garden... 
and the Door surround....

And starting on the "floor" area of the tiny "Glass House" 
which will be part of this side garden.
(I apologize for the dark shot... it was getting late!)

At this point I decided it was time to add the "bricks" 
to the foundation of "The Folly" itself...

And then there was a post needed at the end of the brick wall next to the side steps....

And I made a bunch of "edging bricks" from sculpey 
to go around the edges of the gardens....
Here I am testing the look and placement...

And adding the bottom step "outside" the base walls!

And working on the herringbone flooring for the "Glass House".....
seen in the bright morning light!

Here you can see the Tree House in its position on the side of The Folly base....
and the areas that will be brick walls have been painted red...

Here is the other side view... sorry about the dark photos...
and the messy tables....

This is the side entrance.... 
(the whole base is up on blocks for the painting...)

And brick by brick I am making progress on all the walls.....!

Yes.... it is late ... again!
But isn't that looking lovely in a reverse sort of way?

At this point, Dear Readers, 
I began to see that I would not get all the bricks done during this vacation, 
and I thought that maybe I would feel like I accomplished Something
 if I at least completed the brick foundations on Hardwick Hall! 
(Remember that is what started all this brick mania!)

So I masked the areas that would not want to be painted brick color....

And I painted them with primer and then a base coat of red paint.

And I decided to do the same with The Folly 
where the bricks had been added to the foundation...

Then I added layers of acrylic paint 
to make the bricks look a bit more dirty and aged...
Then added a coat of varnish to seal them prior to adding the grout!
But I had neglected to buy more grout.... so that step will have to wait!

Meanwhile, I had also decided that The Folly's front steps 
needed some more "refinement"... 
so I added some low newel posts 
as well as an extra section of retaining wall along part of the front...

And an added corner post at the side entrance.....
Because I had remembered that I had
 a wrought iron arbor gate that would be perfect for this spot!

Yes, I do believe it was made for this garden!
And eventually it will be old and rusted.....
but that is still a long way down the road!

Meanwhile.... there has been a Marathon of brickwork....
(you know it is late again!)

There are so many steps still to go....

Someday the Tree House will be attached.... 
and might even look like a Tree!

Those bricks will be painted and aged and grouted.... 
and might even look like bricks!

The side gate will lead you to a little yard and garden.....
 with a Glass House.....

And the brick path will lead you to the front steps.....
past a garden of ever changing flowers.....
 
And a lilac bush that blooms for but a week of every year....!
Ah, Dear Readers, did you wonder why I call it "The Folly"?
It's a Long Long paper brick road....
Bases, Bricks and Beyond!