Showing posts with label Tree House Dressing Room. Show all posts

Monday, June 23, 2014

Baby Steps....


Learning As We Go.....

Where To Begin this week is the problem, Dear Readers, because I have so many tiny little things I could show you.... and I am only afraid Some of them might seem a little Boring to look at! To begin with, I have Finally made a little more progress on the Tree House! Do you even Remember where we left that project? Well, I had mostly completed the bathroom (that does seem to be a theme lately!) and had partly finished the Dressing Room ..... but it was not done enough to attach the floor for the next level up! What you see in the above picture is the Beginnings of the Door for the next Room level.... and the floor temporarily in place. And if you look Closely at the door to the bathroom below, you will spot a wire loop on the side of the door... and a magnet on the door frame! It took me Months to decide how to attach the magnets and the door "latches" for the upper doors to the Tree House. Left to their own devices they tended to swing open and I had used masking tape for ages.... but that didn't work very well and could not be the permanent solution. The wire loops are very attracted to the magnets, and they are bendable, so they can be formed to the correct shape when I put the "outer skin" on the whole tree.... a Long time from now!

I have added one of these wire loops (made from a bent paperclip) to each of the upper doors along with a magnet... which I sometimes had to carefully cut away the walls in order to make it fit! (This was because I had not decided on the latching mechanism at the beginning of the project!) So we are learning as we go!
And another little detail that has been waiting for me to accomplish 
is the inner layer to the door on the Spiral staircase.......

This will not seem like much, 
and you might not even be able to see what I am talking about in the picture, 
but it was really very necessary! 
The door fits more closely to the stairs now when it is closed.....
And we wouldn't want any little Baby Ratlings 
to fall through cracks in the walls!
And Another small thing that has been holding up progress on the Tree House 
has been the Lighting for the Dressing Room beside the Bath.
I was originally hoping to make one LED light work for 
Both the toilet room and the Dressing Room...
(This was because the batteries support 10 lights each 
and I had reached that number for this battery 
and I wanted the next battery to light the rooms above, not this level!)
But I finally decided that I had to make a separate light for the Dressing Room....

I used a gelatin capsule for the "glass dome" and a sequin for the base....
And glued the LED inside....
And then I had to paint a piece of ceiling to match the room.....

It is not very big......
And attached the lantern to the ceiling.....

With the wires run through to the upper side.....
And then we see how it looks.....

Do you even remember this room???
With the wild Sea Horses in the waves.....

Well now you can actually see them!

And you can see the ceiling.... 
if you get down on your knees and look up..!

Here you can see it with the other light lit as well.....
I think the battery is running low on that one....
But now we are one tiny baby step closer to starting the next level up, 
because once the wiring is in place I can attach the floor above!
And what is that level going to be, I hear you ask?
Well, it is going to be the Nursery and the Nanny's Room.....

Here you can see the view looking down from above......
I had to extend the floor in several places.....
The Nursery is on the left and 
the Nanny's Room will be on the right of the dividing wall.
When we get there....
One Little Step at a time!

But That is not All, Dear Readers! 
I find that I Must tell you the next installment of Daphne's Story....
And this time we Begin with Guillaume...

Some of you Might recall that he had suffered a terrible Stroke shortly after the Baby was delivered into their care....


And Yvonne found it necessary that she learn to take over the 
management of the Family business and all their Estates.
As Guillaume slowly gained strength she would sit by his bed and tell him all she was doing and learning....

But in spite of the best medical care, his healing was slow.
And Yvonne needed to be away from his side to see to the Business.
They hired a Nurse to tend to him.
 Jean Paul was large and strong and kind.
But Guillaume did not always think so, 
especially when he was being told to try to walk...

They did not seem to understand that his body did not listen to his mind any more....

He was not at all sure that "practice" was going to make it better.
As the weeks turned into months and he could not manage to do the stairs in the Townhouse, 
they made the first Floor parlor into his own room, adding a bed....
And his meals were wheeled in on the tea trolly....
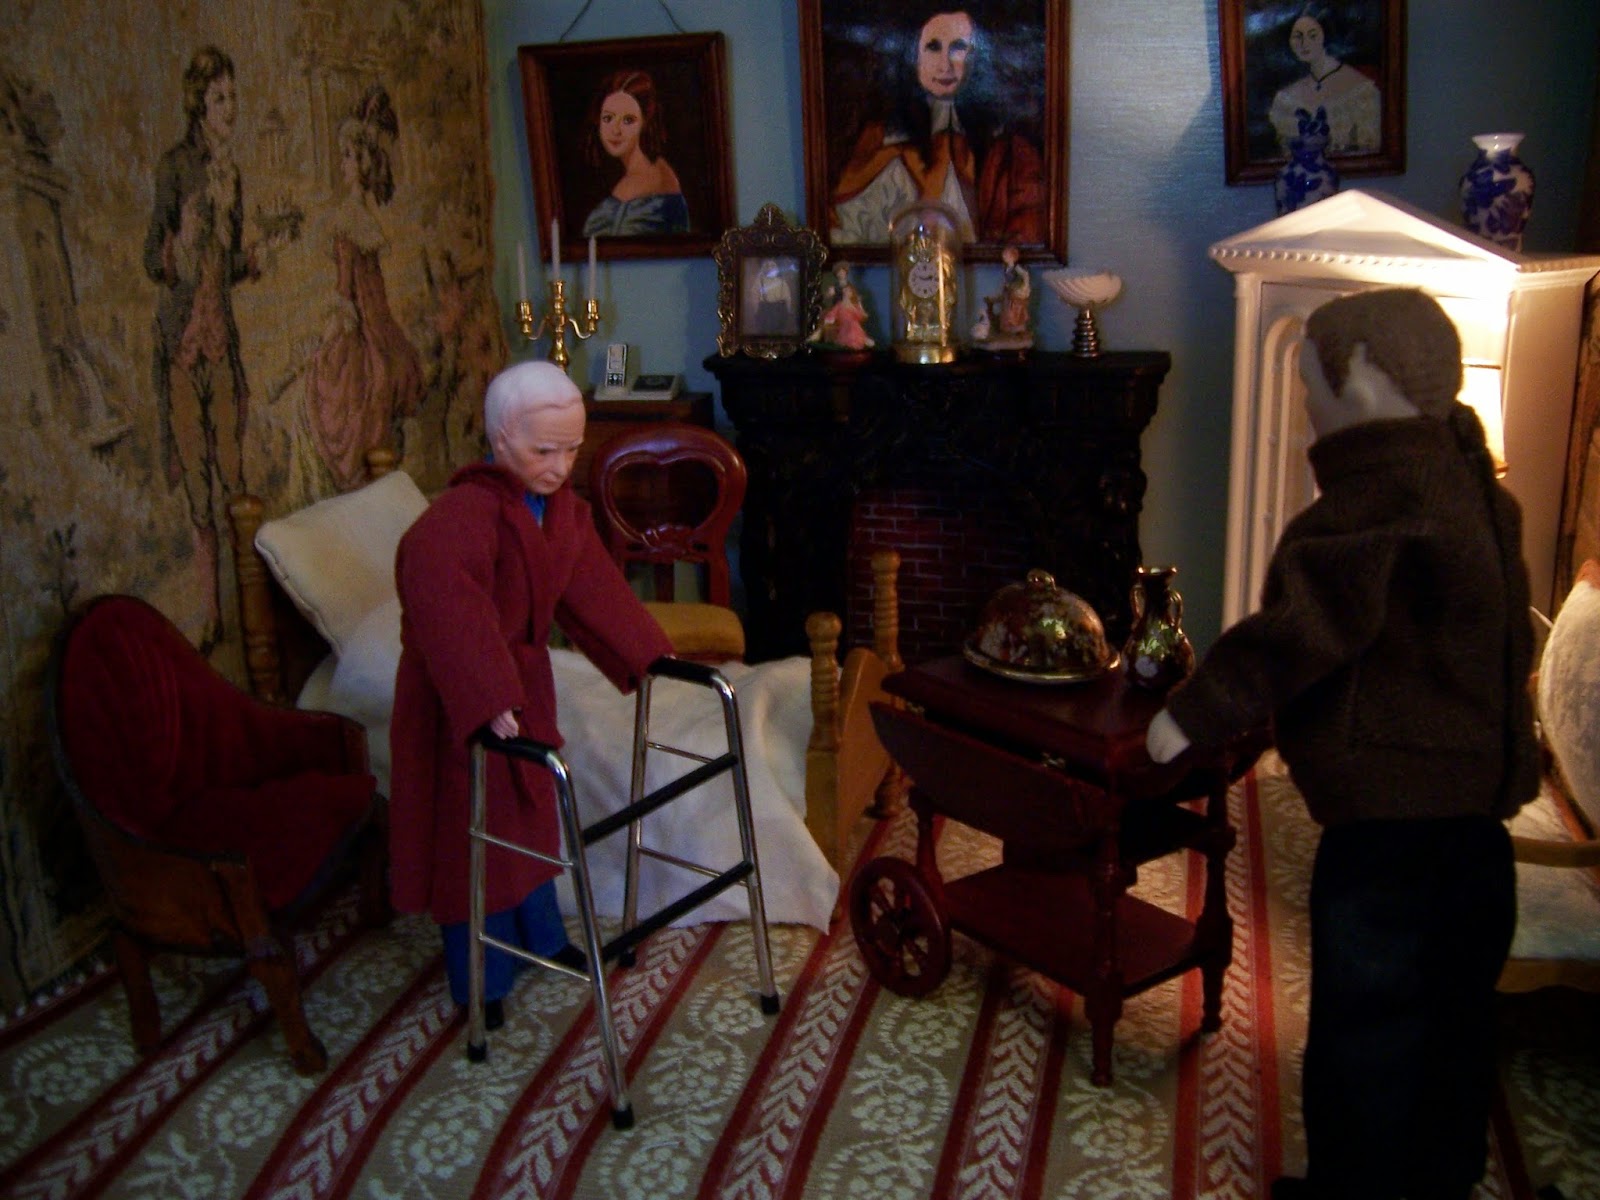
Guillaume was happier to eat alone, 
he felt so ashamed that he needed help even to eat!

And even worse, his words did not return at all!
When he thought "dog" it  came out "pig" or sometimes even "cabbage"....
There did not seem to be a connection any more in his brain and his voice....
so he said nothing at all.

He could not understand why his life had dwindled to this one room....
He thought it would have been better if he had died.
But sometimes in the distance he would hear the baby crying...
and then he would remember that there was one thing to look forward to.

Sometimes Raymond would come to see him and would bring the child.

At first he had no interest. 
He really felt that it did not matter what became of him.
But while the baby slept in his arms, Raymond would talk to him.... 
about the household, about his work, 
and about the baby and the progress she was making.
As the weeks went on, Raymond and the Baby's visits 
became treasured moments in his empty life.

The time passed very slowly for Guillaume.....
They moved in a large TV to give him some entertainment...

But he could never remember how to run the controls....
and he didn't understand what was on the screen anymore.
Travel was impossible for him, so they never went to the Country House.
Yvonne spent every evening with him, reviewing the work of the day....
But he had lost interest and had nothing to say. He was afraid to try to speak to her...
He was sure his words would make no sense.
It was the Baby, little Renee, who gave meaning to his days.
She was growing so quickly!

One day she was just an infant, and the next it seemed she would talk any day!

Or Walk!

Can it be she will take her first steps....?

Just for Grandpa?

He had not realized it before...
His heart had been stolen....
But suddenly he knew This child meant Everything to him!
He wanted to live many more years... to watch her grow!
Yes, Dear Readers,
It all might be just Baby Steps...
But we're all learning as we go!

Monday, December 2, 2013

There!


Oh What a Relief...!

I must Confess, Dear Readers, that this Tree House Bathroom has been very complicated to build... and the farther along it got.... the more challenging the pieces became to assemble! I cannot tell you how many times I have tested the ceiling assembly in place and then pulled it off to make an adjustment! But Finally, I can show you the room with all the pieces Glued in place!!! When I last showed you this room, much of the Domed Ceiling had been completed, but the pearl pillars still needed to be adjusted to fit the height of the room.... and then they needed to be glued to the dome rim.... one pillar at a time! Here you can see them with a make-shift support to keep them upright while the glue dries.

And once they are all glued to the rim, 
I needed to see how well the assembled "pavilion" fit in the bathroom...

I am sure there are some of you who will think I should have stopped right here... 
before I got carried away with the gauzy curtains....


(But I think you would wish there were some sort of curtains 
if you were climbing naked into the bath....;)

So I began to fit the curtains.... 
testing the position of each one before gluing....

The entire ceiling and "Pavilion Dome" are still removable at this point....
allowing me to attach the curtains at the right length....

And each curtain requires testing to see whether it hangs right 
and doesn't obscure too much of the Beautiful Walls.....


And I realized it was also Time 
to glue the beautiful Swan Bath Tub in place....!

And one more curtain.....
Before taking my Courage in my hands and 
Gluing the Ceiling and Dome in place!

Here you can see it before the outer door frame is added....
with the morning sunlight shining brightly....

And while we are speaking of such things as Outer Door Frames....
I also have glued the frames for the Tiny Toilet room and the Dressing Room....

Remember those rooms.....? 
Still only partly finished...

But I did re-attach the toilet paper in the Tiny Toilet Room!

And while we are looking at the outside of the Tree House....

I organized all the wiring for the bedroom and Bathroom and Dressing Room 
into one circuit which runs on one small battery pack 
(they say up to ten LED's per battery pack)
and extended the lead wires so the battery pack no longer dangles from the upper rooms 
but sits securely on the ground!
And I even completed the Spiral Stairs....

Which you can see here with the little door open....
I think I am going to have to add a light into this stairwell...!
And I still need to make the window for the Door....
And when that is all done we can Attach the next level.....!

But for now, Perhaps we can just Bask in the Beautiful Bath Room....

With the outer door frame in place.....
And the Dome Light Lit.....

The LED is covered with another thin shell....
Allowing a gentle light to shine on the Bath....

And aside from a few necessary accessories....
I think I can say the Construction part of this room is Done!!!

It really is such a Relief, Dear Readers, 
to be able to say There! It's Done!

Monday, March 18, 2013

The Wardrobe


A Foray Into Fine Furniture......

I left you, Dear Readers, Wondering about the Ceiling in the Chinoiserie bedroom, but I found myself taking a Different Direction altogether last weekend! What I had not shown you previously was my Terribly Disappointing Attempt to construct a Mini Wardrobe with Hinged doors....! Alas, I was so disappointed that I tore the hinges off and deleted the pictures! So You are going to have to believe me when I tell you that the hinges when first installed on the door panels ended up causing a Huge gap between the door and the side panel when the doors were in the "closed" position..... while they opened up to a tightly closed flat seam. (I know it is difficult to understand the description!) It was so glaring a fault that I was about to abandon altogether the idea of a Wardrobe with beautiful Hinges! But after several sleepless nights... (sort of) and Much pondering, I decided to re-examine the Science of the hinged door. Most hinges have their pivot point off-set from the plane of the surface they are fastened to.... ie the bolt sits above the surface when the hinge is open flat.... so when the hinged pieces swing.... they either swing in a tight arc or a wide arc from the pivot point.... depending on Which Face of the hinge is contacting the surface!  So in order to get my doors to swing in a Tight arc...(and therefore showing little to no gap) I needed to set the pin pivot face Down between the flat sections of the door and the side panel not face up as I had first thought!! I am Sorry to bore you with this incomprehensible description.... but I was just So Excited by the discovery that I wanted to share it with you! Go ahead and try it yourselves!
So thus encouraged I commenced with building the Mini Wardrobe.....

You can see above the beginnings.... I stained all the pieces Before gluing them together, and if you look closely you can see the hinges attached with the pin side Down ... requiring a space between the door and the side panel.... but if you envision it swung closed..... the door and the panel have no crack visible!

Here is a closer shot and a view of the base section as well....
One of the panels (on the left) cracked as I was attaching the hinges 
so I had to start over with a new panel....

Here I am testing the door panels for size 
( I needed to shave off a slice from each door... 
I had forgotten that the hinges in this position would mean 
the door did not overlap the side panels at all and so did not need to be so wide) 
Also you can see the drawer mostly constructed.

Here above you can see the nearly completed Wardrobe next to the rough (and very faintly drawn) sketch I made for an initial design... the size discrepancy is mostly due to the perspective.... the actual is quite close in size to the sketch!

And here you can see the doors open... 
with the bar for hanging clothes.... sorry it is a little crooked! 
But as beautiful as this was, I thought it lacked something.... 
so I added a decorative crown pediment....
and also added all the door pulls and tiny finials made from beads....

That is So Much more Elegant!
Here you can see the drawer open too....

The whole cabinet is just under two inches tall!!!
Which makes it a quite Large almost Eight feet tall in the Mini scale!!!

And then we Have to see it in place in the Tiny Dressing Room.....
Oh Dear.... is there room???

I measured So carefully, Dear Readers... Yes, it fits! 
But Alas, it covers so much of the painted walls....
Can we Forgive it...? 
This is the Dilemma posed by Painting the murals to begin with.... 
we have to hide the paintings with the furnishings...
I should be used to it by now....

But did I stop there, Dear Readers......
I had to make at Least ONE thing to go inside the Wardrobe....
Can you see it...?

And Now can you see it...?

I'm sorry the picture is blurry..... 
Besides.... I couldn't stop there either.....!

I had to make a Lacy Negligee.....

Of course it is really Difficult to photograph it well....

This Tiny little gown tucked into a Tiny Little Wardrobe....  
stuck into a Tiny little corner of this Tiny Little Room.....
Of this Tiny Little Tree House!


I am So glad I was successful with this Foray into Fine Furniture, Dear Readers,
Because what Dressing Room would be complete without a Wardrobe?