Where Do We Start....
With Kit bashing, Dear Readers, as I am sure you know, it is often difficult to know where to start! If you are like me, you have long ago left any instructions behind and must invent your own procedures for every step of the build. And as I am sure you have experienced, sometimes a small amount of work makes a big difference in the project, and conversely, sometimes a large amount of work seems to not make much progress at all. Now that I am working on the "upstairs room" of the Dollmaker's Studio, I am having to deal with the "junction" of all the kit pieces I started with.... which has required a lot of "bashing"! Above you can see that I finally added primer to the wall sections which were originally the "Sugarplum" kit by Greenleaf. If you are at all familiar with the kit, you will know that it is small (which is why I chose it) and very rudimentary (it doesn't even have a staircase in spite of two floors!) and the ceiling height is a barely passable 7 and 1/2 inches! (I have lived in old RL houses with about that much head clearance... so it is doable!) But I wanted extra ceiling height, so I added the ground floor "room-box" and made it extend up into the second floor by about 2 inches. Which causes a really awkward "join" between the stories part way up the wall! Now that I have primed the walls for the kit pieces, you can see where the join is in the above picture.

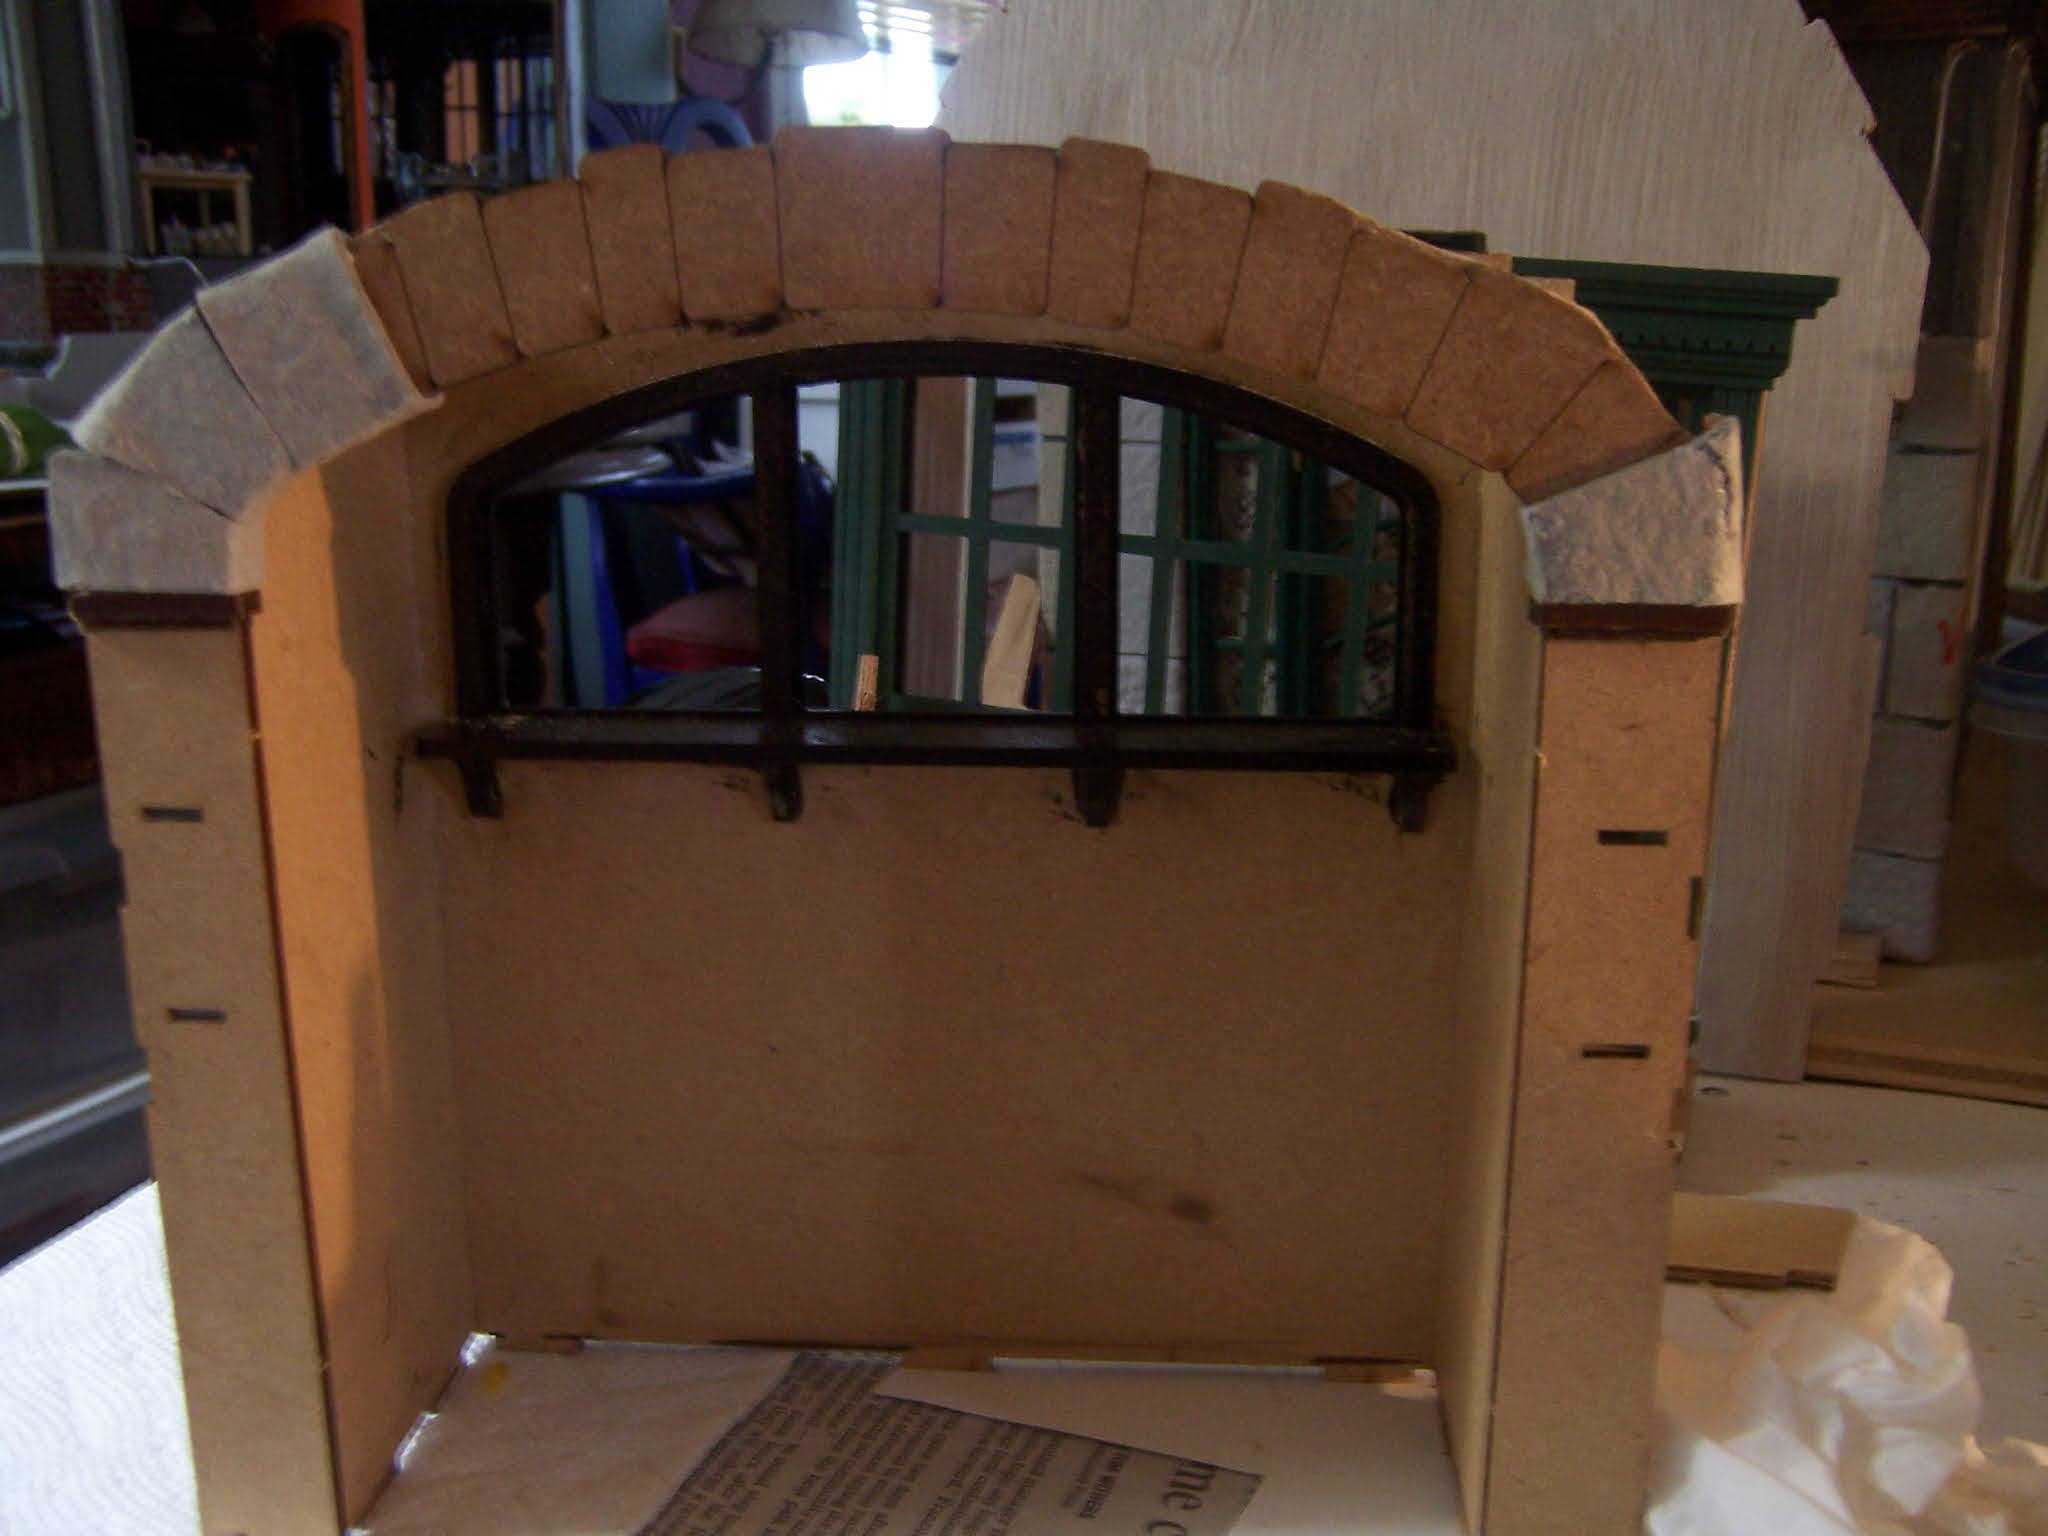
Add to that challenge, the "Dollmaker's Studio Vignette" kit by Sandra Morris which inspired this whole project, and my intention to blend it into the Sugarplum kit as an alcove at the back of the main room, positioned where a window was meant to be, and you will discover lots of places requiring adjustments! In pondering the "where to start" part of the equation, I decided that I needed to get the Vignette assembled and decorated as far as possible before I could actually move forward on the rest of the room. It would be way too difficult to access the alcove once it was attached at the back of the build. Above you can see the framework of the Vignette just tucked into the "enlarged" window opening of the Sugarplum kit. (Sorry, the pictures are a bit dark... it was a gloomy day...). The vignette is framed by a nice arch of "stone" which needed to be made a little bit more three dimensional to work in this build.
Here it is separate from the main room.
I needed to trim off the "corners" of the kit
along the top of the rock arch.
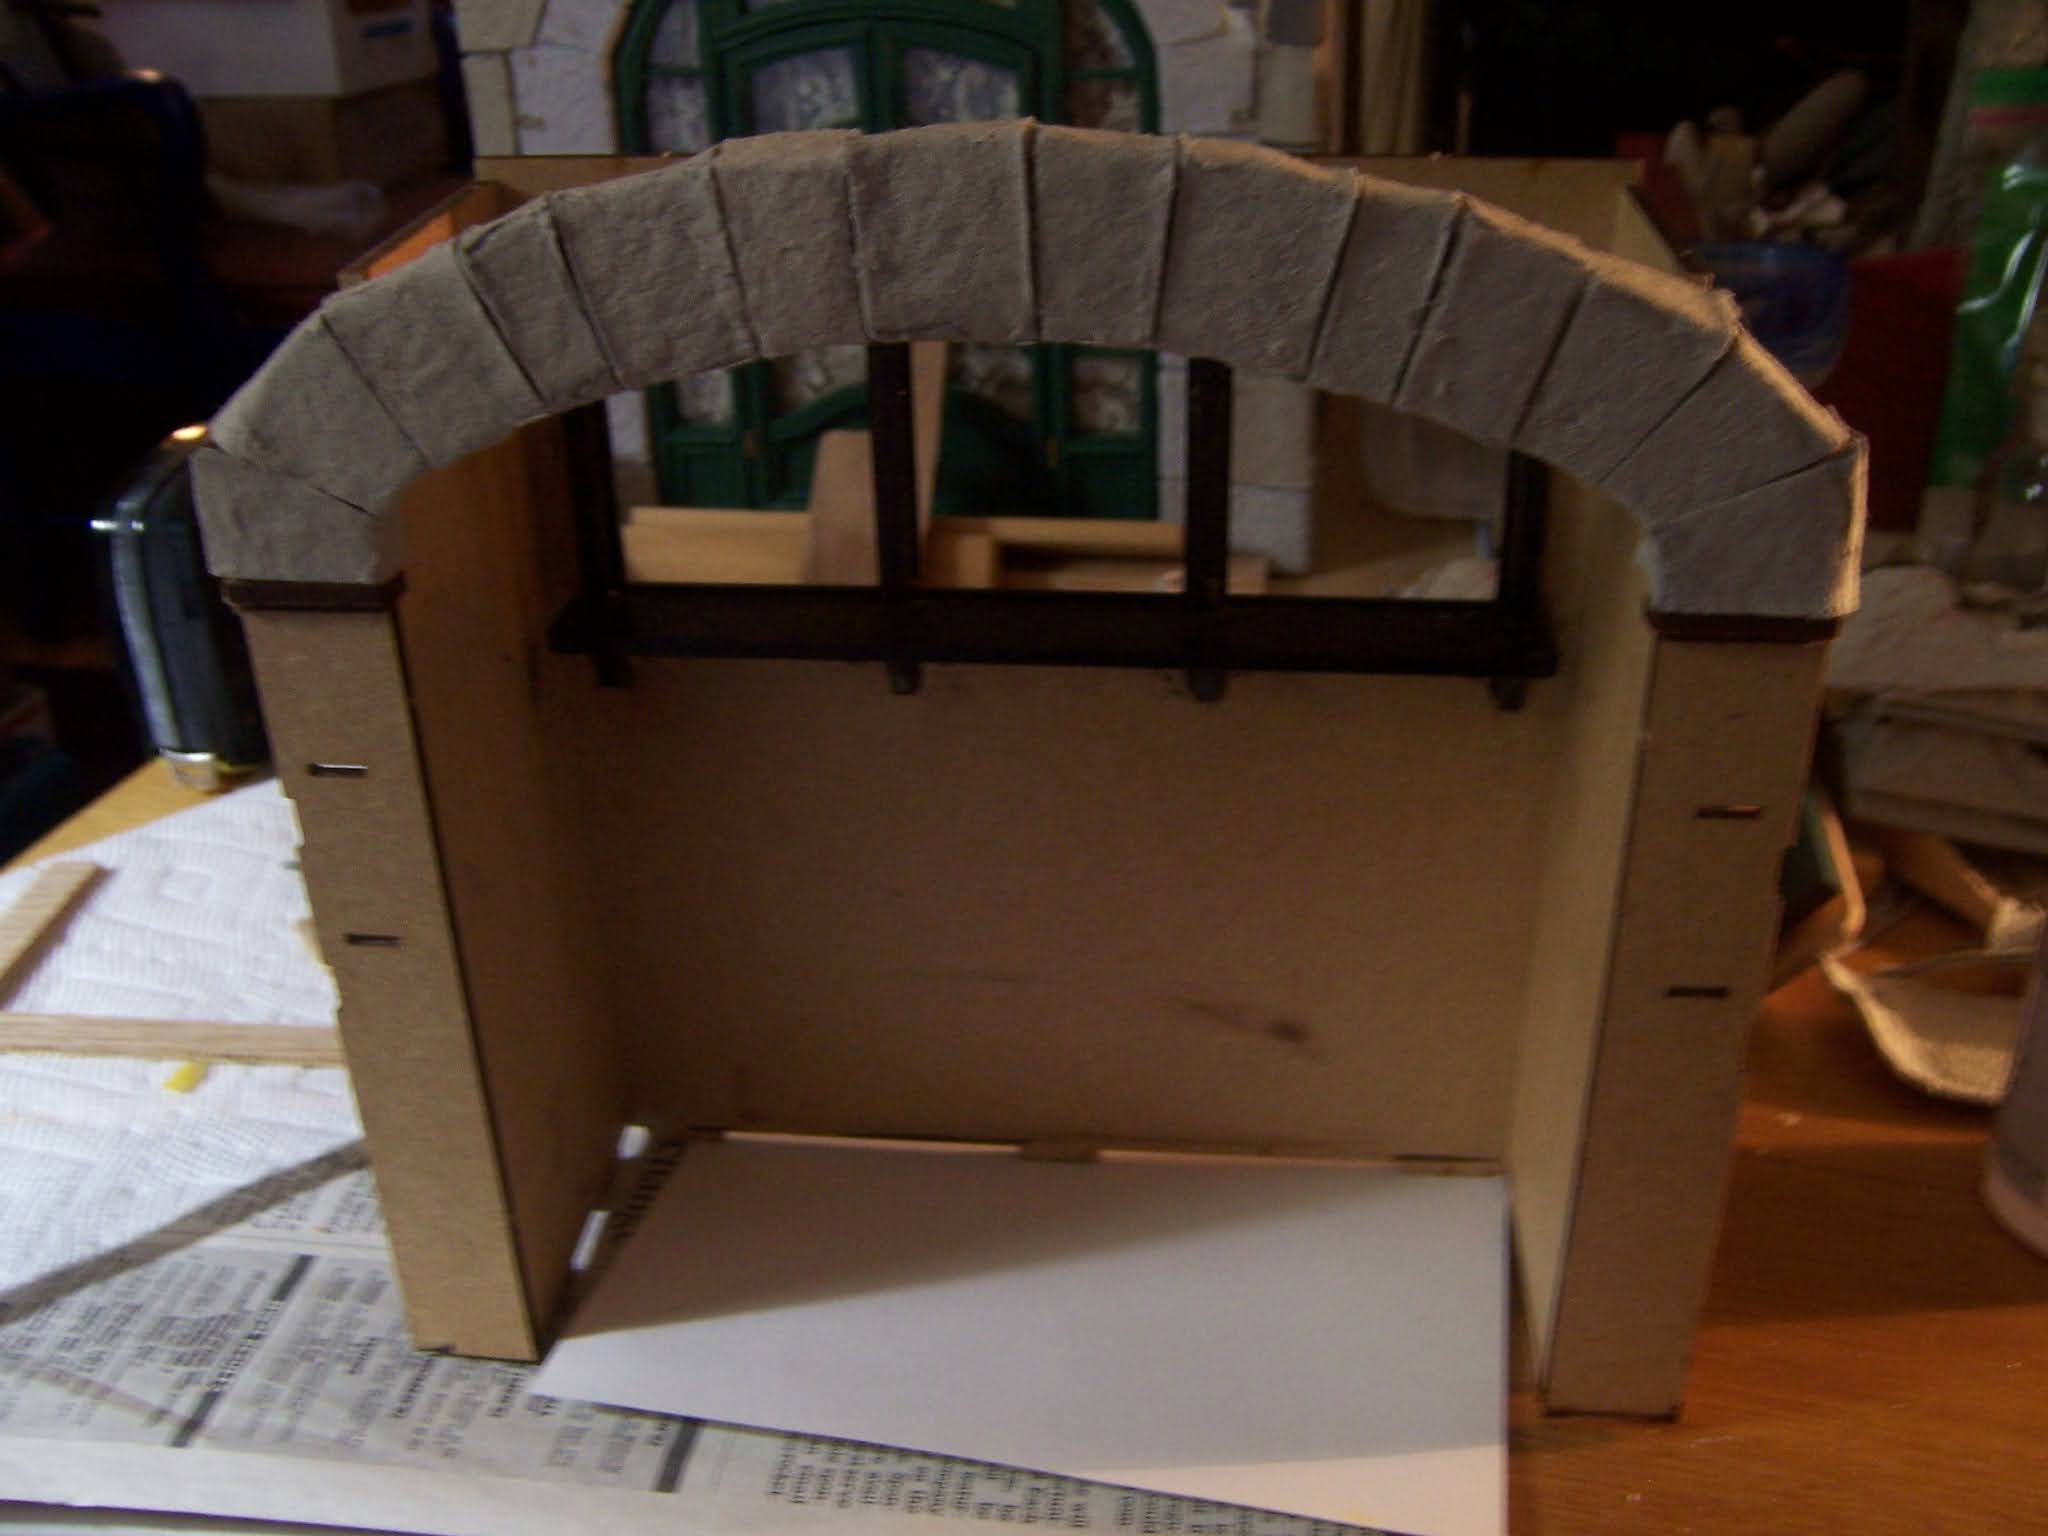
Here you can sort of see I have added a cardboard strip
along the back of the stone arch.
This will allow for the "stones" of the arch to have some depth,
and to hopefully fill the gap between the arch and the wall in a realistic way.
Because the two do not meet on the same plane!
The rocks are good old egg-carton glued to the arch
and wrapped around the frame.
It required lots of testing to see if the "rocks"
were fitting the gap properly.
They have more "weight" than the simple shaped pieces of the vignette...
but that is needed here!
Sorry about the dark.... it got late
and I didn't get good pictures of the rocks before painting.
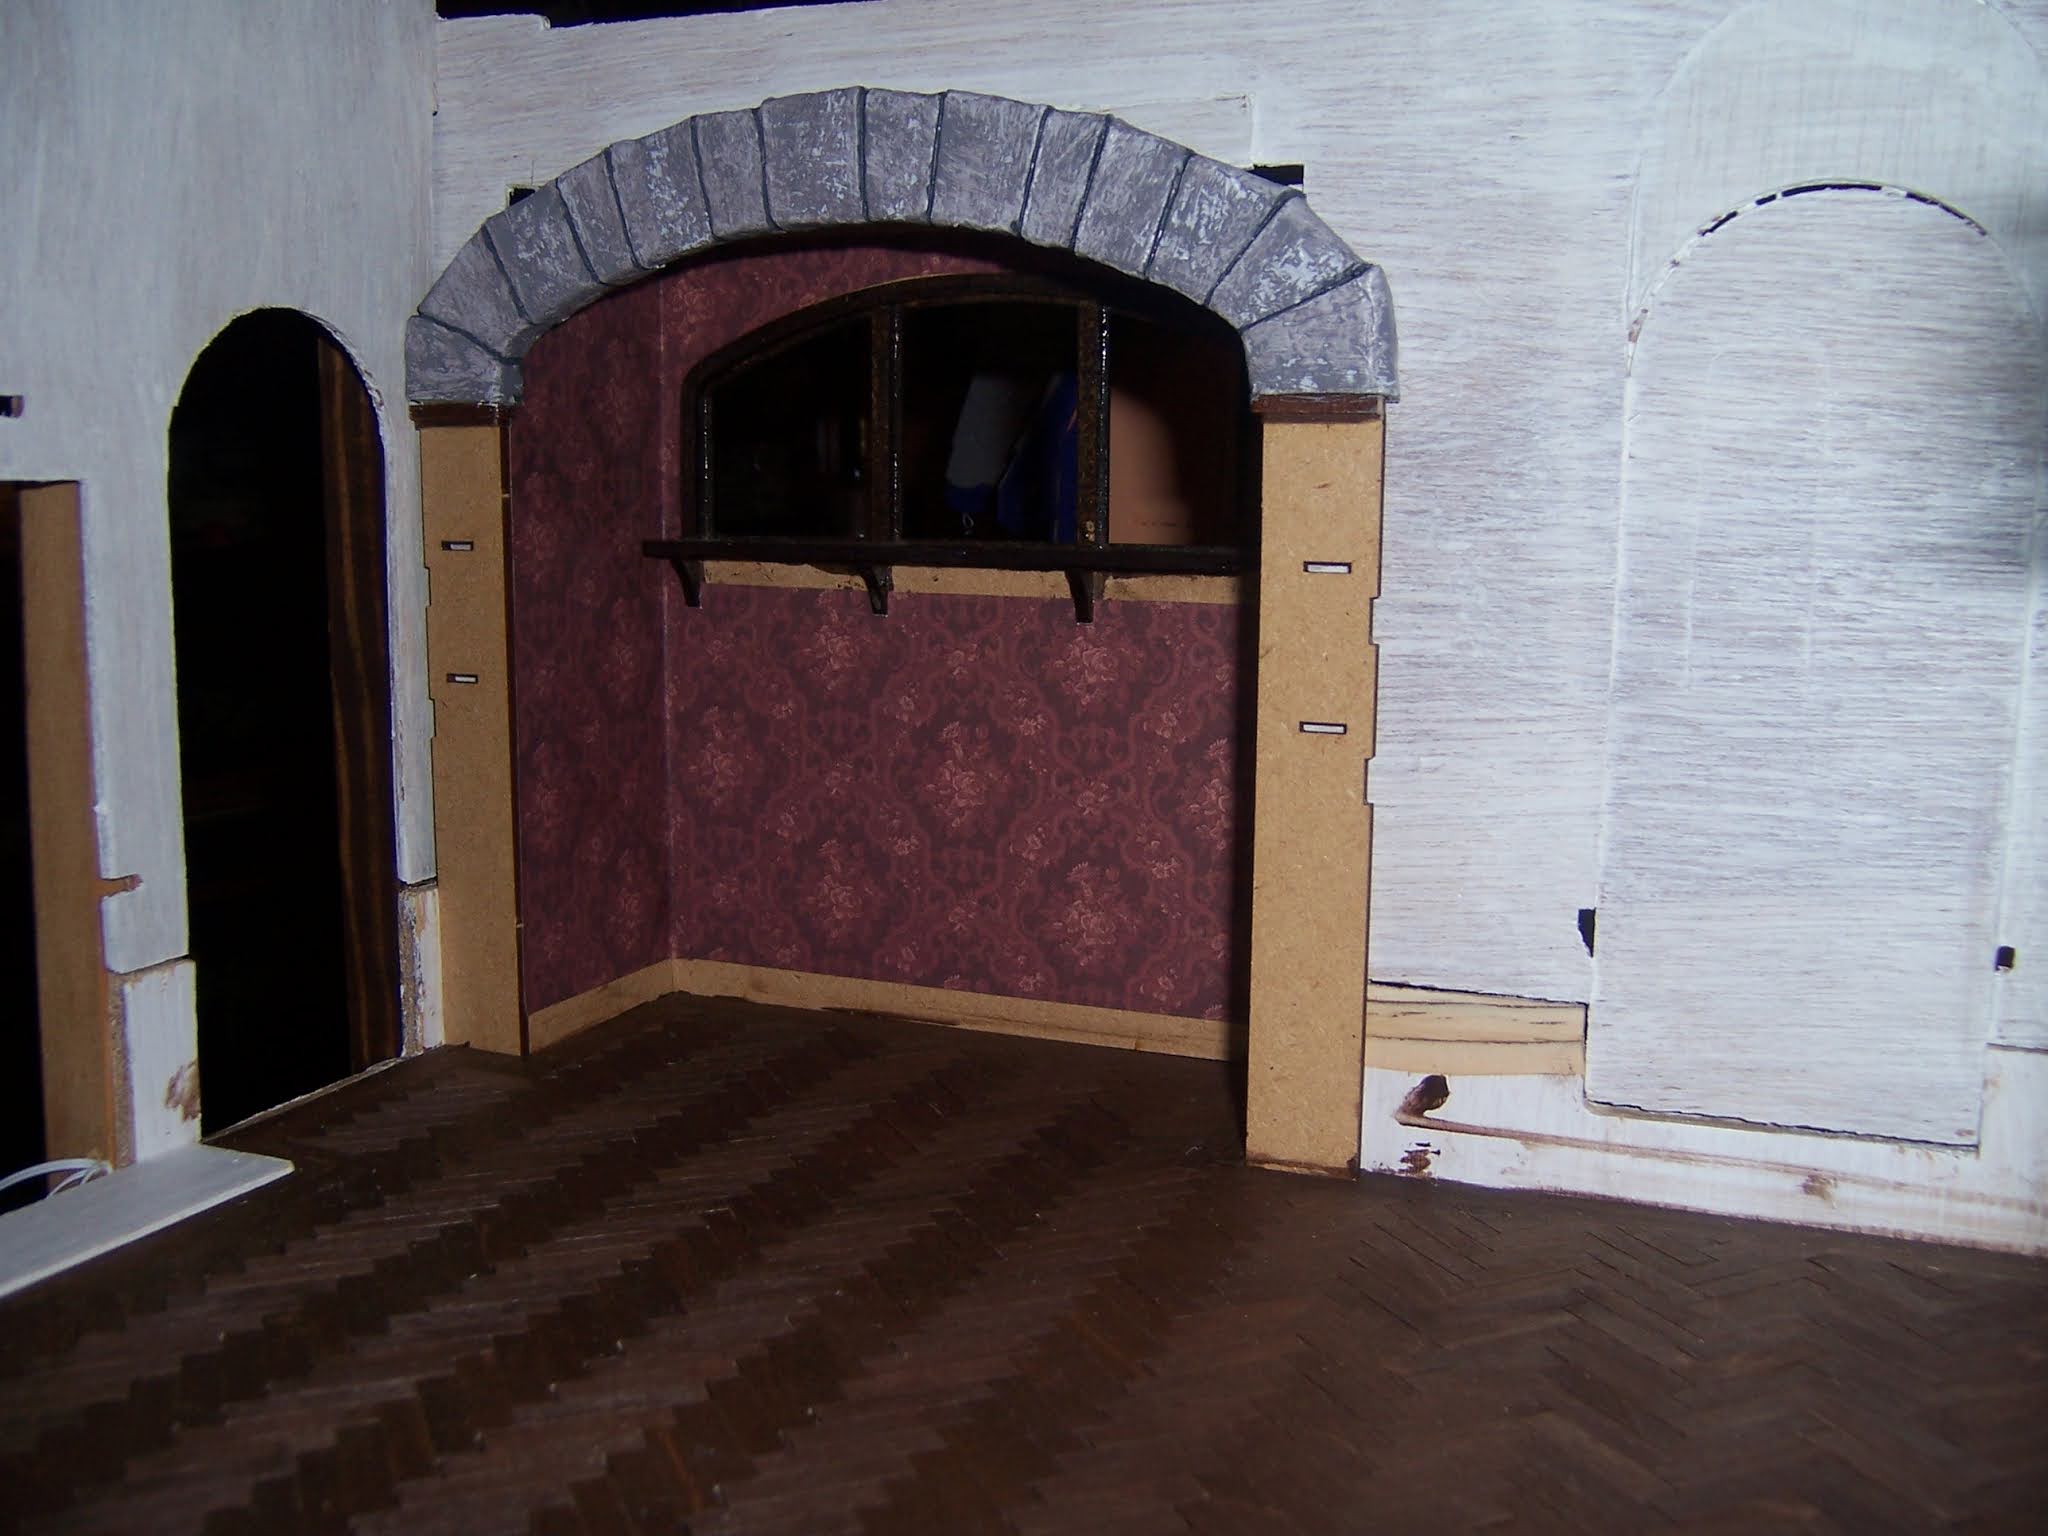
Here they have been given the basic coats of paint....
primer then two different shades of gray.
Here the rocks have been outlined with a darker gray in the cracks.
And I am test fitting the wallpaper.
I got so involved in fitting the pieces, I forgot to take pictures.
The wall paper is glued and the vignette tucked into the opening...
With the flash on is the only way to see anything back there!
(It is late and dark.....)
And another shot.... with the flash....
it starts to give a sense of the space.
The sides will have trim added below the arch...
and baseboard trim...
Once I get the alcove attached
I will be able to work on the rest of the walls.
So you can see, Dear Readers,
I did a lot of cutting and fitting paper
Hoping it turns into rocks.
And it doesn't look like much got done...
but it is a start!


I love how the little alcove looks. The 'stonework' really makes it look dramatic.
ReplyDeleteMiniaturists who kit bash need a special medal. One small change creates a domino effect and then only the most innovative can resolve the ensuing problems!
ReplyDeleteSo Betsy congratulations you are in the running for another medal!
Isn’t the lilac blooming?
Janine
Your ingenuity in solving kit bashing problems never fails to impress, Betsy and I think that your Sugarplum kit is looking positively"Peachy"! ❤️
ReplyDeleteelizabeth
I can't tell you how excited I am to see this amazing project progressing! I just love everything about it! The wallpaper for the alcove is just lovely! It plays so nice with the tone of the herringbone floors! And the stones are just the perfect amount of prominent!
ReplyDeleteThere are always a lot of challenging puzzles to resolve on a good bash, but they are always so worth the trouble. You are going to end up with such a special and unique dollmakers cottage! Great work!
Me encanta como avanza el proyecto!Las piedras encajan perfectamente, el papel es precioso y me encanta como queda en la pequeña alcoba, has hecho un gran trabajo, no puedo esperar para ver más avances, es tan emocionante y original!
ReplyDeleteBesos.
Hi Betsy! Kit bashing is unknown for me as I don't work with kits, but starting with the best intentions with building plans and than adding new things to the original is also searching for problems *grin*, so I do understand what you mean ;).
ReplyDeleteYou've worked out a clever plan for the arch and the stonework to look it more realistic, and the great effect shows later on after adding the egg-carton stones. The combination of the stonewrok and the wall paper is well balanced, as well in color as in sturdy and fine elegant 'material'. Great start!
Stay safe, take care, dear Betsy!
Hugs, Ilona
Well, according to me it DOES look like a lot of work - because we all know how time consuming this kind of work is. It's always impressive to watch how everything is coming together and developing. The stonework for the arch is awesome as always when you're rocking things *grin* - and it's impressive to see how you manage to fit all these different elements of the vignette, the Sugarplum kit and your own additions together. Btw I too think the wallpaper was a great choice, it looks beautiful, and even more in combination with the floor. Keep on rocking!
ReplyDeleteHugs
Birgit
Oh I'm so late. Sorry. Much technical detail in this one- and I'm curious, where do you get egg cartons when you don't eat eggs?
ReplyDeleteI'm sure that little project is going to be worth all the trouble - I love the wallpaper.
Much love, Mom
The little alcove is stunning.
ReplyDelete