Monday, June 18, 2012

New Door, New Floor And More

I LOVE Tiny Hinges!

I Wanted a New Door, Dear Readers, that would be the more Formal Front Door and open into the Main floor of the Tree House, rather than into the below ground Kitchen level. I don't know how it is in your neighborhoods, but around here in New England, people almost Never use their Formal Front Doors! Sometimes they are even nailed shut against the cold Winter Winds and are never opened again! But nevertheless... there IS a Front Door.... and so I wanted one for the Tree House! Figuring out Where it would fit in was a bit tricky and required quite a bit of odd angles and tiny spaces... but I have managed it! It opens at the top of the kitchen stairs into a tiny vestibule off the "Salon" (which is what I am calling the Formal Living Room!) Here below you can see the door and the tiny bit of vestibule flooring....


And here you can see the door from the other side.....
I have made the door handle out of a bit of root.. 
and the end sticks out to act as a lever so I can operate the door from the outside of the house.... !

The tiny vestibule wall is "hung" with a piece of the Unicorn Tapestry.... 
which is Just visible through the door into the Salon....
And the floor of the Salon is made of a marquetry patterned paper.......

Here below you can see the outside of the vestibule wall with the door on the left..... 
and you can see I have started to add the paper mache to the lower level for the roots of the tree...
(I have put a layer of plastic wrap between the damp mache and the wooden floor while I am working...)

More of the paper mache being added to the Kitchen level........
This is not the final shaping of the mache but more of a strengthening base layer.....

And more of the mache layer.... 
this will form a level base for the next floor to attach....


And here you can see the rough framework of the Salon loosely set in place for fitting purposes.... 
nothing is attached yet! You can see the front (opening) wall has a window cut in it....

And I just HAD to add Shutters!!!
These are interior shutters as were common in the eighteenth century around here....
Please forgive my crooked hinges and the ratty edges to the wood... 
But can you Believe there are Hinges that small?!!

See, they open and close!!!!

And here you can see I have added more of the interior wall layers, creating a deep window embrasure.... 
It will eventually be painted, hiding some of the flaws in the wood.... 
and there will be more paneling at the bottom of the wall for wainscoting....


And here you can see the window "glass" panes have been added! 
I used the same technique as before with the painted gold mesh, only this time I used a lighter gray paint and lined the panes up vertically so they would look more like the "sixteen over sixteen" type of colonial window frame which is typical of the elegant older houses in this area.


Here is a view from the outside with the interior shutters partly open....

Meanwhile, for the interior of the Salon I have built a fireplace and mantelpiece in a style I think is sort of "Georgian" what we call "Colonial" over here! It sits on a diagonal wall between the door to the vestibule and an alcove on the left hand wall which is not yet built...... and on the opposite corner there will be an ornamental "Niche" for some statue or elegant china.... whatever I can come up with in such tiny scale!!

Here below you can see the mantelpiece in slightly better detail...
 made of tiny bits of wood and tinier bits of thin cardboard....

And here below you can see the Mirror I will be using.... 
I know it is a bit much... but I will probably tone the gold down a tiny bit.... 
and I think it will do well enough...! 
I also added a "marble" hearth... painted cardboard of course.....
And would you just look at those Tiny Hinges on the door!!!!


Here you can see I have added the painted brickwork to the fireplace...... 
yes, there will be a fire!!!

Here is a slightly closer view of all those painted bricks....!


And here is a view of the "Front" Door from the outside....... 
it will eventually be much more closed in with tree roots....

And an overhead view looking down at the opening wall with the window.... 
this will not be viewable from this angle once the ceiling is in place....! 
But I love how it makes me able to imagine standing at that window looking out at the little brook down below.....

And a view from the "front" where the walls open... two floors tall...
Eventually these opening doors will be covered in paper mache "tree bark" to match the rest...

Oh, and I almost forgot to show you the last Tiny pieces I made for the Kitchen......
I had to make a copper Tea Kettle.... (for how else can one boil water for tea?)
I also made a tiny trivet for it to sit on in the fireplace.....

And here you can see them by the fire......


And there HAD to be A Robins Egg Blue Teapot on the kitchen table.....!

So there you have it...
A New Door, a New Floor and a Whole lot More!


Monday, June 11, 2012

Have I Lost My Marbles?


The Moon Window

Have you ever dug in the ground, Dear Readers, and come across Marbles buried in the dirt and wondered how long they were there and Who LOST them? It seems to me that all my life I have found beautiful Marbles whenever I have dug a new Garden! I have collected them, of course... but I have also LOST them again.... because they Always seem to turn up Somewhere, so I have NOT kept them very carefully.... but tend to leave them amongst the other rocks I unearth. So it can be no wonder that when I think of Treasures found in the Earth.... I think of LOST Marbles... and how they would appear to someone who is building a little Home underground.....


So I decided to include one that got Lost in the Ground and was partly swallowed by the Tree Roots, but was close to the surface so it could let the light into the Underground Room......!
I realize that the walls for the Kitchen are not completed in this picture below.... 
but it gives a Sense of how the Marble looks without any lights on..... 
I think it looks like the Moon!


And speaking of unfinished Kitchen walls.... 
Before I could finish the walls and the ceiling, 
I needed to Finish ALL the little things that would go in this room!  
I had wanted a small Framed "Picture" that said "Home Sweet Home" that looked as though it was a stitched sampler... but I couldn't find any suitable candidates to copy...
so I drew one myself! 
You can see it here below....

It is Quite TINY!
And then I added a Frame made of Sticks.....


And Because I simply Couldn't imagine a House without Tea and Sugar....... 
I made some Tiny Canisters of wood with labels I painted myself.....


And carefully added them to the shelf with the Clock.......
Along with a little jar full of Amber Honey!


I have also added a Tree Root handrail along the stairs....


And I have also added the Rafters overhead in the ceiling...... 
This is the view from overhead before the "Root" rafters are added ...


And here you can see the Roots added.....

Of course, they will be Barely visible from inside... 
unless you are looking up.....
(This is after I added the Ceiling infill...)


Which you can see from the top here......
 
And here I have started the attaching the Lantern in place... 
the wires go above the ceiling, but below the floor above...


And here is what it looks like with the floor layer (Temporarily) added...
And the front archway in place..... 
but not glued in.....
I need to work out the catch mechanism for this opening side... 
I'm thinking magnets.....


And here you can see the framework as a whole.... 
this room nearly done...

And me starting to think about the framework for the next level.....!!


And while there are still a few TINY details I want to add...


Like a Tiny Teapot.... and a stool.... and a basket.....
and the ceiling needs completing..... and ......
This room is Nearly Done!
But, have I Lost my Marbles?


Monday, June 4, 2012

Fidgety Bits

The Tiny Things ....

Dear Readers, there is not as much progress in the Tree House this week with only a normal two day weekend behind me! But I did manage to put together a few Tiny Things for the Kitchen. As you may realize, this House is one of those that will be ALL Glued Together.... no loose pieces.... no changing the scene later.... because on THIS Scale it will be too difficult to access the rooms once the walls and ceilings are all finished! So I must think of Everything I want in a room and Find it or MAKE it before I can move on to the next room! This is Not my usual manner of working....... but I am making a Noble attempt to furnish each room completely!

In this VERY well-lit picture you can see that I have added a shelf over the cupboard and made a small clock to sit on it! (Please note also the Lovely little scrub brush hanging on the shelf over the sink! This is made from a tiny brush-type tooth pick!) There will be more things added to this Clock shelf later.

I have also been working on the Structure of the Kitchen, which because it is partly below ground, requires more than one form of wall, which is complicated to build! And because it is below ground I want the "Ground" to appear to have Rocks and Roots making up part of the walls....... so here you can see that I have included one of my Prized Mini "Geodes" as a piece of Rock in the wall by the stairs.......!

And I know you will think I am silly to include this next part.... because it will be Nearly invisible in the Finished House.... but I wanted a "Back door leading down to the "Cellars" below the Kitchen..... where all the Food is Stored, Naturally!.... (even though I am NOT Actually building the Cellars!) So I have added a Door in the wall off the landing just below the Geode...... which you can Just glimpse to the right in this picture....

Maybe you can see the narrow passage leading down better in this picture....... No? Not Really?

Maybe from this Overhead shot.....
that little door to the right leads down to the Tunnels and Caverns....!
Well. at least you can see the partial wall that I built to go around the Geode..... and the door.......

And That's not the Only Door I built.... 
the REAL Front door is on the other side of the Kitchen....
Here you can see it from the Outside..... 
(When it is all finished it will be tucked in between the large roots of the tree... barely visible....)

And here you can see the open door.....

And from the inside..... Barely visible.......
And you can sort of see the Amethyst crystals cluster I added over the hearth by the door  
(more of my Gem collection!)
And the stick you see in the way in this picture is supporting (Temporarily!) the Lamp I have made from one of the mini LED lights.....

which you can see better in this picture.....
I have used some tiny jewelry findings and beads.... 
trying to disguise the LED black wire leads as parts of the Lantern.......


And here you can see it lit...... 
although it hangs a bit crookedly in this temporary position...!
I will not be attaching the lantern permanently until the last steps of this room are complete!


As for some of the other Tiny pieces I have been making...... 
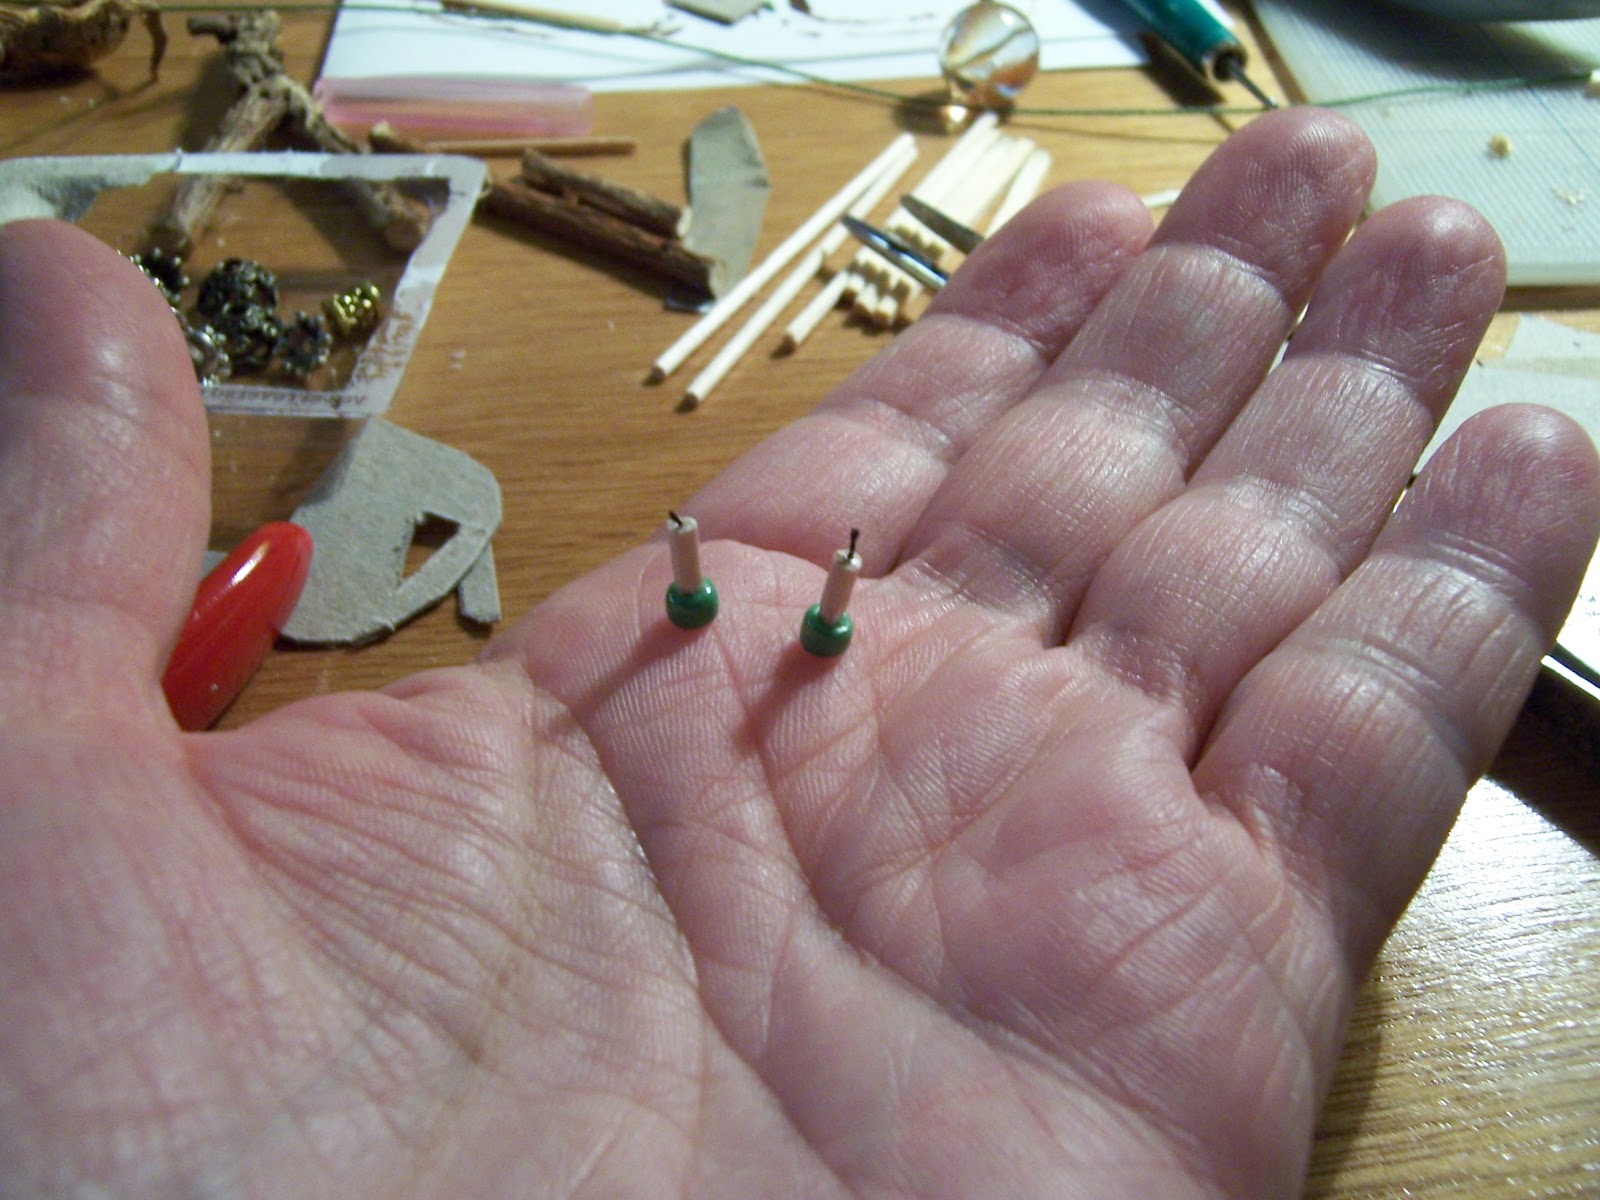
I think the Tiniest are these candle sticks....

See, I even added wicks made from thread!

And if you look Very carefully... you can see them in place.....
one on the mantlepiece....

And one on the kitchen table.......

The Interior walls are nearly completed........ 
the exterior layer will be made of paper mache and will resemble tree bark and roots..... 
But that will be another step for another time.....

Not too much to show.....
Just a lot of Fidgety bits!