
Layers and Layers.....
Blossom number Twenty-seven is completed, Dear Readers, and ready to be added to the lilac shrub! I have to admit that it was a little bit of a shock to look into the "Lilac Blossom Box" and see fewer blossoms than before! Now that they are being attached to the already completed ones, my plan is to add the pair to the shrub as I go, rather than store them up, meaning that the supply in the box will dwindle from here on out! But the shrub will slowly begin to bloom!

And it was as I was contemplating attaching this second set
to the shrub that I realized it was crucial that
I finish painting that shrub before I went any further!
Last week I had "quickly" attached the blossoms and leaves
just to see how they would look...
but of course, I loved how they looked,
so I glued them in place!
But you might not have noticed that I had only painted a couple of the branches ....
in a hurry because it was late and I was just testing....!
But it was now time to get serious about
the color of those branches and stems!

Above you can see the beginning of my paint mixing....
burnt umber, black and white...
along with the "sample twigs"
taken from my lilacs months ago.
I decided the color was good enough to start painting
the branches of my mini "Spring Lilac" shrub.

I started with all the tips,
covering the green wire stems first,
and gradually working down the twisted paper stems.
This shrub will have all the leaves on the green wire stems
because they are "new growth"
and stay green for the first part of the summer.
(The "Summer" shrub will have the leaves attached to brown stems.)
At this point I wanted to see how it looked compared with the Real Thing.....

So out we went into the Garden...
(fortunately it was not raining....)
to visit the Real lilac shrub!

Here, this is even closer......
you can see the texture and the lichens on the RL branch.....
(yes, I will have to make those too...)
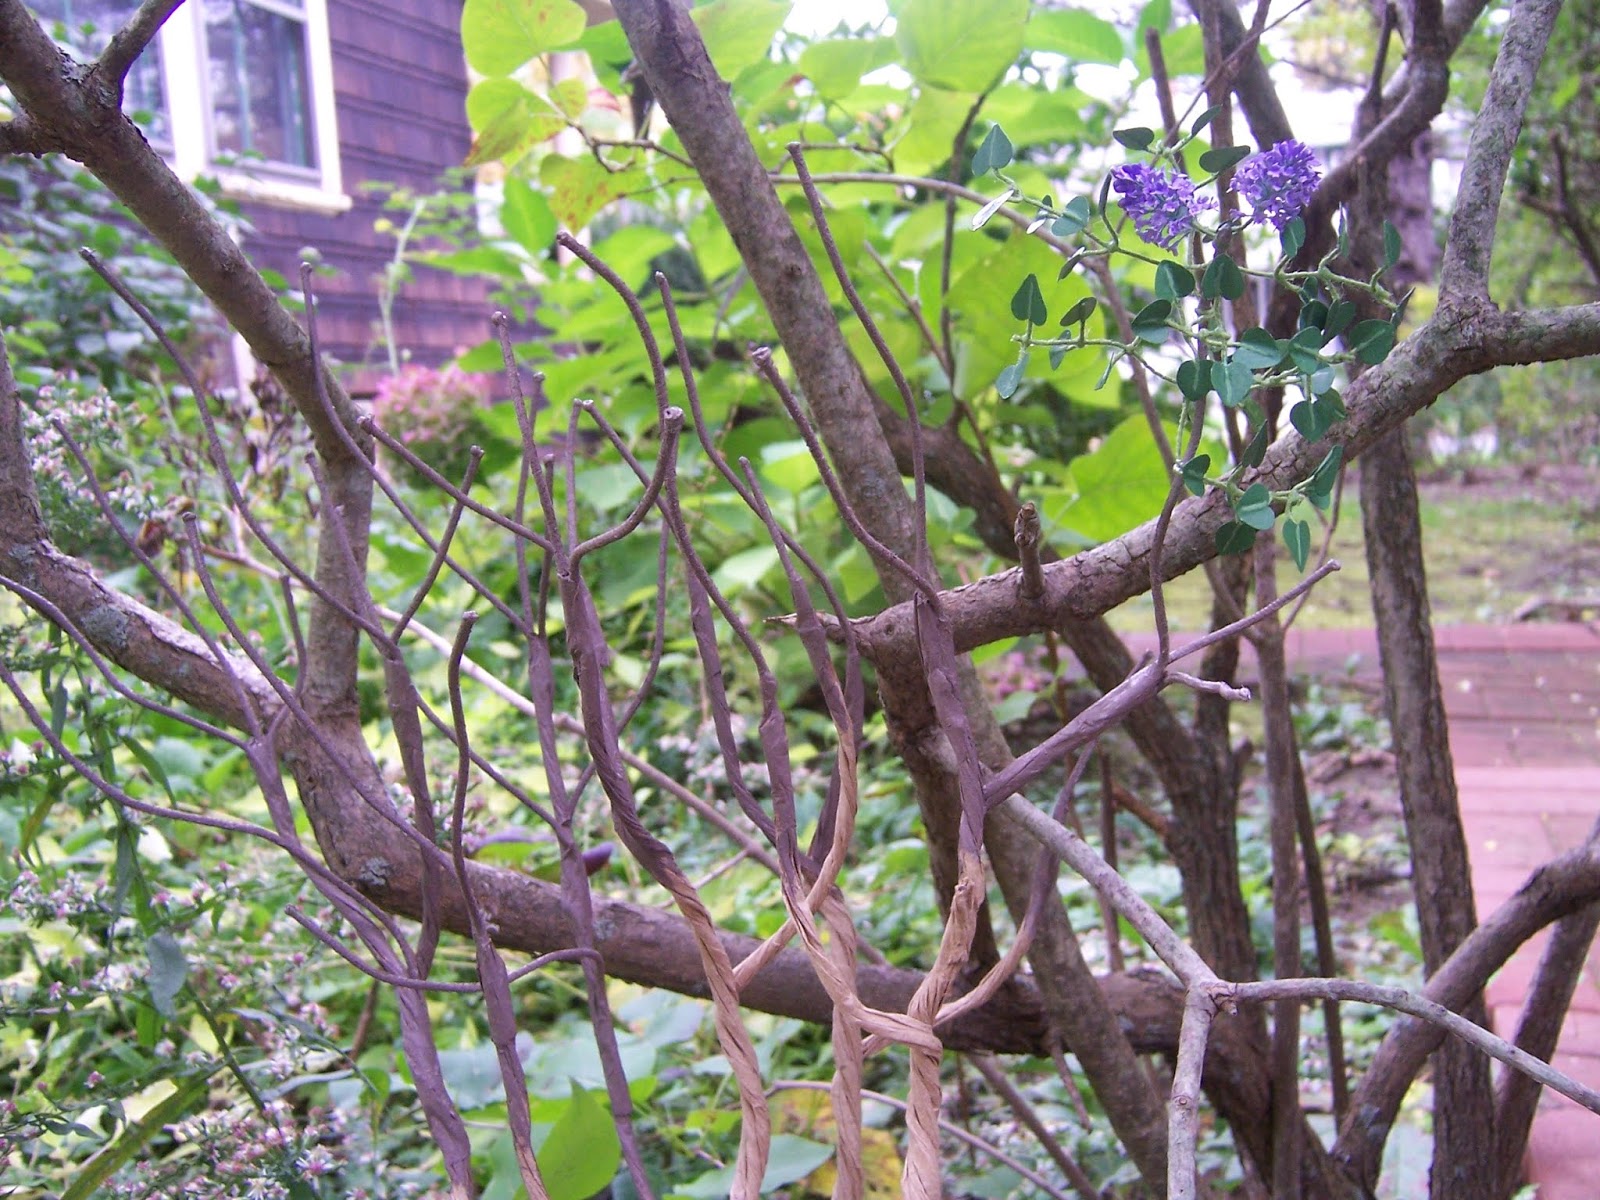
And with the mini blossoms showing too..... aren't they cute?

I know... one more shot.... because the leaves.....
(I'm getting goose-bumps...!)

I Loved the color,
so I painted the rest of the paper wire stems....
and had to test it in The Folly Garden.
The bottoms of the main stems will get
a lot more layers of paint and texture before they are done....

Here I have added some lighter more ocher colored
layers at the base of the main stems....
starting to experiment....
But then I remembered, Dear Readers,
that I wanted to try adding more texture
to the lower part of the stems....
which would be best to add before I got the paint done!
And for this I was going into very Unfamiliar territory!
I had bought some paint texture additive,
used to add to regular wall paint to make a textured surface....
so I mixed some into some of the gray paint I had left from the Castle Caves....
and repainted the shrub!

Yes, I covered over most of that great color I had painted before!

It does add some texture...
but I'm not sure it is enough... or the right texture.....
It needs to look a little more like this....

The ancient Lilac Shrubs at work.....

With all their broken and gnarled stems are the models for my minis!
I think I will have to experiment some more!
Maybe if I mixed some sawdust into the paint....?
Or just more layers with more of the texture in the paint...?
Layers and layers of details....
Yes, this is going to take a while!
But meanwhile, I had to add the newest blossoms to the shrub....

Just to see how they would look....
because I couldn't wait....

They seem to have caught Will's attention!
Well, Dear Readers, it seems as though
I am Branching Out along with the Lilac Shrub!
Layer by Layer I am adding to my abilities
As I add branches to my Lilacs!
Hi Betsy! Your lilac shrubs are getting so beautiful, I love seeing the pictures of how they will look. Yes, the branches do have a certain texture which will hard to get, but I think that you, master with paint, will get a solution ;). I've suggested it before, maybe a bit of sand can help you, or an other painters medium for getting the right texture...?
ReplyDeleteI can imagine how exciting it was for you, when you saw the first blossoms attached to the branches, it looks beautiful!! But I think that Will has to be a bit more patient, because spring is about half a year away from us ;).
Warm hug, Ilona
Hi Ilona! Yes, I am trying sand and different textures.... it is going to take a lot of experimenting! At least I have plenty of time left 'til Spring.... and plenty of blossoms still to make! I appreciate all your suggestions, because I know you make such perfect plants!!! It is exciting to see it starting to look like a lilac! :)
DeleteWow both of your lilac bushes are beautiful.I am sure you will get the texture right as you never give up and you have magic hands :)
ReplyDeleteHugs Maria
Thank you Maria! I have plenty of time left to "get it right"... Spring is still a long way away! I am making my blossoms and experimenting with the stems....! :)
DeleteI know you'll get it Betsy! You're halfway there. And I'm paying strict attention since someday I want to make a tree and you've got great texture to your branches!
ReplyDeleteThank you Sheila! It does help a lot to have helpful suggestions and examples from other miniaturists... I have learned so much from watching others create minis! I am going to keep experimenting.... gosh, I have four separate bushes to learn on! LOL!
DeleteI think adding sawdust (or sand, or coffee grounds) to the paint would be a good idea. Coffee grounds! Yes! Or tea leaves? Those old stems are very ragged. What a tour de force!
ReplyDeletexoxoxox
Mom
Hi Mom! I LOVE your suggestion! I might have to try that! :)
DeleteMaybe pieces of very fine thread... I'm sure you will find a solution. This is what keeps our minds working. Your bushes already look great.
ReplyDeleteHugs, Drora
Yes, Drora, Our minds are working on similar lines... I have been pondering thread... or string... but neither one is "shaggy" enough...! I am trying sand..... I will just keep experimenting! :)
DeleteIt's such a good feeling when, after working so hard to get something right, it is! And this lilac is soooooo right Betsy! I know your excitement, and I think it will propel you even faster to see all four seasons ready for the Folly! I am so eager to see the lilac trees in the garden, but also to see what you make of the delightful planters and intriguing landscape you've got brilliantly started here! Godspeed filling up the box and branches, and I hope you thoroughly enjoy every moment watching this long awaited dream come true!
ReplyDeleteHi Jodi! The lilac is coming along at last.... and this is the season that will require the most time to create... but there are four shrubs in all! I am also planning quite a bit of vinca as ground cover... and so many other details... it will be YEARS before I am done... (especially given my tendency to change projects!) I am being very diligent about this one shrub... but the Tree House is still only half done!!! (It is on the other side of The Folly Garden) But I tell myself I am learning how to make tree bark so I will know what to d when I get that far with the Tree House! LOL! My projects are just so very ambitious... and I don't want to cut corners... and besides, it is more fun to be "doing" than to be "Done"! :):)
DeleteYour ongoing pursuit of Perfection is something I contintinue to admire and applaud you for Betsy and for such a shrub as this; it's Definitely Worth It!
ReplyDeleteIf one didn't know better, your mini Lilac looks EXACTLY like the Real Thing. One can only Marvel at what you'd already accomplished and get mentally prepared for the eventual REVEAL, once the entire shrub is fully completed. :D
Thank you Dear Elizabeth! I am sure it will be a Glorious reveal when I get there! LOL! (The only question is Which spring will host the reveal!) I am still aiming for the coming spring... and am making my blossom a week... and hoping it will prove to be enough blossoms when we get there! LOL! Meanwhile, adding the leaves and the stems to the work-load has been more of a challenge... but so far it is still on schedule! :):)
DeleteYour lilac bushes are beautiful and so real.
ReplyDeleteThank you Fabiola! I am hoping they will look very real! It is fun to try to figure out how to do it! :)
DeleteI'm not surprised that Will is admiring your lilacs… I'm joining him in fullest admiration. Although I know you for a little while by now you never stop to amaze me with your struggle for perfection never forgetting the tiniest detail. Your lilacs already look terrific, but I'm looking forward to see them after you've found the solution for adding the needed structure... then they'll look even more terrific. ;O) Oh, I almost forgot - welcome to No. 27!
ReplyDeleteHugs
Birgit
Thank you Birgit! I am still working on the texture problems... and it is tied in with the color problems too! There is a lot of experimenting going on here! But I am hopeful that I will succeed... and meanwhile I am keeping to my one blossom a week program... and the leaves now too... that makes it a little more of a race to the finish! LOL! :):)
DeleteI always want my plants to look more realistic, but watching you I think and not a thorough as I should be. I admire your commitment, you have it in abundance and it pays off!! Your lilacs are turning out as beautiful as the RL ones.
ReplyDeleteThank you Alexandra! I always am looking very closely because I paint the plants in RL... and I love details! It is a challenge to figure out just how to do it! I am excited that the lilacs are starting to look like the RL ones! :):)
DeleteHi, Betsy - You do have a magic touch when you're mixing paints; the branches, blossoms, and leaves of your mini lilacs are incredibly life-like in color. I'm sure that as you work on achieving the texture that you want on the stems, you'll produce the same magic and conjure up the perfect texture. I can't wait to see the magical results!
ReplyDeleteMarjorie
Thank you Marjorie! I am trying to get the texture right.... it is harder than I thought it would be! I have four shrubs to practice on... so eventually I should get it right! LOL! And I usually paint with artists acrylics because it is easy to mix colors... but I want the bark to be flat with no "sheen" so I am using latex house paint and it is much more challenging to get the color right..... So we will see...! :)
DeleteI love your work. What attention to detail!
ReplyDeleteThank you Lisa! I love Detail! :)
DeleteThis is going to be a true work of art. It already looks spectacular! :D
ReplyDeleteWhen I create my tree trunks, I use Durham's Water Putty. If you make it like thick pancake batter, you can get a good bark consistency. http://www.otterine.com/blog/blog1.php/under-the-maple-tree-part3
Hi Brae! I have watched you build your trees (and even bought some Durham's Water Putty a long while ago! LOL!) But so far I have not cracked the can open... and with this shrub I really want the twisted paper stem shape to still be a part of the shrub shape... I am going to have to experiment and might crack that can open yet! I really appreciate your suggestion and really value all your creative tutorials! I have learned Tons from following your builds!!! :)
DeleteCan't wait to check out what solution you found!
ReplyDelete