Monday, April 18, 2011

Take Two

Blog Anniversary and Just LOOK What I Found!

It was just one year ago, Dear Readers, (give or take a day or two!) that I began this blog, and NEVER in my Wildest Dreams would I have imagined One Hundred and Fifty Six followers, nor could I have guessed the number of delightful mini-lovers I would "meet" here in blogland! It has been an adventure that FAR surpasses anything I imagined when I began. I am planning on making something for an Anniversary Giveaway..... but I have been so consumed by the Little Cottage project that I just completed, that I can't quite think WHAT I will make! So you will have to be patient with me while I get it figured out. I will be sure to let you know when I do!

Meanwhile, I have something I MUST show you!
Do you see the top picture? (I am sorry it is a bit too dark..... I was impatient and didn't take it with the lights on!) Doesn't this house Look FAMILIAR? No, it is NOT the Lovely Old Dollhouse with a new paint job! But doesn't it look ALMOST just like it? I really could not believe my eyes when I saw it at that Very Dangerous To The Pocketbook Miniatures Store that I go to...... It was just SO similar to The Lovely Old Dollhouse in SO many ways!
The very same day that I had shipped the Little Cottage to my Sister, I stopped by the Miniatures Store because I was feeling a little blue and needed to cheer myself up. I had NO intention of buying a Dollhouse. I ALREADY have Plenty of dollhouses I am building.... NONE of them finished..... But then I saw this house, and well, it was like a SISTER house to the Lovely Old Dollhouse!!!! And when the Old Gentleman said it would cost only $25.00, I was hooked! I HAD to have it.... no matter that I don't have room in my Little House for another sort of Large Dollhouse! So it came home with me. Yes, it is a fixer-upper.... but it has "good bones" like the Lovely Old Dollhouse........ They have almost exactly the same dimensions.... this new one being just an inch or two shorter and narrower.
Here is a picture of the Lovely Old Dollhouse before I had fixed the door or built the windows....

And here you can see the New Old Dollhouse for comparison .......
(I will have to figure out what to call it!)

You can see that the facade is charmingly irregular.... but I have seen houses with this sort of non symmetrical window and door arrangement in this part of the world. Sometimes in the Colonial Era it meant that the original house was smaller with the door in the center and then an addition was built on one end.... I really think it adds a lot of character! And this house also has dormer windows in the attic..... Do you even know how many times I have pondered adding dormers to the Lovely Old Dollhouse??? They are a slightly later style addition in the evolution of the Colonial Home design and were uncommon in the oldest houses.... at least in this part of New England!
Here you can see the inside of the house...... it is made from MDF rather than plywood..... but it is all in relatively good shape. The wall partitions are not inset with a dado, so they have all come loose and can be re-positioned as I see fit.....

Here is a closer view of the attic with the dormer windows (with acetate window panes) and the floors have a self adhesive wood grained shelf paper which badly needs to be removed.......
And the attic floor does not span the full width of the house and will need a section added.... but that should be very easy to do!

Here you can see inside the rooms in the downstairs.... old paper and acetate windows (some of which have fallen off).... this room is probably the kitchen....

This is the entry hall....... there are no stairs..... hmmmm, does this sound familiar???? And the only inner connecting door leads off this room to the front parlor.......

Which is already the SAME green that the Lovely Old Dollhouse parlor is painted!!!!

And upstairs is a blue room..... very similar blue to the hallway in the Lovely Old Dollhouse.... I think this room is currently supposed to be the bathroom.... the wall doesn't stay up properly....

And this room is probably the Master Bedroom.... the wall is positioned directly over the downstairs wall.... but I think a former owner had it moved over to create a much larger room.... the wallpaper extending into the hallway next door gives it away........ So, you can see, there is a great deal of POTENTIAL.... as well as a great deal of work ahead!.... But I just could NOT resist!

Oh, look..... someone is coming to look the house over.......

Did I tell you that Sally May's husband Chip is a building contractor and he renovates old houses for a living? He thinks this is one that Sally May should have a look at.......

Okay, so it is VERY dark and gloomy inside at night with no electricity....!!!!

But he really wants her to see this house.... he just has a feeling that it could be special..... with the right amount of work...... he has just the fixtures for the bathroom already in storage.......

He can imagine just how they would look.......

And the bedroom with the wall moved over.... would make a great room.......

He wants to make sure Sally May can see what he sees in the old place..........

She can imagine their furniture fitting very nicely......... it would be so nice to get their stuff out of storage and have their own house........

And the kitchen..... with TWO lovely big windows

And the pink wallpaper is okay for now.....
until they can get it all fixed up that is.......

Pink is Sally May's FAVORITE color........!!!
She can see the kitchen sink under the sunny window.....

"I think you're right, honey..... we should buy this house.....
if you don't think it'll be too much work....?"

"Too much work?" he scoffs.....
"Nah.... it'll be a piece of cake, Sweetheart.... You'll See!"

New blog year..... new old dollhouse to fix up.........
This Must be Take Two!

Thursday, April 14, 2011

Ready Or Not

This One Is For My Sister

The Little Cottage is ready to go to it's new home! I know I have kept you all guessing about the purpose for this little house in my doll world because I didn't want to spoil the SURPRISE for the recipient of this Cottage. But first, let me show you what has been accomplished this week! To begin with, I added the shingles to the roof. I also attached it to a base made from pink builders insulating foam board. I wanted the Cottage to have a small yard and garden space too. You can see here that I have started the picket fence.... made from popsickle sticks and clothes pins!

And inside I have dressed it with a few pieces of decor that came in a Melissa and Doug Bedroom Accessories set. The pieces are a little crude, but they are Charming and add a homey touch.

Here you can see a gilded mirror on the mantle, a wooden lamp and some perfume bottles on a tray. There is still a lot that could be added..... bedding for the bed.... a quilt perhaps? And lace Curtains at the window? Another little rug? Some books? But THAT is what I shall leave for the Recipient to contribute.... or Not...... as SHE sees fit!

Here is a closer view of the tray with the little bottles........

And Downstairs I have arranged the other items in that set..... A Lovely framed picture over the Mantle..... I think it fits this room PERFECTLY! And a Standing "lamp" ..... wooden and non-working, but cute!

And some Sewing Accessories...... a basket with thread and scissors.... a little large in scale, but Cute! And a basket with fabric pieces..... everyone who sews has one of these! But the benches could use some Cushions..... and the windows some Curtains perhaps? Someone will have to add a few details to the decor....... Don't you agree?

And on the table is a Tea Set I have had for a long time...... the design is a heart with the words "I Love You" on it! (I know, it SEEMS perfect for a Honeymoon Cottage.... and Maybe it could be borrowed for that purpose...... But it is really going to someone else quite far away!)

Oh, and one of the Braided rugs I made in my teen years.... the colors are just TOO PERFECT for this room to even Dream of not sending it too!

Outside the front door I have added a very basic, unadorned attempt at paving stones made from egg cartons. If anyone is going to make them look realistic, mossy and rock-like, it will have to be the Recipient, not me!

And the Picket fence encloses the small side yard with a space for a garden...... because I am hoping the Recipient will want to make a few sculpey pumpkins and and other garden veggies and flowers to adorn it!

Here is a better view of the side yard..... I have used plain old Felt for the grass and dirt areas of the yard...... I know.... very basic, but I have never done any landscaping in miniature before..... and I AM trying to get this done quickly...... so If there are to be improvements...... Somebody ELSE will be doing them!

But, I have sent along some garden tools.......

And a little box full of seed packets........

Oh, and look who else is going along with the garden! A tiny turtle! (Not made by me, but given to me by my Sister many years ago along with a couple other tiny turtles....)

I hope she'll be happy to see him again!

And there is even a tiny Dragonfly perched on one of the fenceposts........
every garden needs Dragonflies!

Here is a closer view...... his wings are perfectly irridescent....... and so little!

So, here we have it.... Ready or Not, Dear Sister, it's on its way to you!
I only hope it gives you some Joy in your convalescence.....
and Maybe even a few stolen moments of sewing tiny pillows and curtains and quilts..........
Or making Sculpey pumpkins for the garden........


Ready Or Not, Here I Come!

Tuesday, April 5, 2011

In The Eye Of The Beholder

From The Ridiculous To The Sublime

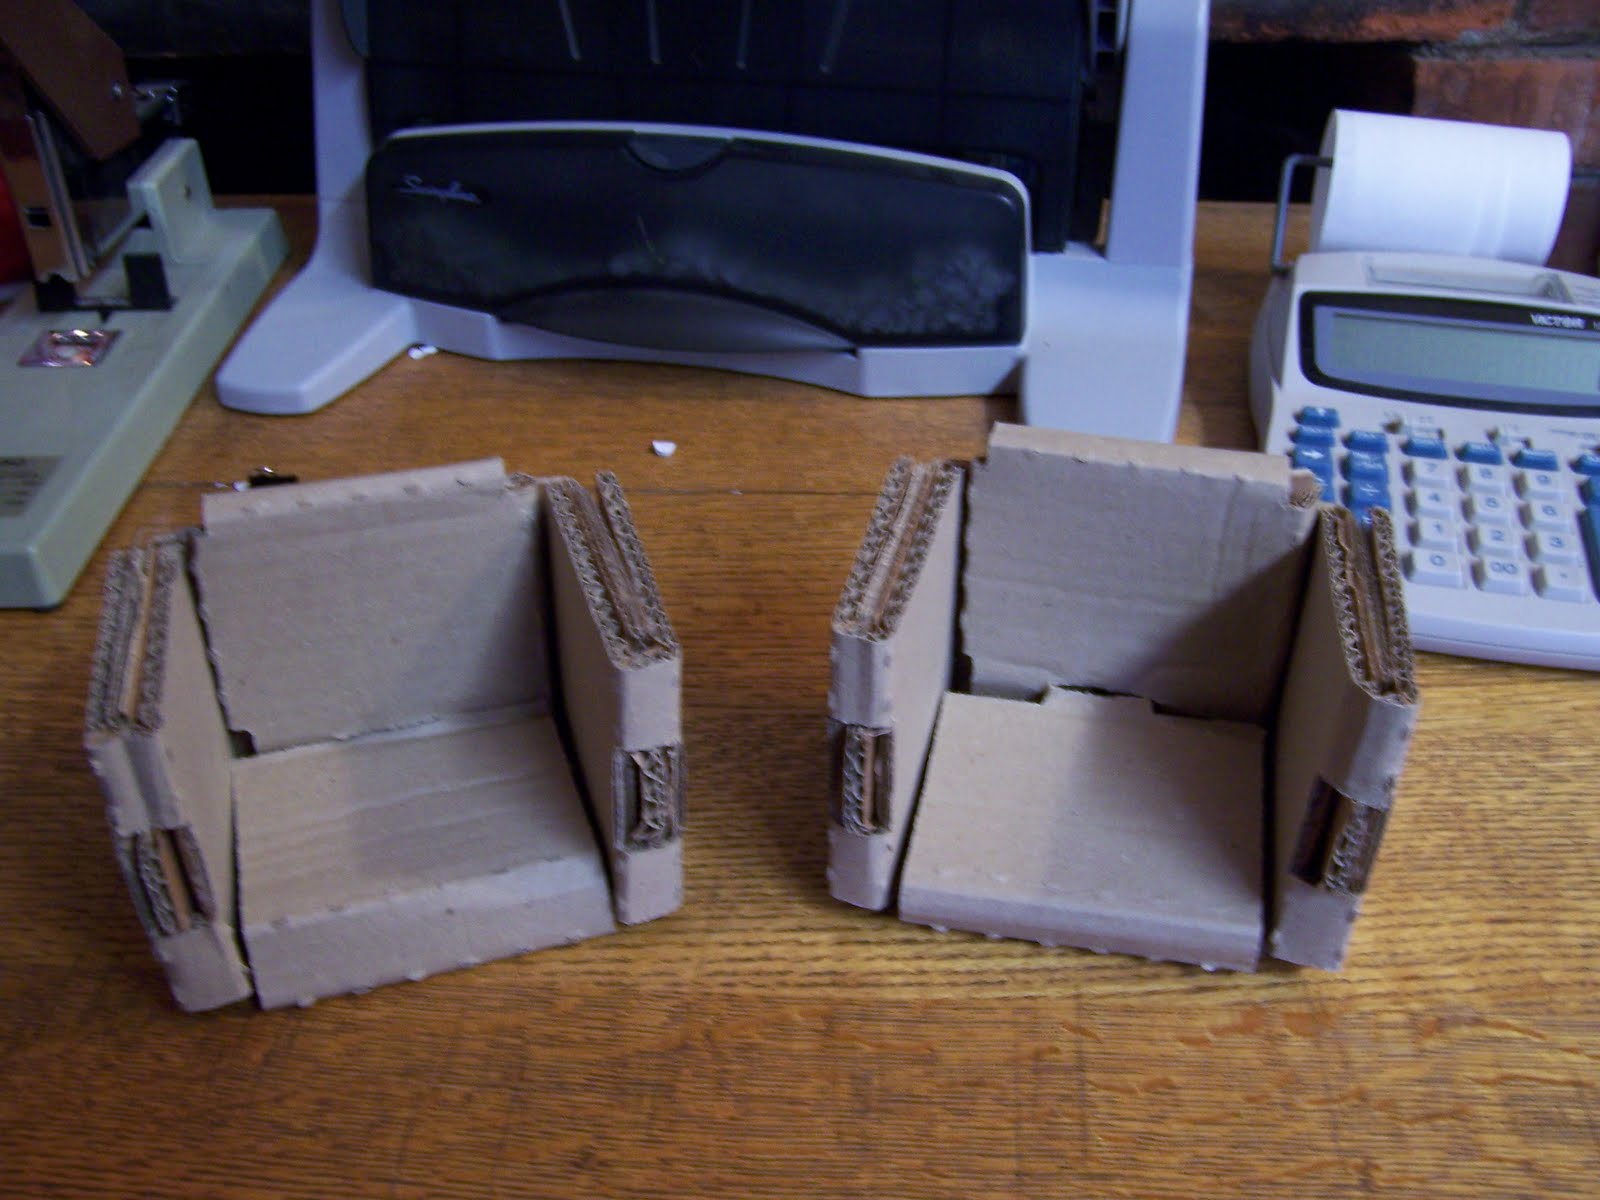
Dear Readers, I hope you will forgive me if I take you on a small detour on our way to visit the little Cottage that is my current project. This detour will take you, briefly, to my workplace where some new equipment was installed yesterday morning. After the technician had finished the installation and had cleaned up the mess and left, I glanced down at the floor beside my desk and noticed that he had left behind some pieces of the protective wrappings that came with the equipment. This is what I saw........

Do YOU see what I see??? Do You?????

I held them up for my co-worker and she immediately said "Those look like little chairs!"
"That's EXACTLY what I thought!" I replied. I couldn't bring myself to THROW them away, so I set them on a table near the door, just curious whether anyone else would also see them as mini chairs.

The next person to come into the office was my BOSS... he took one look at them and said..... "Those look like little chairs!" And laughing, he put them on MY desk and said "Do you have any little people to put in them?" "You should check in that box of toys you have.....!" (A box of toys that once belonged to my boys and now lives in the office to entertain any children who come with their parents...) And he pulled it out and found the little stuffed lion........! I dug a little deeper and found the construction guy....! They make me SMILE every time I look at them!

Now that we have visited with the Ridiculous, we can move on to the (hopefully) Sublime part of this post! I have been working on the little Cottage and made some good progress last weekend. The basic house is finished except for the Dreaded Shingles. I also want to attach it to a base before I send it to it's new owner. So you can see there is still a bit to do before I can call it done. But I think it is looking very sweet with the window box and the seats on the front porch......

And you can see I added a lovely doorknob to the front door.....

And because I just couldn't leave them the way the kit was made, I added vertical dividers to the large bay windows on the downstairs....... the windows just looked too Modern to my eye without the dividers. Here you can see the outside of the bay window on one side......

And here you can see the inside of the front window where I also added the vertical dividers.....

And for the front door I made "strap" hinges out of black leather glued in place. The wood of this kit is much too thin to use actual metal hinges with screws.... so I have improvised..... the leather is strong and flexible and looks rather good in MY eyes!

And for the bay window opening I have added a window seat or bench or deep window sill..... whichever you think you want to call it! It is a bit narrow to actually be a SEAT, but I think it LOOKS good and could hold a cushion or flower pots. The little corner shelf is a piece that came with the kit..... it included some VERY rudimentary pieces of furniture which I have assembled and painted.

Here you can see one of a pair of settles.......

And a better view of the whole Cottage with the rest of the furniture in place. Downstairs is a table and two settles and the corner cupboard......

And upstairs is a bed and a small bench........
I have painted them the same sky blue as the ceiling downstairs and upstairs as well........

And, of course, if you have cherubs flying around on your Downstairs ceiling, you can hardly avoid having them on the UPSTAIRS ceiling as well!

Here is a closer view of the roof panel ceiling before it was installed......

I wonder what he is seeing, don't you?

Maybe he is thinking about what a sweet little room this is....
Or maybe all he sees is his sleeping friend.....

She looks to ME like she is Dreaming Very Sweet Dreams!


But perhaps it is ALL just in the Eye of the Beholder!