Monday, July 9, 2012

The Sky's The Limit


The Gigantic Chandelier and the Too Tiny Table

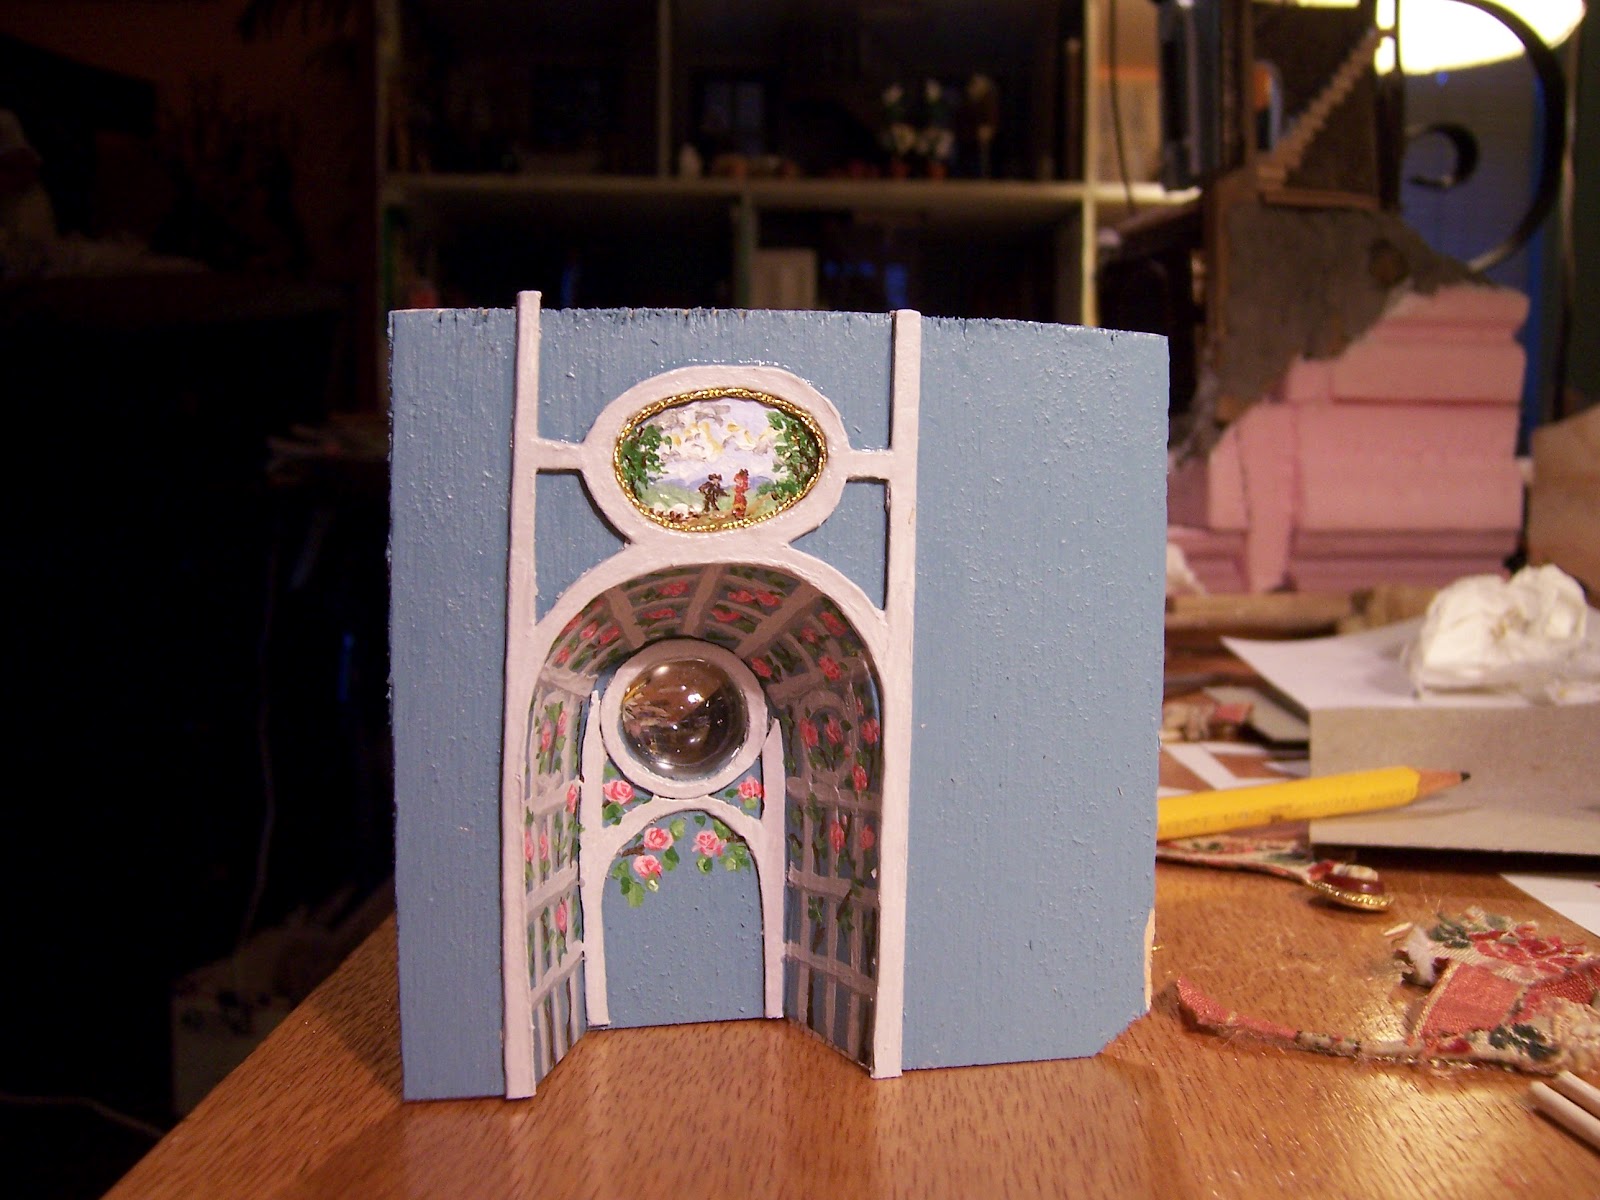
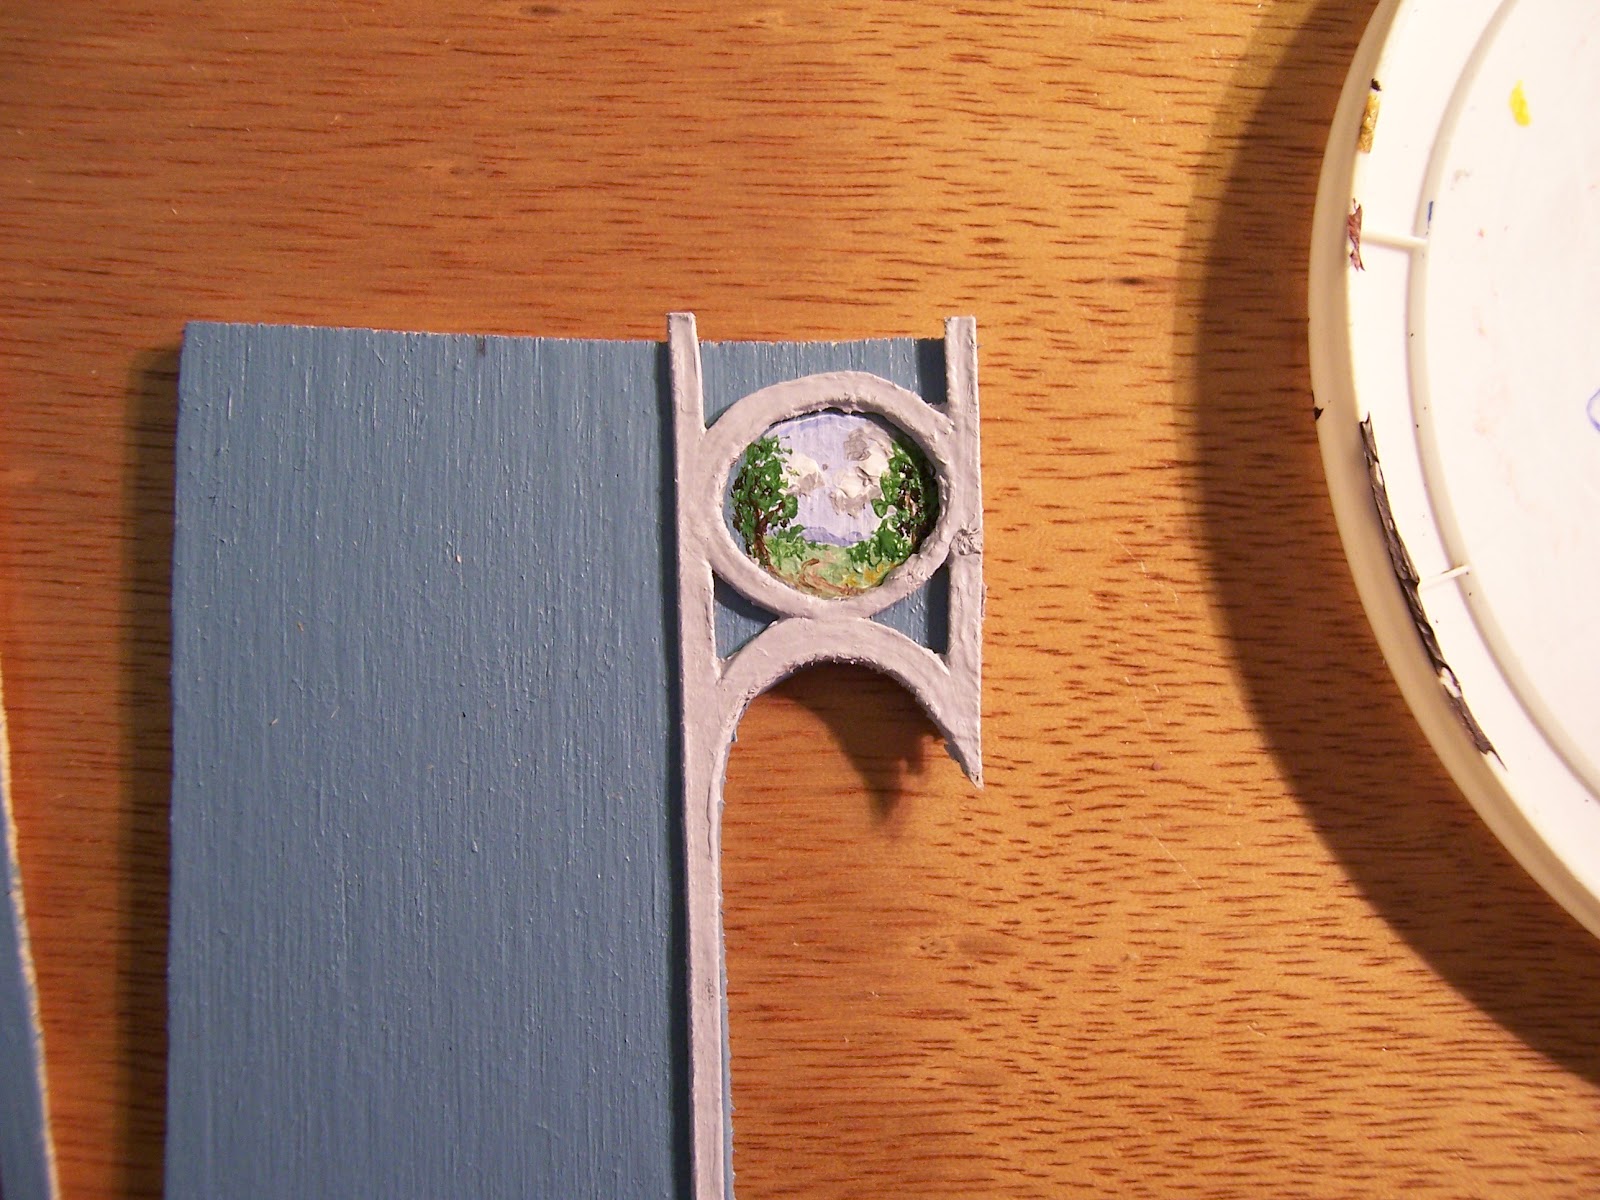
Dear Readers, before I show you the Promised Chandelier, I want to show you the Tiny Little Demi-lune Table I made! It stands next to the stairway and has a faux marble top and gilded legs. It wasn't tall enough at first... so I added some beads for feet, thinking I could paint them gold and no-one would know... but I like the way they add a touch of sparkle to the toes of the table.... so I have left them unpainted. You may also notice that I added two "Cameo" portraits to the walls. These are jewelry pieces from that Miniatures Store.... and I think they are Perfect for the walls in this room and besides they are the only items small enough to fit these tiny spaces! I personally LOVE the way the black and white one sits over the colorful chair, and the Coral one sits over the Black marble table!
Another small detail I have added that can barely be seen in the finished room is the window in the stairway.... just visible through the door on the right.


Here below you can see the leaded paned window in place.....
 I Know... it is hardly visible... but it lets light into the stairway.... 
and I Love knowing it is there!


As for the Chandelier, Dear Readers, no matter how I tried, it ended up being a Bit Large for the scale of this room! It is one and one quarter inches across and one and one and one half inches tall! That makes for Quite a Large chandelier in the quarter inch scale! Here you can see my beginnings....


I am building it around one of the tiny LED lights..... using a jewelry finding for the arms.... stacked with some decorative beads.... and very fine opalescent beads strung on very fine brass wire for the "crystal" ropes..... which all pass through a jeweled bead at the top.

Here you can see the partially assembled pieces.... along with some of the failed attempts....! I just couldn't come up with small enough parts and still have a fancy chandelier..... so it is a bit large for the scale! You can also see the beads I used for the candles on the plate to the right.....!

And here you can see one of the candles attached to the arm .....(on the right side).... and I have even used my favorite Teeny glitter pieces for "flames" on the candles!!!! In the right angle of light they glow as if they are actually burning! Of course, it is nearly impossible to photograph the glow properly..... Can you see the glow on the candle in this picture below????

Or maybe you can see it in this picture.... 
with ALL the candle flames added......!

The REAL test comes with trying to fit it into the room and getting the wires connected..... 
before the ceiling is even completed....


As you can see, it is a bit large... it hangs down too low.... I will have to raise the ceiling up a bit.... but I was thinking of doing that anyway! As for seeing the candles sparkle.... I may have to add an ambient light that shines onto them but is hidden from view..... Is that Cheating???
But before we can build the Ceiling, I must complete the decorative trim at the top of the walls, which is topped with a section of gilded Coving...
You can see the top view  looking down in this picture.... 
yes the angles ARE all irregular!!! 
(What was I thinking?!!)


And here is the same view looking up.....
My mitering is NOT Perfect..... 
but it is close enough for me!

And another view......
As you can see, I have added all the baseboard trims as well....

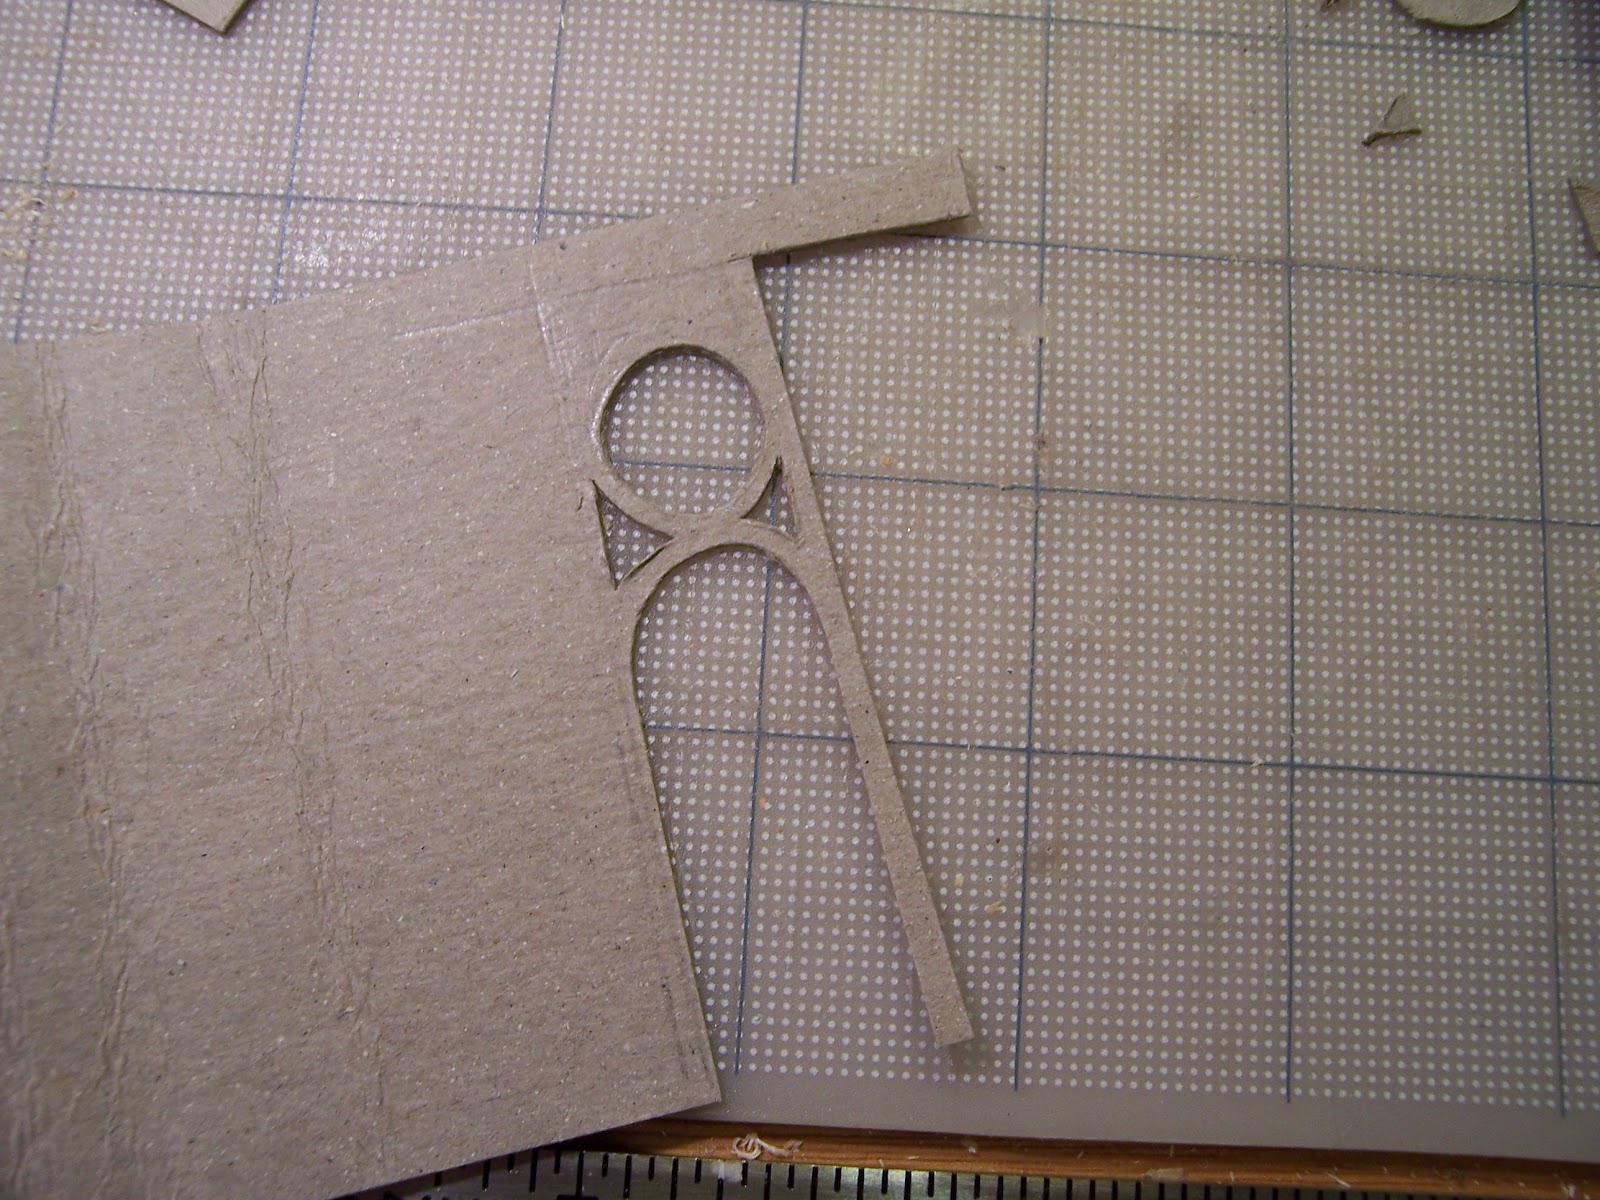
To build the semi-domed ceiling, I had to make a map of the room...
like a dress pattern which I could use to cut out the cardboard.... which looked like this....
The concept is no different than sewing a dress and making "darts" to round the shape of the cloth... 
But here I am cutting away the extra material in thin wedges and gluing the sides together....

And lots of tape on the back side for added strength......
Here it is being tested for fit on the room.....
(By now all the walls are glued in place!!!)

And here you can see the view looking up..... 
before the painting begins......!
I think it Fits!!!

Oh, and Nobody guessed I would paint the sky and clouds on the ceiling?????
(This is just the start.....)

And can we do a test run with the chandelier... Please???
Hmmmm... it is a trifle dark....
Maybe we should TRY the extra ambient light?

Like that!
Or is it too much?
I think I like it..... 
but the ceiling is Barely visible......

Can we at LEAST see the candles sparkle a little bit...?

Yeah, LIKE THAT!!! (Sorry for the blurry pic!)
There's still so much that needs to be done......

But for Now.......
The Sky's the limit!!!

Monday, July 2, 2012

No Restraint!


How Much is Too Much?

Dear Readers, I have been working on the Salon of the Tiny Tree House and find myself wanting to take EVERY idea to it's Extreme, following naturally the philosophy that if I love it a Little bit, I will Love More even More! This is translating into not wanting to stop with the Embellishment of Every surface in True Rococo Fashion. In the Beginning I thought I might just leave the floor uncovered because there was such a lovely patterned marquetry printed surface that I thought it would be a shame to cover it up. But then I thought I might be able to find a piece of patterned cloth small enough.....


To Maybe resemble just a little bit an elegant carpet.... perhaps it is an Aubusson? And because it doesn't cover the entire floor... we can still see the lovely patterned marquetry!
And then I got started on the Furniture for the Salon.... 
here you can see the settee in it's rough framework...

And of course, there must be an armchair to go with the settee, and a side chair too....


But before I show you their evolution... 
I must show you what I did to the Fireplace!
I forgot to take pictures of all the fiddly little steps... 
but you can see here below the transformed mantle....
I painted more marble and added the oval and gilt accents, 
as well as the andirons and the flames....

Here below you can see the fire being tested.....  
before I decided to add the embellishments to the Mantlepiece....

I LOVE the realism of the glowing fire!!!
Back to the chairs.... they each got several coats of antique gold paint (after the primer coat)
 

And then the upholstery!  I have had this fabric for Ages.....
and found a piece of the pattern that looks lovely on such a small piece....

And then the seat.... carefully aligning the pattern!!!

It is SO Small!!

But the Chairs are even smaller!!!

And the arm chair too!

And here they are being tested in the Salon.....

But I could NOT leave them as is, Dear Readers..... I wanted MORE!
So I started the VERY Time consuming process of adding a gold "braid" trim around the edges of all the upholstery..... which you can see below if you look closely.....!
Was it necessary? Would ANYBODY ever notice if it wasn't there?

And That is not all I have Adorned in the past few days.....
I have added Embellishments to the mirror... 
Do you not remember me promising to Tone It DOWN a Bit?
Well, I added some sconce arms from metal scrolls and jewelry findings....
I know it is hard to see in this picture.....


And then I added some broken bits of "crystal" from iridescent "snowflakes"! 
And I did paint it all the same Antique gold to unify the pieces.... 
but did I "Tone it Down"???? 
I think I Jazzed it up!

I could not even leave the STAIRS alone!
They are barely visible as they go up behind a wall on the right.... 
but they had to have "marble" treads
To go with the Marble hearth.....

And speaking of "Marbles" I have found another one of my Lost Marbles!
It is now the Window in the Alcove on the other side of the room.....
But before I could glue it in place... 
I HAD to Paint the Alcove to resemble an Arbor in the Garden...


And what is an Arbor with out a Blossoming Rose?

The Marble makes Such a Beautiful Oriel Window!
Even though you can barely see it at all when the Alcove wall is in place...
And I Am going to make a smaller Settee for the Alcove.... that matches....

I have become SO Obsessed with this Tiny Scale... 
that I am Alarmed...SHOCKED with the comparison...
to the normal 1:12 Dollhouse scale...

Do You recognize this? The Still unfinished Floor of the Castle Great Hall?

It seeme that the Wizard has been doing some Conjuring Experiments... 
and has summoned chairs of the Future.....?
In Miniature!!!

And Belle has Never seen Anything Like it!
"Can you make these bigger?" she wonders....
They would be so comfortable to sit in .... 
and the fabric is more beautiful than anything she has ever seen!
The Wizard is thinking he may have to do a Memory erasing charm on Belle... 
Chairs like these are still four Centuries in the Future!

Well, Never mind.....
The Tiny Tree House has me Enchanted Too....
And now that the Marble stairs are attached and leading upward, 
I am already planning the NEXT floor in my mind.....!

Even though there are still quite a few details to complete in the Salon......
Not the least of which will be the Ceiling itself.... and a Chandelier?
And Certainly I need a Statue for the Niche....

And can you tell I will probably be thinking of More ways to Adorn it all? 
Most Likely I will be showing No Restraint at All!

Monday, June 25, 2012

Fitting Pieces

The Salon Taking Shape

Why is Progress always Slower than I think it will be? Well, I will tell you ONE of the Reasons, Dear Readers, is because I can't imagine how many times I will need to Assemble the pieces temporarily, just to check how it is fitting , or how it will look, only to disassemble it all in order to Work on the pieces! I thought it was going to be easier on the "above ground" rooms because the room could take on normal rectangular proportions with four solid walls (or three and an opening side;) and the walls could all be "decorated " while flat and slid easily into place! Well, maybe that would be the case if I didn't insist on having alcoves and vestibules and stairways inside the walls...... all the parts I love the Most because they make the space so interesting...! And then you must realize that I am building it inside a tree.... which means the shape is NOT square... and I am trying to maximize floor space because there is so little.... and then you will see that NOTHING is just neat and square! EVERYTHING needs to be tested and adjusted in place, and None of the pieces are attached so they keep falling over and getting out of place! But in spite of all that I have made some Wonderful progress on the Salon!
To begin with, I painted all the walls in a smoky antique blue that I am very fond of.....

And I also made a niche out of Sculpey for one of the corners of the room....
(This required quite a bit of Fidgety fitting!!!)

And then I began the long process of cutting the trim out of cardboard in the pattern I wanted for each wall...

For now I am just making the around the door framing.... 
the baseboards and chair rails will be added later when all the walls are assembled....
Here below you can see them all propped in place to see how they will look.... 
(after painting them all in a soft Dove Gray....)
(Can you guess how many times all the pieces fell over...?)

I had decided to make a "Roundel " over each door.... 
so I could paint a tiny scene in each!
Here below you can see the paintings begun.....
 
And here is more detail....
It is supposed to be a bucolic countryside... 
but it is only about one-half an inch in diameter so my technique is a bit rough.....

And here you see it with the framework overlaid....

And here below is another one...
This one has sheep... Can you see them... there on the left...?
No? ...
Well, never mind...... 
I will know they are there and even if no-one ever sees them and says "oh look, sheep!"....
I will not mind!

Here is another one... over the main door... 
I Hope you can all see the Cow and her calf?
(do be sure to poke the pictures to enlarge them... or even better... use the right click and choose open in new tab... then you can zoom in Really close... Scary close!)

And here you can see it with the door trim also temporarily in place...

And here is the fourth little painting....
I hope I don't need to tell you it is the shepherd with his sheep (on the left!) meeting the milkmaid on her way home with the milk.... the cow is not in this picture.....!

And here below you can see the same picture with the delicate gold rope border added.....

Here you can see the Cow painting with it's gold border added too....
The trims have been glued on , but all the walls are still unattached....

Here you can see them all propped together.... 
and I have started to paint the fireplace Mantelpiece...

And here is a closer view..... the better to see all the flaws.....
And you can see the Niche with it's sculpey shaped backing....

 The door needs a "crystal" doorknob......

 I have finished the "marbled" pillars in the mantelpiece....

 And here the niche has been made to fit snugly... 
it required a whole lot of very careful carving away of the excess material on the back side.
I will probably put a statue on a pillar in there.... depending on what I can find that is one inch tall!

 The stairs are not finished... 
but you can see where they lead up to the next floor.....
And here below you can see the whole room framework.....
still not attached but in place for fitting.....

Here below is a view looking down from the top.... 
I have attached the floor and the opening side door!

And here is the view from the side looking down..... 
with the stairs taped in place.... 
none of the walls are attached yet.... 
but we are getting closer!
On the right you can get a glimpse of the vestibule and front door... 
right behind the wire frame support....

And on the left in the alcove you can see there is a problem with the floor which will have to be disguised somehow.... 
I will still need to make all the baseboards and chair rails.... 
for the tiny bits of wall that require them
not to mention the ceiling trim and the ceiling itself....!

But maybe it is almost time to attach the walls?
Could it be that I'm almost done with fitting these pieces?