Monday, April 25, 2016

The New Dollhouse....


It Was Just A Matter of Time....

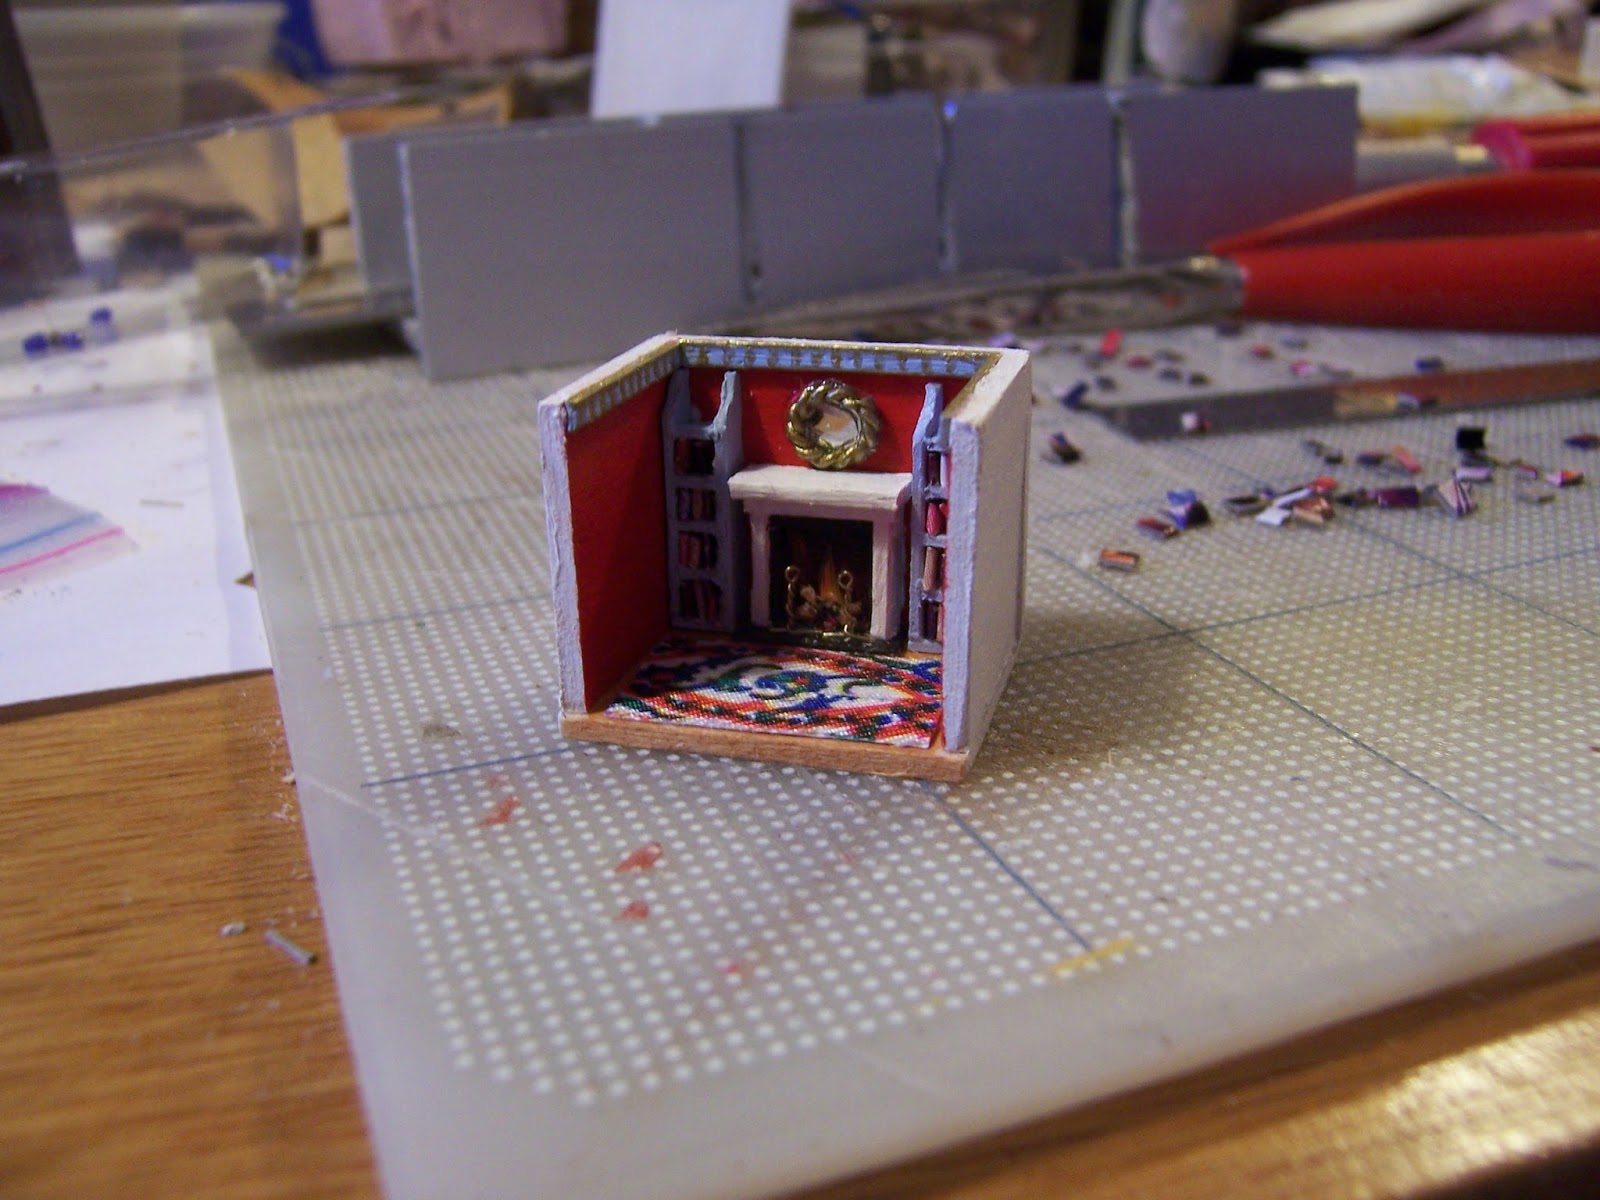
I suppose, Dear Readers, that you want to see the Tiny roombox in its proper location on the bookshelf in The Folly Parlor. But I must tell you that it is incredibly difficult to photograph it there! I cannot seem to make the camera focus on the roombox, so it is always just a little out of focus! At least the morning sun was shining brightly on Saturday, allowing me to get this picture in the best possible light. It is not completely finished, there are still one or two details I think I want to add, but I was not able to accomplish any of them over the weekend. It was one of those weekends where I seemed to do a lot of little things that didn't add up to anything noticeable, and certainly no steps crossed off the lists!

( Where it all began... The Lovely Old Dollhouse.....)

I have also been aware in the back of my mind that last week was the Sixth Anniversary of this Blog...!!! (How does the Time go so fast???) I have debated having an anniversary drawing... but have been too disorganized to pull one together... so I mention this as an aside... that I might get one organized... so stay tuned! I also debated trying to do a "Review" but.... that just seems Exhausting! I cannot begin to summarize the Adventure that it has been for ME... connecting with so many Wonderful, Inspiring, Creative, Generous, Talented Miniaturists from All over the World...! I just Never could have Imagined how enriching and supportive and amazing this community would be! Thank you ALL for sharing yourselves and your creations in this amazing Blogland! I hope it continues being an amazing Adventure for many more years!


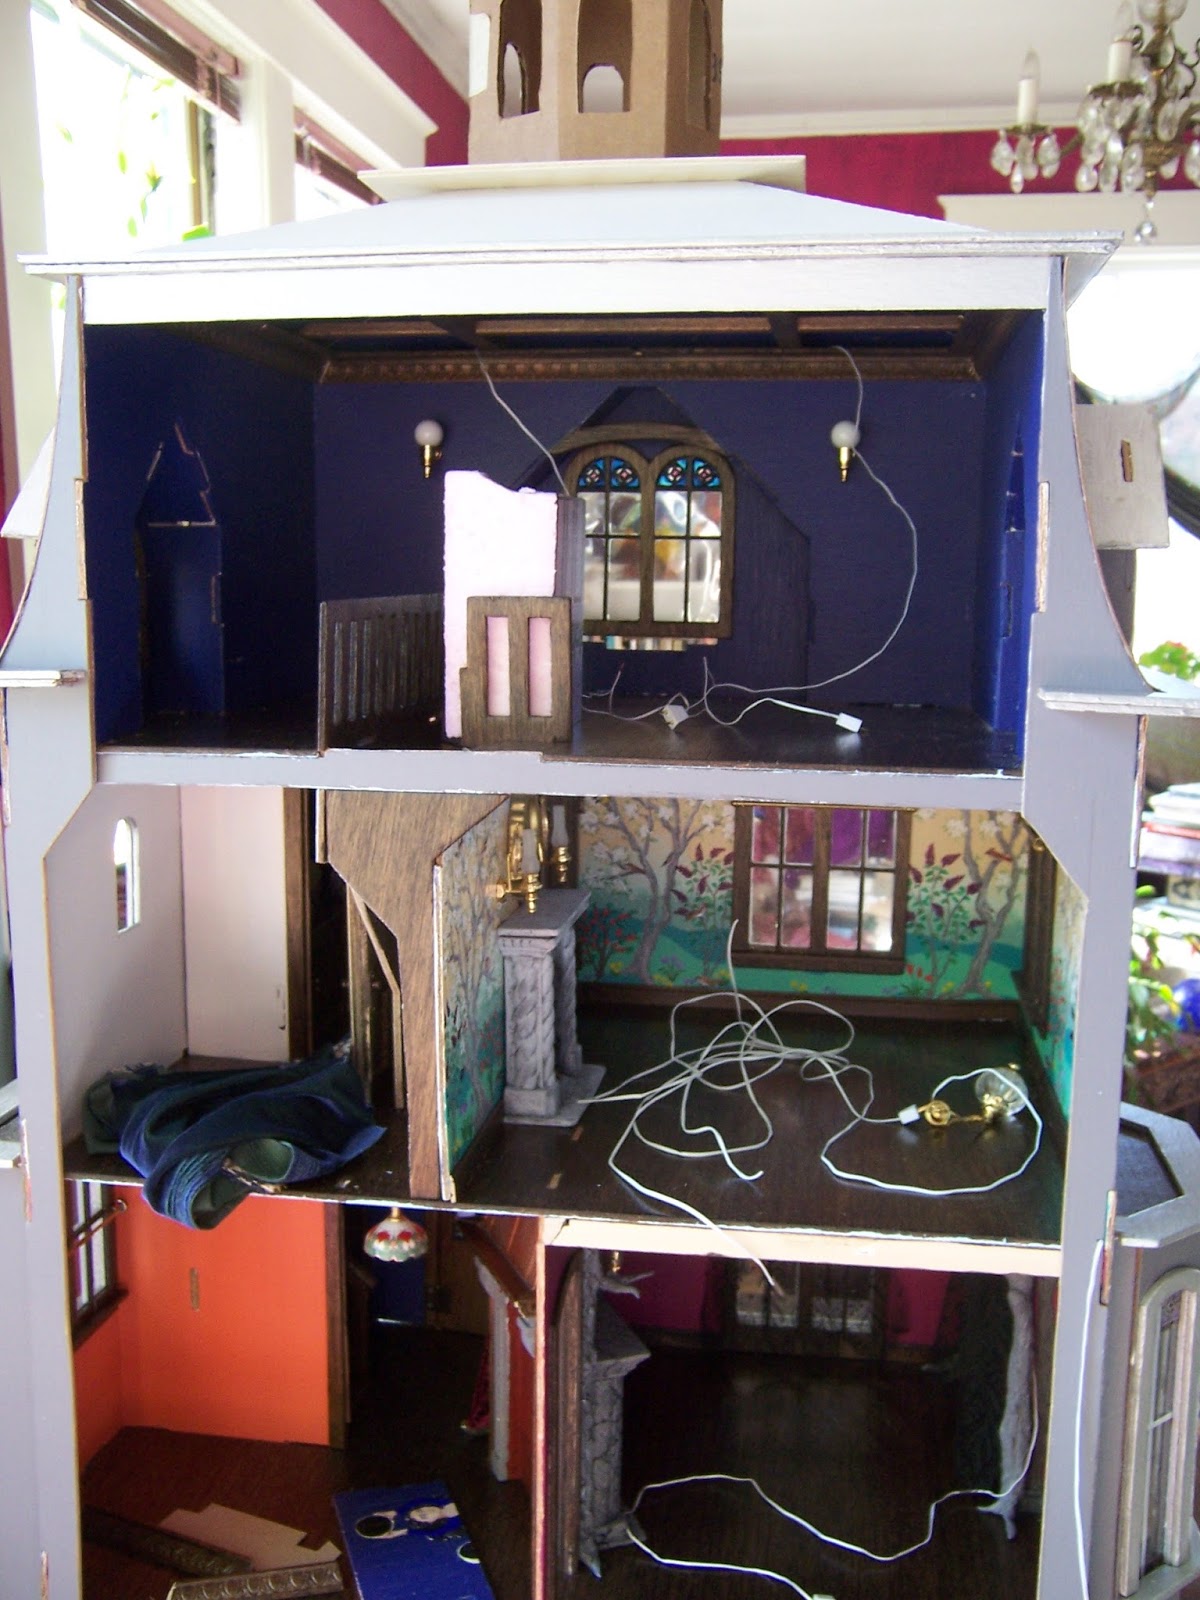
 As for the weekend.... I managed to work a little more on the attic of Hardwick Hall! Remember that LIST I made of All the steps I needed to accomplish before I glued the side walls in place? I know, it was a while ago... but One of those steps was to figure out the Wiring for the attic lights! So far the majority of the lights in this house are on the central wall, and the wiring goes down behind the kitchen hearth to the basement where it connects to a plug strip. Well, my Plan was to add sconces to the attic walls and to run the wires around to the back of the house and down the outer corners to the plug strips. These wires would eventually be covered by the corner trim of the house. Well, I got a little ahead of my plan, and glued the Mansard Roof onto the sides before I remembered to run the wires for the sconces..... which meant I had to Make a New Plan! I think the New plan will work as well as the old one so no harm was done and I did not have to remove the Mansard roofing! In the above picture you can see I have attached two sconces to the far wall, one on either side of the window.

Here you can see they are being tested..... 
it is such a dark room and it was a dark day.....
But the lights work!
The New Plan is to run the wires around to the back 
above the ceiling trim where they will not be visible. 
It will probably be easier this way!
I still need to splice extensions onto the wires 
because they have so Far to Go to reach the plug strips!
I think there will also be at least one overhead pendant light.... 
but the ceiling is still being designed... 
so I am not at all sure where those wires will travel!
I know it is not very visible in the above picture... 
but there are stars on the ceiling....

Well, of course there are!
But so far I have not been able to get a satisfactory photograph 
of them with the ceiling panels in place!

And Another small thing that I started but did not finish...

Was adding my favorite Silver paint 
to the table and chairs which will go in the Dining area of Hardwick Hall.....

It was a Very Gloomy morning.... 
and they probably need another coat of paint....

And there will be some other decorative details... 
so they are far from finished.... 
but I do think they look wonderfully... Spectral!
But what about the "New Dollhouse" I hear some of you asking?
Well, I was wandering through the Internet recently during my lunch break at work, 
and stumbled across the "Pickering Manor Dollhouse"!
It was Love at First Sight!
And it arrived Today!

Yes, I am in Trouble now, Dear Readers.... 
An entire Mansion in 1/144th scale!!!

It is one of those purchases that Surpasses the wildest expectations!

The interior is not divided into rooms.... 
so I can design them as I see fit.....!
Even the attic opens!!!

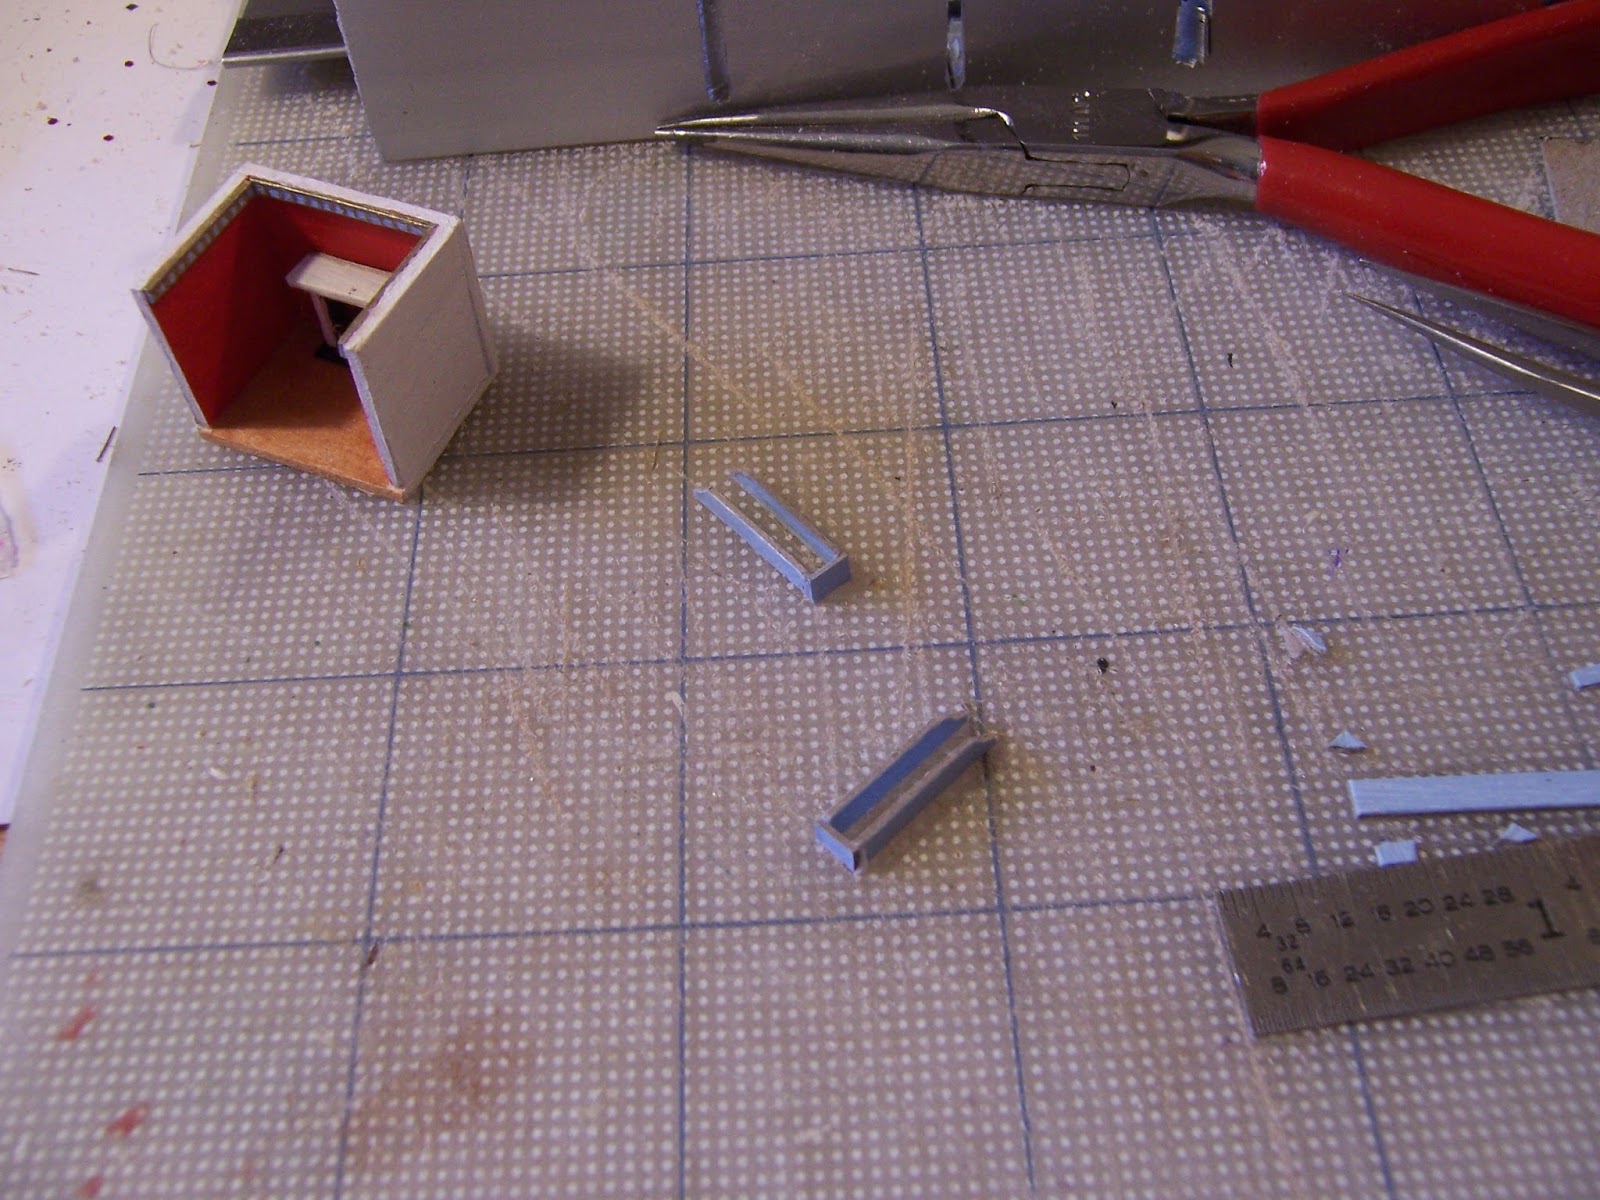
And just to see how the scale looks with my Tiny Roombox....

Yes, there is ample room for elegant interiors!!!
And if one wanted to, 
it could even serve as a bookcase in 1:12 scale!

But Where oh where am I going to "house" this "dollhouse"?
I don't think it fits into ANY of my current Dollhouses!
Who does it belong to?
What era will it be a part of?
Will there have to be a New Dollhouse to house the Tiny One?
There HAS to be a Story......!
Ah, Dear Readers, this Adventure is Far from over!
I have Always wanted a tiny dollhouse like this one!
I guess it Was only a matter of Time 
before I got another New Dollhouse!


Monday, April 18, 2016

The Tiny Settee Upholstery....


How Hard Can It Be....?

I Left you last week, Dear Readers, with the incomplete Settee for the Tiny Roombox, and me struggling with which fabric to use. I thought I had made a perfectly good carpet in the first attempt. At least it looked well with the colors of the room. But it was not a good match to the carpet in The Folly itself, and with the tiny roombox trying to be a copy of that room, I thought I might have to try again. And then the settee was not at all to my liking using the same fabric as the carpet, it just didn't look enough like the settee in The Folly, and the two together were all wrong! So I was back to square one seeking fabric in tiny patterns and colors similar to the one in The Folly! How hard could it be?  Well, I spent a considerable amount of time pawing through my fabric stash.... Looking for tiny prints in patterns and colors even close to the Chinese red and blue in The Folly! Over and over again I found pieces that were not small enough, not the right color, too thick.... this was much harder than I thought it would be! But I got lucky! I found a piece of fabric with a tiny bit of print that would probably work for the carpet..... but only if I got creative.....

Here you can see the new carpet completed... along with the old one....
So you can see the colors are a good, almost Perfect fit!
But I had to piece this rug together from tiny pieces of patterned print...

Can you see it on the little fan in the middle...? 
Fan shaped... not rectangular.......
I cut the fans out and glued them onto a piece of silk seam binding....

Here you can see some of the trimmed pieces.....

And the carpet glued together... 
made up of three sections of the pattern aligned carefully!

Yes, I do like that carpet! 
But the fabric on the settee is still all wrong!
I went back to searching my fabrics.
And while I was at it, I made a tiny hearth rug too.....
 
It is not exact...... but it resembles the one in The Folly.....

Which you can see in this picture... 
(I know there is a lot of mess on the floor!)
And you can also see a glimpse of the settee
 and the fabric I am hoping to copy.....
And while I was searching my fabrics again and again...
I also made a tiny framed picture for the wall behind the settee.

Sorry this picture is upside-down, 
because the image is so small that 
I had it turned the wrong way when I took the picture!
It is a Madonna and child .... 
taken from a printed mini book page of a Medieval Manuscript.
The colors and subject are right, even though 
it is not the same painting as the one on the wall in The Folly!
(Remember you can poke the pictures to enlarge them!)

I tried other prints from that same fabric......
 
 
But I really didn't like the way they looked at all!
This was much harder than I thought it would be!
But then, Dear Readers, 
I remembered that I had (half-jokingly) 
responded to a comment last week,
 that I would probably end up painting some cloth....!
Well....Just How hard would That be???

Well, it turns out Dear Readers,
 it was Not very hard at all!
I found two scraps of silk, 
a white with a texture and an off white raw silk...
pulled out my acrylic paints 
and painted a "similar" design to the fabric on the settee.

The design is so tiny, I have really only approximated it......
But it gives the stripe and medallion feel of the pattern, 
and the colors are right. I even used the gold paint!

I decided to use the white textured one... 
and I was so excited that I forgot to take any pictures of the process! 
So you will just have to imagine the next steps.
The fabric is glued to a piece of plain paper cut to the exact shape needed,
and the edges are then turned under and glued to the back of the paper....
and then it is glued to the settee.
Basically the same method used for larger pieces, just very small!

I did my best to match the stripes and pattern.....
I really think it looks remarkable....!
(sorry it is a little blurry... so hard to photograph this small!)

Can you see it now?

And in the roombox...?

Can you see the resemblance...?

Maybe if we move some of the mess....
Now it looks like I imagined it could!

Well, Dear Readers, That is the smallest 
upholstery I have ever attempted!
And it really wasn't as hard as I thought it would be!


Monday, April 11, 2016

Not Much To Show...


Tiny Progress.... Or The Fabric of Life...

There really is not much to show you this week, Dear Readers, because it was the first weekend of Garden Season, and I needed to get outside and clean last year's dead leaves off the flower beds in my RL Garden! But that doesn't mean there is Nothing to show... because I did manage to work on a couple of Tiny things! The first is the petitpoint cushion in the Tree Of Life pattern from Janet Granger. I know, you are saying I showed you that last week... but that was the one made from her kit! As with the first cushion, there were leftover threads, and I decided to make another one using the 28 count canvas I had, which does make a slightly smaller cushion. You can see it in the photo above, nearly finished... and nearly at the point where I RAN OUT of the thread supplied with the kit for the background! We All know how Impossible it is to match the color of different batches of thread, even when we know the brand and the name of the color... neither of which I knew! But I decided to dig in my embroidery basket and see if I could come up with something close... and then I would "explain" the color change with a story about an Old Pillow that had tea spilled or some such tale! I found a skein of ivory floss.... but the skein no longer had it's color and number label, (I have had these embroidery threads for at least thirty five years!!!) but it looked to be a close match with the ivory supplied with Janet's kit... so I finished the stitching.....


And I don't know about you, Dear Readers, 
but I CANNOT tell where the new thread begins!!!
Can you imagine how unlikely it seems 
that I would have the Perfect threads for so many years?
So this is the second in the Tree Of Life cushions... 
all I need to do now is the backing and stuffing.
I do Love this pattern!
And because I am now having so much fun with the needlepoint kits, 
I needed to start another one right away!

Fortunately, I had another of Janet Granger's kits ready to sew....
This is a "sampler" done on 32 count canvas with a single strand of floss,
 so it is another step smaller than the cushions, 
even the 28 count ones I made.
(I used my magnifying glass!)

It is relatively quick to stitch, and as with real "samplers" 
the background is not stitched.
(And I only made one notable mistake!)

It is designed to be an "antique" with the stitching date of 1806.
I think it is quite charming,
 and like many things in the mini world,
 I have Always wanted to make one!
The kit even comes with a frame... 
I will have to show you when I get that step done!

I have a few more of Janet's kits ready to sew, 
I have bought some of her smaller count projects....
 I will be sure to show you as I get them done. 
I am now a confirmed petit-point addict.... 
when I finish one project, 
I need to start the next one right away!
(Even if it means running out of the right threads 
or using a different count fabric!)

And the last Tiny thing I worked on a Tiny bit, Dear Readers, 
was the settee for the Tiny Room-box!

I had already made the seat part last week....
But I have not been able to find the right fabric to use as upholstery!

Yes, I know you can barely see the pattern in this light.....

And then I thought I should add the legs now, 
even though they would be delicate 
and might make it harder to add the fabric later....

Just the tips of toothpicks, 3/32nds of an inch long.... 
but I think they are too tall and will need to be trimmed.

And with the legs painted too....

Isn't it Adorable?
But I am still not settled on the fabric to use...

This is the same fabric as the carpet in the roombox...
And I think it makes the seat disappear when it is put in the roombox.
Which defeats the point entirely!

So I have not decided whether to use it of not.....
I still might change one or both of the fabrics....
And because it is so Tiny, and so Incomplete....
I didn't take any pictures of it IN the roombox to show you!
Just this picture.
None of these belong together...
And they come from such diverse sources....
Old Threads and new.... 
Fabric from my former mother-in-law....
Kits from overseas and cardboard from work....
Coffee stirrers and toothpicks....
Somehow, Dear Readers, 
These Tiny Things become the Fabric of My Life!


Tuesday, April 5, 2016

How Small Is Small.....?


Oh, Those Details....!

Believe it or Not, Dear Readers, It looked like that outside my windows all day yesterday... so I stayed home and finished a few small details on some of my many projects, one of which is the "Tree of Life" pillow on the sofa in the above picture! It was a gloomy day and I was feeling a bit "under the weather", so I did not get much done, but fortunately I have all sorts of details to show you from the past week. As you can probably imagine, once I had started on the Tiny Roombox version of The Folly Parlor, it was hard to put it down! What you saw last week was just the merest beginnings! The tiny people were high on my list of things to do.... so I started right in on the First Lady.... (Perhaps her name is "Eve"?)..... she needed to be painted....

So Much "personality" is added once there is a face!
But can you even see her?
(Please remember to poke the pictures for a bigger view!)

And for modesty's sake, I have added a lace petticoat....
(please pretend that it hides anything at all!)
 
And then because I always work on several things at once, 
while glue and paint are drying, 
I also started on the details for the fireplace....

Because a fireplace Must have logs and flames....

And I also painted the surround to resemble black marble, 
like the one in The Folly Parlor!

And I started to make a tiny mirror... 
by painting a metal jewelry chain link gold.....
And gluing on a piece of reflective mylar 
(cut from fancy glittery wrapping paper!)...

But Eve needed some hair, 
and I was having a hard time figuring out how to make it!

My first attempt did not work out, so I pulled it off and started again....
You can see here I have knotted the end of a piece of brown sewing thread....
and I am gluing the knot to the top of her head to form a "bun"....
but I had to be patient and let the glue dry all night and all day....

Before I could add more glue and carefully wrap the thread around her head....

When it was wrapped far enough and dry enough, 
I cut off the tail end of the thread!
(She may not be Perfect.... but she is the First Lady!)
 
The next Tiny little detail that gave me fits was the andirons for the fire!
I kept thinking I needed to use beads... but none were small enough!
Eventually I tried just twisting the finest brass jewelry wire I have....

They are a tiny bit large.... but they work!
You can still see the glue drying in this shot!

And then the Roombox itself Dear Readers, 
still lacked all sorts of architecture....
starting with the crown molding trim.....

 It is just painted cardboard... cut very small....
with gold painted details...

And the bookshelves that flank the fireplace....

Again, just painted cardboard.....

The shelf widths are just 3/32nds of an inch!
And the tiny mirror....

(I "pinched" the jewelry piece a little to make it oval instead of round.....)

And we must test it all for fit.....

It is starting to look like The Folly Parlor!
(But it is still missing a few small details.....)

Like the ceramics on the mantelpiece.....

Will beads work..... 
if I glue them together and paint them......?
And what about books???
We Must have Books!
 
I cut strips of paper from magazines
 that had interesting color patterns on them...
and glued them around a piece of cardboard .....
cut it into a narrow strip, then sliced it to tiny tiny pieces....
Most of these "books" are too large to fit in the shelves!
But I found enough small ones.....

To fill the shelves... which don't hold many books
 even in The Folly Parlor itself!

Can we even see the books on those shelves???
How about with the ceramics on the mantel....?


(The Folly mantel has even more....)
 
Another ceramic vase and a book on the mantel.....
(and a couple of "vases" on the top shelves of the bookcases too!)
It is Not perfect, Dear Readers... 
the details of the closeup photos 
reveal all the flaws in the painting
 and the rough edges of the bookcases....
 but it is starting to look a lot like The Folly Parlor!

Of course, it is late now, 
and really difficult to get a well lit and in focus picture!

But maybe you want to see it in the bookshelf of The Folly?

Or how about an excruciatingly revealing close-up....?
 
Yes, Dear Readers, it is a bit rough around the edges....
And of course, there are still several missing details to be completed...!
And in order to make those little details..
I keep having to ask just how small is "Small"?

Oh, and did you want to see the "small" snowfall we had...?

Almost five inches fell!
(Not very small at all!)