Monday, August 28, 2017

The Hound's Tale...


Be Careful What You Start.....

It was already several weeks ago Dear Readers, that in my enthusiasm for embellishing the Dining room of the Secret Christmas House, I suggested that maybe there should even be a Hound under the table waiting for bones....! I Should know better by now.... because of course I then have to Attempt to create such a creature.... and have to decide at some point to Finish what I have started, no matter how far off it is from my original idea....! Above you can see the Hound completed. And from this angle he looks quite acceptable as an initial foray into the realm of making tiny hounds!

And because I do not have any flocking to make him appear furry, 
I am going to have to accept him as he is. 
His uneven physique I will have to attribute to his advanced age....
And really, the only problem I have is that he is so Large!

See....? Here he is with Theodora.....
 it appears that he is her favorite. 
She has named him Odysseus.

Perhaps you can see them better here.....
Clearly he is a Wolfhound at the very least!
But is he too Large for the Secret Christmas House? 
Does he really belong with Theodora and her family...?

Clearly he is Not a candidate for a "hound under the table..."!!
 
So while I was pondering these Weighty questions, Dear Readers, 
I decided to continue with making the furnishings for the Parlor.
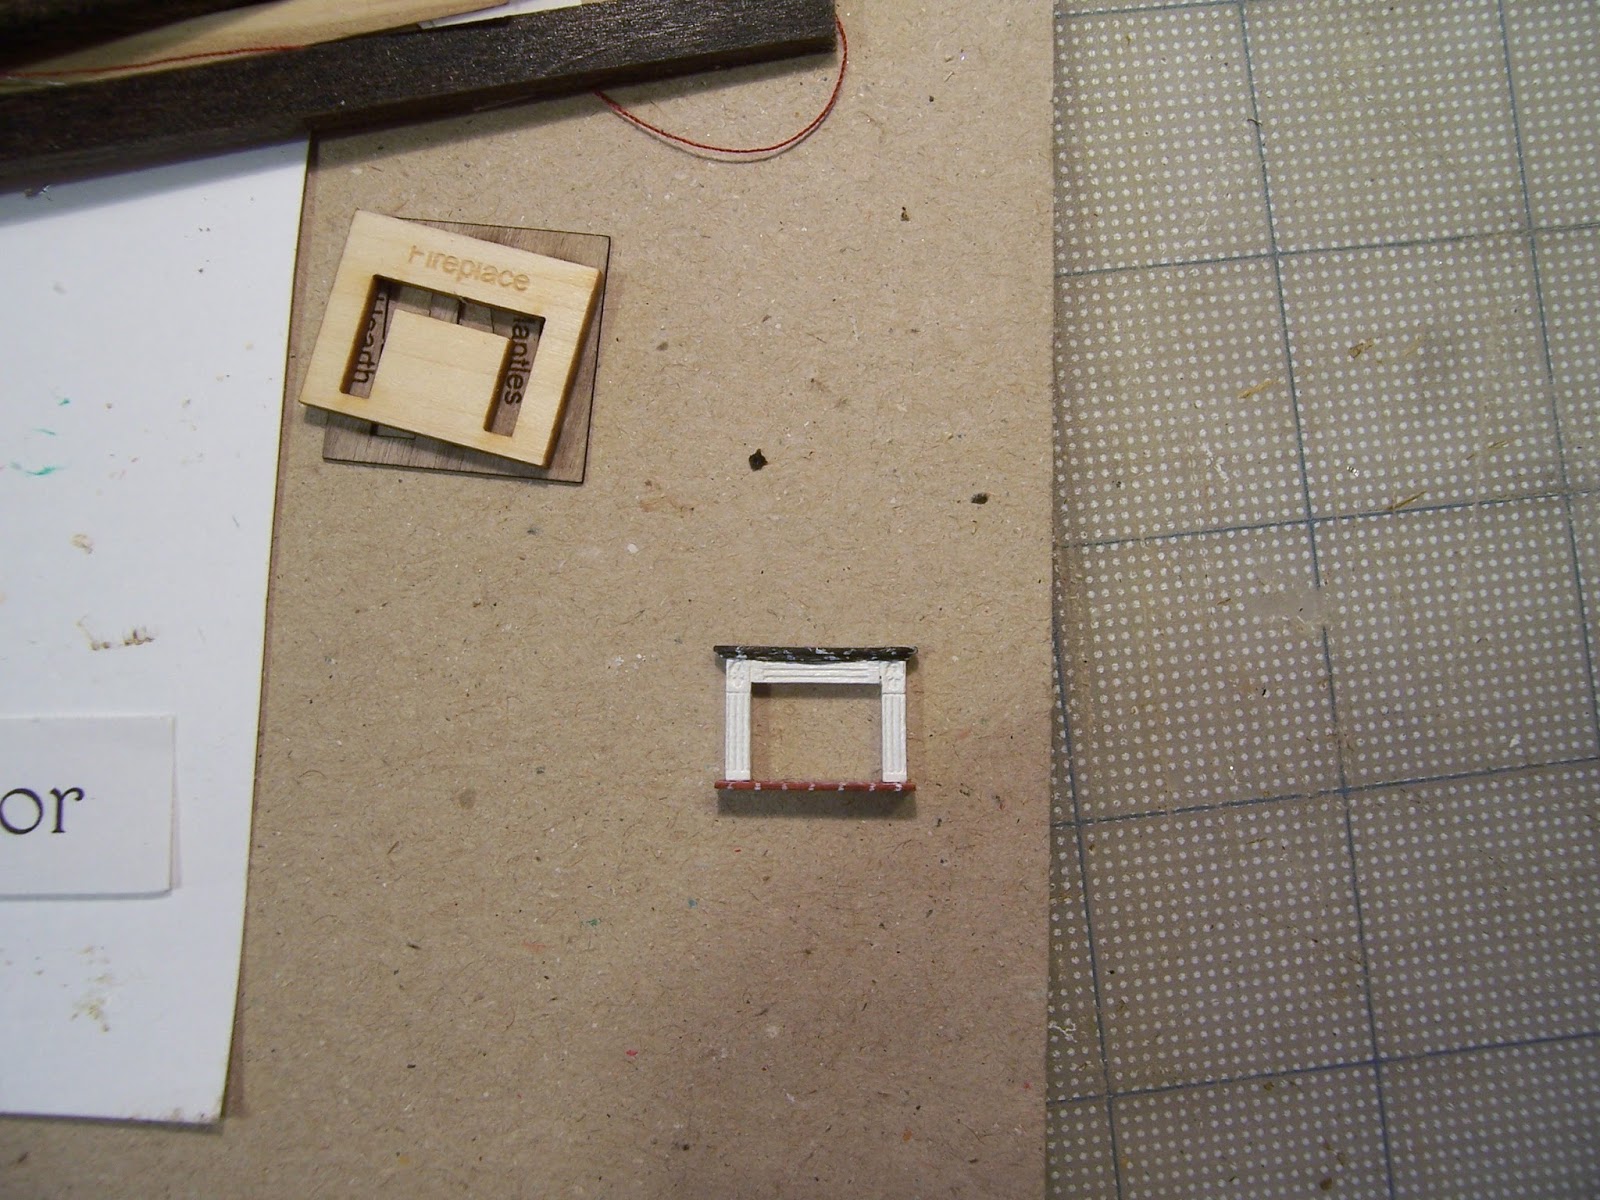
And I realized that I did Not need to attach the fireplace
 into the room before I could "embellish" it as I had previously thought!
I could add the logs and the "flames" while the fireplace was separate, 
as long as I glued it while flat against the plastic surface....

That way it would not attach to the plastic,
 but would still keep the flat profile at the back 
for gluing against the wall when completed.
Above you can see I have added logs
 and a piece of painted plastic packaging to resemble flames.

Then I added a couple of pieces of red glitter to resemble glowing coals.....
Yes. I know they are a trifle Large... 
but I didn't have any finer glitter in that color...

Here you can see the Parlor with the fireplace "fire" printed on the wallpaper....
and beside it you can see the hearth...

And here I am testing the placement of the burning logs
 against the picture on the wall....
and decide I will need another log on the fire!
Not to mention Andirons......
 
I know, they are a bit uneven and crude...... 
and I almost lost one of them in the carpet more than once....
And maybe they won't be very noticeable
 once all the rest of the decorations are in place... 
so I glued them in place!
And started in on the decorations that come with the kit....

Beginning with the greenery swag made from bunka....

And testing it in the room to see how it is shaping up......
Maybe those andirons are okay....!

And starting the stockings which will hang from the mantle......
The kit instructions suggest adding little snippets of thread and beads
 to make it look like they have presents in them.
You will probably have to poke the pictures to see those details...
Oh, and there are candlesticks for the mantle too....

Can you even see them there on the plastic...?
They are getting the "glue trick" on their bases 
to make them a little three dimensional....

And then I made a tiny "doll" with thread and a painted bead for her head.... 
can you see her there sticking out of the top stocking?

Can you see her better here? 
I decided to paint her dress blue 
so she would stand out better!

And while I was waiting for the candlesticks to dry, Dear Readers,
 I went looking for the other decorations that go on top of the mantle....
it is supposed to be a large bouquet of flowers, 
a bit like the one on the dining table, using the same techniques.
When I finally found the paper printed part
 I realized that it wasn't what I wanted to put on the mantle at all!
And as I wondered what I should put on the mantle instead, 
it occurred to me that there was no Nativity scene for this house!
Well, you can imagine what That means....
of course, I have to try to make one!

So I started to make a small "stable" to house the Nativity.....

But is it just a Tiny bit too Large....??
Hmmm.... I will have to give it some thought.... 
while I am trying to figure out 
how I am going to make all the figures....!
And speaking of things that are too large..... 
I should know better... 
but I thought I would Try to make another hound....
 just a little smaller this time...
and maybe if she was Lying down she would fit under the table.....
 
*Sigh* I should know better..... 
she is just as large as Odysseus... 
and obviously she is a Wolfhound too.
Meet "Penelope" the faithful wife of Odysseus....

Waiting by the hearth for her mate to return.....

Clearly I have just added another entire Family to my Tiny Worlds.... 
because no matter how ungainly or imperfect they are.... 
I cannot "discard" them once they are begun!
So you can see Dear Readers, 
that I should know better by now 
to be Very careful what I begin!
(And don't even think about suggesting puppies....!)


Monday, August 21, 2017

A Long Way From Complete....


Eclipse.....

It has been very hard to ignore, Dear Readers, that on This side of the Atlantic we have been presented with a Solar Eclipse that was a Total Eclipse for the entire path across the United States! If you were lucky enough to be near the path of totality, then I hope you had great viewing. Here in Northern New England, the eclipse was nowhere near a complete one, but still, it caused a few moments of complete focused attention, even in the Doll Worlds! Arthur and Pollyanna joined Will on the Terrace of the Folly which has a wonderfully unobstructed southern view!

With the special glasses, one could stare directly at the sun 
and view the moon's shadow as it covered the sun!

I stepped outside at work for a few minutes myself....

And took a picture through the glasses with my camera!
I know, it's tiny and far away, and terribly amateur....
But that is pretty much what we could see from here!
(Poke the pictures to see if it is better close-up!)
And while I was sharing my glasses with co-workers who didn't have any, 
I was noticing the shadows on the ground!

The sun cast crescent shadows through the leaves of the tree!
So even though it was not a complete eclipse in this neck of the woods...
it was a complete blast to get out and have a look!

And because it has been that kind of a week here, 
Dear Readers, I only have a couple of other 
small incomplete things to share with you!
As you might imagine, while I was painting the mural for the Tinker's wagon, 
I was also starting the kits for the final room of The Secret Christmas House. 
This room is the Parlor, and it will hold the Christmas Tree 
along with a decorated fireplace, clock, sofa, and two candle stands.

I started by assembling the fireplace, which has a lovely mantle 
and a hearth which I thought should be painted to look like bricks.

And then I decided that the top of the mantle 
should be painted to resemble black marble
 because the plain white seemed to disappear
 against the ornate walls of the room.

The fireplace has a lovely profile which you can sort of see here.

Here I have glued the mantle to the hearth.
 And then I realized that in order to create a more realistic fire 
than the one that is printed on the wall...
 I would need to attach the fireplace to the room, 
and I needed to "decorate it before I did that!
So instead, I assembled the rest of the furniture for this room.

A lovely Swedish style clock, 
a Victorian sofa and two candle stands or side tables.

You really do need another project to work on
 while you are assembling these kits, Dear Readers, 
because they take only a tiny amount of work gluing pieces 
and then long stretches of waiting while they dry completely!

And then you paint them..... and let them dry....
And then you varnish them.... and let them dry....


And finally you can add the printed art for the clock face!

And the lace doilies on the tables.....

And the upholstery for the sofa.....

And you will be relieved to know 
I did not try to paint my own cloth upholstery for this sofa!

I even glued the carpet into the parlor, in readiness for the furniture. 
And that's as far as I got, Dear Readers...
it's all still a Long Way from Complete... 
 
But like many things in life..... 
it's not really about how complete it is, 
it's about how much Fun you have with what you've got!
I hope you all have had safe and fun viewing of the eclipse....
However much you could see!
And if you are overseas and not near the path.... 
I hope you can enjoy the view from here just a little bit too!
Happy Eclipse!

Monday, August 14, 2017

The Tinker's Dream.....


Sweet Summer Solace....

I Had a week of Vacation, Dear Readers, during which one would think I got a Lot done because I went Nowhere at all, except perhaps to Travel far far away into a land that never was and perhaps will never be, trying to find the Tinker's Dream. That elusive place where the horses are always running free but never running far, where the sun is always just rising, or just setting, and one can sit and watch the shadows shift with the promise of peace and go nowhere at all! And there is a soft mattress in a quiet corner where the Dreams find you and steal you away....

Perhaps some of you will remember that A year ago 
I got swept up in building a Gypsy Caravan.... 
and as with so many of my in-progress projects,
 I came upon a challenging place 
and jumped to an easier project instead!
In this case the challenging place was the realization 
that in order to complete the outside of the wagon, 
I had to first complete the inside!

Which meant first of all adding glass to the windows!
This kit comes with lovely frames, but no glass panes.
(I wanted real glass panes)
Here you can see that the windows are finished....

Including the ones in the front door panels 
which here are open wide to give you a view inside. 
They required quite a bit of fancy measuring, cutting 
and additional interior framing to hold the glass in place.
(The roof is only temporarily in place.)
But that was just the beginning! 
Because a Gypsy wagon has to be very well organized... 
and all the spaces have to be carefully planned.
And in this case the sleeping compartment was so dark and gloomy... 
even with the two windows.... 
It made me think that perhaps the Tinker had painted the walls
 to bring in a feeling of the outdoors he knew so well.... 
and perhaps he had painted all his beloved horses...
So I had to see if I could find that place and bring it here....
 
The beginning is many coats of gesso...

And then a rough sketch and the beginning of layering the sky.....

You might be shocked that the next layer is the yellow ocher for the ground...
 but I wanted the warmth of sun to infuse the land.....

But there would be deep shadows 
so next came the burnt umber wherever the shadows lay.
At this point I began to need to be very specific about the source of the light in the painting... 
which is the sun just tipping the hill....

And then I start to add the greens....
 first the chrome green which is an olive yellow green....
And then the pthalo green which is a very translucent and blue green.... 
layered on top for the shadows....

And then I started to place the trees in the middle foreground..... 
to start to define the distance of the horizon...
And the ones at the "corners" which would frame the illusion 
of the outdoors on all sides of the wagon....

Arching their branches over the top of the "view" to enclose it....
To make it more sheltered and intimate and moody...


And of course, there will be horses!
They need a coat of white under-painted first...

But it has gotten very late and I had to pause for the night, Dear Readers, 
lest I begin to make too many mistakes...
And I go to sleep dreaming of grassy meadows I have never seen before...

And in the clear light of morning, start chasing shadows again.....

feeling my way into the left-side of the wagon...

Here I need to check that the shadows "run straight" 
once the wall is at 90 degrees angle to the main panel....
Of course, it depends entirely on the exact point of viewing to see it correctly....

And there will be another horse there too!

The horses will be colored... 
but their coats require the layering of colors too...
 
And too many details to enumerate... 
and shadows to ground them....

Being careful to leave the highlights of the lighter color where the sun strikes them.....
(sorry the surface is reflecting too much....)

And more close-up of the left side....

And the right too.
And another day has flown and I must stop for the night.

And with the fresh eyes of morning I can see 
that the central horse needs to be patched with black markings too....

And shadows added to ground the shire on the left.....

And highlights added to the leaves at the top....

And shadows in the trees....
 always tweaking the shadows.
And at some point Dear Readers, 
one must decide that enough is enough!
And move on the the framing.... 
here being the "structure" of the wagon...

The arched piece comes with the kit, 
but I have added the corner pieces....
because by now we are desperate to see how it will look when assembled!

Looking through the open doors to the sleeping compartment....
 (the blue tape is still on the inside of the door panel 
which has not been finished yet!)

Closer.... to see the right side panel too...

And the left hand side.... 
I know it is dark... the sun has set....
Can we feel the Tinker Dreaming?

So you can see Dear Readers, I did not go anywhere at all...
but I spent my Summer vacation in search of solace...
chasing the Tinker's Dream.
I hope you did not mind that I brought you too!