Roots and Trunks.....
Well, Dear Readers, I apologize for the dark and gloomy picture of the Rhododendron Shrub Skeleton, the weather has been dark and gloomy again, and this is the only picture I have showing the "before" scene for the shrub roots! As you know, I am making three of these Shrub Skeletons, as identical as I can so that I can have "seasonally changeable" Rhododendrons in The Folly Garden. I was eager to get the skeletons moved on to the next stage of construction and didn't pay much attention to the photography as I went along. This is to show the Roots of the shrub... the main trunk is old and the roots are showing partly at the top of the soil. This is partly for stability (the branches spread quite far) and partly because my RL Rhododendron shrub has a long root that snakes off to the side and sprouts a new trunk at the edge of the garden bed. I am copying this detail for The Folly Garden shrubs.
Here you can see I have removed the pod from the Garden...
and it is really hard to see, but I traced the roots positions on the pod
so I could know where to poke the holes for the roots to go into.
(That nail poking up through the pod is the temporary "handle"
for lifting the pod in and out of the Garden spot.)
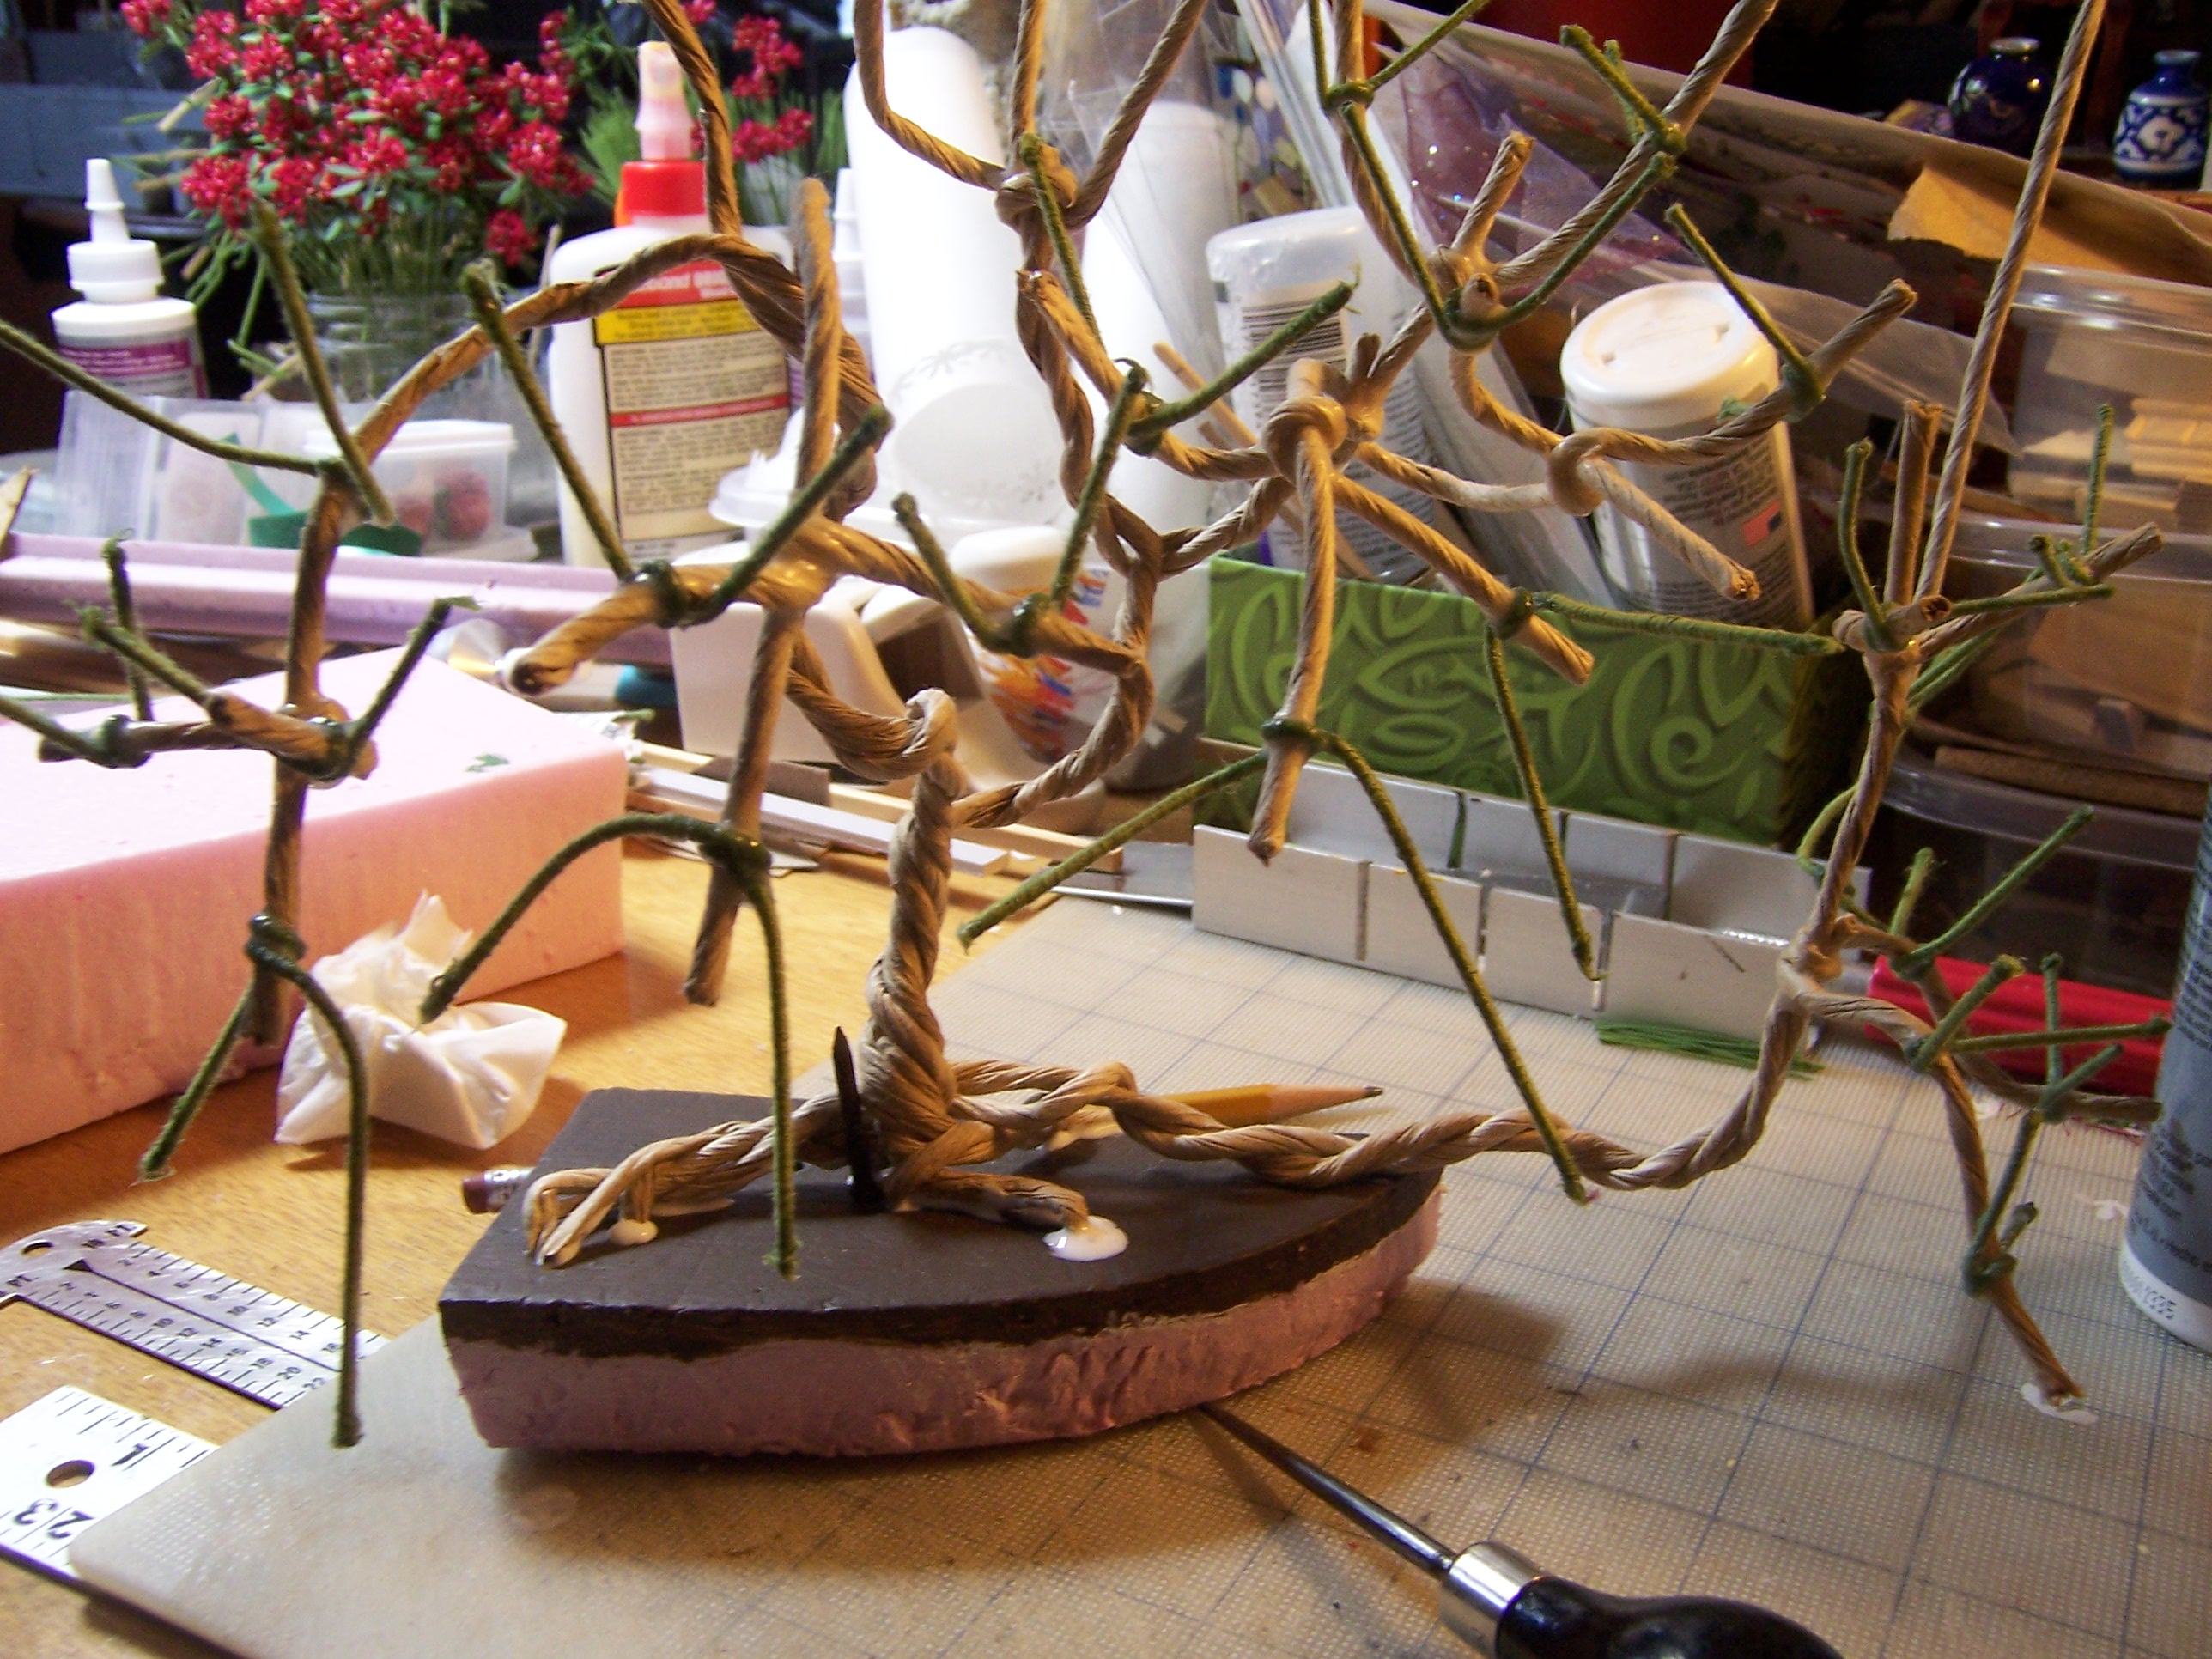
Here you can see I have bent the ends
of the three major roots downward
(this is the view from underneath)
And here you can see the holes I have poked into the foam ....
And here is Shrub#1 with the ends of the roots
poked into the holes and glued in place!
This leaves a part of the roots "above ground",
and the long side root in particular just runs along the surface.
I plan to build the "ground" up a bit to cover this part way.
And since Shrub#1 glued into the pod #1 with the greatest of ease,
I went onward with Shrub#2...
Here the ends of the Roots are bent downward....
And the locations traced on the pod #2 and the holes poked...
And the roots glued into the holes of Pod#2!
Two pods done... only one to go...!
But imagine my Surprise, Dear Readers,
when I grabbed Shrub#3 for Pod #3,
only to discover that it would not fit right on the Pod!
What????
The position of the nail in the pods is not identical........
so as I have "shaped" these shrub skeletons,
I have worked around the nail position to the best of my ability
to keep the shrubs centrally positioned in the pod.
Shrub#3 was not fitting right ....
Then I checked to see if it WAS Shrub#3....
only to discover it was Shrub#2!!!....?
I had accidentally used Shrub#3 for the Pod#2
(These pods are marked on the underside
with bold magic marker to keep them sorted out....!)
I needed to move the nail to a different spot
to fit the Shrub#2 onto the Pod#3...
Lest you worry... at This stage of the construction process,
it doesn't matter if Shrub#2 or Shrub#3
is the one on Pod#2 or Pod #3....
But the poor Shrubs might now have an Identity Crisis...
One is Shrub#2-3... and the Other is Shrub#3-2
and I am not sure which is which!
Shrub#1 is securely just #1 and will be the blossoming Shrub....
the other two will have to slug it out between
Winter with snowy Leaves
or Year-round just plain green!
But once I had adjusted the nail...
things moved along and I got Shrub#2 attached to Pod#3...
Here they are all three lined up and letting the glue dry thoroughly.
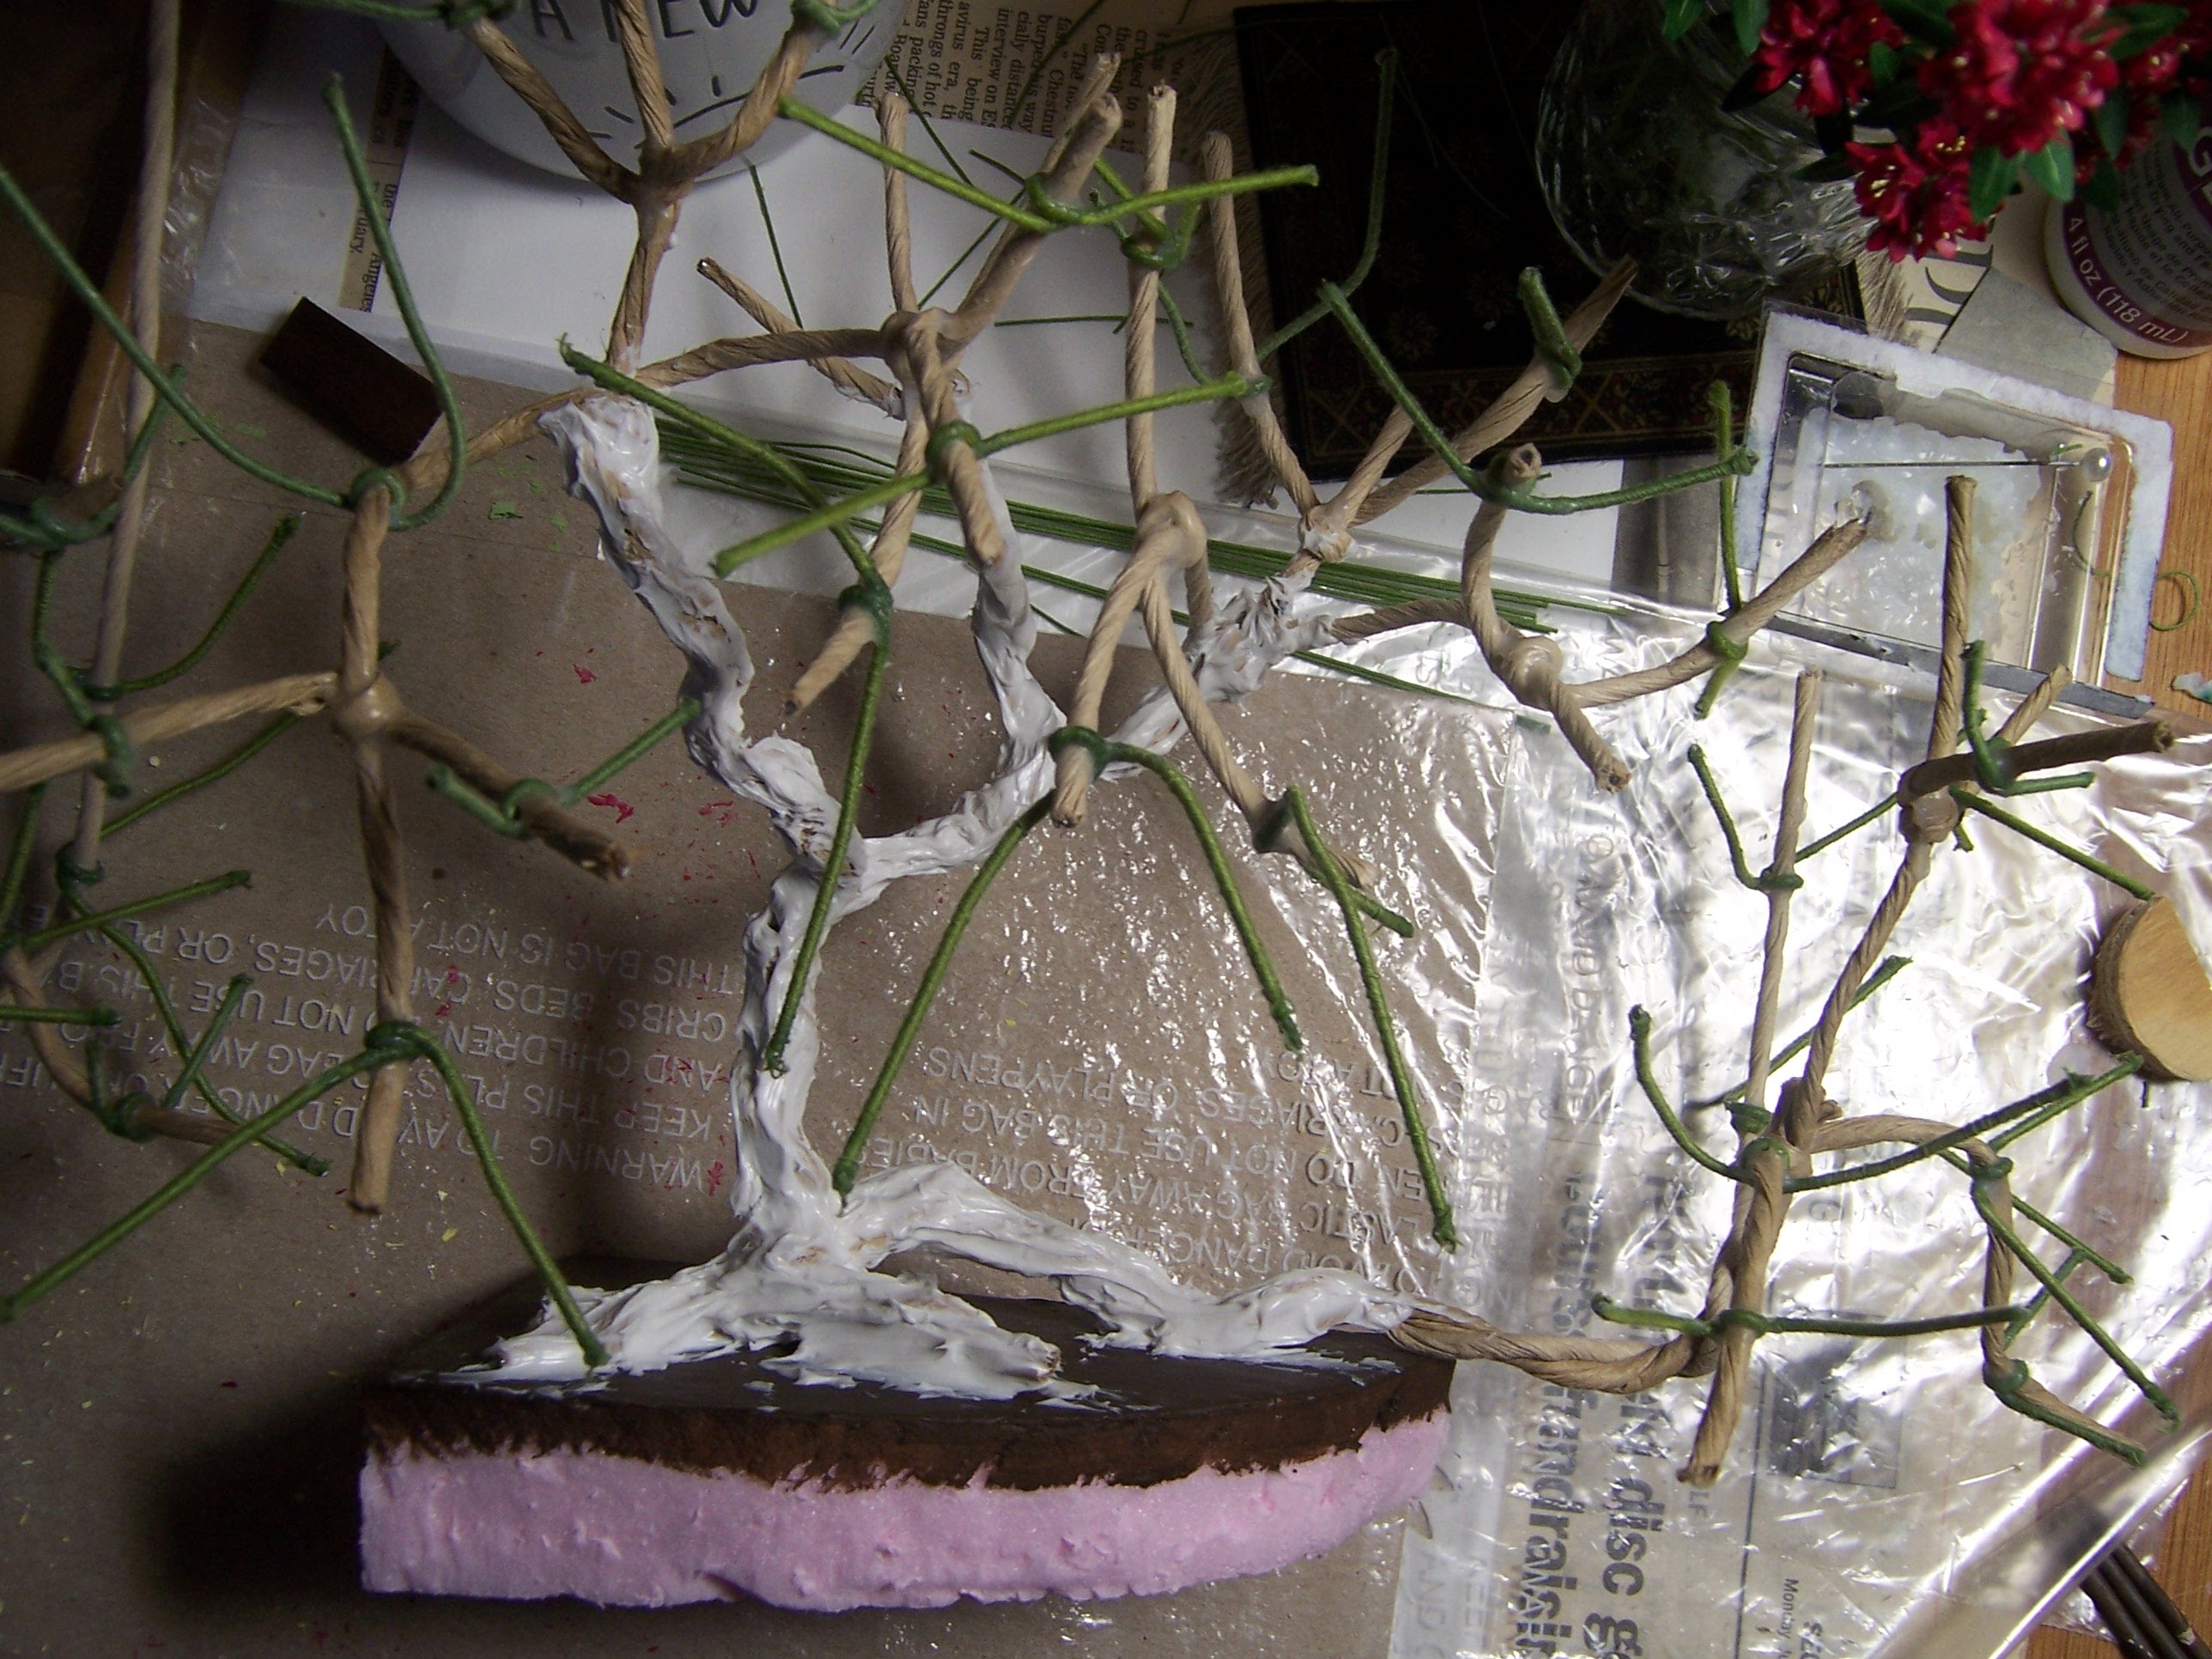
The following day, I began to add the "Acrylic Modeling Paste" to the trunks and roots.
And to Shrub#2.... (or is it 2-3?)
And Shrub#3... (or #3-2)....
And Shrub#1 in the Folly Garden...
(Dark and gloomy again......)
Here you can see clearly just how "textured"
this made the Roots and Trunk of the Shrub.
But Rhododendrons have quite smooth bark....
they don't need a textured surface...
The modeling past was to help me smooth out
all those bumps and twists and glued spots
on the paper wire stems.
It also gives added strength to the joined areas.
Fortunately it is made to be carved and sanded fairly easily...
This is what it looks like
after I have begun the "carving and sanding"......
Hmmmm.... this is going to take a while!
It is challenging to get the exacto knife in among the branches....
and the sandpaper is only a little easier to wield....
And I get to do this for all three shrubs!
Well, Dear Readers, the Rhododendron Shrubs
are taking Shape; Roots, Trunks,
Leaves and Blossoms...
Spring is Sprung in my Neck 'o the Woods
(Even though we got snow the other night....)
And I have almost 100 Blossom clusters done!


First of all: Happy Easter! I hope you'll find the time to put your shrubs away for a little while to enjoy a lovely EasterSunday-"Kaffeeklatsch" with one, two cups of coffee (or tea *wink*) and one, two, three, four pieces of cake as well as some occasional chocolate egg here and a chocolate Easter bunny there... And can it be that everybody is taking some time off for Easter? As I tend to be a bit late in commenting I'm not used to be the first to comment... ;O)
ReplyDeleteBtw - if you'd leave them a bit alone while enjoying an Eastersunday-"Kaffeeklatsch" it might give your shrubs the chance to overcome their identity crisis. A little shrub group therapy with Mr. Gnome as supervisor... perhaps this would help. Or did you ever consider a radical new start? Throw away the numbers and name them B, G and S (Bloomy, Greeny and Snowy)!
But with or without identity crisis... your progress is amazing. I have no doubt that this is very time consuming and needs a lot of concentration, dedication and testing because we would always know if they weren't identical. *grin* This project is so amazing... and so is reaching the landmark of 100 clusters.
Hugs
Birgit
Wow - that is a LOT of work - amazing!
ReplyDeleteI'm so amazed by your Rhododendron Shrubs and by you making 100 clusters! This is going to be the most beautiful garden!
ReplyDelete