Monday, May 16, 2016

Next To Nothing Done......


So Very Little.....

It was one of those weekends, Dear Readers, after one of those Weeks, where I just didn't accomplish anything very noticeable in my Mini Worlds! The Tiny Ladies were all asking for improvements... they wanted new hairstyles, new trims for their gowns, and the youngest of the Sisters even needed their petticoats! The trouble is, these Ladies are So Tiny, that whatever you add, it takes a long time and is barely visible when it is done! Nonetheless, they are quite particular in their requests! Salome's gown needed embellishment, so I added a glitter spangled gauze over-skirt with a train. You can see it (sort of) in the picture above. I must apologize for the occasionally blurry pictures... it is very difficult to get these details in focus! And while I was adding the train to Salome's gown, Virginia was reminding me that hers needed decoration on the neckline... or Something! I could not find any trim of a suitable delicacy, so I decided to braid together three strands of sewing thread.....

(Of course, the picture turned out a bit blurry.....)

And then I glued it carefully to Virginia's neckline....

Which you can hardly see here.....

There.... is that better?
I do think it is Much better!

And of course, Salome wasn't content 
with the amount of glitter on the new over-skirt....
so I had to try to add some more......

I spilled a lot...... 
and practically dunked her in the dish.....
Is she sparkly enough now?
(Again, this is so difficult to photograph!)
And while she was waiting for the glittered glue to dry, 
I was also starting to dress another sister....
You can see her here...

She has her face painted and her petticoat on....
but still no hair....

Her name is Halcyon.....

And I started on her hair... she wanted curls too......

We still have a long way to go....

She has a very sunny personality....

Who knows what she will look like 
by the time we have her hair done and her gown made... 
but it is a good start!

Although, I must say, I sense some sibling rivalry here....!
So that's it Dear Readers, that is all I accomplished!
It's all so Very Little.....
It feels like Next to Nothing got Done!


Monday, May 9, 2016

Unfinished.....


Tiny Progress....

I hope you don't mind, Dear Readers, if I skip about between my various projects, because I don't have a whole lot to show you on any of them! I apologize for the blurry photo you see above... the weather has been unrelentingly dreary, dark, cold and rainy for more than a week (until yesterday afternoon), making it difficult to take good photos of what little I have accomplished in my Mini Worlds! While I have been very absorbed in the Teeny Tiny Mini World recently, I have also been trying to make progress on the Exterior Trim for Hardwick Hall. Some of you might be familiar with this kit (The Willowcrest) and will be aware that it is Lavishly Adorned with ornate Victorian Woodwork... which I have to confess is a good part of its appeal! But Constructing all that Lavishly Ornate Woodwork Trim is an Adventure to say the least! It is all made up of layers of pieces you must punch out of the thin and splintery plywood sheets... and be sure to label them all carefully because they are confusing until you know how they fit together... and they all need to be sanded and sometimes glued back together because they are fragile and don't punch out easily! One of the sheets for this kit which included some of the skinny porch sections was badly prepared and the pieces were not easy to punch out. I had to use my exacto knife on the back side to cut through in places where the punching wasn't complete. Hence the parts needing to be glued back together... before I could even assemble the structure! But I managed to get it built to the best of my abilities, and fortunately the worst sheet was the one for the middle layer that would show the least on the finished porch. (And my story for the rough and broken parts is that any Old House must have very weathered wooden parts!) In the above picture you can see the assembled porch framework, still unpainted, propped in place to see how it will fit. This piece is not supposed to be attached until after most of the other trim is done... and it will need to be squeezed into it's spot between the porch floor and ceiling... a process that I only want to do once!

Here you can see I have painted the framework... 
first the primer, then the gray base coat 
and then the shiny metallic silver....
It will need more coats of the silver paint.

I had also recently finished the front gable ornate trim... 
and now I also attached the front attic window trim.....
Which also needed the exterior muntins added...

Which you can see here (sort of) 
along with the front balcony being tested for fit!
The balcony was much simpler to assemble, 
being mostly just one layer of plywood punch-outs.
It also needs another coat of the silver paint...
So it is not quite finished.

And while I was waiting for the paint to dry on all those pieces of trim, 
I was also trying to make the gowns for the Teeny Tiny dolls...
I started with a gown for Virginia in green velvet and silk....

(I apologize for the dark and blurry pictures... 
these tiny Ladies are really hard to photograph!)
With apologies to Lady Evelyn, 
I wanted her sister's gowns to have better sleeves.
So I cut a very narrow strip along the selvage edge of the fabric
(so one side of the cloth would have it's edge already "hemmed")
and glued it directly to the arms, starting at the back, 
and when that was dry, wrapping it around and gluing again.
Of course, I forgot to take any pictures of those steps.
And then I glued the green velveteen skirt around the doll...
(having already put glue on the underside 
to prevent fraying on the cut edges)
I am still trying to work out what material to use for her bodice....
 at the moment her neckline seems scandalously low!
I think I will try a thin strand of embroidery floss...
or perhaps just another piece of the selvage....
but at the moment this, too, is unfinished.

And while I worked first on Virginia's gown, 
it is on Salome's gown that I really tried some tricky cuts!

Here you can see her with just the sleeves attached.

Here you can see I have started with the gown itself.....
I spread glue on the underside of the cloth where the cuts would go 
before making the cuts, and let it dry thoroughly before cutting.
This way it prevents raveling, 
so I was able to cut a "v" neck for this gown 
and slits for the arm holes.
Here you can see I have glued the front part of the gown...
and am waiting for it to dry.

This is another angle... showing just the front part being glued....
(The sewing pin you see is useful for spreading glue in a very small space,
 and also for pulling apart the pieces that were not supposed to have glue get on them yet!)

Yes, another angle, showing the one side being glued in the back...
 letting it dry before the other side is glued!
This way you can get the pieces cut to fit as they are about to be glued.

And yes, Dear Readers, this gown is also Unfinished!
I think it desperately needs some delicate silver edging 
or a waistband at the very least!

See how Tiny she is?

Yikes, it makes the hand look enormous!

Of course, now they are eagerly waiting for their House....
(When they are not complaining about their dressmaker!)

Yes, Dear Readers, in spite of all the Unfinished pieces,
I have made some Tiny Progress!


Monday, May 2, 2016

Teeny Tiny Dolls


Pollyanna Goes Shopping....

I Think it was Inevitable, Dear Readers, that Pollyanna would come across that Fascinating Dollhouse Cabinet as she was browsing in a Trendy Local Shopping Mall, and that she would be smitten! She can hardly believe that she Never Knew that something as Marvelous as this Cabinet Dollhouse even existed! Where has this been all my life, she wondered, as she suddenly saw all the potential for making a one-of-a-kind miniature house! It didn't matter at all that she had Nowhere to put it... and she hadn't even asked about the price! She knew she had to bring it home with her! She hurried to find Arthur so she could show him her Discovery!
"Isn't it just Amazing?" she asks him.

Arthur isn't Quite so sure!
"What will you Do with it... ?" he asks.
"Well... I'll decorate it...." explains Pollyanna.
"It will make a Wonderful practice piece 
to try out different decorating..." she argues...
although she really just wants to fill it full 
of everything she has always wanted but never could have.... 
but she couldn't explain that to Arthur... 
he might feel badly that they 
don't have everything she ever wanted....
"It's so big..." said Arthur, trying not to sound critical...
"Where will you keep it?"
"Ummmm...." said Pollyanna... 
"I haven't figured that out yet....
But I'm Sure we can make room for it 
Somewhere in that Big Old House... 
even if we have to clear out the mess in the attic.... 
I could make a workroom up there" she added excitedly!
Arthur is not looking convinced!
"Can we even fit it up those stairs?" he asks.
"Of course we can!" said Pollyanna... 
determined to find a way.

And while Pollyanna is trying to convince Arthur of
 the Wonderful Opportunity that is This Cabinet, 
Dear Readers, I have been trying to dress the Teeny Tiny dolls!
Lady Evelyn de Paradise needed a Gown Worthy of her stature 
as the First Lady of The Teeny Tiny Dolls!
(Do remember to poke the pictures to see them larger!)

I started with a tiny scrap of maroon velvet 
that has lovely glittery flowers on it....
I glued it on as best as I could and made a "train" at the back....

Of course, the cloth is a little bulky... 
but I was determined that I use this fabric!
And then I added a ribbon 
wrapped around her torso for the top of the gown....

Surely it is a Gown from the House of Worth at the very least!
The signature asymmetrical glitter "embroidery"
 and the long train that resembles a peacock's tail....

Of course, it is not easy getting good pictures of this gown!

Is that better?
I know she looks so matronly... 
but she is the eldest of seven sisters....
and so far, she is the only one who is married....!
Here, let me introduce you to a couple of her sisters...

Please excuse their nakedness.... 
we are just getting started, after all!
Here I have painted several of the little people...
and then I add their hair....

This one is Virginia..... she is the next eldest sister.
I start by gluing a "knot" of sewing thread to the top of the head....

And then when the knot has completely dried, 
I gradually add glue to the thread and wind it around the head...
Eventually it looks like a hairstyle with a bun at the top.
But I wanted to try something fancier on the next sister....

I wanted to try to make some curls....
This sister is named Salome...
And she is probably too pretty for her own good!

Once I had added enough curls, 
I wrapped the thread around the bun the same as for the others...
And then I needed to give them each a lace petticoat....

At which point, Lady Evelyn came by to see how they were looking....

Clearly, we have a long way to go!

But Lady Evelyn has had a lot on her mind....
She is trying to find appropriate housing for all of them....

It is not easy, because nothing seems to be Ready for living in....

Or it is completely the wrong scale!

"But perhaps something very nice 
can be made of this one", she is thinking.... 
When suddenly the house is opened wide...!
"Oh", says Pollyanna in surprise.
"Look, Arthur!" she exclaims. 
"It even has a little doll inside!"
"We'll have to bring her home too...!"

Well, Dear Readers, Clearly I am 
just getting started with the Teeny Tiny Dolls....
And Pollyanna is just getting started with her Shopping!


Monday, April 25, 2016

The New Dollhouse....


It Was Just A Matter of Time....

I suppose, Dear Readers, that you want to see the Tiny roombox in its proper location on the bookshelf in The Folly Parlor. But I must tell you that it is incredibly difficult to photograph it there! I cannot seem to make the camera focus on the roombox, so it is always just a little out of focus! At least the morning sun was shining brightly on Saturday, allowing me to get this picture in the best possible light. It is not completely finished, there are still one or two details I think I want to add, but I was not able to accomplish any of them over the weekend. It was one of those weekends where I seemed to do a lot of little things that didn't add up to anything noticeable, and certainly no steps crossed off the lists!

( Where it all began... The Lovely Old Dollhouse.....)

I have also been aware in the back of my mind that last week was the Sixth Anniversary of this Blog...!!! (How does the Time go so fast???) I have debated having an anniversary drawing... but have been too disorganized to pull one together... so I mention this as an aside... that I might get one organized... so stay tuned! I also debated trying to do a "Review" but.... that just seems Exhausting! I cannot begin to summarize the Adventure that it has been for ME... connecting with so many Wonderful, Inspiring, Creative, Generous, Talented Miniaturists from All over the World...! I just Never could have Imagined how enriching and supportive and amazing this community would be! Thank you ALL for sharing yourselves and your creations in this amazing Blogland! I hope it continues being an amazing Adventure for many more years!


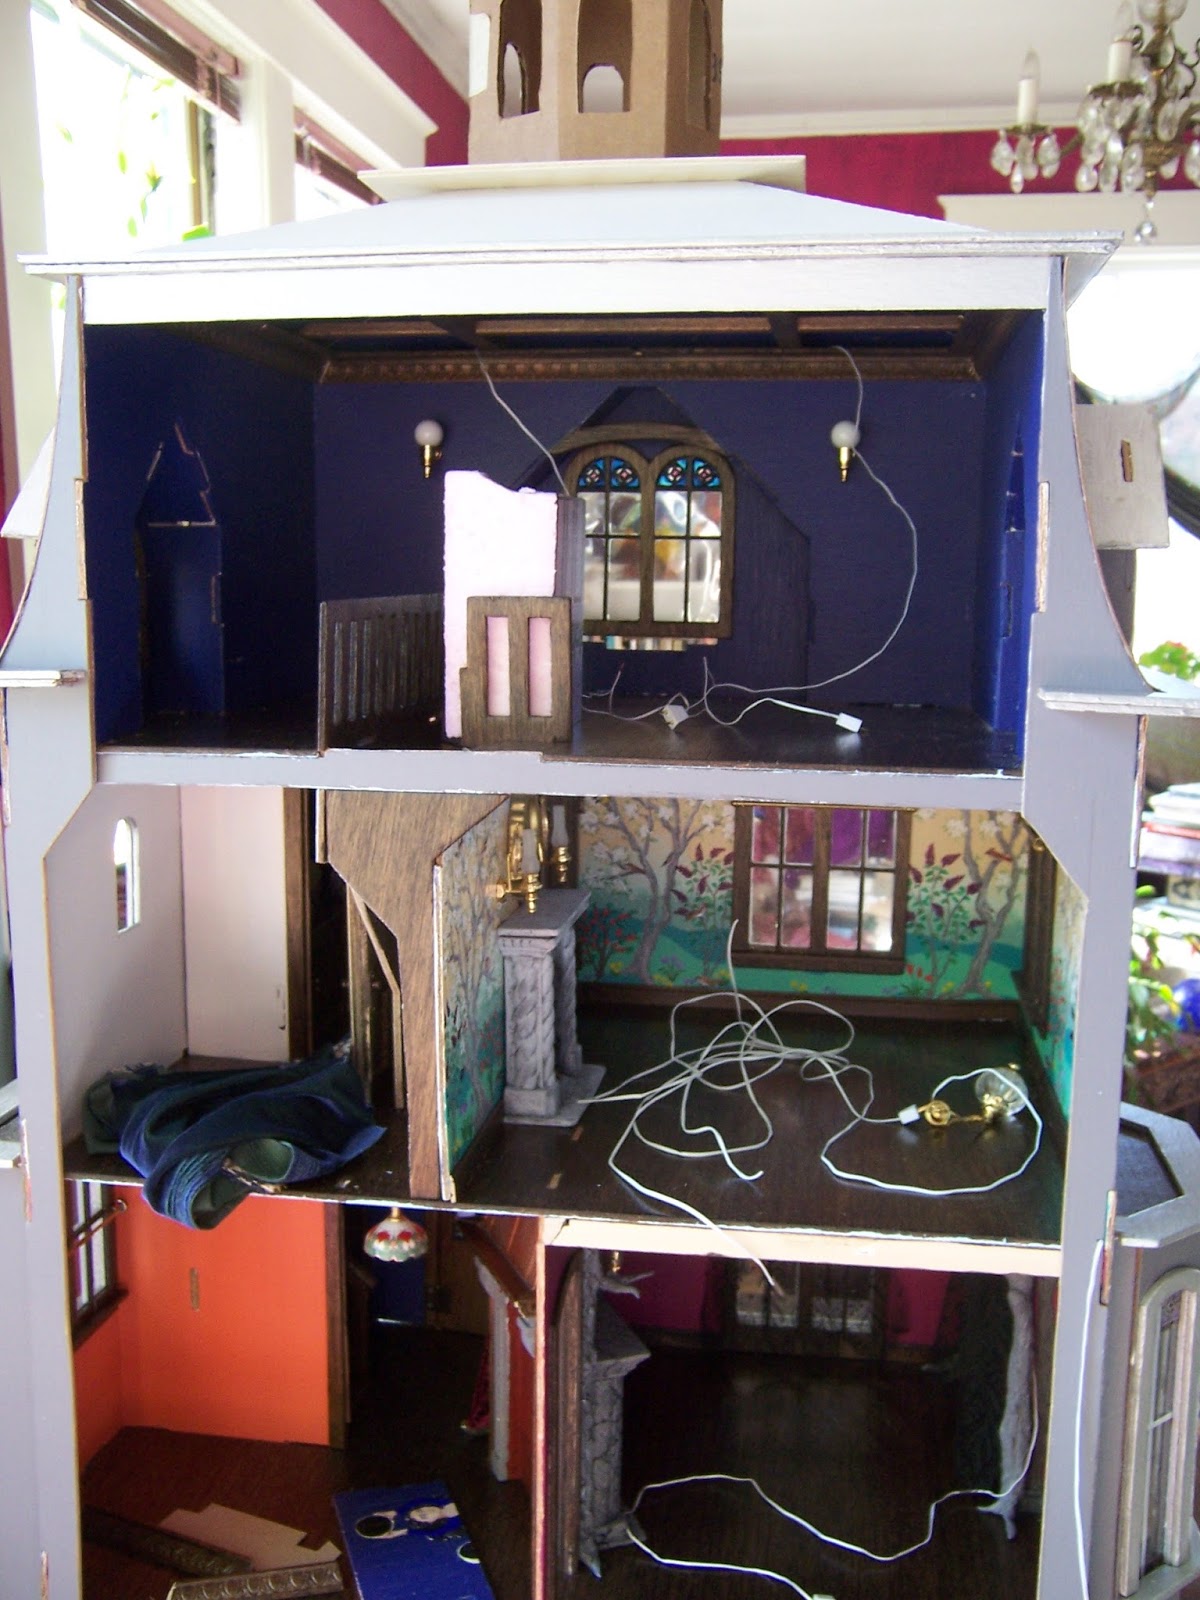
 As for the weekend.... I managed to work a little more on the attic of Hardwick Hall! Remember that LIST I made of All the steps I needed to accomplish before I glued the side walls in place? I know, it was a while ago... but One of those steps was to figure out the Wiring for the attic lights! So far the majority of the lights in this house are on the central wall, and the wiring goes down behind the kitchen hearth to the basement where it connects to a plug strip. Well, my Plan was to add sconces to the attic walls and to run the wires around to the back of the house and down the outer corners to the plug strips. These wires would eventually be covered by the corner trim of the house. Well, I got a little ahead of my plan, and glued the Mansard Roof onto the sides before I remembered to run the wires for the sconces..... which meant I had to Make a New Plan! I think the New plan will work as well as the old one so no harm was done and I did not have to remove the Mansard roofing! In the above picture you can see I have attached two sconces to the far wall, one on either side of the window.

Here you can see they are being tested..... 
it is such a dark room and it was a dark day.....
But the lights work!
The New Plan is to run the wires around to the back 
above the ceiling trim where they will not be visible. 
It will probably be easier this way!
I still need to splice extensions onto the wires 
because they have so Far to Go to reach the plug strips!
I think there will also be at least one overhead pendant light.... 
but the ceiling is still being designed... 
so I am not at all sure where those wires will travel!
I know it is not very visible in the above picture... 
but there are stars on the ceiling....

Well, of course there are!
But so far I have not been able to get a satisfactory photograph 
of them with the ceiling panels in place!

And Another small thing that I started but did not finish...

Was adding my favorite Silver paint 
to the table and chairs which will go in the Dining area of Hardwick Hall.....

It was a Very Gloomy morning.... 
and they probably need another coat of paint....

And there will be some other decorative details... 
so they are far from finished.... 
but I do think they look wonderfully... Spectral!
But what about the "New Dollhouse" I hear some of you asking?
Well, I was wandering through the Internet recently during my lunch break at work, 
and stumbled across the "Pickering Manor Dollhouse"!
It was Love at First Sight!
And it arrived Today!

Yes, I am in Trouble now, Dear Readers.... 
An entire Mansion in 1/144th scale!!!

It is one of those purchases that Surpasses the wildest expectations!

The interior is not divided into rooms.... 
so I can design them as I see fit.....!
Even the attic opens!!!

And just to see how the scale looks with my Tiny Roombox....

Yes, there is ample room for elegant interiors!!!
And if one wanted to, 
it could even serve as a bookcase in 1:12 scale!

But Where oh where am I going to "house" this "dollhouse"?
I don't think it fits into ANY of my current Dollhouses!
Who does it belong to?
What era will it be a part of?
Will there have to be a New Dollhouse to house the Tiny One?
There HAS to be a Story......!
Ah, Dear Readers, this Adventure is Far from over!
I have Always wanted a tiny dollhouse like this one!
I guess it Was only a matter of Time 
before I got another New Dollhouse!