Tuesday, February 18, 2020

Lucky Winner!


Legos and Other Little Things....

A Few weeks ago, Dear Readers, I was lucky enough to be the Winner of Noelle's giveaway on her blog Nono mini Nostalgie! I could not believe my good fortune to win her teeny tiny mini Lego set! My sons' favorite toys were Legos (and we still have a big box of them!) so I was enchanted to see them in mini on Noelle's blog. But for some reason our emails would not connect to each other... so after a couple of tries both ways I put my mailing address on her comments so she could send me the prize. It worked and the little package arrived last week in my mailbox. I tell you, I am always amazed that a little parcel can cross the Ocean and reach its destination without mishap!
But here it is!!! 

The little box itself is a tiny wonder...!

But the contents are beyond amazing!

Can you believe how perfect these tiny Legos are?
I feel so Lucky to have them!
Thank you, Noelle, for sharing your treasures!
They are Awesome!

And in another way I also feel very lucky, Dear Readers,
 because I have had a few alarming set-backs
 with my stone floor for The Dollmaker's Studio....
which might have turned out alright after all!

You might recall that I had showed the floor
 with the newly applied grout all dry and ready for "dirtying up"....

The pale color of the dry grout was too new and
 clean looking for such an "old" stone floor!
So I mixed up a watered down acrylic mix of brown and black
 and began to brush it onto the floor, 
planning to wipe most of it off the stones 
but leave the grout a darker shade.

I started in the back corner where it would naturally be very dirty...
and quickly realized I had not swept off the dry grout residue
 from the original application.
 It would be too gritty if I didn't clean it first.
So I did a little careful sweeping... 
only to realize that the grout was lifting out of the cracks...!!

Yikes! That was not supposed to happen!
Since most of the grout was still in the cracks,
 I decided to go ahead with the "dirtying" process... 
and fill in gaps later if necessary.

You will understand if there are no pictures of this part of the process...!

As I brushed on the dirty water.... 
the grout just melted... 
apparently it had dried to dust!!
 It was really very alarming....! 
So I just "dabbed on" the color... 
and wiped it off with a paper towel... 
and where the grout "lifted" I smeared it back into the cracks 
with the wet paint mixture...
And then I let it dry.... again....!
I could not get the paint tones to mix carefully.... 
it was scrub and dash and smoosh and dab....
Yikes!!!

Here it is part way dried....  
At this point I couldn't be sure
 if I was going to have to scrub it ALL off and start over.

So the next morning I had a closer look
 once the "grout" was dry again.
I was planning all along to add a sealer coat of matte varnish, 
and decided to give it a try
 in spite of the gaps and the uneven colors..... 
it is supposed to be an Old floor after all.

Of course, the newly applied varnish 
just adds a milky looking glossy sheen.... 
so it is really hard to tell how it will look when dry....
But at this point I was telling myself 
that I could just  cover the whole floor with a carpet....
(possibly part of the plan anyway...!) 
so who cares how it looks?
(Yes, I Know.... I would know anyway....)
So I let it dry and refused to look at it for a couple of days!

And when I did look at it again,
 I scuffed the tiles a bit with a scrubbing sponge.....
 and decided that they might not look so bad after all!

There are a couple of spots where I will 
"repair" the missing grout with a paintbrush....

 
Somehow, Dear Readers,
 the floor seems to have turned out alright....
and I guess I am starting to feel like 
I'm a Lucky Winner after all!

Monday, February 10, 2020

Painting Bricks.....


And Grouting Stones.....

Before I could progress any further with the floor of The Sugarplum Studio, Dear Readers, I needed to complete the fireplace that stands between the doors on the end wall of the ground floor room. This was because in order to add the grout in the floor, the fireplace needed to be in place. And if I were to add egg-carton bricks to the fireplace, I would surely wish to do that before I got out the grout, so all the grout could be accomplished at once. And even if I decided to just use paint for the bricks, that would be easier done before the fireplace was attached. As I was debating the merits of paint versus three-dimensional egg carton bricks, I was thumbing through an old book I have about miniatures. It was talking about the "Nuremberg Dollhouse" one of the oldest known "baby houses", built in 1639, and mentioned that paint was used throughout the house very effectively to suggest three dimensions where only two existed. Aha! (thought I) If paint alone is good enough for the Nuremberg House, then surely it is good enough for the Sugarplum fireplace! So I jumped right in and began painting the faux bricks. In the picture above you can see the beginnings... just rough covering of the cardboard with a mixture of brick-ish colors. I use red oxide, burnt umber, alizarine crimson, black and white mixed in varying amounts.

It is best to keep it very rough and imprecise.
Then I started to add the rough "grout" lines in gray.

The spacing is not precise....
The effect will be not closely examined when done...

Then I started in making the bricks...
Trying to keep them in line....
but not being too precise.
(This will mostly not be visible in the end....)

(Please don't get out your rulers!)
 
Testing the hearth in place....


Then it needed more soot on the bricks...
And testing it again.... I think it will do!

Time for Glue!
(And those trusty sophisticated clamps!)

And then finally, Dear Readers, it was time for the grout!
I don't know why this step always makes me so nervous....
but it does.
I spread the mixture over the floor....
it is such a small area it didn't take long.

And then I wiped the excess off with a damp sponge.
It really didn't take long at all!

It didn't take off enough of the "glossy" effect of the polyurethane....
but I will be "dirtying" it up a bit when the grout dries.

When the grout is dry it becomes too "clean" and new looking.

The grout is just too invisible when it is clean...

But I really like how it makes the stones look more real!

Well, Dear Readers, that is as far as I got.
Perhaps you can tell me which is more faux... 
the bricks or the stones?


Monday, February 3, 2020

Sugarplum Studio.....


Shedding A Little Light.....

Some of you, Dear Readers, might recognize this picture as it was the setting of Last Year's Christmas Card, but that is not why I am showing it here now. It is simply a way of showing you the challenges I face with Lighting my own Studio in order to get good pictures of my projects. This room I call my large studio is really meant to be the living room in my small house, but I have it set up as the dining room because it is the only room big enough for the dining table and the hutch (which is off to the right in this picture). And a "dining room" in my life has always ended up being where I work because the table begs to be used! And after a while it just becomes my studio and I no longer pretend to have a "dining" room! And because this house is an older house with limited electrical fixtures... the only "overhead" light in this room is the candelabra you see... yes, it really is only candles! I have one old table lamp on the table and one old standing lamp that can be repositioned depending on where I am working. I also have a couple of old clamp lamps which sometimes are used to add light to dark corners... but they are tricky to manage as they sometimes un-clamp themselves in dramatic ways. I have one small point of use table lamp for the cutting mat work area to ensure good light in close detail work. And that is pretty much it for the light in my studio! As you can see, it is dark in all the corners and the "pool" of light under the standing lamp is the primary available light. And at this time of year, while the days are lengthening noticeably, it is still dark in the evenings when I might want to take photos of my work progress. So I hope you will understand, many of my photos are just not well lit... but I might only have that picture to show my "progress".

And I have been making some progress!
The "stone" floor of the Sugarplum Studio got a coat of primer.

And then I painted the first coat of color....
 a light gray that I use all the time.

I also started to position the rafters,
(which you can barely see overhead)
 but they are not attached as they will just get in the way
 while I am working on the floor and walls.

Here you can see I am testing some paneling options...
I have had these panels for years and there are just enough for this project!
 I will be using a different color on them.
And you can also see that the Sugarplum kit is a Small kit!
The main room here is only 9 inches deep  and 14 inches wide.
(Hmm... I just realized those dimensions 
are similar to my RL studio room dimensions!)

But the first task needing to be finished is the stone floor!
I began painting the dark gray into all the cracks
 and adding some "brushing" of  dark texture on the stones.

Again, these are the same two grays I have used for years
 to make the "stones" in my projects... the Castle in particular.
And I realized that I have a natural tendency to think stones are gray...
 rather than yellow-ish or red-ish or brown-ish..... 
because the rocks in New England are mostly
 gray slate and gray granite.
(I wonder what color the stones are where you live?)
 
Next I started to dab on bits of ocher and red oxide and burnt umber
 to create some variance in the "gray" of my stones.
(This picture is terrible... ! )
But you can see I was very rough and random with the dabbing.

Then I began with the next layer of gray... the lighter gray again.
This time I dry-brushed it lightly over the whole stone
 and then used paper towel to smear it and remove excess paint.
 I didn't want the light gray to completely cover the under colors.
I have only done the stones in the left hand corner in this shot.

I think this shot is slightly better....
You can see that the gray paint is changing the tones, 
making them more uniform and lighter.

The stones on the left half have been done here.... not yet on the right.


Here the stones have all been "grayed" ... 
(but the lighting is terrible!)

That's much better!
I am not going to over-work these stones Dear Readers,
 because it is only a small floor which will probably have a carpet
 and be hidden by the furnishings too. 
But I wanted a relatively uniform look
 to the stones and a over-all gray-ish tone.
And  because I am planning on using grout with this floor,
 next I added the first of several coats of varnish to seal the paper surface.

Of course, it makes the stones look way too glossy.
But I am fairly confident that the grout will scuff up the glossy surface
 and it is better to add enough protection 
for the paper "stones" before trying to grout them.

And that's as far as I got, Dear Readers, 
working on the Sugarplum Studio floor. 
But I feel as though I'm finally making a little progress... 
And I hope I have shed enough light for you to see it!


Monday, January 27, 2020

The Christmas Card....


At Last...!

Well, Dear Readers, Here it is! I know my photos never quite do it justice. And the copies from the printer that go out to family and friends are always subtly different from the original. It is difficult to be the artist and to know that what is sent out is not really really Really exactly what I painted. This year the printed version shows much more "gray" than I had intended.... but the photo here does come close to the pure, brilliant colors I was painting. As always, it is 8.5 x 11 inches, pen and ink and watercolor paint on Arches watercolor paper. It is copied in the same size it is drawn, not enlarged or reduced. The details and vignettes are scenes from the happenings in my life over the past year. And as always, the setting has something to do with the Christmas Season. (It is intended to be a Christmas Card, after all!) The main stories this year were the numerous (Wonderful!) visits of Family to my little home. I saw every member of my immediate family during the Summer and Autumn! And of course, the work in my mini worlds had to be shown..... even though it was shoved into the corners and really only amounted to lilacs... and more lilacs... and more lilacs... and the barest beginnings of the Sugarplum Studio project. The Letter "S" is, I hope, Self explanatory! My Sister and I were amusing ourselves with searching out the number of "s" words involved in the drawing! So there you have it. It only took me one hundred hours of drawing, inking and painting.

And because I am slowly trying to find my way
 back into my mini projects, 
I did work more on the tiny Christmas Stocking.
And as I stitched, the masking tape holding
 the cloth in place kept giving way....

Making it impossible to stitch.
It is really a problematic method... it leaves
 a terribly gummy residue on the cloth, and doesn't hold very well!
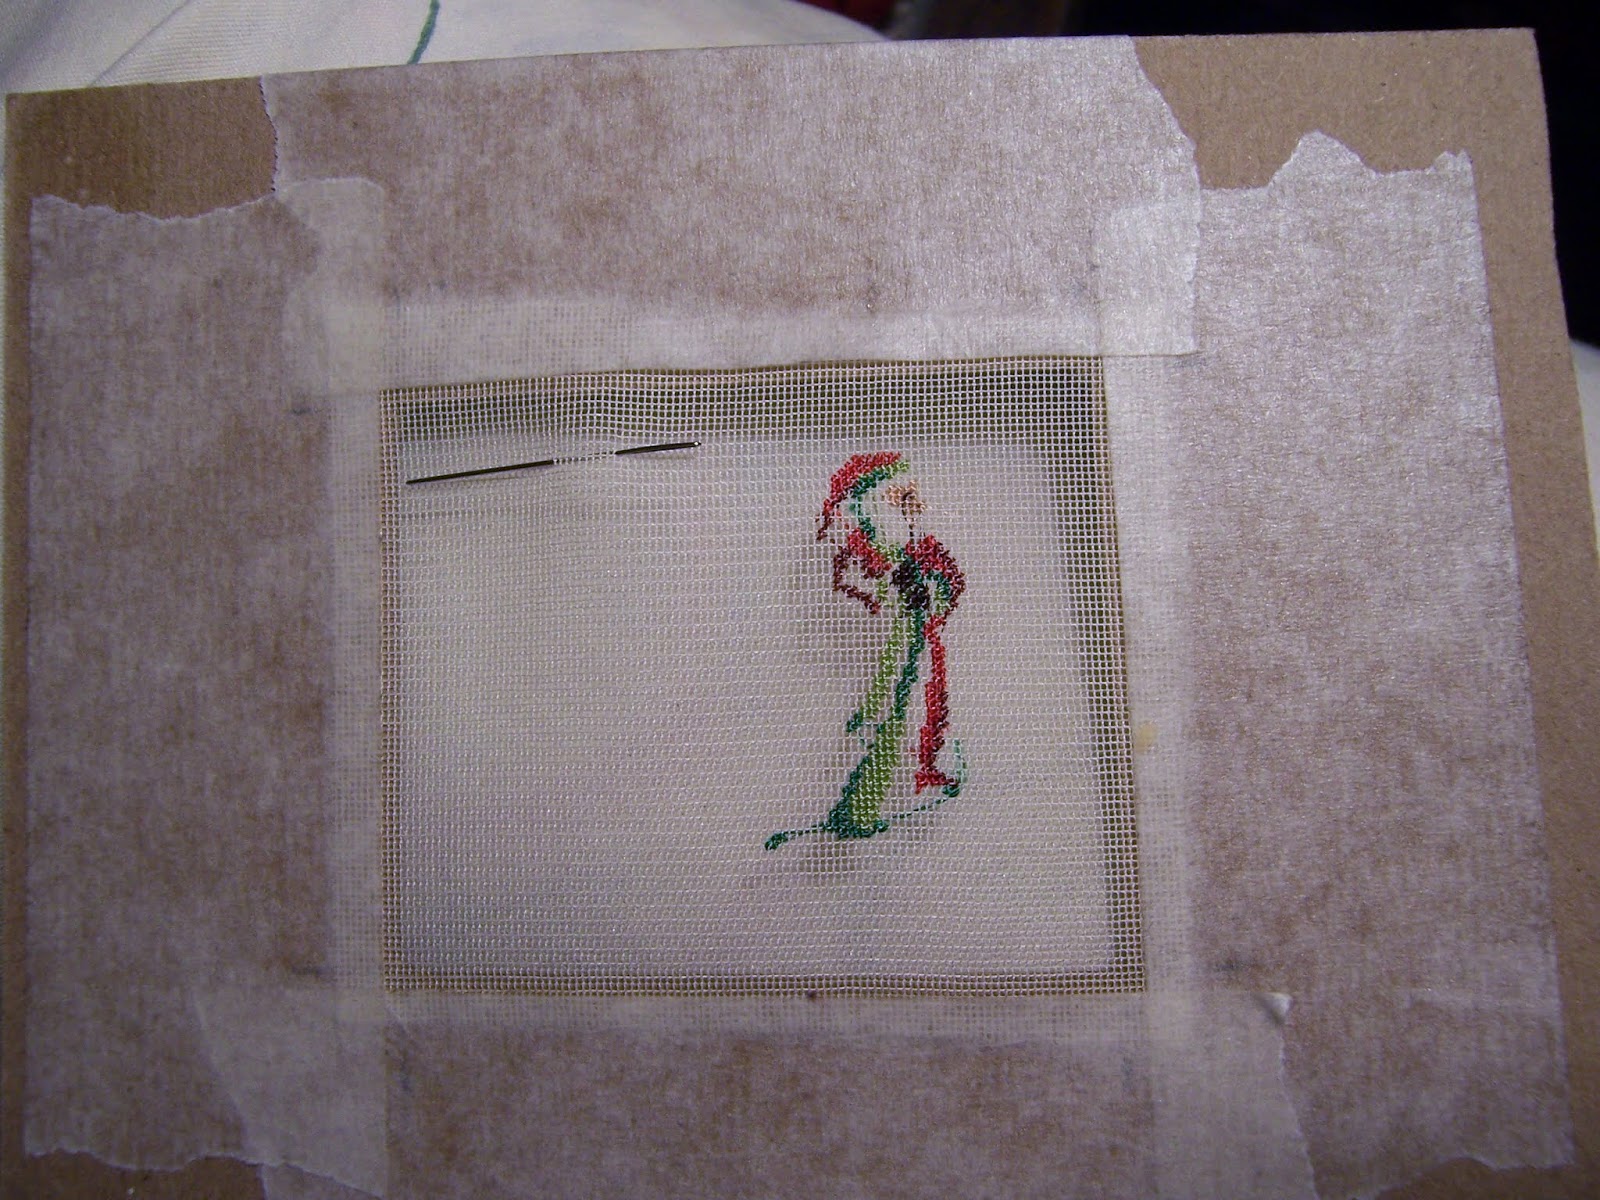
I peeled it back from the cloth and used sewing thread
 to bind the cloth to the frame instead.
(Sorry about the blurry picture!)

At least that allowed me to complete the stitching on the Santa!
But I didn't get much else done.
 Because I always forget that once I am done Drawing the Card...
 I still have to write and mail a whole bunch of cards!
So I hope you don't mind such a short post, Dear Readers,
and I hope you enjoy seeing the Christmas Card at Last!


Tuesday, January 21, 2020

Taking Stock....


After The Card....

Well, Dear Readers, I have finished THE Card... but I can't show you pictures yet because it would ruin the surprise for my Family. So while I await their receipt of the card in the mail, I have been racking my brains for something to show you on the blog. You will understand that there has been NO time for minis for weeks.... and weeks...... and weeks! In fact I can't really remember what I was working on ... other than the Sugarplum structure construction, which has also languished in the weeks of focus on the Holidays. And I will confess that I always feel a certain amount of "loss" or disorientation when I complete a card.... or any project that requires such intense and prolonged focus. It feels as though I must reacquaint myself with ME.... what I am doing, what I am planning... where I left all my parts and pieces of all those other projects.... ! Not to mention that Usually I am done sooner... and can begin Taking Stock sooner... right after the New Year is a good time to begin again. So I hope you will not mind too much if all I can show you is a few tiny stitches done on that tiny Christmas Stocking... (yes.... Christmas still!) which I started while visiting my parents in the Fall.

I had managed to work on it a little bit in November...

Hoping that I would maybe finish it by Christmas....

I made good progress around Thanksgiving...

But that is as far as I got before I really had to begin The Card.
And we know what happens after that!
So here we are weeks and weeks later
and I hope you don't mind that I have nothing else to show!
(And I apologize for the blurry pictures...!)
I guess I'll just have to keep taking Stock(ings)
now that I am done with the Card!

Tuesday, January 14, 2020

Not Yet Finished.....


New Year.... Same Old Story....

Well, Dear Readers, I hope some of you will Not be surprised to learn that I still have not quite finished painting the Christmas Card. It does seem to take me a little longer every year. I have already put hours and hours and Hours into it.... and it is nearly done... but it is not a good idea to rush the final parts. So I will take the Time that is needed to complete it to my satisfaction. Which leaves me to lament that I have nothing New to show you here! Except for this small teaser.... a glimpse into my workroom as it now stands.... all those Unfinished projects.... waiting! (And as I am sure you are aware... what you see here is nowhere near All of them!) Yikes!

Upstairs, beside my drawing table
 where I am painting the card,
 the ponies are waiting and the hounds keep watch
while Rose Thorne Cottage sits Teasing me....

And the sun shines in at this time of year...

Illuminating the beauty 
and the potential that awaits...
for some time......
When I have time.
(Jodi's chair has found a home for now...)

And downstairs.... where Hardwick Hall has been shoved into a corner....
The sun reminds me of so much I have left undone....
*Sigh*

Well, Dear Readers, I promised you
 this has to be just a little Teaser.... 
it's back to the drawing table for me,
 or I never will get the Christmas Card done!


Monday, January 6, 2020

Taking Down Christmas Decorations....


It Has To Be Done.....

Well, Dear Readers, I am sure you feel the way I do about putting away all the Christmas decorations.... Didn't we just get them all put up? Is it really time already to put it all away for another year? (Where does the Time go?) Certainly, my RL trees were evidence enough that it was Past time to take them down, dried and crisp and sagging as they were. So I spent my weekend removing all my sparkly treasures and finding all the right boxes and wrapping them safely for another year. The closets are crammed full once again and the empty spaces where the trees stood feel.... empty. But good in their own way. As if they are ready now for whatever is next.... until I rearrange the dollhouses again and the empty spaces are suddenly full of projects! And then I remembered the Dollhouse decorations too.... Charles was just at the point of deciding it was time to take down the tree in The Lovely Old Dollhouse.

"I think it's time to take it down now" said Charles.
"Well, I suppose it is getting to be that time," said Helen. 
"But the lights are so pretty... I just want to look
 for a few more minutes..." she added.
(I couldn't help but agree with her...
 although I know Charles is looking forward
 to having his favorite chair back in his spot...)

But the Time had come!

And when everything was cleared out and put back to rights......
"Doesn't that feel better..." asked Charles?
"Well.... " said Helen.... 
"I know I will think so in a little while."
"Uh-oh...." said Charles, looking over her shoulder...
"I missed the little tree on the Mantel..." he added.

"Well.... then let's leave it for now...." said Helen.
"Just a little comforting memento..." she added.

Well, Dear Readers, I hope you have all had a wonderful Holiday
 and that you are well on your way in your new year projects!
Alas, I am not quite done with my Christmas Card, 
so I will be still be looking back at the Old Year for a while.
 But I did take down my decorations... 
It just had to be done!