Tuesday, August 8, 2017

Setting The Table.....


I Promised you Plates....

It was quite some Time ago, Dear Readers, that a dear blogfriend sent me a selection of beautiful ornamental ribbons and trims as one of the wonderful "giveaways" on her blog, and here you can see some of them packed into an old wooden trunk where they are still awaiting special projects. While she has not been blogging for a while now, her Treasures are still giving me joy! And last week when I rashly suggested I could make some teeny tiny plates for the Teeny tiny dining room, it was because I had remembered these trims! How could they Possibly make me plates, I hear you ask? Well, if you look closely you will see that several of those trims are made of little sequins!

Just how little the sequins are was the only question in my mind....

And if I carefully painted one..... 
would it be the right size to serve as a plate?
See the painted one on the right?
(Do remember to poke the pictures to see them larger!)

Can you see I have painted one to resemble china?
I was happy to see it looks about the right size!
So I quickly made five more....

Well, perhaps not quickly..... 
because the method requires several coats of paint.....
which must dry between coats.
Above you can see the white blobs of paint on the plastic, 
and each one covers a single sequin.
The surface tension of the wet paint covers the hole in the sequin 
and when the layers have dried thoroughly, 
you carefully pull the "plate" off the plastic.

Here I have added the decorative details before pulling them from the plastic. 
(It is much easier to paint them when they are stuck to the plastic!)

Here they are removed from the plastic and with their edges carefully cleaned up....

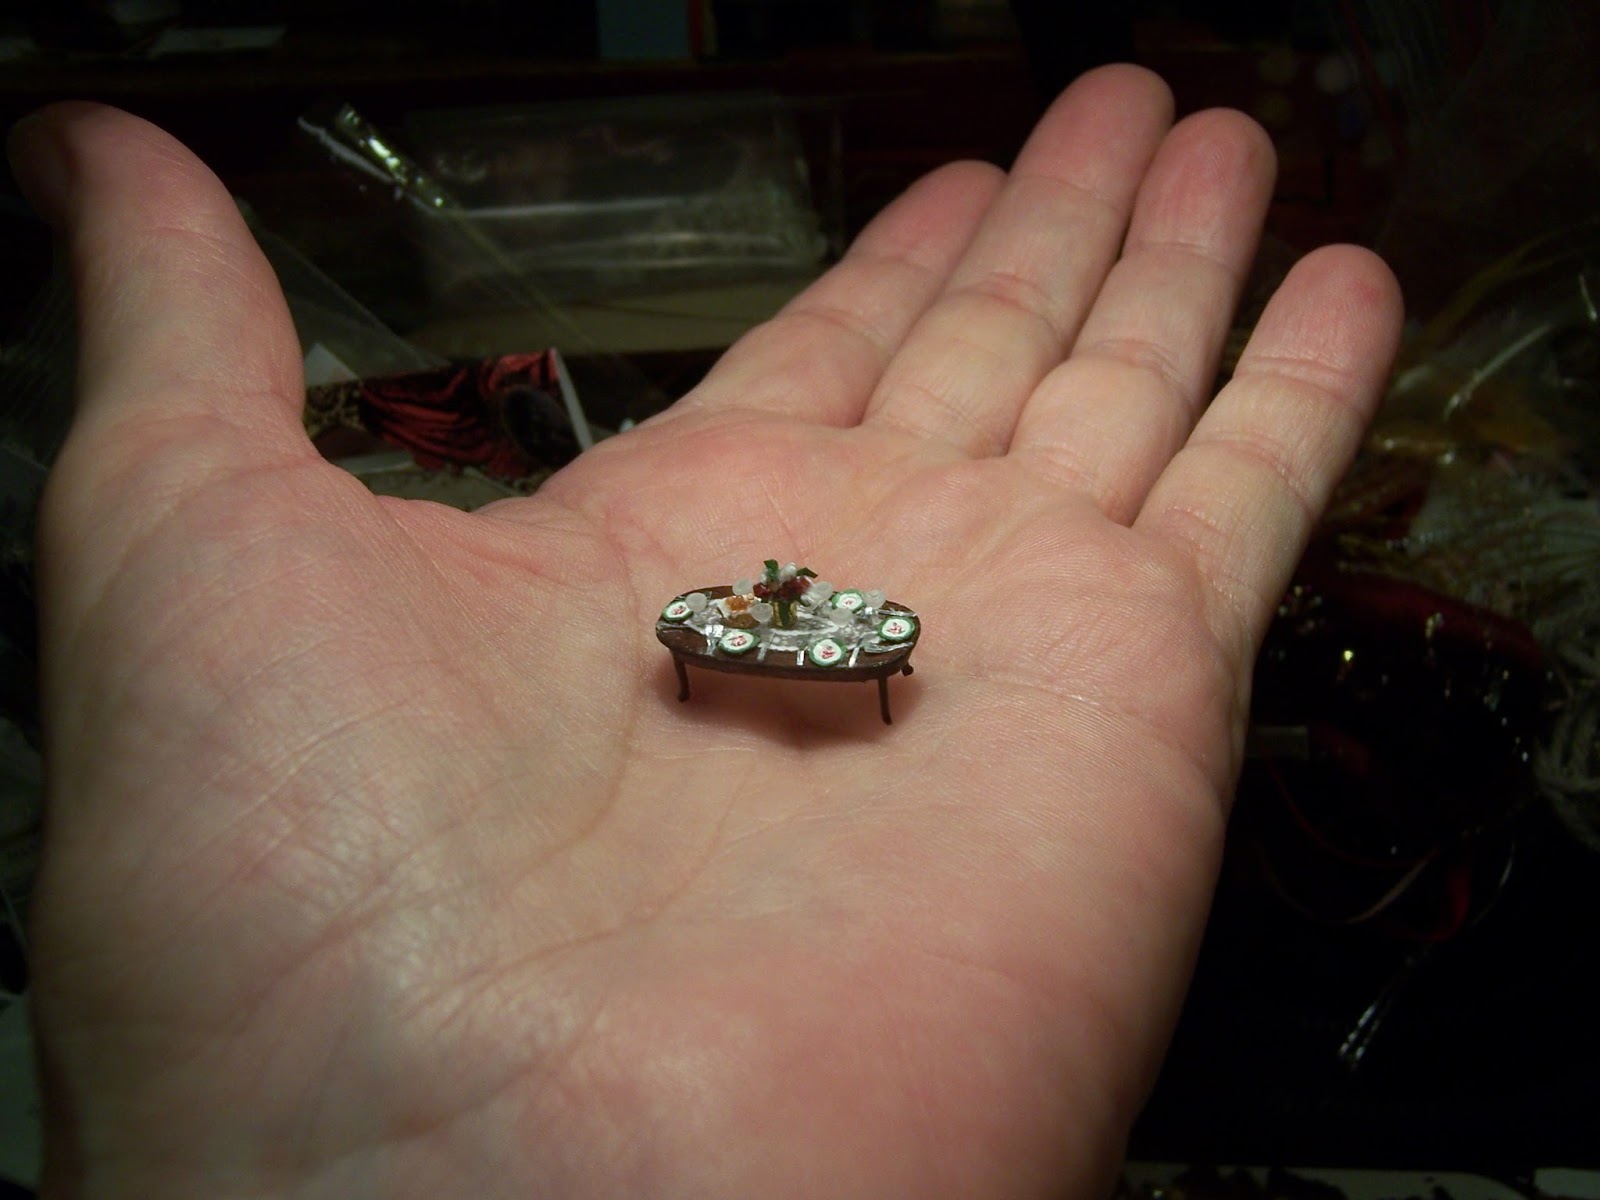
And Ta-da!!! The plates on the table!
But maybe we want to see how they look with chairs too....

Oh, and did I mention a basket of rolls....?

Can you see it there in the front? 
I know it is a little blurry... 
it is so hard to convince the camera to focus on the tiny things!

How about on the table.... can you see it there?
(This is made from a blob of glue that was dried onto a toothpick, 
painted to resemble a basket with a linen cloth 
and then tiny orange no-hole beads glued on top! 
Sorry I forgot to take pictures of the progress!)
 
And then I realized, Dear Readers, 
that if we were going to have plates and a basket of rolls.... 
we would need to set the table properly with glasses and utensils too!
(Who had thought that far ahead???)
So I pawed through my beads to see if I could find any 
small enough to pass for glasses....

I found some tiny milky white ones.....
which needed to be tested on the table....

Can you even see them there? 
I am less than impressed.
These are not what I wanted at all!
And then I remembered something Dear Readers, 
that I clearly had been saving for just this sort of occasion.....
In one of my little boxes somewhere.....
Aha!

Do you see what I see?

Here.... look closer.... 
Do you see wine glasses?
(This is a piece of plastic used to attach price tags 
to clothing in the department stores!)

Carefully cut apart.... 
with a dab of "The glue trick" to make the foot....
I was giddy with excitement!

And can we see them on the table?
Ooohh, I think they are Perfect!
And can we see the table in the dining room....?

Wowee, I do love those wine glasses! 
But now we are faced with the challenge of silverware.....
Tiny knives are not so hard......

Snipped from an aluminum foil baking pan.....
 
Here you can see it in better light......! 
But the Forks.... arggghh... 
the forks are not so easy....

The first couple were much too big.... 
here you can see me testing them.....
So I persevered in trying to make them smaller....
The operative word being "tried" .... 
with marginal success.
The forks still look too large.....!
(waayy too large!)
But perhaps we should see if it is even noticeable when in the dining room?

Especially when all the other furniture is in place,
 and the chairs block part of the view....
Are they small enough...?
(Yes, I know... you are saying "what forks"?)
 
Well, Dear Readers, 
I think you will need a magnifying glass 
to even see them with all the other pieces to look at....!
Especially those wine glasses... I Love those wine glasses!
I might have promised you plates and a basket of rolls....
But I ended up having to set the whole table!
(And we won't mention the hound unless I succeed.....)
 

Monday, July 31, 2017

A Feast of Tiny Things....


I Had to Try...

I was so Carried Away with Tiny things last week Dear Readers, that when I signed off at the end of my Post, I actually wrote on the spur-of-the-moment that there might be a few more items made for the bedroom.... perhaps a footstool and tiny slippers or a shopping bag with gifts inside...! Well, it was late and I was getting tired, so I didn't think too much about it. Until I thought about it... and Then I wondered if I Could Possibly make those items? Hmmm? Well, I had to give it a try! I started with the shopping bag.... you can see the beginnings in the picture above where I have glued loops of sewing thread for handles to a scrap of patterned tissue paper....

Then I folded the sides of the bag, making creases 
at approximately even spacing... it was hard to tell!

Here I have folded the bottom flaps together... 
after cutting slits at each corner.... not easy!
Somehow I got glue in the bottom to hold the flaps closed!
Can you see it there?
(I know, you will need to poke the pictures... 
And pull out a magnifying glass!)

Then I added some red tissue with a bead inside... a "gift"......
 but also for added weight...
And we have to see it with the bed... is it the right size?

Here, can you see it now?

And can we see it in the bedroom....?
I think it works!
And you can see I have also started a little footstool...
But I have not finished it yet. 
I need to finish all the "upholstery" on the wing chairs too.
And what about the slippers I so rashly suggested...???
Well, I had to try....

I started by gluing some textured silk to a piece of card stock, 
and then I glued a tiny piece of lace trim to the surface, 
with "bumps" where the lace is not glued. 
I let it dry thoroughly. 
(You can be forgiven for thinking it is a piece of lady's underwear!)
Then I cut it into tiny strips and trimmed them to the shape of footwear....

Can you see them there?
But the real question is... 
do they look the right size in the bedroom.....?

Can you see them in the back by the Victorian Dresser?
Yes, you will need to poke the pictures again!
And maybe the lady of the house has big feet.... 
but I think they work!
 
And that is just the Beginning, Dear Readers, 
because I was on a Roll!
The next room in The Secret Christmas House is the Dining Room.
The first pieces went together with no trouble....
 
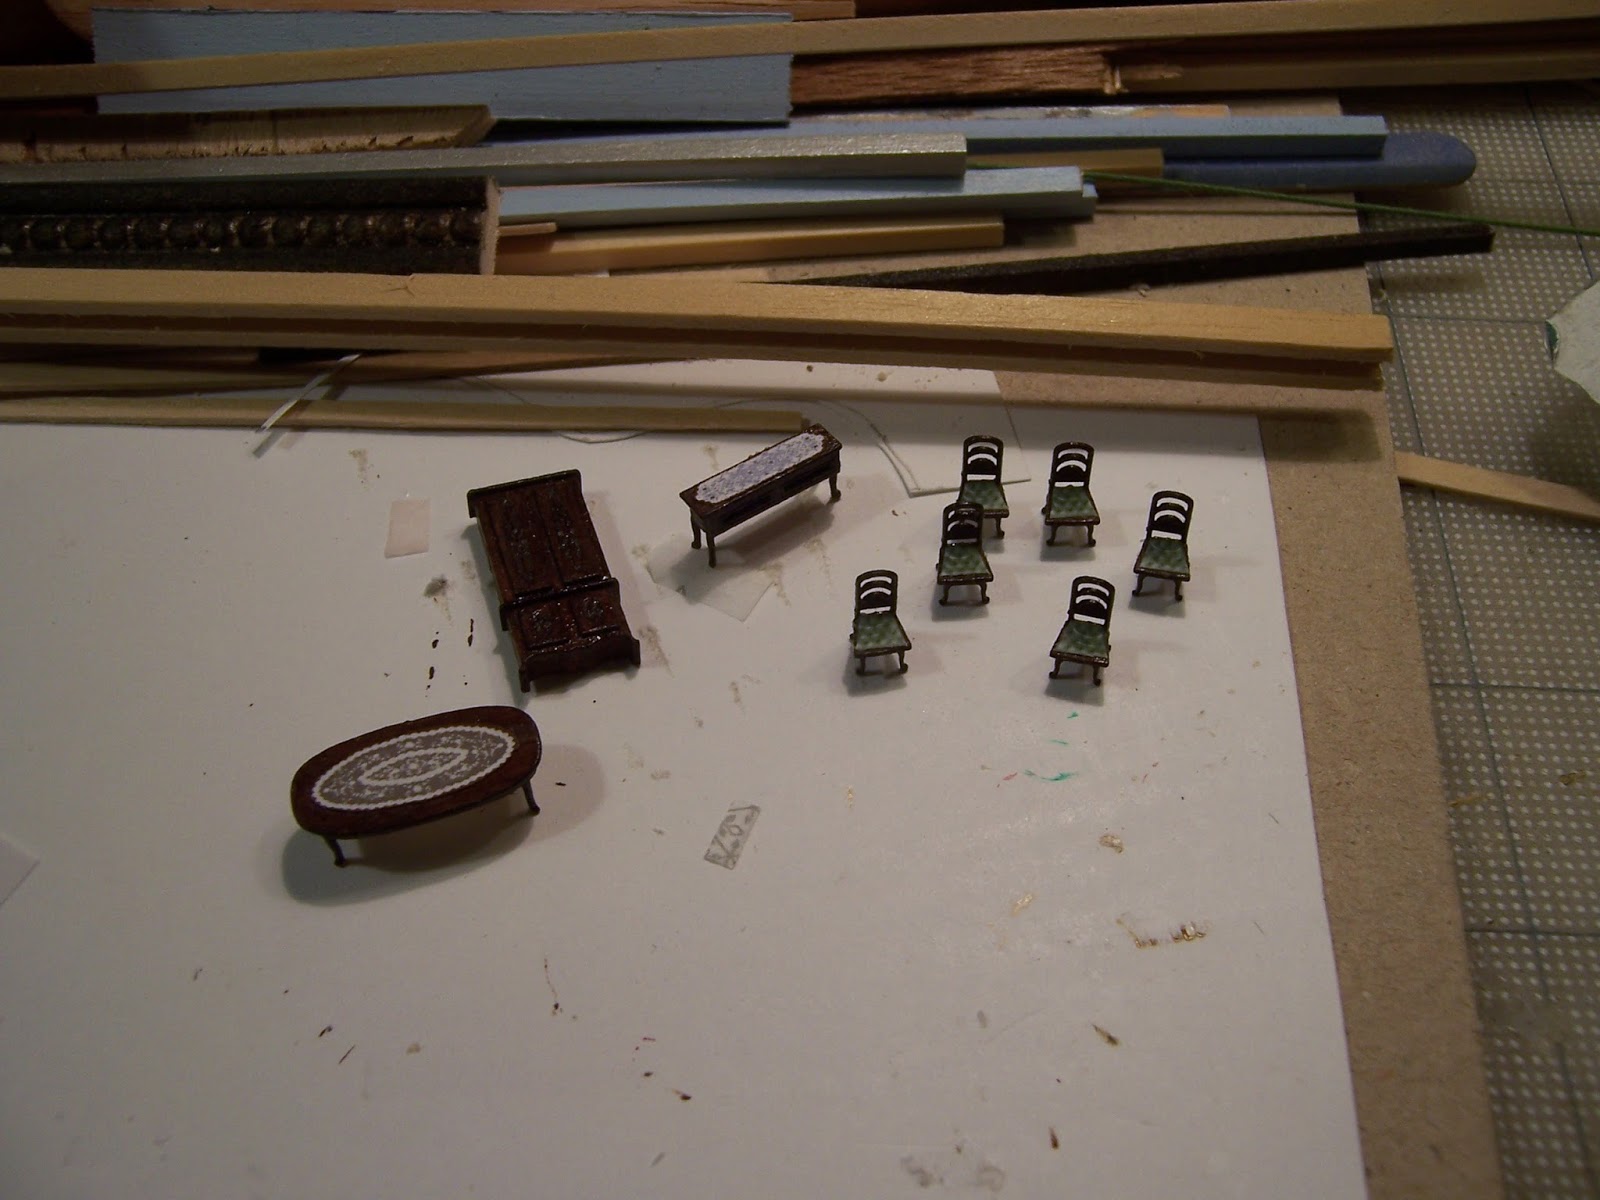
There is a tall closed cabinet and a buffet table
 as well as the large dining table and six chairs.

All those spindly legs did require quite a bit of careful glue application!

I had already assembled several of this kind of chair.... 
so I knew that I would want to have a "perch" for them 
when gluing the front legs in place!

Like so!

Here is the set ready for painting.....

But I was impatient to see them in the house.....

I almost decided I liked the lighter wood look, Dear Readers, 
but I decided to stay closer to the era and style of the kit,
 so I went ahead and painted them the dark brown color recommended...

And then began the varnish and "decorations"......

Each of the tables has a "lace" cloth just as the sitting room tea table had...
just a paper cut out with the "ground" color the same as the painted wood....
 which was the biggest reason for not going with a lighter wood look!
And the chairs got their "upholstered" seats with no trouble.
Then we got to the fun bits! 
I had forgotten how many "little" bits there were for this room!
Starting with the bouquet for the dining table.....

Can you see it there???
(I know you will get tired of having me ask that question!)
The bouquet is "embellished" with tiny scraps of greenery (just dried paint) 
and blossoms made from just the knot cut off a piece of thread!
It is glued into a large brass bead....

And placed in the center of the table!
And then I started on the next tiny pieces... 
the candelabras and the chandelier..... 

These are laser-cut pieces of heavy gold paper... 
very delicate and requiring that you notch them together 
at just the right angle and let them dry.
Then you paint the candles white.
I almost ruined it by trying to paint the candles first.... 
and in the way I was holding the piece with my tweezers... 
I almost crushed the tiny slot where they notch together....! Yikes!
But I was able to rescue it and let the glue dry before finishing the painting. 
In fact, I then decided to use my "glue trick"
 to create three-dimensional bases for the candelabra... 
if you look closely you will see the glue on the base partially dried.
And I got so caught up in making the next pieces, 
I forgot to take any pictures!

This kit comes with two "glass" decanters for "spirits" for the buffet!
They require separating from the sheet, 
cleaning the burn residue with alcohol 
and then painting to resemble sherry or brandy
 or port or your favorite beverage!
Can you see them there on the buffet with the candelabra?
(Please poke the pictures!)
And then there is another little tray painted gold....
with another Teeny-Tiny (really huge!) cake.....

And I wanted to let a certain Little Furry Friend know that 
This cake is a vanilla cake layered with marzipan and strawberry ganache, 
frosted with dark chocolate fudge frosting
 and crowned with a halo of fresh strawberries!
Can you see it there???

But please bear with me Dear Readers, 
because I am still embellishing these little pieces....!
The candelabra, once their bases were well rounded (the glue trick)
  were painted gold and the candles themselves were painted white.
And then I added a touch of glue to the tips of the candles 
and dipped them in glitter... 
so in the right light they shine!
Can you see the glitter in the candelabra above?
It is very difficult to photograph, 
but produces a charming spark of life in the reality!

Can we see how it looks inside the room?

And with the other pieces of furniture......?
Yes, I know... I still haven't added the carpet... 
or the chandelier.... or the curtains!
 Don't even ask about the Curtains!

But the chandelier was coming along nicely with it's glittery candles...!
(I will not glue it in until everything else is firmly in place!)
And I thought that was everything for the dining room 
until I woke up this morning thinking there should be tiny plates.... 
maybe a roast on a platter...? 
A pup under the table waiting for the bones?

Ah, Dear Readers, I hope you have enjoyed
 this Feast of Tiny things.
Come to think of it, 
I may even have to try a basket of Tiny Rolls!