
A Little Distraction....
All that framework fixing, Dear Readers, was in preparation for attaching the light fixtures for the lower room of the Dollmaker's Studio. It was finally time to commit to attaching the lamps and running the wires through the walls to the exterior. I drilled the holes where the wires needed to go through. You can see the hole in the mantelpiece in the above picture. The lights on the other end of the room are positioned on either side of that big arched doorway... and where the wires go through the wall, I had already started to glue the "stones" a long time ago. I had stopped because I realized I was getting ahead of myself and needed to run the wires first! But a couple of the "stones" were already in the way.

There was nothing to do but make "adjustments" to the stones...

This consisted of peeling back one stone
so I could carve the channel underneath it...
and making small cuts which will need patching in the other stone.

Actually gluing the lamps in place requires patience!
I needed gravity to assist while the glue was drying for each lamp,
which meant turning the building on its side...
a different side for each lamp!
Above you can see the first one gluing.

And after a couple have dried....
testing the electrical connection...
so far so good!

And testing the look with the ceiling panel in place...
not glued yet!

And testing the lights on the end wall...
still working!
But there was a LOT of waiting for glue to dry!
And while I was digging out my extra wire
for extending the wires so they could reach the switch connectors...
I came across a little Bell Jar that I was hoping to use someday.
I couldn't decide what sort of object to put inside...
But then I got an idea.....
Could I make a mini mini version....?
I thought I would give it a try while the glue was drying...
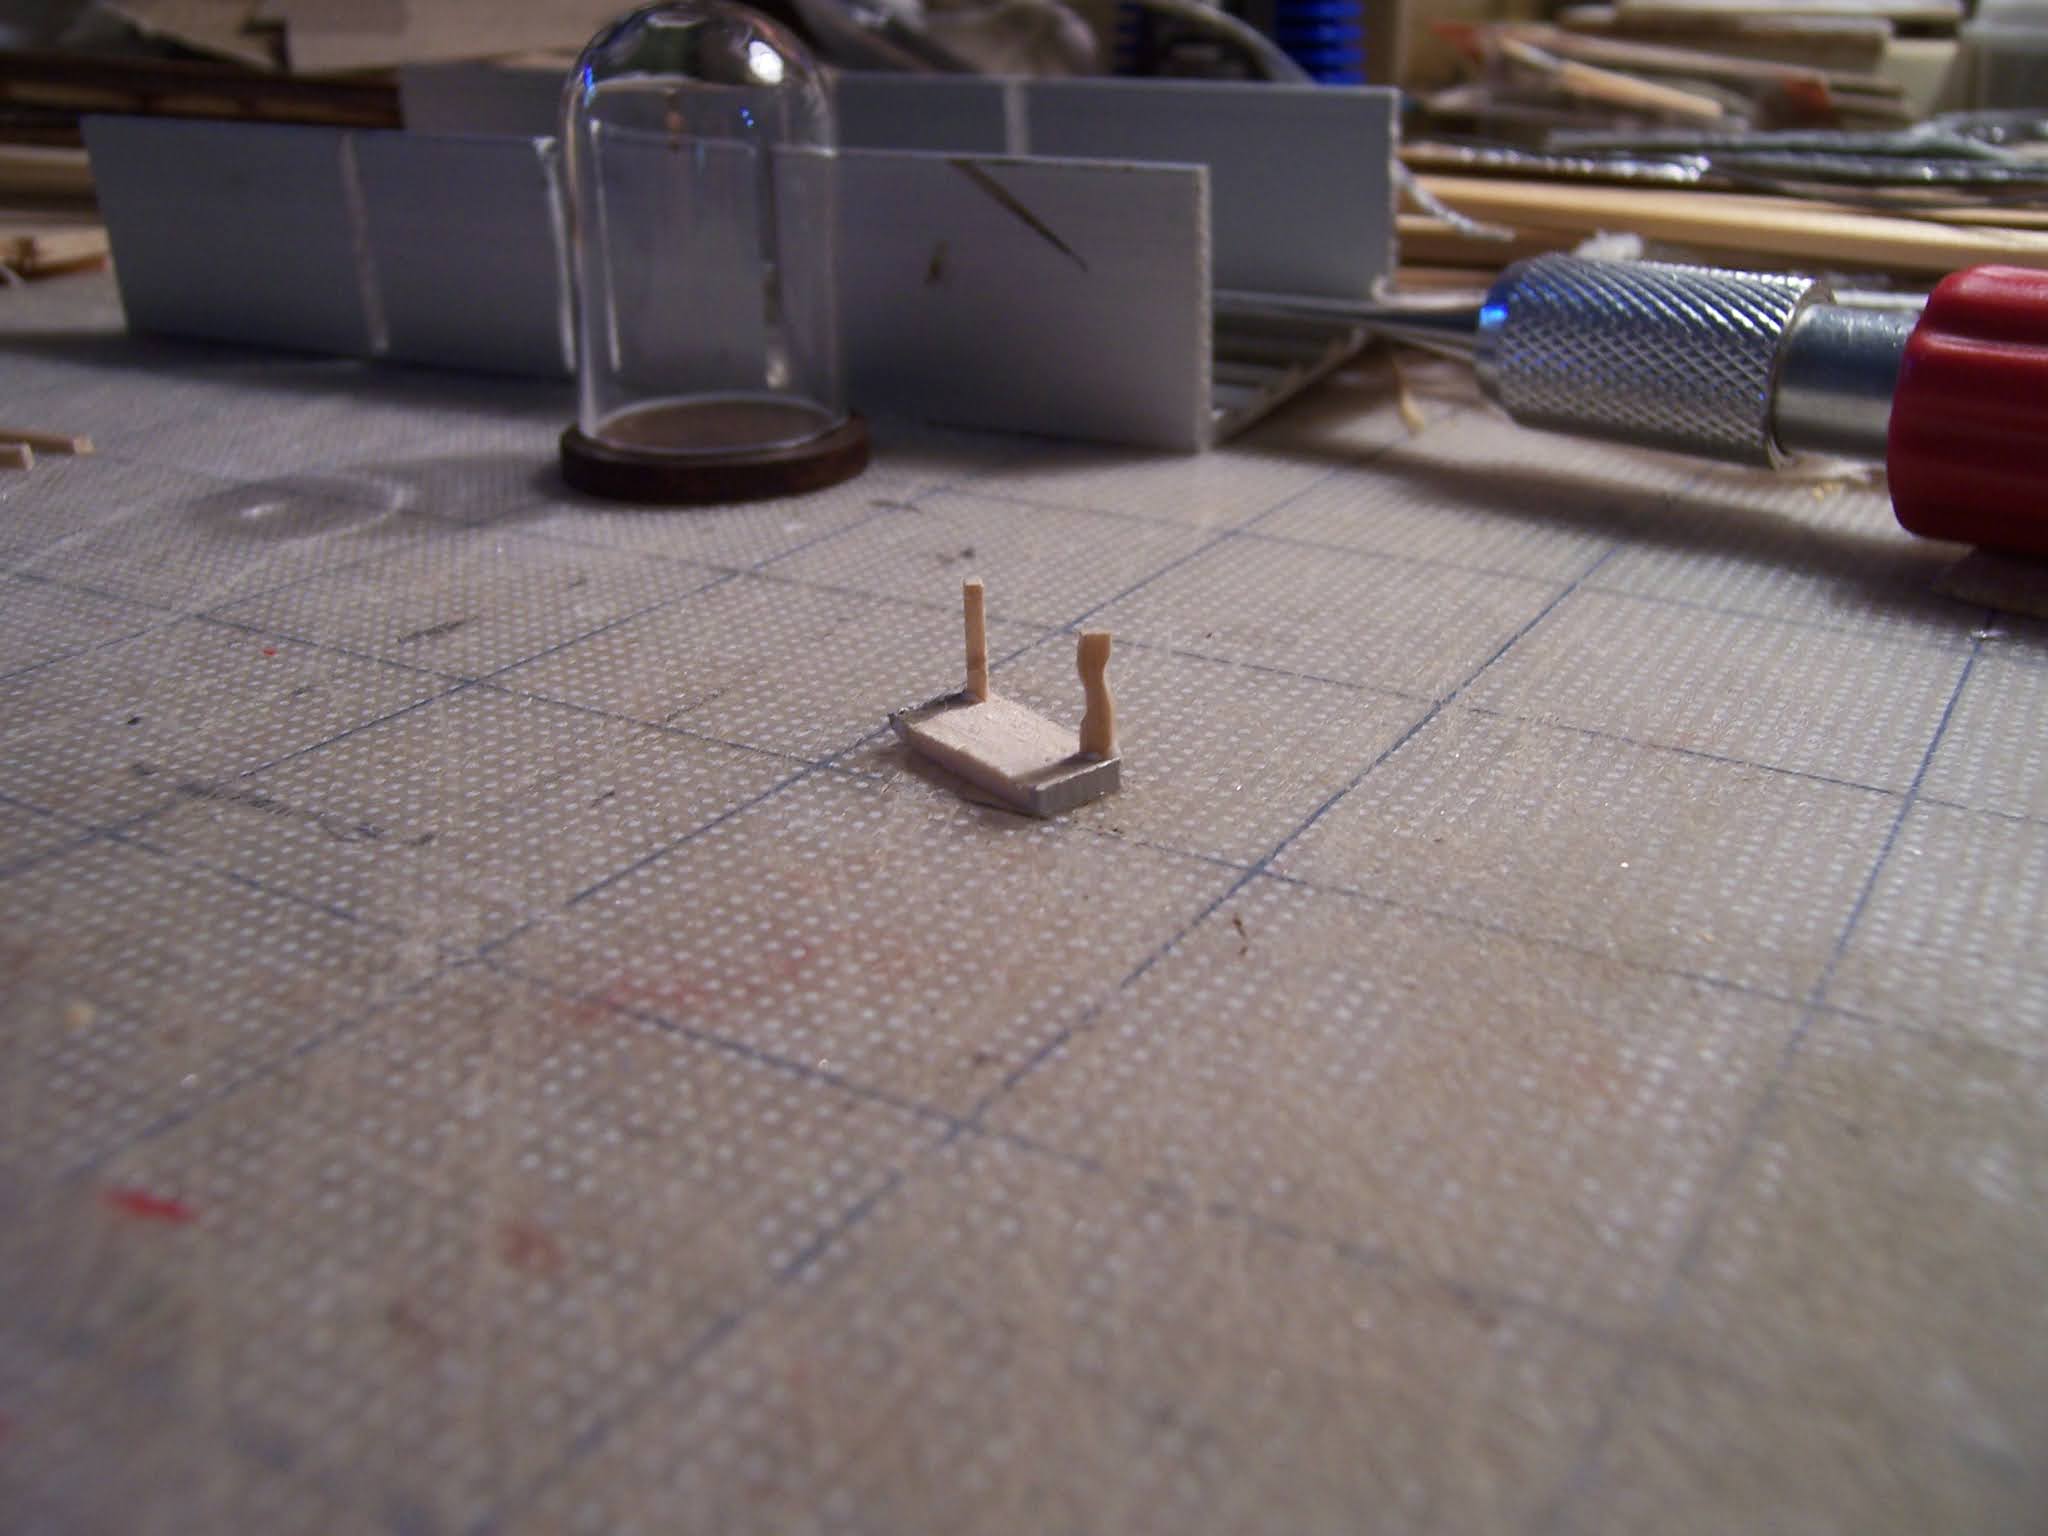
Just see if I could make a Tiny table....
There was a Perfect piece of wood waiting in my scrap pile...
(an off-cut from a castle ceiling trim "stone" from last summer's work....)

Can you tell what I am thinking...?

Have you seen this table before?

Is this a big enough clue?
But of course, I am really trying to get
those wires buried in the walls
of the Dollmaker's Studio Project!

This is boring work...
you won't want to see endless pictures
of glue and wires in a carved channel...

I will try not to bore you!
But the truth is, I got very VERY distracted
by this Teeny Teeny building project!
Could I even make it happen....?

Well, Dear Readers, I had to give it a try!
I started with a tiny sketch of the wall shapes I would need...

And I needed to see if I could paint that small with any degree of success...
(Can you tell now I am duplicating the Secret Christmas House...?)

All of this is using plain card stock
cut with my exacto knife and a ruler.
Above is the inner core of the framework.

I cut the pieces out as I needed them...
(I wouldn't want to lose a section!)

Here is the framework on the table....
Oooh... this might actually work!

And just to remind you what I am copying.....

See?!!
But this is just the beginning....
It is the interior that takes the time....
When I am not working on the Dollmaker's Studio that is....

Here the ceiling has been glued to the wood panel.
I debated making different "tiles"
but decided it was pressed tin panels instead!
And the board is quite warped....

It took a lot of "convincing" to flatten out.
But I had plenty to do while the glue was drying!

I needed to paint the interior floors with the carpets...

So I could start to assemble the interior pull-out sections.

Which had to be tested for fit every step of the way!

This is the other interior pull-out section before gluing...

And here it is being tested for fit.

Of course, I had to paint the ceilings on the undersides of the floors...
(I did this in the Secret Christmas House too!)
If you look very carefully you can see a sky with clouds....

See how cute this is?

Here you can get a good sense of the structure...
Two house sections pull out from the sides of the main framework.

Testing the front roof panel....
(not yet glued...)

And I wanted to see if I could make a Christmas Tree for the parlor...
(using the glue trick and florist wire)

Here it is in the parlor... I know it is really tall
I always make the tree as tall as possible!

Here the outside wall is attached...
and testing to see if it "works"
It does!!!

They both fit and slide in beautifully!

And the side roofs are attached....

Here it is with the sides closed.

And on the table...

And for comparison....
(please ignore the crudity of the tiny one...)
It only needs a few more details!

And inside the jar...
I think it worked, Dear Readers!
I only got a Little distracted
While I was waiting for the Glue to Dry!
I can't believe you made an even tinier house! Is there no end to your genius?
ReplyDeleteI'm so glad that your lights work after you'd gotten them glued in. Yay for electricity! They look wonderful.
As a person who has just completed the 'Secret Christmas House' and all its furniture, I am in awe of what you did to work in an even smaller scale!! WOW! The teeny, tiny model is very impressive! Electrical work is also impressive and looks wonderful...Cheers, Alayne
ReplyDeleteThat’s so awesome Betsy! I adore it. And a really fun idea. Although if it was mine I would be tempted now to put it inside the Christmas house rather than under the done! And how pleaseing that your lights are installed AND working. One of the pleasures of mini-making is the satisfaction of seeing different steps of the construction completed and looking good.
ReplyDeleteI am so happy that you had to wait for glue to dry because your creative mind was compelled to keep creating! What an inspired idea to make a mini, mini Secret Christmas House! I don't know how you made such a tremendous marvel so tiny, but WOW! You, like Birgit, are so adept with that scale!!! It's just awesome, Betsy, and something you'd be charmed to find in a dollmaker's studio! And the lights with that tin, beamed ceiling? Just magical! I love it all!!!
ReplyDeleteTu espera de que todas las luces tuvieran que secarse, ha sido de lo más fructífera! Por un lado la electricidad está instalada y por otro tienes una mini, mini casita adorable!!
ReplyDeleteGran trabajo.
Besos.
Well, waiting for the glue to set dry, can make us do the most nice things, isn't it ;)?! Betsy, your teeny tiny Christmas House looks so wonderful and adorable, you're a genius!! But I also like it when you got side-tracked, because that's mostly the time to invent the most loveliest things in mini.
ReplyDeleteI love how the lights in the Dollmaker's Studio turned out, the glow of the light to the ceiling and beams is wonderful.
I'm glad you had found some fun to create while waiting, keep on making mini's, Betsy.
Stay safe, take care, dear Betsy.
Hugs, Ilona
So that's what you were trying to describe to me the other night on the phone! Amazing. What next?
ReplyDeleteLove you,
Mom
Todo tu trabajo es fantástico pero esa mini mini casita es maravillosa.
ReplyDeleteUn saludo
Wow! Waiting for the glue to dry was was well worth the time. The tiny Christmas house is simply adorable! The lights came out beautifully.
ReplyDeleteHugs, Drora
WOW!!! This left me almost speechless!!! Really, I needed a while to study the pictures again and again until I could start to comment... Betsy, you never stop to amaze me! This is incredible in every way - teeny tiny gets to a new dimension whenever you're involved. And silly ol' me was thinking that the teeny tiny copy of the Folly's living room next to all the work to all the stunning teeny tiny additions you did for the Christmas House itself was the top of the tops. But no, I should have known better... your extraordinary talent knows no limits. This is another one in the row of the most magical, amazing, beautiful, terrific, breathtaking, unbelievable miniature projects I've ever had the honor to see and enjoy. And it's amazing how many of these most magical, amazing, etc. (you know by now) projects are coming out of your hands and your mastermind. ;O)
ReplyDeleteThe idea itself of having a tiny copy of one of your fascinating projects is wonderful already - but the way you did it... WOW, WOW, WOW!!! And honestly, the tiny copy itself would already have been a true miniature miracle... but no, of course never enough for a miracle worker like you. Including the whole interior and not even missing the carpets, the painted ceilings and the tree (!!!) and making it possible to pull this out from the sides like the real one... well, what else could I say than: That's sooooooo you! Wonderful, wonderful work... absolutely stunning - and without doubt a new masterpiece made by you.
But I've also enjoyed to follow your progress in the Dollmaker's Studio. Having now electrified my first house (with the extra difficulty of having an already built house) I have now a better idea about this kind of work. The result is so beautiful... I really liked to see the pictures with the lights on, so cozy and inviting. And I liked especially to have a closer look at the beautiful wallpaper which appears in so many different ways with the lights on. And according to me it's good that you stuck to your "tin" ceiling - together with the wallpaper and the wood panels this is adding so much atmosphere. Well, my fingers are crossed for another round of glue needing to dry... hoping for more stunning ideas of yours for a little inbetween-miracle! ;O)
Hugs
Birgit
I know this is not the way to go about this, but I can't seem to make the email contact button work from my end, ggggrrrrr, technology! I'd like to figure out a way to contact you for help and/or advice with my mini petit point. I haven't found any good youtube tutorials, and I'd appreciate your help!!! Maybe someone on here can share a safe way to connect? Or maybe my email will be available to you?! Nobody in my tiny miniature group does any of that type of handwork! Sorry and thank you!
ReplyDeleteHi Talia! You can email me at betsyrogers6@gmail.com
DeleteThe idea for the wires is brilliant. The tiny house under the bell is adorable; you had a lot of fun waiting for the glue to dry.
ReplyDeleteWhat a wonderful way to spend your time while the glue dries! Great idea and great outcome. Love the tiny house 😊
ReplyDelete