Small Progress....
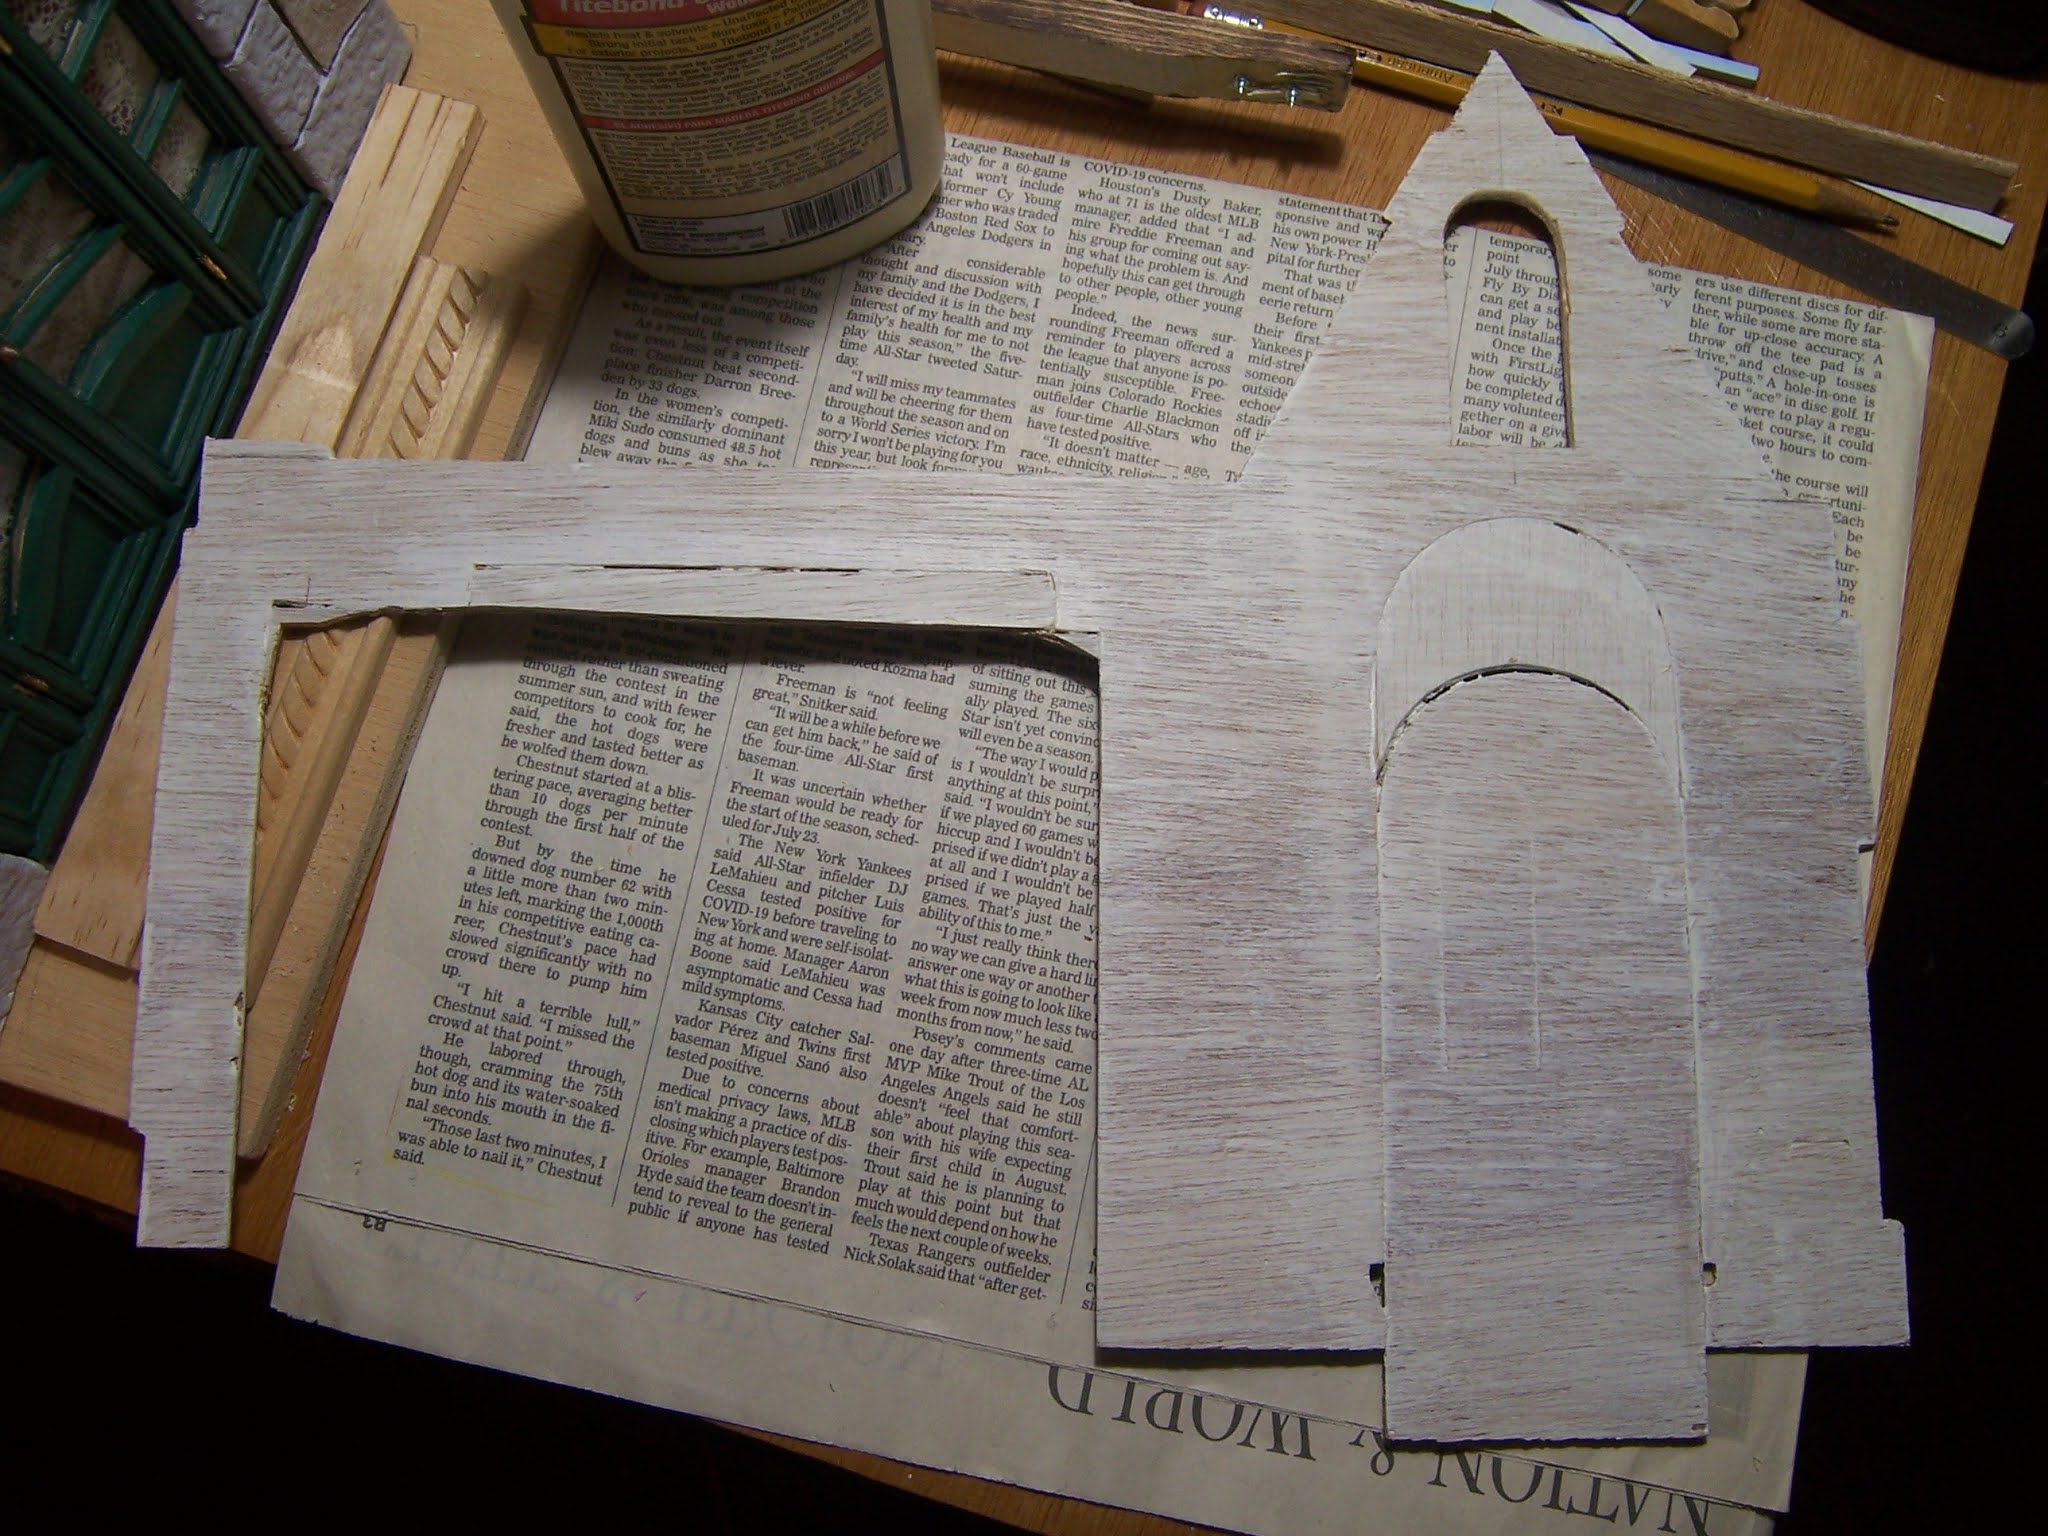
The Back Wall of the Dollmaker's Studio, Dear Readers, is the weakest part of this project. You can see above the cut and patched wall assembled from the Sugarplum Cottage kit with my alterations clear to see. What was the front door has been (inexpertly) filled in, the once upon a time picture window opening has been enlarged so far it fills almost the entire wall (so the Dollmaker's kit can be inserted here) and now I have added a little window into the attic dormer. Because the walls needed to be taller and they sit on the base I built for the Ground Floor room, the one filled-in door opening extends below the rest of the wall, and actually provides some "anchoring" onto the lower floor walls. I know, it is really confusing! The picture below shows what I mean.
Here is the wall temporarily in place.
The left side wall has been glued and so has the arched alcove
(the original Dollmaker's Vignette kit)
Because there are so many rough parts to this wall,
I decided to "pad" it with a layer of cardboard
cut to fit exactly over the entire surface.
This would allow the wallpaper to have a smooth finish,
and would strengthen the joined pieces.
Here is another view of all the rough edges in this patched wall!
The "fitting" of the wall padding took a huge number of tries
to get it to cover all the little corners and gaps and cover the entire wall.
Once I was sure it would fit correctly,
I needed to glue it to the wall while the wall was lying flat,
to ensure that the wall didn't warp and bubble while it dried.
The cardboard wall padding extends below the original floor line
so it also will cover the extended wall section when in place.
Of course, I didn't remember to take pictures of the gluing....
Except for my one dark shot showing the elastic band
holding the wall tightly to the final end wall which is not yet glued....
to ensure that the alignment would be right when the glue dried.
The following morning I was Amazed at how much
the padding strengthened the wall!
It was positively Sturdy!
I had made a paper pattern from the cardboard padding
that I could use for cutting the wallpaper....
The section of paper I had was not long enough
to cover the entire length of the arch...
and the small piece on the left was the continuation
of the pattern on the left hand wall...
And the pattern was not going to match in the middle!
I console myself with the knowledge
that the joined pieces at the top of the arch
will be covered almost entirely by the crown molding trim....
And who is going to notice that the rest of the pattern is off by 1/4 inch?
Here is a shot of the two rooms together...
so far so good!
I forgot to take pictures of the wallpaper once it was glued on....
(It was such a rainy and gloomy day!)
But this morning as I was rushing off to work,
I had to try to grab a couple of pictures with the morning sun shining in....
You can sort of see my wallpaper patch at the top of the arch....
And a slightly better shot of the ceiling...
without the lamp, of course!
So you can see, Dear Readers,
in spite of my Long Weekend,
It doesn't look like much got done,
But it is good Progress after all!


You got more done than I did!
ReplyDeleteI think it's going to look great once it's all together. No one will notice the little wallpaper patch.
It looks to me as though you accomplished quite a lot! Great work getting that wall strengthened, papered and attached! No one will ever notice the pattern patch, even if you offered a prize to find it! The room looks incredible, and the photo of the two rooms together is but a hint of the charmer this entire project will become! Great work, Betsy!
ReplyDelete¡Buen trabajo!
ReplyDeleteClaro que has progresado mucho! y además has hecho encajar la pared perfectamente, estoy segura que nadie observará el pequeñísimo parche.
ReplyDeleteQue vista tan bonita tienen las dos habitaciones juntas!!
Besos.
By having issues with the thickness of the farmhouse walls myself, so I know exactly what you mean of making alterations and the consequences thereof, Betsy, it aks a lot of thinking and work to get it right, but you succeeded well in your adjustments. This all takes a lot of time, but at the end it is worthed the efforts.
ReplyDeleteI'm sure the little wallpaper patch won't be visible after the whole room has got together, Betsy, and once more I enjoyed seeing the cherubs on the handpainted celing: sooo beuatiful!!
Hugs, Ilona
Hi Betsy. Good work on strengthening that wall up, I am sure it will really help in the long run and worth all that time. And no-one will notice the patched wallpaper, especially once the cornice is added. We’ve all been there huh?? But it is part of the challenge of mini-making. And besides, real houses are like that, especially old houses of the lower classes where there wasn’t the money to have carved and painted wall panels or expensive tapestries. I think imperfections add to the charm. X
ReplyDeleteYou've made great steps forward... and even found the time to take wonderful pictures. How I loved to see the room after all your work and with the lovely wallpapers added together with the cherub ceiling!
ReplyDeleteIt was a great idea to "pad" the wall; I suppose you will thank yourself for being so thoughtful over the years. And the patch... what patch??? Is there a patch? I just saw a stunning room with beautiful wallpapers on the walls...
Hugs
Birgit
"It doesn't look like much got done," Now there is an understatement if ever I read one. :-)
ReplyDeleteThis post shows great progress indeed! The strengthening of the wall works perfectly. The fact that it will become (already is) totaly invisible is the more reason why this was a succesful operation!
And with the wallpaper, the cut stone arch and the cherubs in the painted ceiling this room is coming together nicely. A lot has been done and it all looks good.
Huibrecht
I'm late again. Details, details! I'm glad that the morning saw the little house more sturdy.
ReplyDeleteCarry on, love,
Mom
Small, but beautiful progress.
ReplyDeleteit looks great!
ReplyDelete