Monday, December 12, 2016

'Tis The Season....


Decorations.... Visitors..... Gifts.....

The Time had come, Dear Readers, for me to get my RL Christmas trees decorated! I had put them up last weekend, with only the lights on them, which I dearly love at this dark time of year, but I also love the trees fully loaded with beautiful shiny treasures.... which takes hours of unpacking and arranging. It is a task I love to do and don't like to feel rushed, so it needed the full attention of weekend days. Saturday I adorned the upstairs tree in my Little Studio, all in white lights and snowmen and birds with a few Santa's and reindeer too. This is the room where I have my drawing table so this tree keeps me company while I work on the Annual Christmas Card....(still in the sketching stage...)! Having the tree done definitely helps with setting the mood. And Sunday was the day to decorate the larger tree in my Living room downstairs.... really it stands in the large doorway between the Living room and what would be the Dining room, but is really my Dollhouse workshop!

I always put the colored lights on the downstairs tree.... 
and all the brightly colored glass ornaments 
and all the decorations made over the years by myself and my children.
This way I have a tree nearby whether I am working upstairs or down!
I had almost completed this tree when I got a call from my Sister.... 
she was in the area and hoped she could stop by for tea!
(She lives hundreds of miles away... so this is a Rare Event!)
She wasn't traveling alone.....

Look who came with her....!!!
Buttercup and Marmalade!!!
(They left their wings in the suitcase for safe-keeping on this Journey)
Of course, they had to visit in the Cloud Palace.....

Where Blue had Just put up the Silver Tinsel Christmas Tree 
with all those gold wishing stars....
(Sorry it is so dark and difficult to photograph...!)
Everybeary was so excited to see Buttercup and Marmalade!

And while my Sister and I drank our tea....

Buttercup and Marmalade made friends with the gumdrops!

In case you did not know, all these Fairy Bearys
 are the handiwork of Birgit of BiWuBaren Blog.
 And not only is Birgit marvelously talented, 
she is also amazingly generous!
She sent me a Box of Christmas goodies.....

Full of mini gifts and beautiful cards and ornaments and Marzipan!
(Now we know Nobeary will go hungry in the Cloud Palace... 
as if Hamish Harry would ever let that happen... 
but at least we now know there is enough Marzipan 
to keep us all happy!)
Thank you Birgit!!!!!

Alas, my Sister's visit was very brief, Dear Readers, 
a snowstorm was threatening and she needed to return 
to her daughter's home before it started. 
Once she left, I continued with my Christmas Tree decorating....

I pulled out the little tree that goes in the Lovely Old Dollhouse.
Here you can see it close-up....
It has dozens of tiny ornaments, 
glass balls and metal snowflakes, 
resin figures and lace hearts.... 
icicles and star garlands....
And a beautiful angel at the top!
It always goes in the same corner 
of the Living room of the Lovely Old Dollhouse.
The angel brushes against the low ceilings.....

Charles has taken charge of setting it up again this year.
Helen just likes to watch while he arranges everything and plugs in the lights!
Oh, I never tire of seeing those tiny colored lights!

But where is Pollyanna, I hear you ask? 
Isn't she the one who loves to decorate the Tree?
Well, Pollyanna has become a bit distracted....

She wanted to make a Mini Tree for the little dollhouse....
But when she tried it in the little house, it was too tall! 
It barely fit into the medium dollhouse,
 but Pollyanna has so far to go on this property, 
she was not ready to decorate it just now!

So she made another tree... a little smaller....
And added some golden garland and red ornaments.....

Can you see it...?

This time it does fit into the Smaller house!
Pollyanna is so pleased with the way it looks!

But before she could even blink, 
Salome came to have a look....
"I need one in Gold or Silver...." she said.
"The green one doesn't go with my gown..." she added.
Well! thought Pollyanna.... 
a silver one would be fun too...!
Ah, Dear Readers, 'Tis the Season
For decorations.....
For Trees and visitors....
And Gifts....!

Monday, December 5, 2016

Not Another One....!


Stolen Moments.......

I hope you are Not Shocked, Dear Readers, to see an entirely different Tiny House kit featured in the above picture! I was pawing through my boxes of mini Christmas supplies, looking for something else entirely, when I found this kit I had bought a few years ago but never assembled. And if you are like me and are procrastinating from all sorts of more difficult tasks, then something as simple as this becomes Irresistible! There were hardly any parts, and they would go together so quickly! And best of all, the printed decorative papers that needed to be glued on would give me Practice in attaching these sorts of  papers to the constructed house! (And I was feeling a trifle nervous about gluing the papers for the Secret Christmas House kit!)
So I quickly assembled the parts 
and forgot to take any pictures of the beginning....

The entire House is less than three inches tall. 
The kit is made by "Dragonfly International" 
but I bought it through the Hobby Builder's Supply Catalog.
 
 
The laser cut wooden pieces went together quickly 
and the exterior papers were simple to glue on.
But after that, Something happened.....
 
 The attic was not supposed to be "accessible". 
But I thought that would be a real waste of space!
So I cut an arched opening in the roof paper.
And then I realized that the roof paper was not sturdy enough alone,
 and would need to be stiffened with some cardboard...
(Which was easily accomplished.)
And then I realized that while there were two printed floor papers, 
there was only one decorative paper for the ceiling.... 
but there were two ceilings....!

So you can imagine what had to be done to the unfinished ceiling!
(It did not take too long!)

And because the middle floor fit so snugly in the house, 
the printed wallpaper needed to be cut in half 
and applied separately to each room after the floor was attached.. 
So there you see, Dear Readers, 
I made only a few modifications to the kit!
And I had good practice with the gluing of the decorative papers!

Which made it much easier for me to feel confident
 about the Secret Christmas House!

 And because I was still stealing moments from all those other tasks on my list, 
I decided it was time to glue the windows into the front of the Secret Christmas House,
since the interior side of this wall would not be decorated and so 
I needn't worry about getting paint or glue on the window panes by mistake.

And then I glued the rest of the floor papers into the rooms.
Because the ceilings had all been painted
 there was no risk of getting paint on the floors by mistake!

And then I went ahead and glued the exterior wall paper 
on the right side rooms!
I had glued the window panes in last week, 
and could not attach the exterior frames 
until the paper was in place.

Here I am testing the fit with the right side in place.
And since that was looking so good... 
it was time to attach the front wall papers too! 

Here it is without the interior rooms in place....

And here they are in place.
What a difference the papers make!

Here you can see a close-up view into the Library through the window!
I still have to paint all those incredibly delicate window frames.... 
but I figure that will take me quite a while and I don't want to rush.

Well, I don't know about you, Dear Readers, 
but I just couldn't resist stealing a few moments 
to work on these Tiny House kits!
(And No, I don't have  Another one!)

Monday, November 28, 2016

Teeny Tiny Progress......


One Step at a Time.....

Another Day, Another painted Ceiling in my Mini Worlds, Dear Readers! I hope you do not think it is too boring to have the same cloudy sky repeated on the ceiling of the other room on the ground floor of this little house. This room is supposed to be the "Parlor", but I think I will call it the "Salon" as that sounds a little more ornamental! In any case, I wanted it to have the same elegant feeling as the library, although in this room I left a border of "plaster" around the edge of the ceiling with the "open sky" in the center. The walls in this room have a lovely pink and white stripe pattern paper with decorative pink "losenge" panels on several of the walls. There are many gold accents in the picture frames too, so I planned to add the gold trims at the cornices as with the Library. But I didn't get that far! I thought it would be a good idea to figure out when the window panes should be attached before I went too far with the decor! And along with that step, there was also the window trims for the outside of the building which needed assembling and primer painting.


These pieces are Sooooo Tiny and fragile..... 
it feels absolutely amazing that they are as elaborate as they are!
The exterior window frames all are made up of two pieces.... 
a base and a trim section.
Here you can see I have assembled a couple of them.

It is interesting to note how much sturdier they feel 
with two layers than with one alone!

The door is very elaborate and is composed of two layers  
plus two trims across the top!

(And no.... I am NOT going to attempt to make hinges for this door!)
So while I was trying to construct all these frames, Dear Readers, 
I was also figuring out that I needed to glue the windows in 
before adding the paper on the outside walls of the house.

The plexiglass is inset into the walls and once the paper is added, 
it covers over the window pane a tiny bit.
 And then the Outer Frames are glued over the paper edges, 
holding the pane firmly in place.
Here I have glued the windows into the end wall
 of the removable portion of the house but not the front.
I wanted to test the glue before gluing them all! 
I am using Aleene's Quick Dry Tacky Glue.
 
 
And here I have painted primer very carefully
 on a couple of the frames..... 
Although it is really hard to tell!
It is Not easy to get the primer onto 
all the crossbars and muntins!

Here I am testing the window frame before the paper is glued in place.

And the view from the inside.... 
which is where I realize I have a problem!
This is the one window, Dear Readers, 
where I should have left the edge of the window opening
 dark brown to match the frame! But it is white, 
so I should probably paint the reverse side
 of all the crossbars and muntins white like the front.
All the other rooms will have white trim 
so this will not matter with those windows.

And while I am painting ceilings, I decided to add 
the embellishment of a "gilded plaster rosette"
 to the ceiling of the room above the "Salon", 
which is supposed to be the "Dining Room"

But first I had to paint the edge for the gilded cornice trim in this room too.


Here you can see the gilded "rosette" has been added.
It is a tiny bit asymmetrical.....
But you are not supposed to notice that!

Well, Dear Readers, that is as far as I managed to progress 
last weekend, in spite of the extra days off for the Holiday! 
At this rate the house Might be done by Next Christmas!
But I am making Teeny Tiny Progress....
One step at a Time!


Tuesday, November 22, 2016

Ceilings And Trims


Oh Those Details....

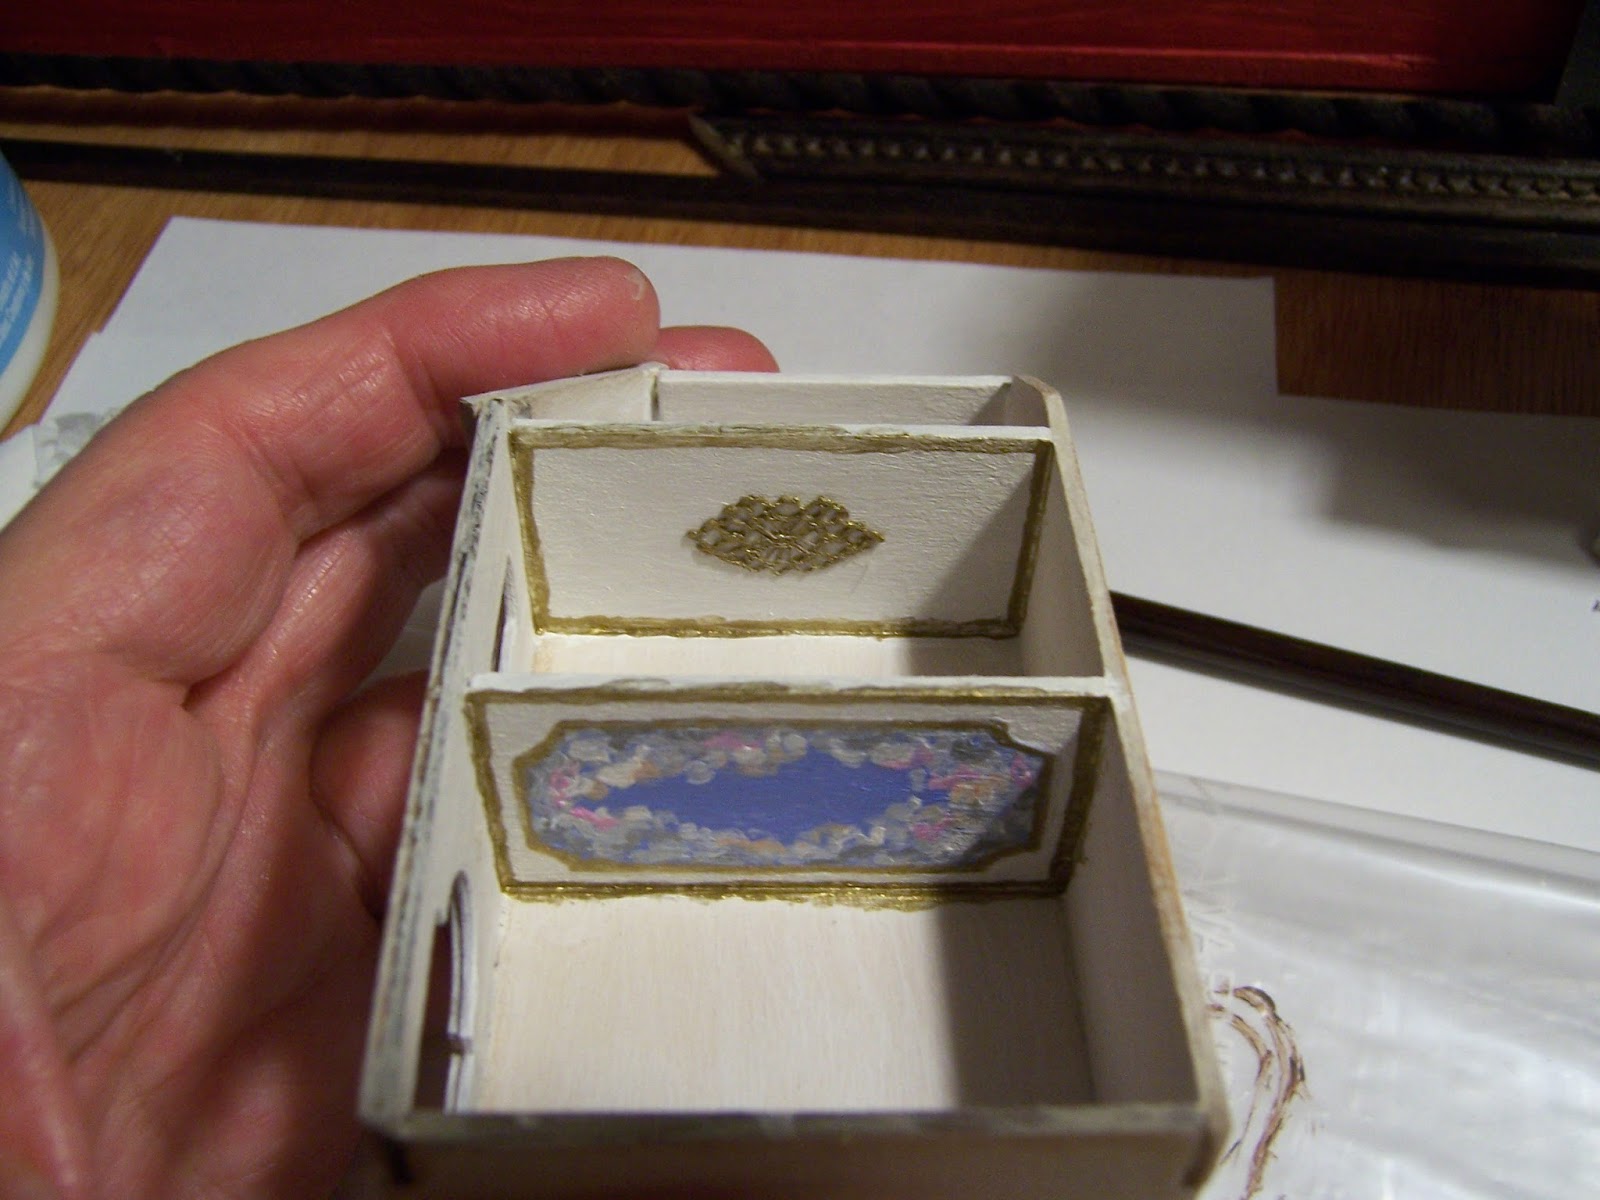
In Case you need reminding, Dear Readers, I left you last week with my realization that this "Secret Christmas House" kit has no pre-printed decorative papers for the ceilings of these rooms! And if you know me at all, you will understand that I have trouble leaving the ceilings unadorned! So the first thing I did was begin to paint the ceiling of the "Library" with a lovely cloudy skyscape.

It is really difficult to take good photos of these tiny scale rooms, 
so I hope you can forgive the occasional blurry pictures!
 
The pre-printed floor paper is glued in next.
 
And then when I tried to add the printed papers for the walls, 
in this case the "floor-to-ceiling book cases", 
I really felt that they needed both a baseboard
 and a ceiling crown molding too!

I painted a border of gold along the edges of the ceiling 
and then added a gold strip to the top of the wall paper bookcases.


I had to cut and paste a little bit with the shelves 
so the books would not be half covered with the added trim. 
But I think it looks so much more realistic with the trim!

Then I did the same for the side wall with the false door to the other rooms.

It was only later that I realized I should have added the trim around the door too.

Maybe I can still add it in.... I think I will try!

Of course, as soon as the Teeny Tiny Dolls heard that 
there was a "Library" in one of the houses, 
Theodora and Halcyon had to come take a look!
They were rather impressed at the number of volumes.... 
and dismayed that it was all an illusion!
(They wanted "real" books!)
But there was still the "window wall" to be added, 
and that had its own layer of challenges!
 
The kit comes with the trim for the window interior as well as exterior 
and even a tiny pre-cut plexiglass window pane!
But figuring out just when which parts are attached is not so easy!
There is a chance that I got ahead of the plan, Dear Readers,
by starting to add the interior wall decoration 
before doing the exterior wall papering.... 
but I'm not sure.....!
The Instruction pictures don't really show
 when the "glass" windows are added. 
And the outer wall paper covers over a little of the window edge, 
so the windows probably should be attached first!
But before any of the windows get attached, 
I wanted to paint the edges of the openings
where the laser cutting scorched the wood.

If you look carefully you can see all the window openings 
have been painted white around the edges.

Here you can see it close-up! 
When the window pane is in place, 
you will be able to look in 
and see the Library bookshelves!

Well, Dear Readers, I can't believe it, 
but that is all I accomplished over the weekend!
Between the ceilings and the trims, 
I can tell this is going to take a bit longer that I thought it would! 
But it's those details.... all those lovely teeny 
tiny details that make this so much fun!


Tuesday, November 15, 2016

Primer


Nothing Much To Show....

It was one of Those very busy weeks, Dear Readers, when it seemed as though there was no Time for making Anything, even though there had been an extra hour added to the calendar recently! And now that it is "standard Time" again, it is dark in the evenings when I get home and that makes it really hard to photograph anything! But I did manage to get one small step accomplished on the Secret Christmas House kit! And that was to put primer on all the surfaces prior to gluing any of the decorative papers on. The instructions for this kit are very "visual" meaning they are almost entirely pictures with very little written direction to follow. In one of the pictures showing the papers for the walls glued on, I noticed the interior surfaces looked as if they had been painted white.... so I am assuming the entire house should be "primed" to protect the wood before gluing the papers on. The above shot shows the house with the primer done. I was about to start right in on gluing the wall papers when I noticed that there were papers for the floors, but not for the ceilings! Well, I am sure you know how I feel about un-decorated ceilings! I decided that I could not proceed until I had painted all the ceilings.... which was going to require that I study the decor for each room that is already provided....! I am really trying to just complete this kit without going too far off the plan!

                                                So while I was pondering those ceilings,
                                      I noticed another tiny house that Pollyanna has found...

She has decided that she needs to "practice" this 
miniature dollhouse decorating 
before she starts on the beautiful big cabinet 
which she is calling "Paradise Hall".
This smaller house will not need to be so grand and elegant.
She can learn different techniques without worrying 
that she will mess it up too much!

She has managed to get the first coat 
of primer on all the rooms.
But she forgot about the front wall. 
It isn't attached and doesn't fit right. 

She wonders if Maybe she should try to add hinges 
so it would open like a cupboard.....
Which would need to be done before she painted any more walls!
Hmmmmmm.......
This was going to require some planning!
 
Well, Dear Readers, I hope you don't mind 
if I leave you here 
with Nothing much to show but the Primer!

Monday, November 7, 2016

Just a Tiny Project....


Falling Behind.....

Well, Dear Readers, We turned our clocks back on this side of the Pond, Falling Back they call it, but somehow I just feel like I am falling Behind! We are now into the Dark Season, when all thoughts turn to the Holidays, and what better way to get in the mood than by starting a little Holiday Project? Every year I plan to try to make something "Seasonal" and never seem to get very far before I am overtaken by the looming deadlines for my major yearly project, and here I refer to my Annual Christmas Card, which I have drawn every year now for more than thirty years, so I dare not skip a single year! (And so far this year, I have no idea what my drawing will be!) So to make myself feel as though I am making Some sort of progress on Something.... I have started a New Project! (Don't Laugh!) It is just a Little project.... it is a kit for making a 1/144th scale Dollhouse which is all decorated for Christmas! It is called the "Secret Christmas House" and is a kit made by Robin Betterley who makes marvelous tiny things! I bought the kit last Spring at the Sturbridge Fair and have been itching to get started ever since! Of course, I forgot to take pictures until the project was well under way...

All the pieces are laser cut from very fine wood. 
They go together with very little adjusting needed.
The central framework for the house holds two slide out sections.
Here you can see the main house frame and the left hand section partly done.

Here they are a little closer....

Here the wing sections are tucked inside the framework.....

Here they are pulled out.

And there is a table too....

And here they are together....
But I will not attach the house until it is finished.

And just so you could see how Huge this house is.....
Salome came by to have a look at it!

I am sure she will be telling her sister Lady Evelyn de Paradise 
that it is yet another unfinished property!
Certainly Not ready for Habitation!
Well, I don't know about you, Dear Readers, 
but I Love to start new projects!
And whether I am Falling Back or 
Falling Behind remains to be seen!